Bluefin Restoration in Progress

evancody1

Cadet
Joined
Mar 12, 2011
Messages
24
Here I go,

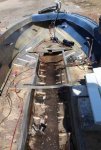
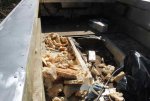
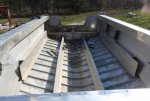
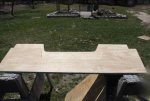
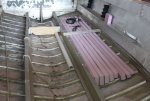
I've read and got so many tips from reading many other projects, I figured I would start and show my progress on this Bluefin. It ran ok before, but seemed to be bogged down so much, I thought it might have been waterlogged foam and transom that was adding a few hundred pounds to it. Boy was I right, the foam was soppin wet. I filled 5 contractors bags full of the stuff each bag had to weigh 50 + pounds each.boatfoam.jpgboatfoam2.jpgboat foam3.jpg
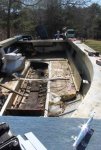
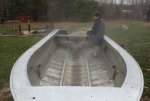
Clean boat after deck and foam taken out, put my kid to work, instead of video games:)cleanboat1.jpg

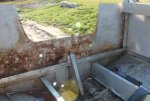
Now the transom, ouch there was a hole in it the size of my fist...transomrotten1.jpg
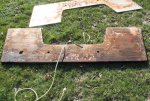
Sorry about the late posts: I kinda went at it for 3, 4 days and took a bunch of pics, so your kinda getting four days worth of work and pics...

Getting the gunwale screws that were attached to the transom were impossible, not sure what I am going to do to reattach, thinking I was going to reverse the L bracket and put it on the outside instead of under and inside of gunwale.
 

jigngrub

Fleet Admiral
Joined
Mar 19, 2011
Messages
8,155
Re: Bluefin Restoration in Progress

Lookin' good!

You were wise to research and read ahead before starting, something everyone should do.

Tell us a little bit about what you plan to do, materials and such.

Keep the pics coming, we love the pics!
 

wlg

Petty Officer 2nd Class
Joined
Jan 1, 2012
Messages
168
Re: Bluefin Restoration in Progress

Welcome evancody1,

Nice project you got going on. I reversed the gunwale brackets in the front and rear on the Sylvan i'm doing. It was much easier.

Have fun.
 

kfa4303

Banned
Joined
Sep 17, 2010
Messages
6,094
Re: Bluefin Restoration in Progress

Cool project. I've always like the lines of Bluefin boats. Looks like the worst is over now that you've got all the demo done. Only a few rules to remember: 1.) NO Pressure Treated lumber, use exterior grade plywood instead. Aluminum stock and angle are even better for stringers and braces 2.) Seal wood with epoxy, poly resin & fiberglass, Spar Urethane and/or porch paint (in decreasing order of desirability.) 3.) Use aluminum replacement rivets and Stainless Steel hardware dipped in 3M 5200 throughout. That's about it. The rest is only limited by time and money. Good luck. Holler if you get stuck. We love pics ;)
 

evancody1

Cadet
Joined
Mar 12, 2011
Messages
24
Re: Bluefin Restoration in Progress

Hello all,

I'm converting it into a center console, I will be making the splashwell smaller and utilizing either side of the splashwell for a couple of pedestal swivel seats. Not too keen on carpeting, thats what it had on before and didn't fair too well, looking at either vinyl, or something like KiwiGrip. Other than the center console and the two swivel seats, still looking for a good configuration, utilizing the best use of space.

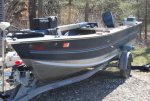
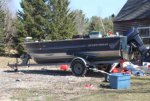
Here's a couple more pics, lost the pics of before I entered into resto zone, but its a basic Bluefin tinny with a 50 force on it. I would rather have a 85 powering it but the 50 still runs and I figured I'd ride her until she bucks..
before2.jpgBefore1.jpg

Here's where I am today, tomorrow looking to sand it down real good, cut the new transom pieces, exterior grade ply, epoxy to pieces together, put the transom back into place and drill holes, take it back out mesh the edges and epoxy real good.

I heard and read that when putting the two pieces of ply together for the transom, to start in the center and in a circular pattern moving outward put temp. screws in to draw the two pieces of wood together and create a better bond. then later remove the screws and epoxy entire area and use mesh on the edges.

Anyway thanks to all of you for your posts and resto forums, this site is really helps when tackling a project like this...
todate326.jpgtoodate326.jpg
 

Jeep Man

Commander
Joined
Oct 17, 2008
Messages
2,803
Re: Bluefin Restoration in Progress

Nice project. Always like the Blufin, and the idea for a center console. Keep us posted and keep the pics coming.
 

Shife

Chief Petty Officer
Joined
Oct 22, 2009
Messages
404
Re: Bluefin Restoration in Progress

Looks familiar. Have fun!
 

kfa4303

Banned
Joined
Sep 17, 2010
Messages
6,094
Re: Bluefin Restoration in Progress

you got the right plan for laminating the layers of plywood together. some folks just leave the screws in place and epoxy over them too. I love the center console idea too. there are lots of different ways to make one. here's a link that may give you a few ideas. Of course, you could always buy one, but that's no fun. Keep us posted.
http://www.tinboats.net/forum/viewtopic.php?f=3&t=24595&p=251522&hilit=center+console#p251522
 

evancody1

Cadet
Joined
Mar 12, 2011
Messages
24
Re: Bluefin Restoration in Progress

Thanks wlg, ya thats what I figured I would do is reverse the brackets to make it easier...I beat the crap out of my hands trying to get those two screws out, finally I just cut them out.

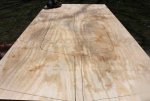
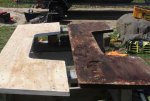
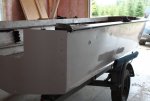
Kfa4303, I appreciate the tips, I'm using ext. grade BCX ply, on the transom I coated with epoxy and used 3M 5200 to join, the two pieces, here are some pics of the work today:transom1.jpgtransom2.jpgtransom3.jpg After everything sets up I'm going to wrap the edges with fiber mesh and coat both side with epoxy....

Found some pitting in a few places, only one place actually went through.. I hear JB Weld has a good marine aluminum product to fill and bond to the holes.pitting1.jpgpitting2.jpg

Kfa ya I think I'm gonna try to make my own center console, I was thinking either to use foam and mold it to the shape I want and then fiber and hot coat, or take the easier way out and use 1/4 inch ply and coat it...

Well time to go do some sanding....thanks all
 

kfa4303

Banned
Joined
Sep 17, 2010
Messages
6,094
Re: Bluefin Restoration in Progress

MAking great progress Evan. JB is great for filling those holes. There are two types you can get. There's the liquid, two-part form that comes in small tubes and you mix equal parts black and white to form a spreadable, grey mixture. It's best for skim coats and filling holes smaller than a dime. Larger holes can be filled using JB Marine Epoxy Stick/putty. It has the texture of Play-do until you knead it which catalyzes the reaction. It's best used on holes larger than a dime, or to fill spans. Both are readily available, cheap, easy to use a very strong. I keep both versions around just in case. Keep us posted. I'm really curious to see whet you come up with for the CC.
 

evancody1

Cadet
Joined
Mar 12, 2011
Messages
24
Re: Bluefin Restoration in Progress

Still sanding, and cleaning, and sanding, and cleaning......

Well as I've read in so many of these resto's, prep. work is 90% of the finish quality.. I only want to do this once so trying to take my time and do it right the first time. I'm not sanding the old paint off, just light sanding to abrade the surface, and sanding the aluminum to take the discoloration off...Sanding the aluminum plates around the transom and getting them ready for the JB Weld in the pitted areas...

I'm using a stainless wire brush to get around the edges of the rivets and the seams on the inside of the boat to ready for Gluvit. will have some pics when complete...

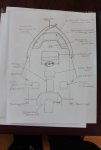
As I'm doing the manual fun stuff :confused: I cant help but continue to think about the layout of the tinny...here's what I came up with, its a very rough sketch, not sure if you'll be able to see it....anymore ideas are welcome...

layoutsketch.jpg

Thanks all
 

kfa4303

Banned
Joined
Sep 17, 2010
Messages
6,094
Re: Bluefin Restoration in Progress

Ain't paint prep fun :) ? You're almost there. Once all of the old, loose paint is sanded down, wipe down the hull with either a 50/50 mix of white vinegar and water, or Acetone. Once it dries, give the entire hull a LIGHT coat of Zinc-Chromate, self-etching aluminum primer, allow to dry, then paint what ever color you like. There are lots of brands of paints, but a lot of folks have have good luck with Rustoleum Marine/Aluminum paint. You may also want to do a search here in the forums under "Roll and Tip Method" of painting. I love the layout too. Functional and Flexible. Good luck. Keep us posted!
 

evancody1

Cadet
Joined
Mar 12, 2011
Messages
24
Re: Bluefin Restoration in Progress

First coat of Gluvit applied to inside seams and rivets, First coat Epoxy resin applied to new transom..JB Weld applied to the pitting on the aluminum exterior of the transom... Planning on scuffing Gluvit and applying 1 more coat, then applying self etching primer, then bare metal primer, then alum paint to give a little uv protection. Prob. overkill but I only want to do this once. Also planning on 3 coats of epoxy on new transom. I'll take some pics when its done.

One thing I'm trying to figure out is how to drill holes in new transom? Figure I would use the inside aluminum plate as a template and mark the holes, I tried to dry fit the new transom in, and it was very snug so there wont be much repositioning once the transom is in..any other tricks I may be missing?

Thanks ahead of time
 

evancody1

Cadet
Joined
Mar 12, 2011
Messages
24
Re: Bluefin Restoration in Progress

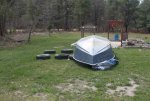
OK Finally had a couple of days, or at least half days to work on boat. Moved the boat off the trailer, Sorry didn't have an extra hand to take pics while I did it. Basically set up two tires, you can see them on the left side of photo, moved the trailer back to the tires and slid the stern off the trailer onto the tires, raised the tongue of the trailer and slowly moved the trailer forward until about a forth of the way up the bow, then stuck two more tires under and moved the trailer the rest of the way off the boat. ahya, if that made any sense.Flippedboat.jpg

To flip the boat, set up four more tires beside the boat. I strung a rope in a hole in the gunnel on the bow to a hole on the stern gunnel, where the pos light was. I tied a carabiner to one end, and the other end looped through the carabiner, and centered the rope so I could pull , I wish I had some pics...I pushed the side up while I had my brother pull the rope, once the boat was on its side I repositioned the tires so the gunnels would rest on the tires, then gently lowered the boat. When I reflip the boat back over I'll try to get some pics of the process.

It actually was pretty easy.

Got busy on prepping the bottom, half bottom done. Sanded 120 and 220 and used wire wheel. Not taking existing paint off, factory primer and paint is holding up well, just going to lightly sand and use bare metal primer on it. Any scratches I'll sand and feather out and use zinc chromate on it.Halfbottom1.jpg

Hopefully tomorrow I can finish sanding and apply gluvit to the seams and rivets..
 

evancody1

Cadet
Joined
Mar 12, 2011
Messages
24
Re: Bluefin Restoration in Progress

Prob. overkill but I used gluvit on hull exterior, just below the water line, on the seams and rivets.gluvitbottom1.jpg

I resanded hull bottom and cleaned with mild soap and water as prescribed by the directions on the zinc chromate. Wiped it down real good and let dry. ready for zinc chromate on bare metal areas.gluvitbottom2.jpg

Applied 2 coats of zinc chromate on aluminum. Now waiting 48 hours as directed before coating with a primer. I am surprised though as it does appear to be dry already. It took really well...I was a little apprehensive if it was going to take on the gluvit areas, but I sanded and scuffed those areas pretty well. I've been sanding so much lately I've been having dreams about my hand vibrating...

zincchromate1.jpgzinchromate2.jpg
 

evancody1

Cadet
Joined
Mar 12, 2011
Messages
24
Re: Bluefin Restoration in Progress

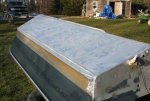
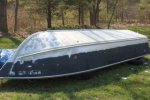
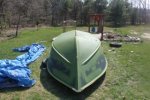
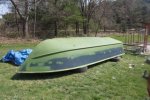
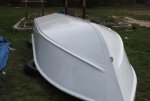
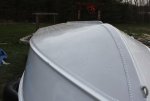
I didn't get any pictures of the primed hull, but I primed the entire Hull with rustoleum bare metal primer. Then applied Topcoat of white gloss. These pictures are from today, two coats. I'm gonna sand lightly tomorrow and apply the last coat. I used the roll and tip method. hull2coat1.jpghull2coat2.jpg
 

kfa4303

Banned
Joined
Sep 17, 2010
Messages
6,094
Re: Bluefin Restoration in Progress

Looks great. Feel free to drive on down here to FL to do mine :) Where do you live in Maine? My uncle just moved/retired to Farmington.
 

evancody1

Cadet
Joined
Mar 12, 2011
Messages
24
Re: Bluefin Restoration in Progress

Thanks, I live in southern maine just across the NH border...I think once this is done I'm gonna be hangin up my restoration boots...Although I'm learning a lot and having fun, this takes up massive amounts of time...Can't say I didn't know this, I read a lot of the resto posts on here, I figure I am only about 10% done.... Next week I'll have 5 solid days to work on the boat, looking at getting the paint finished, flipping the boat back on the trailor, working on the transom and deck...
 

evancody1

Cadet
Joined
Mar 12, 2011
Messages
24
Re: Bluefin Restoration in Progress

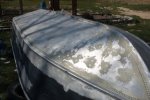
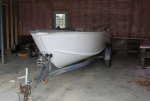
It's been raining for a while, flipped the boat and put it back on trailer, here's a couple of pictures of the finished paint.. It came out ok, not perfect, but gets the job done...finishpaint.jpgfinishpaint2.jpg

Started installing the foam, figured I would try to add some support for the deck, a little more work but I installed them vert. cut each piece, left that little space between the ribs for the foam to breath..I did this on both sides, only have picture of one side done, I'll get another when I take the deck back off. I used the home depot pink sheets, 2 inches thick.. in the back I filled with some noodles..
foaminstall.jpg you can also see the PVC pipe I ran for the steering cable, I think this should work? I'll just make it long sweep in the stern and under the center console, I need to install another for the wiring harness, I think I will pull an extra string through the pipe for future use..

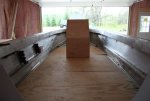
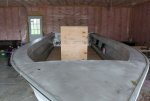
I put the deck on and built the center console from wood 1/2 inch exterior ply, used 2x2 for support inside. I just loosely put it together because I need to take apart and epoxy all the wood. I needed to mark the deck for the holes, PVC pipes and livewell..

centerconsole.jpg

centerconsole2.jpg

I think this is a good placement?
 

kfa4303

Banned
Joined
Sep 17, 2010
Messages
6,094
Re: Bluefin Restoration in Progress

Nice! I love the center console arrangement. Should look great. What kind of motor are you gonna put on her?
 
Top