Applying Gel Coat with Stencils and Applying and Removing Masking

Yacht Dr.

Vice Admiral
Joined
Feb 26, 2005
Messages
5,581
Re: Applying Gel Coat with Stencils and Applying and Removing Masking

This job is easy ..

Your on the right track there RWB :) ..

Overspray does not matter with gelcoat .. thats how you do an inlay.

The blue over white..or red on white..does not matter in a case that your going to sand and buff. You can over spray the red/blue/purple (whatever color) on top of your base color (white).

You would spray your base .. remove masking .. spray inlays ( overspray on the base and NOT remask ) ..

You still have to sand/buff your base color and your gelled stripes/name/stars .. so who cares were the over spray lands .. your going to gel it when you remove the masking.

Your going to use a "guide coat" .. the over spray IS partial to the guide coat..

YD.

PS. I hope this makes things clearer ..
 
Joined
Sep 13, 2010
Messages
16
Re: Applying Gel Coat with Stencils and Applying and Removing Masking

Opps,

I have never used gell before. I am sure that concerns you. My son is a very capable 17 year old, but he has a job that works him on the weekends, so I will probably be solo. I know what I am signing up for is big and I know my inexperience is working against me.

I am not using Patch Aid. I plan to thin with styrene and acetone as needed to match the viscosity that I find my gun can handle.

I checked out my pressure pot and gun. I performed well with water.
I am going to run some latex paint through it next week and find out what my viscosity needs to be to layout the product. One thing I noticed, the pressure pot kept popping pressure above 40 PSI. I dialed my regulator down to about 50 PSI, and than made the pressure at the pot more stable. My compressor was able to keep up with a full pot spray, I never noticed a change in the delivery of air or the water as I pulled the the two stage trigger. I know everything will be different with a high viscosity liquid like paint or gell.

Please note, I am not doing the entire boat. Everything I do in this stage will be from the candy stripe and below. I will save the topsides for later.

I think I can pull it off
1. I will have everything masked and ready to go
2. I can get the first color (WHITE) sprayed (wax in my final coat)
3. get through the gun to get acetone flowing through the lines and tip and let it sit ( I am using liners in my pot, this will help in cleaning)
4. then I will pull my masking
5. Finish the gun cleaning
6. Mix and shoot second color (wax in final coat)
7. Clean gun
8. Mix and shoot third color (wax in final coat)
9. Clean gun
10. cover with PVA.

If I find that my plan is caving in, then I will adjust and salvage what I can. My confidence is high, my aim is high. If I toast my gun, then I will go buy another one, and make the adjustments that I need to, to come at it again.

A few questions
How long do you suspect I have to pull the masking once the first coat hits the surface?
I have a 20 foot bow rider. I have two gallons for my white coat, a half gallon for my candy stripe (red) and a quart for my stencils and some stars. Do I have enough material to do the job?
When I get to sanding the second/third color down to the inlay, should I go with wet or dry sanding and what grit?
 

Yacht Dr.

Vice Admiral
Joined
Feb 26, 2005
Messages
5,581
Re: Applying Gel Coat with Stencils and Applying and Removing Masking

Opps,

I have never used gell before. I am sure that concerns you. My son is a very capable 17 year old, but he has a job that works him on the weekends, so I will probably be solo. I know what I am signing up for is big and I know my inexperience is working against me.

I am not using Patch Aid. I plan to thin with styrene and acetone as needed to match the viscosity that I find my gun can handle.

I checked out my pressure pot and gun. I performed well with water.
I am going to run some latex paint through it next week and find out what my viscosity needs to be to layout the product. One thing I noticed, the pressure pot kept popping pressure above 40 PSI. I dialed my regulator down to about 50 PSI, and than made the pressure at the pot more stable. My compressor was able to keep up with a full pot spray, I never noticed a change in the delivery of air or the water as I pulled the the two stage trigger. I know everything will be different with a high viscosity liquid like paint or gell.

Please note, I am not doing the entire boat. Everything I do in this stage will be from the candy stripe and below. I will save the topsides for later.

I think I can pull it off
1. I will have everything masked and ready to go
2. I can get the first color (WHITE) sprayed (wax in my final coat)
3. get through the gun to get acetone flowing through the lines and tip and let it sit ( I am using liners in my pot, this will help in cleaning)
4. then I will pull my masking
5. Finish the gun cleaning
6. Mix and shoot second color (wax in final coat)
7. Clean gun
8. Mix and shoot third color (wax in final coat)
9. Clean gun
10. cover with PVA.

If I find that my plan is caving in, then I will adjust and salvage what I can. My confidence is high, my aim is high. If I toast my gun, then I will go buy another one, and make the adjustments that I need to, to come at it again.

A few questions
How long do you suspect I have to pull the masking once the first coat hits the surface?
I have a 20 foot bow rider. I have two gallons for my white coat, a half gallon for my candy stripe (red) and a quart for my stencils and some stars. Do I have enough material to do the job?
When I get to sanding the second/third color down to the inlay, should I go with wet or dry sanding and what grit?

Your on the right track RWB..a few things though.

1. Your pressure pot should not have popped. The regulator ON the pressure pot should be about 8-10 psi. INLET pressure should not matter unless you have the HVLP one ( you stated you have the normal one ).

2. There is a spring loaded Needle valve on the underside of the lid ( backflow preventer ). REMOVE this. If that thing gets stuck then you will not get pressure to the pot. ( DONT tip over the pot though or the gel will get into your regulator )

3. When cleaning/flushing your gun turn OFF your air pressure at the GUN. You dont need to spray your acetone. You should only have a pee stream coming out of the fluid nozzle. In fact you can remove your air cap and clean that with the stream of acetone ( along with the pot and anything else that has gelcoat on it to save acetone in the final cleanup ).

4. I have 2 pressure pots at my disposal dong full sprays ( just in case ). You can always return one if you dont need it.

5. Scotch bright All of your fineline tape and/or masking tape for crisper edges.

6. Wait until the gel is about "wax" consistency .. you can remove the masking anytime as long as you dont brush it against the gelcoat. Then remove the tape when the gel no longer "strings".

As far as how long until you can pull the masking off.. thats variable depending on many conditions. From the point of the last coat.. you should be able to pull in about 30 min to 1 hour. Plenty of time to clean the gun. ( remember to flush your gun with water after the acetone flush before you put your PVA in the pot..after the PVA flush with water FIRST and then final flush with acetone before you retire your gun.

Your Going to have Plenty of gel after your reduction ( save a little bit of all colors just in case you need to spot in a burn through ).

Your inlays should be blocked out starting with 320 WET. Most pros wetsand with a hard rubber block on there first sand out.

Use guide coats ! Pencil or markers or dykem ...

Hope this helps :)

YD.
 
Joined
Sep 13, 2010
Messages
16
Re: Applying Gel Coat with Stencils and Applying and Removing Masking

YD,
What do you know about the MEK substitute product? The label says it is compatible, but that is not good enough for me. Have you ever used it?

BTW, I have been slowed down in my progress, the day job, kids, weather etc. I might shoot this weekend if I get my masking done. I'll be putting up pics.

RWB
 

Outback Jack

Petty Officer 1st Class
Joined
Apr 23, 2010
Messages
267
Re: Applying Gel Coat with Stencils and Applying and Removing Masking

Hey RWD great thread here, I will definately be watching this one . I am going to be doing something similiar as I want to get rid of the vinyl stripe . Keep us posted with pics and some details :) I have slowed down on my project too, but will be going back at it soon. Good luck on the shoot.

Jack
 

Yacht Dr.

Vice Admiral
Joined
Feb 26, 2005
Messages
5,581
Re: Applying Gel Coat with Stencils and Applying and Removing Masking

YD,
What do you know about the MEK substitute product? The label says it is compatible, but that is not good enough for me. Have you ever used it?

Im not sure what substitute your speaking of. If its anything other then MEK solvent then I have not used it.

YD.
 
Joined
Sep 13, 2010
Messages
16
Re: Applying Gel Coat with Stencils and Applying and Removing Masking

I shot the boat on Monday morning. I was able to lay down the gel fine. It took a minute to figure out I needed more air pressure at the tip of the gun to get the gel to come out with enough volume.

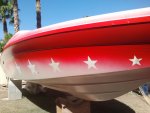
I had a couple of problems though. I did not see the coverage problem of putting red over the original green, and star vinyl adhesive separated from the vinyl and stayed on the surface of the boat. So I still need to shoot the blue, and do some thing about the red. The problem with the red is that the green was harder to cover, the easiest fix is to put more on, what is too thick? The more difficult fix is to sand it down cover with white and re coat with red again. The latter is not perferred, but it depends on how thick is too thick?

I checked the gel this morning, and it seems to have cured fine. It was hard, not tacky and was sandable to a powder. I think that is a good sign.

I will put up some in-process pics tonight when I get home.
 
Last edited:
Joined
Sep 13, 2010
Messages
16
Re: Applying Gel Coat with Stencils and Applying and Removing Masking

redwhite_blue,

It would also be nice to see some in-process pictures. I can picture what YD is speaking of, however, it is also helpful to see some detail of how this takes shape.

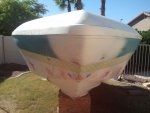
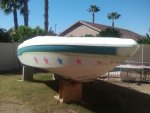
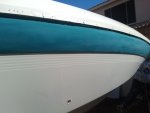
Here are some shots showing the before the shoot look. The nose was reconstructed, the keel was repaired and the stripes and stars are masked for the primary color

2011-10-08 14.47.27.jpg2011-10-08 14.43.12.jpg2011-10-08 14.47.51.jpg
 
Joined
Sep 13, 2010
Messages
16
Re: Applying Gel Coat with Stencils and Applying and Removing Masking

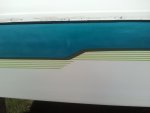
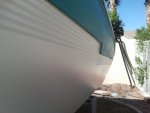
After the shoot, here are a few pics, nothing much to see but in my haste, I was a bit zealous with the red spray. I will be sanding forever and then some.

2011-10-10 09.38.52.jpg2011-10-10 09.39.25.jpg2011-10-10 09.57.52.jpg
 

oops!

Supreme Mariner
Joined
Oct 18, 2007
Messages
12,932
Re: Applying Gel Coat with Stencils and Applying and Removing Masking

you will be surprised to see how fast it comes off with 320 !
 

Yacht Dr.

Vice Admiral
Joined
Feb 26, 2005
Messages
5,581
Re: Applying Gel Coat with Stencils and Applying and Removing Masking

Hmm .. I was talking about Inlays. The red was not an inlay per say .. it was just a panel shoot.

You could have masked the white off at the tape edge.

I did not realize that you had a radius in the hull that was going to be a break point in the colors.

So the red did or did not cover the Green ? .. no reason to sand it off. If needed just re prep and apply more red ( this time mask off the lower portion of the boat ) .

YD.
 
Joined
Sep 13, 2010
Messages
16
Re: Applying Gel Coat with Stencils and Applying and Removing Masking

red covered the green if you put enough coats on. I did not think I could mask on the new primary color,it was still soft. I just have a lot of sanding to do.
I will for sure mask to finish the red and shoot the blue. I'll put up more picks when I have more progress to show.
 
Top