Aluminum Boat Restoration-101 A Project from A to Z.

D

DJ

Guest
This is going to take three threads to cover. Here goes installment 1.

There have been quite a few threads on restoring aluminum boats. I thought I'd dig up my old project and share.

Special thanks to member i386 for helping me get the pictures out of various mediums.


SN-2.jpg


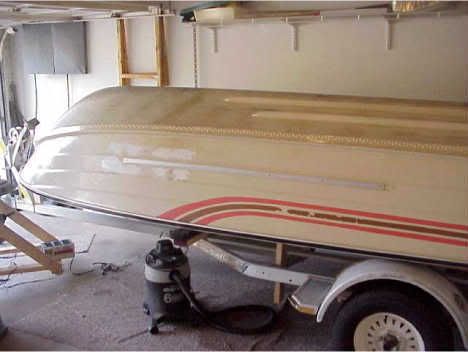
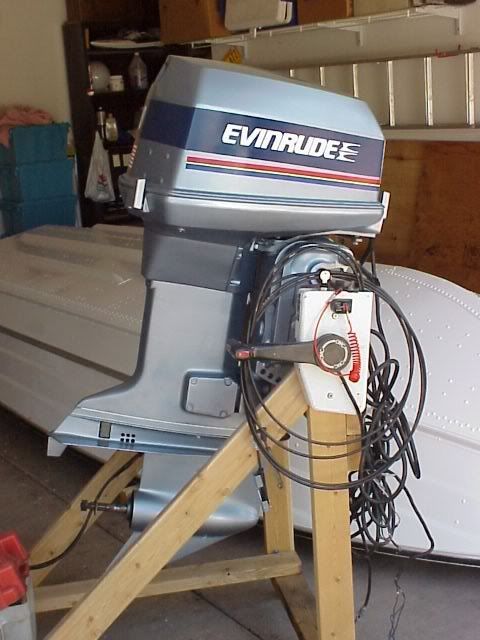
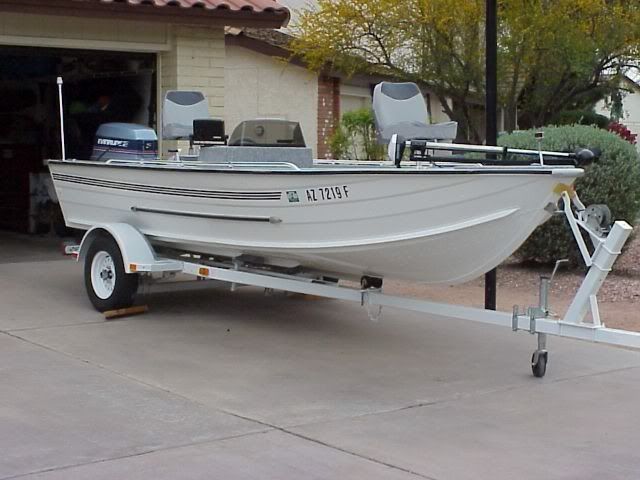
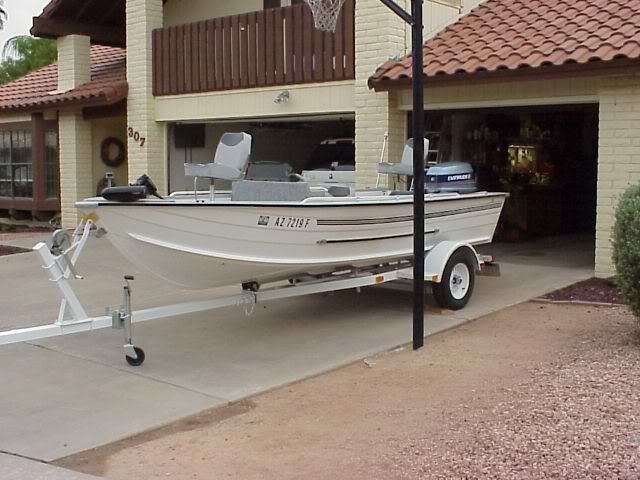
Here she is, after I dragged it home. It's a 1983 Sea Nymph 16' with a 1983 90 Evinrude sitting on a Shorelander trailer. It's ROUGH but not beat up, just completely neglected for 16 years!!!

I had to take the engine off to transport it because the transom was shot.

SN1.jpg


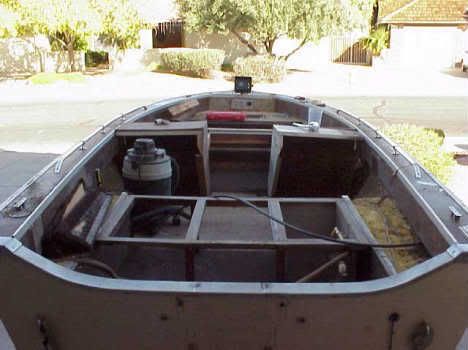
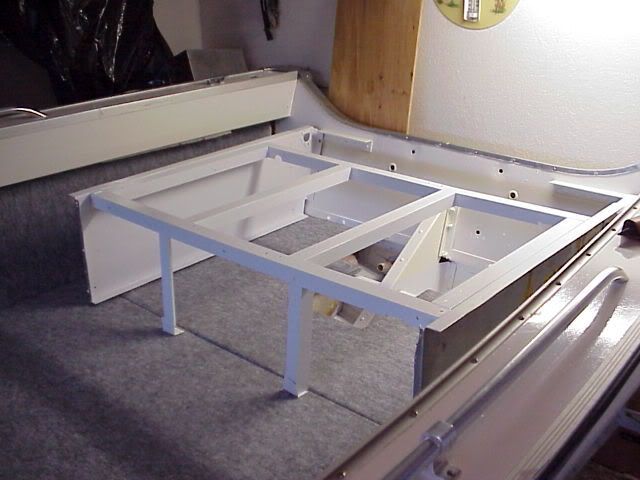
We begin gutting it.

SN3.jpg


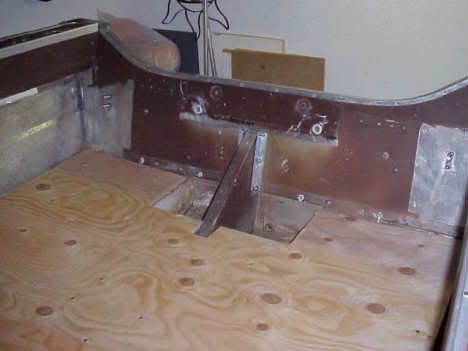
Here's a shot of the transom area. It's full of junk and dust. It sat 16 years in the desert.


SN4.jpg


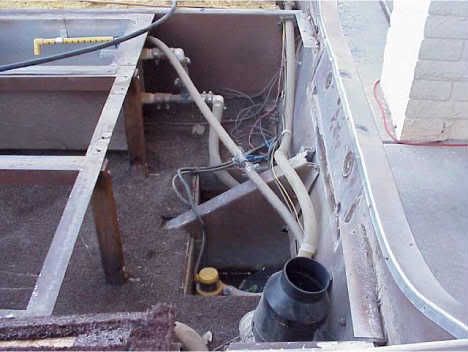
Here's a shot of the transom after I took it apart and dug out the rotted wood. I used the old piece as a template. The tray/seat in the bottom was a source of some of the rot. I drilled holes in it to allow drainage.

SN5.jpg


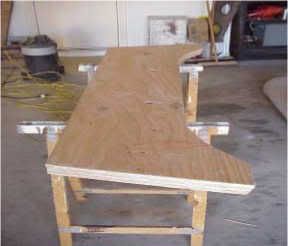
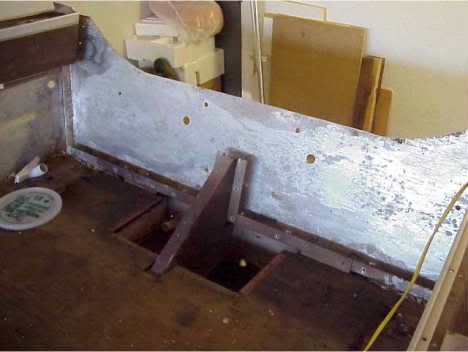
Here's a shot of the new piece. It is 3 pieces of 3/4# ply glued together with waterproof glue and screwed together with stainless screws. It was then covered with epoxy on both sides.


SN6.jpg


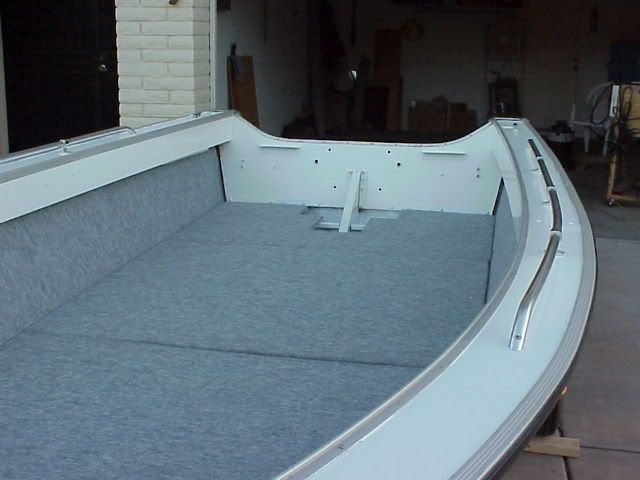
The wood is in! The inner sheet old aluminum was put back in place. There are four stainless bolts (carriage heads facing out) that hold it to gether. The engine provides the rest of the clamp force. Time for the top cap.
 
D

DJ

Guest
Re: Aluminum Boat Restoration 1

Re: Aluminum Boat Restoration 1

Installment #2

SN7.jpg


Transom in and floor boards fitted. Boards are coated both sides with epoxy.

SN9.jpg


Boat is flipped and the sanding begins and never seems to end. There were a few rivets that were suspect. I tightened them with a hammer (both sides) and then touched them with some Gluv It sealer.

I sanded the whole thing with 220 grit (wet) paper and then cleaned ith with paint thinner. Any bare spots were primed with zinc chromate primer after a wash with a 50/50 solution of vinegar and water and the rest was just painted over.

Evin1.jpg


Boat is painted (background) with Interlux Brightside using the roll/tip method.

Meanwhile the engine was gone through (new carb kits, impeller kit, plugs, rectifier, fuel pump, hoses, stat's and reliefs) and refinished with new decals, etc.

The engine had literally NO paint left on it. I painted any bare spots with zinc chromate after a 50/50 solution of vinegar/water washdown-just like the boat. The cowl was painted and the dark blue stripe is hand painted. Only the name and stripes are decals.

Under the hood, she was like brand new. This was a very low hour engine. It was bought new in 1983 and parked in 1984 and not to be run again until 2002.

I could run the engine, on that stand, (stand is on casters for easy movement) with a cut down plastic 55 gallon barrel.
SN20.jpg


The deck (flooring) is in with about 900,000 Stainless screws, each sealed with 3M 5200. The carpet is from Lowe's and glued down with exterior porch carpet glue.

SN11.jpg


SN21.jpg


The re-designed front and rear deck frames go in. You can see a livewell in the bow deck. You can also see the new front control center with: trim/tilt switch, trolling motor plug in, livewell switches (w/LED telltale) and timer.

A 15 gallon fuel tank went under the rear deck. I restored the aluminum tank by swishing BB's around in it for about an hour, cleaned it up beautifully. I also installed a fuel/water seperator under the deck with an access hatch. All the rear deck area was vented and a wall built between the battery and fuel tank. The battery had a Perko shut off switch.
 
D

DJ

Guest
Re: Aluminum Boat Restoration 1

Re: Aluminum Boat Restoration 1

Installment #3

SN19.jpg


The seats are in sitting on storage boxes. The boxes were made of 3/4" ply painted on both sides before the carpet was glued/stapled on. You can see the glove box and one vent behind (center) of the seats. The seats are removeable (and swivel) for use on stands for bow and stern casting. I actually had four seats.

SN18.jpg


Console is in with wiring and sporting all new OMC guages (Tach., Water pressure, Volts, Trim, Fuel). The trim and water pressure guages are right next to the tach. for easy viewing. You can see my nifty little homemade control panel complete with LED's to let you know what you left on.

The console was made in the same method as the seats. I could stand on it.

SN15.jpg

SN16.jpg


And here she is!

The trailer was sandblasted and painted with Rust Oleum. I replaced the carpet on the bunks with the same type that is in the boat. I also repalced the inner fender liners with carpeted ply-all matching.

The trolling motor is an older Minn Kota that was on the boat. With a little cleaning up, she worked fine. It was a 12/24 volt model with a max. thrust of 48. It worked fine on 12 v. but I installed two battery trays if anyone wanted to go to 24. Both trays are under the front deck with access hatches and room for a charger.
 

Willyclay

Captain
Joined
Sep 8, 2006
Messages
3,239
Re: Aluminum Boat Restoration-101 A Project from A to Z.

First class job! Now I know why the price of stainless hardware has jumped.
 

Drowned Rat

Captain
Joined
Jan 20, 2004
Messages
3,070
Re: Aluminum Boat Restoration-101 A Project from A to Z.

Wow, DJ. That boat looks great! Congratulations.

Have you had it on the water yet? What size motor is that?
 
Joined
Sep 5, 2007
Messages
1,790
Re: Aluminum Boat Restoration-101 A Project from A to Z.

I am starting on a 60 crestliner and hope it turns out 1/2 as well as yours. Looks real good!
 

Joe_the_boatman

Chief Petty Officer
Joined
Apr 14, 2005
Messages
482
Re: Aluminum Boat Restoration-101 A Project from A to Z.

Looks great. I like those electrics.

Any closeups of the carpet? I was thinking of putting something like that in my Starcraft.

Did you remove the original hull paint or scuff it and paint over it?
 

QC

Supreme Mariner
Joined
Mar 22, 2005
Messages
22,783
Re: Aluminum Boat Restoration-101 A Project from A to Z.

Awesome summary DJ. Thanks.

BTW, my Lowes is eliminating their 25 and 20 packs of stainless hardware and they're all on clearance, I just picked up a bunch for .20 on the dollar. You might check and see if yours is doing the same. You can never have too many stainless screws, just ask DJ . . .
 

rndn

Commander
Joined
May 20, 2007
Messages
2,323
Re: Aluminum Boat Restoration-101 A Project from A to Z.

Nice job and a great looking boat, motor, and trailer package. How many hours do you think you have into the job?
 

jennis9

Petty Officer 1st Class
Joined
Mar 22, 2008
Messages
396
Re: Aluminum Boat Restoration-101 A Project from A to Z.

Amazing!
 

waterlogged59

Petty Officer 3rd Class
Joined
Oct 28, 2007
Messages
90
Re: Aluminum Boat Restoration-101 A Project from A to Z.

How did you paint the hull in the background. I am in process of painting it with the roll and tip method. how many coats did you do and did you sand between. Did you have problems with dust.
 

Paul Harve

Recruit
Joined
Aug 14, 2010
Messages
1
Re: Aluminum Boat Restoration-101 A Project from A to Z.

I have the twin to that special project of yours its an 1982 sea nymph originaly bought in pennsylvania just recently transported to florida. I'v started to restore the boat and just finished the transom. your photos are a great help I am getting ready to buy the paint. thanks for your help
 
Joined
Jun 17, 2011
Messages
1
Re: Aluminum Boat Restoration-101 A Project from A to Z.

how much weight did all the customizing add to the boat afterwards? also just exactly how did you take the transom out. i will be doing this on my aluminum boat. thanks for this btw, its really inspired me to do something similar.
 

Rchris

Recruit
Joined
Jul 12, 2011
Messages
1
Re: Aluminum Boat Restoration-101 A Project from A to Z.

Wow, I was googling for ideas on putting a floor in my boat, and found this thread. I am truly blown away by your craftsmanship.
 
Top