Aluminum boat project

Matrix1

Cadet
Joined
Oct 28, 2015
Messages
15
I am sure this has been covered many of times but I need some good advice. Bought a used17' weldcraft aluminum project boat. Made a Big mistake by not looking underneath the hull !!. Yes it had some cracks, about 5 of them at about 3" long. Took it in to a guy who has repaired many aluminum boats with cracks. He fixed them and I painted the bottom afterwards. He said I should be able to use it at bouy 10 if I wanted, so he said. Now I need to foam the whole inside. But before I commit to that I need some advice. From all the searching I have done it sounds like I have a good chance a weld will devalope a hair line crack and leak. My question is can I coat the inside floor with something first and them foam it to prevent it from leaking if one does ? And yes, I should of never bought it. But I got it now!!!
 

64osby

Admiral
Joined
Jul 28, 2009
Messages
6,816
Pictures would help with advise on this one.

If the hull is welded construction, the type of aluminum used in making the boat is made to be welded. If the job was done properly you shouldn't develop cracks. Other things like drilling the ends of the crack prior to welding help with stopping cracks.

The structure of the hull and supports for the floor are key here. Adding sheet foam would enable you to perform future repairs if needed. Also installing the deck so the panels can be removed easily would be advised.

Start a photobucket account and post some pictures.

Welcome to iboats. :welcome:
 

Matrix1

Cadet
Joined
Oct 28, 2015
Messages
15
Thanks for the reply 64osby.... I tried to post photos but I have to post something 3 times before I can post any pics. So here's # 2 , one more to go!!! Pictures I had picked showed the fixed cracks and then 1 of inside the boat. As far as foam inside I was thinking of a water proof two part foam if there's such a thing.
 

Matrix1

Cadet
Joined
Oct 28, 2015
Messages
15
Also you will see that's it definitely a project boat. Just hoping I can get it done at a reasonable cost. As I screwed up bad buying this in the first place.
 

64osby

Admiral
Joined
Jul 28, 2009
Messages
6,816
^^^I have one too. Just about everybody at the site has a project or has done one.

Tear it down and fix it up.

The only screw up is buying it and not finishing it. Well maybe paying too much counts too. ;)
 

Matrix1

Cadet
Joined
Oct 28, 2015
Messages
15
I just wanted a decent boat to springer fish out off and this looked like it would fit the bill if I put a little money in it.
 

Attachments

  • image.jpeg
    image.jpeg
    256.8 KB · Views: 1
  • image.jpeg
    image.jpeg
    31.8 KB · Views: 1
  • image.jpeg
    image.jpeg
    42.4 KB · Views: 1
  • image.jpeg
    image.jpeg
    45 KB · Views: 1

Frey0357

Petty Officer 1st Class
Joined
Mar 13, 2014
Messages
313
Also you will see that's it definitely a project boat. Just hoping I can get it done at a reasonable cost. As I screwed up bad buying this in the first place.

Dont worry Matrix, I'm in the club too! I bought a boat that I shouldnt have, I even knew it needed work.....now I know its a lot of work!:eek:

Just know that you have friends that "are in the same boat" as you!:lol: We can help, I will be installing foam in my boat as well. Most of the recent boat builders have used and are using the sheet foam rather than the 2 part mix stuff. Personally, I fought with the spray in garbage for many days, which turned to several weeks, I refuse to put some back in! I have already bought the sheet foam, just waiting for some warner weather next week to seal the rivets (with Coat-It by GOOP) and then its onto cutting the foam to shape and installing.

Good luck, get a photobucket account, it makes the sharing of photos better for you, and the viewers! It's Free

Frey
 

Frey0357

Petty Officer 1st Class
Joined
Mar 13, 2014
Messages
313
Sweet boat by the way, "she's got good bones!"

There are many here on this forum that will help you through the entire process if you want, just ask.

Frey
 

Matrix1

Cadet
Joined
Oct 28, 2015
Messages
15
Thanks Frey0357, should of got into this web site awhile back. You said sheet foam is used now. Looking at the inside of my boat floor how do or would you fill in all the nooks and crannys with sheet foam? Bigger areas I can see using it but in the holes and some of the frame would be a bearcat to do. What demensions does this sheet foam come in and how much. Is it water proof too. Then my other question would be what did you do to prep the floor area? Any coating along seams to keep boat bottom water tight?
 

BWR1953

Admiral
Joined
Jan 23, 2009
Messages
6,178
Here's how I did the sheet foam. It's cheap and available from the big home improvement stores. Completely waterproof too.

foam blocks5.jpg
 

Frey0357

Petty Officer 1st Class
Joined
Mar 13, 2014
Messages
313
Thanks Frey0357, should of got into this web site awhile back. You said sheet foam is used now. Looking at the inside of my boat floor how do or would you fill in all the nooks and crannys with sheet foam? Bigger areas I can see using it but in the holes and some of the frame would be a bearcat to do. What demensions does this sheet foam come in and how much. Is it water proof too. Then my other question would be what did you do to prep the floor area? Any coating along seams to keep boat bottom water tight?

Matrix,
I intend to install the foam in blocks just like the fabolous picture provided by BWR1953. I will get the foam cut and fit under the floor with a means to allow water to travel down the center to the bilge area where it can be pumped out, assuming that I get some water there....hopefully not! I also have some larger "foam filled" areas in the stern of the boat. I will refill most of those with foam as well, in case I get swamped, but I will also use some of it for additional storage. The foam in my boat is also structural, so I need it to be firm and able to hold up people walking across the floor...

As far as getting the foam in all the nooks and crannies, I dont believe that it has to be there, the original foam was sprayed that way and it turned into a giant sponge, what I plan to do has to be better than the original! At least that's my story and I'm sticking to it!

I will post picks once I get going on the installation. As far as the sealer I got mine from the online giant that begins with A and ends with an N and contains zon in the center.....they had the best pricing. It is a 2 part epoxy type sealer, which I plan to simply paint onto the seams and riveted areas. I will heat up the areas prior to installation to ensure good sepage into the areas....I don't have any leaks now, but I dont want any in the future either... :)

Frey
 

Watermann

Starmada Splash of the Year 2014
Joined
Jan 12, 2013
Messages
13,787
:welcome: aboard Matrix, nice project Weldcraft you have there!

I have a couple questions, is that a patch welded over the damage on the inside of the center crack? It would be a good idea to use a patch, that way if the hull suffers an impact it's way more likely to with stand it. I have to say I'm not liking the look of the bead that was laid down though, it looks like something I would create rather than a pro. Also it doesn't look like the weld is covering the entire circumference of the center crack. Be sure to do a leak test to check it before foaming the hull.

fetch
 
Last edited:

Matrix1

Cadet
Joined
Oct 28, 2015
Messages
15
The sheet foam you used and layed down looks good Bwr1953. That would be doable in my boat too,hmmm. And yes the structural support of the foam is important to so that is good. Would like to know more about that sealer your going to use to. As to the question from watermann, a weld was cracked inside the boat on one of the ribs and someone tried to re-weld it. My welder said they got it to hot and made the aluminum brittle. So when we tried to weld the 3" crack on the hull it would not work so we had to cut that area out a bit and made a patch to fit. Just like that one other big patch you see. It was along a rib too and they made that area brittle to from not knowing how to weld aluminum. I was impressed how tight and perfect he worked that piece to fit. I knew then he knew what he was doing. And yes the bead looks ugly but I know it's welded in good. And since its on the bottom more or less we left it that way, won't be able to see it when the boat is in the water was our thought. What would be the better way to leak test? Fill the boat up a bit with water or actually launch it and watch?
 

Watermann

Starmada Splash of the Year 2014
Joined
Jan 12, 2013
Messages
13,787
I would add water in the driveway until the bottom was covered only up to the seams where the sides are welded just to check. That way you can see the drips under the boat if there is even the smallest leak..
 

gm280

Supreme Mariner
Joined
Jun 26, 2011
Messages
14,604
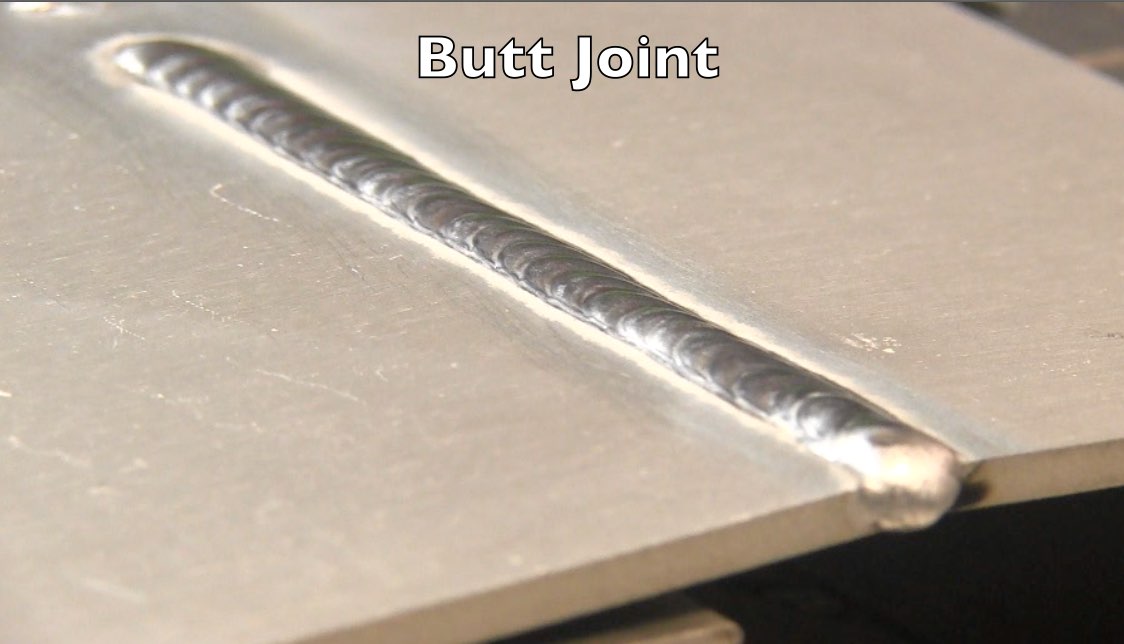
I honestly hate to be critical as well. But those welds don't look correct to me either. You should see smooth nice flowing beads that mends the parts together and not lumpy dirty beads. It really looks like the aluminum was not cleaned before trying to weld. It should look like this. JMHO!

butt-joint-weld-aluminum.jpg
 

ondarvr

Supreme Mariner
Joined
Apr 6, 2005
Messages
11,527
It's very common for aged aluminum boats like that to have cracks, and many boats used at bouy 10 need to have cracks re-welded after a season or two.

Don't use spray foam, use the sheet foam as shown in the prior posts, the hull will need to be welded again and any 2 part foam will need to be removed to do it, and it's not easy to remove. Don't use any type of coating to seal it either, for the same reason. Just weld it and leave it, if it leaks weld it again.
 

Matrix1

Cadet
Joined
Oct 28, 2015
Messages
15
No Title

Ya I know what you mean and I appreciate yours and others opinions. As I am seeking help and advice on trying to get this boat back in the water. And staying dry doing it šŸ˜Ž ... The guy told me from the looks of it the boat had been used in salt water and has some electralsis build up on it to which contaminates the aluminum. Which makes it hard but not imposible to weld. Unlike working with new clean aluminum. So I took his word and let him do his thing. I will water test after this wknd as suggested by Watermann. Then I hope to get the sides painted while it's still warm out. Then the foam....
Here's a picture of the boat before he started on it.
 

Attachments

  • photo233341.jpg
    photo233341.jpg
    46.6 KB · Views: 1

ondarvr

Supreme Mariner
Joined
Apr 6, 2005
Messages
11,527
And don't paint the sides, if there's any corrosion the paint will bubble up and flake off. Bare aluminum looks better than flaking paint.
 

Matrix1

Cadet
Joined
Oct 28, 2015
Messages
15
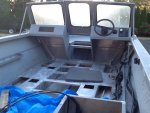
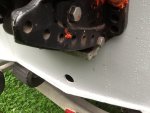
Well ondarvr, I suppose I could get by with out painting it. Would be one less thing to deal with. Already painted bottom and up to the front of boat as you see in first pic. Next pic is drain hole I need to install new one. Third is pic of side I was going to paint up to the weldcraft logo area but you got me thinking otherwise now. So I am Going to look for a bilge drain plug kit today. The hole is 1 1/4 dia and it has two screw holes already there. The metal is 1/8 thick only and I don't know if the plug should go from outside in or inside out? Inside out the plug would stick out an inch or more from outside the back of the boat. That would look weird to me. Once I see my options at the marine supply store I might understand what and how it will look when done. Need to plug the hole and let some rain water fill the bottom of the boat up to check for leaks per Watermanns post.
 

Attachments

  • image.jpeg
    image.jpeg
    239.3 KB · Views: 1
  • image.jpeg
    image.jpeg
    235.3 KB · Views: 1
  • image.jpeg
    image.jpeg
    260.1 KB · Views: 1
Top