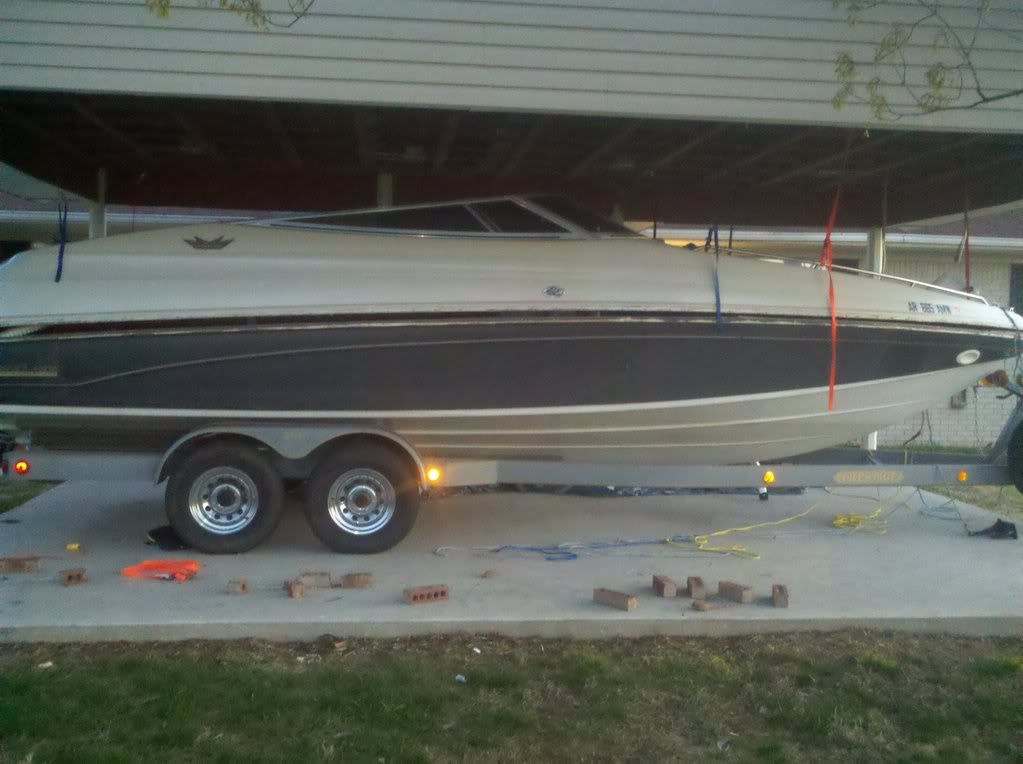
94 Crownline 266br

Maddoxsdaddy

Petty Officer 1st Class
Joined
Sep 22, 2008
Messages
222
Re: 94 Crownline 266br

Man, after seeing what you've gotten into, i'm starting to have that bad feeling about my 95' 210 CCR. Opening up a mole hill to find a mountain underneath. Best of luck to you and i'm sure we'll keep each other posted on our projects as they progress.
As far as your motor mounts, I would keep them as close as possible to the height they are now. If not, the result could possibly be a bit of vibration from shafts not lining up straight, etc. That's just a guess on my part having not gone through this (yet). Something i would do in this situation would be... make a wooden "jig" to fit between the bottom of the motor and a small floor jack so you don't have to pull your motor out.
 

Bondo

Moderator
Staff member
Joined
Apr 17, 2002
Messages
70,866
Re: 94 Crownline 266br

I am curious how touchy the engine is to the height of the motor mounts.

Ayuh,... They're Very Touchy,...
You're limited to the amount of threads on the motor mounts...
When the motor is reinstalled, you need to align it to the gimbel bearing with an alignment bar...
 

jonesg

Admiral
Joined
Feb 22, 2008
Messages
7,198
Re: 94 Crownline 266br

Thanks for the reply jonesg. I was hoping that would work. In several places the stringers are two layers thick it looks like I might have to grind out the middle so I don't get a gap in between the two at the bottom. Today my little 4" grinder died a hot smoking death. Poor thing. Good excuse to go order plywood I guess.

I got to have a clear look inside the motor mount / stringer sections today. My motormount screw/lags were sitting diagonal for the reason that I feared. The wood inside the mounts is soaked and rotting badly. Not much to grab onto any more. I would imagine it was just a short matter of time before something really bad happened.

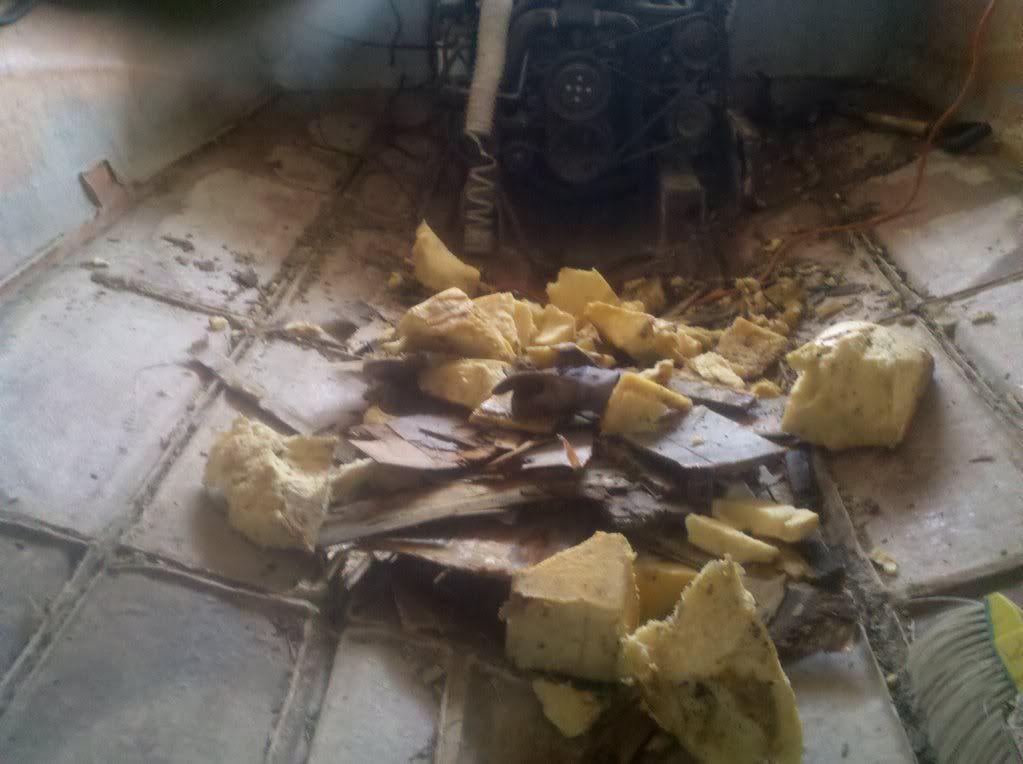
I am curious how touchy the engine is to the height of the motor mounts. I'll get them as close as I can but at what point do you measure your work and go "nope... not going to work" and start a redo there? The fiberglass obviously adds a little bit so kind of aim a bit low/short and build up to it? Considering the potential consequences of being wrong I'd *really* like to get this part right.

597041274_photobucket_21357_.jpg

I have an outboard but from extensive reading here I know the engine alignment is critical, I don't see any way around pulling it to do the transom and mounts. Its not a patch job, you're involved in a gut and rebuild.
Yes get a sawzall, the 18v dewalt are great, I chop through 1/2" stainless bolts like budder. Skillsaw is good for sectioning the transom wood prior to prying it off the transom glass.

Make a basic list so you can see fwd more clearly.
De-rig and remove outdrive.
Make internal measurements of mounts, engine height etc, (visit the I/O forum and ask the experts first)
Hoist engine out and set on pallet, oil the cyl's up.
Gut it all out, gring transom glass clean.
Finish removing all stringers, wet foam.
Grind back to new glass all areas where tabbing takes place.
Dry fit new stringers, mark for limber holes.
Remove stringers/bulheads and glass, cut limber holes and seal the holes with resin.
Make sure not to cut tiny holes that an acorn would clog.
Install and tab all substructure to deck.
Brace new transom to glass and bed with PL or poly putty.
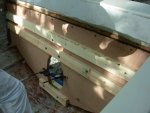
Use 2x4's on inside and thru bolts to hold it overnight, pic below.
The transom pic ( forget who's boat that was) the glass needs more grinding. It would have been better to do all the grinding before installing wood.

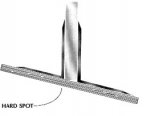
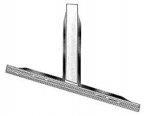
Also examples of good and bad stringer bedding, keep them just off the glass to prevent hard spots, especially sharp corners ,see pic.
 

Attachments

  • DSCN2447-640.jpg
    DSCN2447-640.jpg
    28 KB · Views: 0
  • bad.jpg
    bad.jpg
    6.3 KB · Views: 0
  • good.jpg
    good.jpg
    4 KB · Views: 0

Tolyn

Seaman
Joined
Jun 28, 2010
Messages
57
Re: 94 Crownline 266br

Thanks kindly for the replies Bondo and jonesg. I always look forward to hearing from you both (and others). I went and read the post on drive/engine alignment and will go ahead and buy one of the alignment tools. So as long as my mounts come fairly close to where they are then I can use the adjusters and alignment bar to put it dead on where it should be. Admittedly I read it and thought, wait .. how the heck do I turn the engine 90 degrees?!!? oh wait..

Hang in there Maddoxsdaddy! Just grit your teeth, prep yourself for the worst and have a look. Read a lot here when you get scared or confused. It's a pretty straight forward and well trod path that many here have been down or are very familiar with I'm finding out. It's a lot of work thats for sure but there's a certain satisfaction to it. Knowing the job is done right and the pride of being able to say that *you* did it. Of course mine's still all demolition so I'm basically proud of a pile of rotten wood and torn up fiberglass so far. heh

Some developments today:

I got a new grinder. One of the bigger 7" ones with the extended warranty. Person at Lowes said I had like 90 days on an exchange so if it smokes in that time period I get a replacement apparently. We'll see...

Ordered some plywood today. I went with the Arauco exterior stuff. It looked pretty good and some folks here have used it with good results by the sound of it. It's being delivered tomorrow sometime.

Here's the kicker though.. I am discussing all of this boat stuff with the wife so she is in the loop. She looks at me and goes, "well can you put epoxy on the wood to keep it from getting water?"... This gets a raised eyebrow out of me so I explain what I know about sealing the wood and that we would be using poly resin instead of epoxy resin since the price difference is considerable and we need a lot of it... She goes "um.. I think we have a bunch of that stuff at the warehouse at work.. Thats the stuff we use to seal the floors we put in. Makes 'em waterproof.."

So come to find out.. they have 5 gallons of "Epoxy A" and 5 gallons of "Epoxy B" that we can just have. It's not enough for them to use (they use this stuff by the barrel apparently) and/or it might be some different color or something. So! You epoxy wizards out there... I have more questions:

1) Can I use this stuff?!? Epoxy is epoxy isn't it??

2) What kind of problems might I have using that as opposed to Poly since I guess the two don't stick to each other and I'm guessing my boat was made with Poly?.. or does that even matter once it's cured?

Mixture ratio according to the job/warehouse dude is 1:1 which seems kind of crazy but I guess is possible? Which equates out to 10 gallons then!? I'm really hoping the answer to #1 above is yes! Also is unwaxed according to the wife. She says they have wax in the warehouse to that they have to add to the mix when the customer wants it. Apparently we are welcome to that also.
 

Yacht Dr.

Vice Admiral
Joined
Feb 26, 2005
Messages
5,581
Re: 94 Crownline 266br

Hello Tolyn..

Im sure you wont burn up that grinder within the warranty time :) ..

As far as the Epoxy 1:1 resin .. Do you know what kind of resin ? What is the cure time..what is saturation of the resin..is it Laminating compatible Epoxy..can you use it with Fiberglass.. ETC..

I see no problem right now using this for undersides of a deck..but for stringers etc....hmm.. I just dont know ( and nobody else will ) .

YD.
 

Maddoxsdaddy

Petty Officer 1st Class
Joined
Sep 22, 2008
Messages
222
Re: 94 Crownline 266br

Hey Tolyn, thanks for the positive thoughts! I'm not sure about your epoxy question but if it works out, what a bonus! My wife and i were fortunate to recieve about $150.00 in HD giftcards so that will take care of the plywood and screw portion of my build but no luck on gift cards from i-boats....HAH!
 

jonesg

Admiral
Joined
Feb 22, 2008
Messages
7,198
Re: 94 Crownline 266br

May I remind you , its a felony to use floor epoxy in boats, send it to me and I'll dispose it.

Just get it and try it with some glass cloth on scrap plywood.
I've used bar top surfacing epoxy with glass cloth and it works very well, tough stuff.
It will not be laminating resin because its a final finish product.
It will be fine for the deck surfact, whether its ok for the transom and stringers you need to do some test layups and see how a 1/4inch thick layup with multiple layers of 10oz glass cloth cures, it might stay rubbery. If it cures rigid and tough you hit the jackpot.
 

Tolyn

Seaman
Joined
Jun 28, 2010
Messages
57
Re: 94 Crownline 266br

Epoxy should be coming home today. I talked with the warehouse/installer guy some. He seemed to know a lot about it.

Setup time is approx 30 mins.
Cure time is approx 5 or 6 hours.
Cures hard
Takes well to fiberglass

Apparently its very thick. He mentioned to my wife that he might have to thin it up some in order to be put on with a brush. I told her to tell him we'll take it just like it is. I'd rather it be too thick to use than too thin to use.

We'll see what shows up.
 

LippCJ7

Vice Admiral
Joined
Sep 20, 2010
Messages
5,431
Re: 94 Crownline 266br

good to see you guys bringing a couple good Crownlines back to life!!
 

Tolyn

Seaman
Joined
Jun 28, 2010
Messages
57
Re: 94 Crownline 266br

We will see! At this point in the process it still looks like I am putting it out of it's misery. :redface:

Still waiting on the free epoxy offer to occur. It does not sound like it will be a problem. I am anxious to see exactly what it is and test how well it would work for me. I am curious however, if the stuff is insanely thick like they mentioned (unpaintable with a brush) what would/might I thin it with?

Got brave and pulled the lower unit yesterday in preparation for taking the engine out. It went pretty much according to the manual (thanks for that link again Don S.). To my completely untrained totally non-professional eye everything looks in pretty decent shape. The splines and joints all look healthy. No missing parts or excessive play or worn edges or anything.

Wife found a place that rents an engine puller for $50 a day. Kind of expensive (since I will obviously need it twice) but better to do it safely than try the "hold my beer" approach in this case I think.

I am at that turning point where the "little" stuff is done and now it's time to go big or go home. Pulling the engine means I have to split the cap since I don't think the lift can clear with the engine suspended. Both very big steps I have had some trepidation about (just seeing the boat in that state would seem like a significant wow moment).
 

Bondo

Moderator
Staff member
Joined
Apr 17, 2002
Messages
70,866
Re: 94 Crownline 266br

I am curious however, if the stuff is insanely thick like they mentioned (unpaintable with a brush) what would/might I thin it with?

Ayuh,... I doubt it's That thick, but if so, acetone will thin it, but don't use very much of it...
10 gallons of Free epoxy is almost $1000....
Great Score...

Instead of rentin' an engine lift for $50....
Call a Wrecker with an extend-a-boom...
It'll be Safer, 'n it'll lift High enough to clear the gunwales....
And probably for the Same money, or possibly Less...
 

Maddoxsdaddy

Petty Officer 1st Class
Joined
Sep 22, 2008
Messages
222
Re: 94 Crownline 266br

Just curious if you got anything accomplished this weekend. Got a little bit done on my end. Thankfully i don't have to go as far as you do with pulling the motor and outdrive...

Best of luck to you.
 

Tolyn

Seaman
Joined
Jun 28, 2010
Messages
57
Re: 94 Crownline 266br

Stellar idea on the wrecker Bond-o! I canceled the hoist rental and will give that a try. I took a week off vacation with the family to get my mind off work and the train wreck of a boat parked out in front. Ended up staying at a really nice hotel and staring out the insanely numerous hotel windows at...Table Rock Lake...and the boats.. Yep. Really need to get this thing fixed.

I managed to sneak out the front door last weekend and cleanup the faces of the outdrive and transom mount since they had some gaskety looking gunk on there. Also loosened up the exhaust tubes and disconnected the water intake in preparation for the motor coming out. I don't really want to do any more hull grinding with it still in there due to the enormous amount of nasty dust it makes.

Have sort of firmed up the deal on the epoxy and put in my request with my wife to have that occur whenever possible. I am still unsure of it's usage as a laminate (or anything for that matter) but will test it when/if it arrives.

I could use some help in estimating the amount of fiberglass I will need so as to not over/under purchase by too much. At 26.6 feet long, replacing stringers, transom and deck, I am not sure how much stuff that equates out to. After much reading it seems like 1.5 CSM and the 1708 are the way to go? 1708 with resin seems probably a little overkill but I am not sure what else I would use instead and I am ok with some overkill if the price difference isn't absurd. So for a shopping list I need:

X feet of 1.5 CSM (50"+ wide seems common?)
Y feet of 1708 (similar roll width)
Z amount of chopped/filler material for PB mix?

metal fiberglass roller thingy

(I have breather/goggles and all of that stuff)
 

Tolyn

Seaman
Joined
Jun 28, 2010
Messages
57
Re: 94 Crownline 266br

Short update with no pictures.

Have the engine mostly disconnected and ready to come out. Every time you think you got everything you find some other wire or hose hanging down there that needs to be disconnected. I'm sure for those that do this for a living its a 30 minute operation they do without even thinking about it. Not so much for me.

Pulled the rub rail from around the boat and took out the 2.5 million screws that keep that boat halves together. Of course it still doesn't want to come apart. I used a long flat metal painters edge thingy tool to push up there and help break the gasket stuff seal that is there. Still no luck. Maybe some screws inside still holding it together or something. I'll see if I can figure it out during the week.

Hoping to get engine out and both split in half this week so this weekend I can do some serious grinding.

Days like today where you do a whole bunch of work but nothing looks like it changed are tough.
 

Tolyn

Seaman
Joined
Jun 28, 2010
Messages
57
Re: 94 Crownline 266br

After getting some much needed sleep, I have another question.

While splitting the cap it was pretty obvious there was some kind of caulk/gasket/sealant around the edge. In breaking the top half and bottom half loose from this stuff (still have not managed to actually separate them) I inevitably ended up cutting, pulling and discarding bits of it in various places.

Presumably I need to put this back when I rejoin the two halves so what is this stuff? Just a giant bead of 4200??

Also, if anybody wants to chime in on my fiberglass estimation question two posts up that would be much appreciated. :)
 

steveclv

Petty Officer 1st Class
Joined
May 12, 2010
Messages
242
Re: 94 Crownline 266br

Can't really help too much but a couple of things that might help you from my experiences

Epoxy will stick to poly but sand the poly first and wipe down with acetone.
Colored epoxy will not wet mat/cloth very well - for the first coat, use clear epoxy then colored afterwards
Acetone will thin epoxy but no more than 10%
Thin epoxy will creep into wood - it can/is used for termite repair of houses but don't be tempted to try repairing WET rotten wood - it only works with DRY rot.
Epoxy works best on flat surfaces and remains flexible. Poly can be a bit brittle. So I used Epoxy on my deck to great effect.
And just a personal observation - almost every job documented on iBoats is 500% better quality than the job that was done by the original factory - whether it's 'overkill' is a personal choice but I don't necessarily believe that you have to take 18 months to rebuild your boat to a perfectly acceptable standard - it depends if your hobby is boat building or boating ;) (dons flak jacket)
 

Maddoxsdaddy

Petty Officer 1st Class
Joined
Sep 22, 2008
Messages
222
Re: 94 Crownline 266br

Gotta agree with ya steveclv... There's a couple of little spots in mine that i'm not going to replace just for spite...not really, i just didn't want to get into the cabin to replace a 4" wide X 10" tall rotten piece of stringer when everything surrounding it is very solid.

Tolyn, i don't envy you one bit. You apparently have alot more work to do on yours than i do. I have a wife pushing me to get mine done by Memorial day weekend. I'm not gonna skimp but if it ain't broke... yadda, yadda, yadda...

My deck is 94" wide x 104" long... roughly 68 square feet. I ordered 16 feet of 60" wide 6oz cloth and the same amount of 1708 biax. I did chose to use epoxy under the deck (stringers, tabbing, etc.) but will most assuradly be switching to Poly for the top side. I got 2 gallons of west system epoxy, enough 206 hardener, and whatever the stuff is for filler to make fillets with. I plan on getting 2 gallons of unwaxed and a gallon of waxed for the finishing layer, then i'm gonna hit it with some non-skid paint (to be decided).

This has been a pain in the rump so far but it looks like the demo portion is definately the hardest part. So far, getting the new stuff cut and fitted has seemed to fly by.

Best of luck to you.
TB
 

Tolyn

Seaman
Joined
Jun 28, 2010
Messages
57
Re: 94 Crownline 266br

Well, some progress finally after recovering (still working on it) from a nasty ankle injury that left me unable to climb in and out of the boat or much less just walk around normal instead of like a zombie looking for braaaains.

The cap has been split which was more difficult and weighty than I expected. Running a taping knife between the top and bottom half to help break the seal there seemed to help a lot. The aft portion is much lighter than the front (since there is just a whole lot less of it) so I could get in the boat and help lift while securing with straps.

The front was another matter entirely. The bow rider "tub" portion which is all part of the top half adds a lot of weight and was very difficult to move also due to the fact that I couldn't stand in the boat to do any of it.

Here she is in all of her "glory". Note the split between the top and bottom half. Finally I could see through there!
597041274_photobucket_33182_.jpg


After a lot of huffing and puffing and a few nearly uttered bad words, I ended up purchasing a manual cable winch (come-along) for about $35, which greatly sped up the lifting process. Initially I had thought that I would split it in two, pull the bottom out from underneath the top and then get the engine out of there and have at it.

Great idea in theory... I quickly realized that a Plan B was required when I started to raise the upper section away from the lower. The distance from the top of the upper section to the beams holding it up was a lot less than how far the "tub" sat inside the boat. It was simply impossible for me to raise the top high enough to be able to pull the bottom out. Stellar planning.

Plan B became get more straps and strap the heck out of the top section, go to town on the front half, rebuild structure/stringers, rebuild as much deck as I can (+glass), rejoin top and bottom, deal with engine mounts/transom. Currently am near the end of the "go to town" section of Plan B.

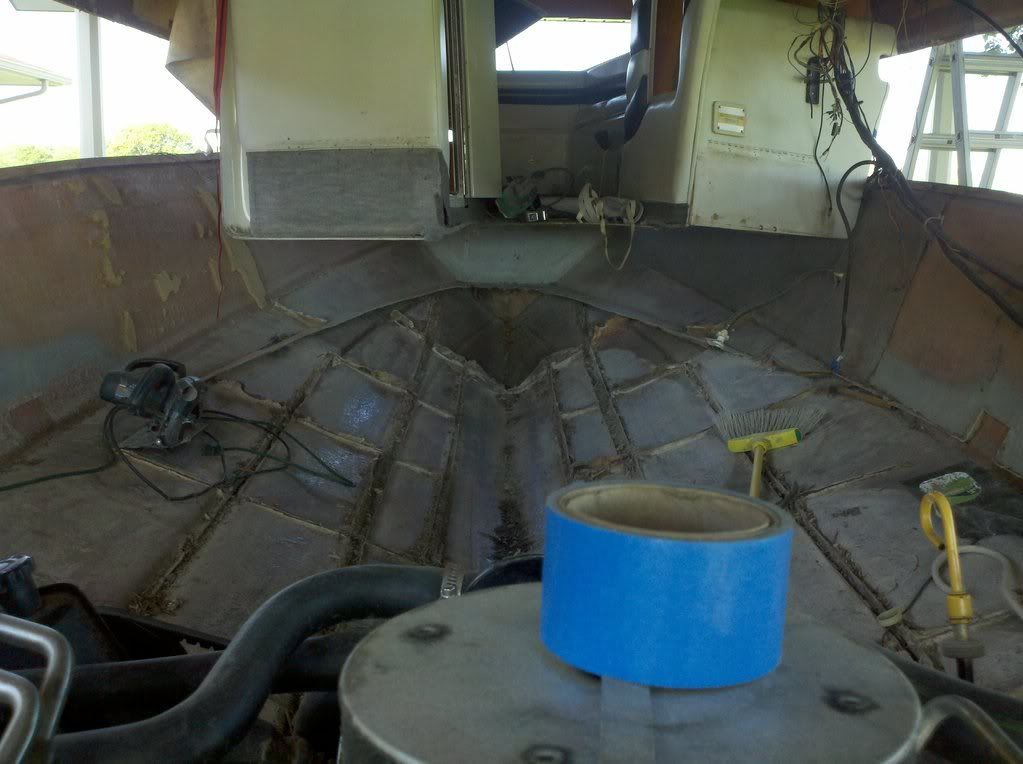
Here you can see how close I came to being able to pull the two sections completely away from each other. Even with all of the additional strapping it's still kind of nerve wracking working underneath that top section in the front. There was a piece of plywood glassed to the bottom of the "tub floor". That should be a real joy to put back.
597041274_photobucket_33180_.jpg


Here's the last foam stuff coming out. Good riddance!
597041274_photobucket_21357_.jpg


It feels good to be almost at the end of the destruction phase. Strangely enough the front was actually worse off than the back! All of which was in rather scary shape. I am not sure we could have gotten through this season without some kind of really unfortunate incident.

My wife came home with the equivalent of about 7 gallons of epoxy last night. I'll mix up a small batch and test it's bonding capabilities. She said there was more if we needed it to which I answered "probably! ..but this will get me going at least".
 

ezmobee

Supreme Mariner
Joined
Mar 26, 2007
Messages
23,767
Re: 94 Crownline 266br

Nice work. That does look like one HEAVY cap.
 
Top