redneckpunk
Petty Officer 2nd Class
- Joined
- Nov 19, 2008
- Messages
- 130
A little history to help people understand the issue better. Boat is a 1993 and Im assuming it came new with a 1993 era O/B. The original O/B has since been replaced, before I bought it, with a pre 1980 (we think 1977-79 but no tags) Mercury 1150 tower of power. Ive run the crap out of it, been a great motor but last month I finally toasted it and have to hang a new motor. Which brings me to where I am now. Last year I got a great deal on a 1985 Merc 115 straight 6, checked out by my mechanic and its flawless so it sits in the garage ready to hang. The issue is the difference in bolt pattern for the lower mounting holes and the previous work and how to fix it "right".
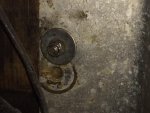
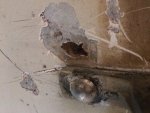
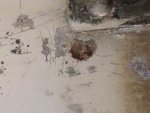
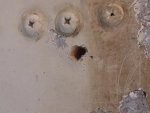
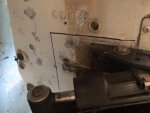
I have not pulled the pre 1980 motor completely off the boat because I have another project in the garage I need to get finished and moved so I can free up a little more room to work, but I have done some unbolting, cleaning, stripping paint and exploring to prepare myself. I did find that the transom wood is still in good shape and there are no signs of leakage, rot, penetration or anything to concern me there. I had worried that I might be replacing that as well. What I did find was shotty repair work to seal and cover the original motor mount holes as well as some pitting as a result of corrosion. It looks as though the holes were just partially shot full of silicone and then the aluminum was covered with Marine Tex and painted over. The same holds true for a couple of holes caused by corrosion. Im lucky with the beating ive put it through it hasnt developed any leaks in those locations.
So here is what Im thinking and hopefully some of you more experienced guys can chime in and correct me or help me out with suggestions. Once the motor is off I want to use round dowls to plug the four existing lower holes in the transom from the 2 different motors that have been mounted. Either find ones that fit tight in the current holes or dril the holes slightly larger to fit the next size up dowls and then soak the dowls in epoxy before tapping them into place and finishing with epoxy brushed over each end of the dowls/hole. This should seal those holes through the wood. My next step is closing the holes in the aluminum. I would like to find someone locally who can weld them but I do not know if that is possible with the wood transom backing. My other option is a Marine Tex or Star Brite Putty to fill the holes. On the upper half of the transom, where the motor will mount I will then find a welder to weld a plate, covering all those patched holes and strengthening that area. I have also purchase aluminum support brackets that mount on the inside of both the upper and lower mounting bolts for putting on the new to me motor. As far as the corrosion holes, most are on the lower transom and I suspect from previous owners and their funky wiring jobs which I have since fixed. My goal on those is to clean them up, a vinegar and water bath and then a good coating of Gluvit or Coat-it on both the outside and inside before repainting.
Any advise or suggestions? Maybe what to use for the transom plate to weld on and thickness? I know there is an ideal aluminum for this. I dont have any pics right now because its smashed in against the wall behind a bunch of other stuff, but maybe drag it out tomorrow.
Thanks in advance, Id like to have everything ready to go so when I pull the motor and set the plan into action it hopefully goes somewhat smotthly. Im a DIY type person, but the welding part is what throws a wrench in things for me


