87 Chaparral 235 XLC complete restore

Status
Not open for further replies.

davedog

Seaman Apprentice
Joined
Aug 4, 2010
Messages
33
Thanks tpenfield for your help posting pics.

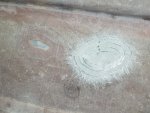
The more I think about these white areas, I think they must have been caused by either the core sticking the resin out when originally built or they were areas where the core was most wet and the moisture desalinated that area.
Regardless I will grind out these areas hopefully without going thru the hull.
Layup schedule:
1.5oz CSM
1708
1708
1.5oz CSM
I feel this should rebuilt and strengthen the area, but will probably make a high spot which will cause issue when laying the new core back down so will most likely have to sand this area back down or somehow build up the areas surrounding these patches before able to attach new core.
Does this all sound correct?

My next question for more clarity. When ready to lay new coring, this is to be done with just resin and maybe some chopped fibers mixed in, but no Cabosil. Is that correct? Using Poly btw. If I use epoxy for the core it will force me to have to use epoxy for everything going forward like top skin and stringers tabbing etc. So need to stick with Poly since have 15 gallons.

Thanks for any input and advice on all of this.
 

davedog

Seaman Apprentice
Joined
Aug 4, 2010
Messages
33
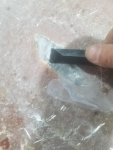
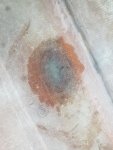
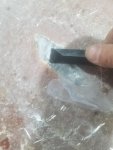
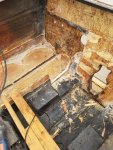
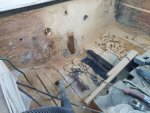
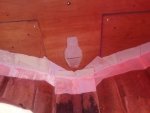
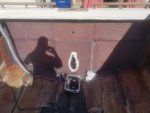
I still have not attached the coring to the hull because while grinding away at the white dry areas I ended up going through the hull. After grinding out the area the hole is about 1" x 4" and crappy part is it is right on top of the trailer bunk so having access to the other side to repair on outside will need to wait until I have enough support back in the boat to lift it off the bunks. So here is how I handled all of this.
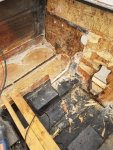
using a popsicle stick I wedged thick piece of plastic thru the hole to be a backer and keep me from watching the boat to the carpet on the trailer bunk.
I then ground out a bevel of about 12 to 1.
I made small batch of PB and filled the hole cavity followed by a torn piece of CSM the size of the beveled repair area and glassed that down on top of the PB and hole.
I then on a piece of plexiglass I made a patch with 4 pieces of 1708 largest to smallest oval shape and rolled out all bubbles and excess resin.
I then applied the wet patch over the CSM and rolled it all out removing any air.

This seems to have worked perfect for the repair on the inside of the hull. I should be able to now move forward with the coring and then once I have the stringers at least installed I can lift from trailer to repair other side.
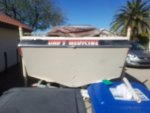
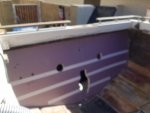
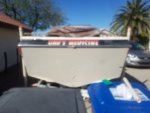
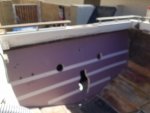
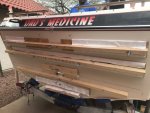
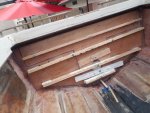
Resizer_15901268769280.jpgResizer_15901268769281.jpgResizer_15901268769282.jpgResizer_15901268769283.jpg
 

davedog

Seaman Apprentice
Joined
Aug 4, 2010
Messages
33
I still have not attached the coring to the hull because while grinding away at the white dry areas I ended up going through the hull. After grinding out the area the hole is about 1" x 4" and crappy part is it is right on top of the trailer bunk so having access to the other side to repair on outside will need to wait until I have enough support back in the boat to lift it off the bunks. So here is how I handled all of this.
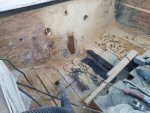
using a popsicle stick I wedged thick piece of plastic thru the hole to be a backer and keep me from watching the boat to the carpet on the trailer bunk.
I then ground out a bevel of about 12 to 1.
I made small batch of PB and filled the hole cavity followed by a torn piece of CSM the size of the beveled repair area and glassed that down on top of the PB and hole.
I then on a piece of plexiglass I made a patch with 4 pieces of 1708 largest to smallest oval shape and rolled out all bubbles and excess resin.
I then applied the wet patch over the CSM and rolled it all out removing any air.

This seems to have worked perfect for the repair on the inside of the hull. I should be able to now move forward with the coring and then once I have the stringers at least installed I can lift from trailer to repair other side.
Resizer_15901268769280.jpgResizer_15901268769281.jpg
 

davedog

Seaman Apprentice
Joined
Aug 4, 2010
Messages
33
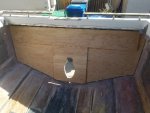
I figured I should post some pics from when I did the transom at the beginning of this complete restore which went great I think. Here is when I started removing the inner skin and wood.
Resizer_15902525829508.jpg
Resizer_15902525829507.jpg
In the next pic you will see where I put a piece of contact paper over the whole outside of the transom so no resin or PB would get stuck to the outside gelcoat.
Resizer_15902525829506.jpg
Next you will see my template made out of 1" pink foam from Home Depot.
Resizer_15902855398880.jpg
 

davedog

Seaman Apprentice
Joined
Aug 4, 2010
Messages
33
Not sure why its causing 2 posts. Anyway here are some pics of the clamping I made and used when attaching the transom wood which was 2 3/4" thick pieces of Marine plywood glued together with Titebond 3 waterproof wood glue. I also put a piece of CSM on both outside pieces of transom to waterproof it.
Resizer_15902525829501.JPG
Resizer_15902525829505.jpg
That is a piece of PVC pipe at the bottom protecting the drain plug.
Here is pic if the start of tabbing after I filled the edges with PB and made my fillets.
Resizer_15902525829504.jpg
 

davedog

Seaman Apprentice
Joined
Aug 4, 2010
Messages
33
I have another dilemma I need some help with.
my stringers measure 3/4 actual wood thickness x 12" tall and 10.3' in length and 3/4 thick 8" high and 10.3 feet long. There are 2 of each of them obviously. I am trying to figure out what lumber to use for them. Plywood is only 8' length so I was looking for fir in those dimensions and not having luck. What other wood type is proper to use for this size boat? (23.5' cuddy cabin) I don't want to splice anything together to get the 10' length if I can help it. Resizer_15907150559750.jpg
I assume a ommon board from Hm Depot isn't going to work so hope someone has done thoughts.
 

davedog

Seaman Apprentice
Joined
Aug 4, 2010
Messages
33
Ok after weeks of life getting in the way I am about ready to put the coring back in. Has anyone ever used [h=1]945 VINYLESTER BONDING COMPOUND?[/h] I am thinking of using it to bond the new core to the hull. Looks like it would help fill any gaps or uneven areas from the grinder or should I just use straight polyester resin to attach the core pieces?
Any input anyone has is greatly appreciated.
 

kcassells

Fleet Admiral
Joined
Oct 16, 2012
Messages
8,611
Just make your own PB and add 1/4" chopped glass. You'll be using it for the whole project anyway. You will have 2 of the ingredients on hand. Other 2 woud be cabolsi, cheap and chopped glass, cheap.
 

davedog

Seaman Apprentice
Joined
Aug 4, 2010
Messages
33
So I am basically doing it just like I did the transom. I probably just misunderstood, but I was just under the impression I wasn't suppose to use cabosil when bonding the core. Is there any benefit to also using some milled glass fibers in the mixture?
 

kcassells

Fleet Admiral
Joined
Oct 16, 2012
Messages
8,611
Cabosil lets you make a thickness so it not runny, chopped glass with poly is mandatory for strength.
 

davedog

Seaman Apprentice
Joined
Aug 4, 2010
Messages
33
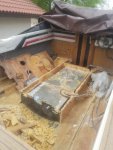
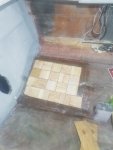
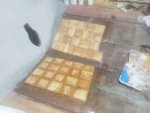
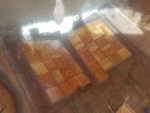
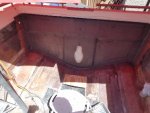
I have the new coring in the aft area of the hull completed and now working on area under the fuel tank near the keel. I know everyone suggested using foam, but I decided to go with 1/2" marine ply anyway just like it was done from factory because I had it on hand, and this boat isn't going to be around another 30 years I am sure even though it should last that long. Here is how I did it.
. After I removed the old core I glassed in a layer of 3/4 CSM, followed by a layer of 1708 using Poly. Then I decided to switch it up a bit and started using Vinyl Ester resin to use for everything that will be encapsulating the core material. I glassed another resin rich layer of 3/4 CSM and laid each of the 6x6" squares of 1/2 ply alternating the grain direction of each piece leaving almost a 1/4" open around each piece like I was doing that tile job.
. I then mixed up some Vinyl Ester and brushed the end grain of each piece pretty thick and gave the wood about 30 minutes to soak it up. Next I mixed up another batch of Vinyl Ester with some milled fibers, Cabosil, and 1/4 chopped fibers to almost a peanut butter consistancy. I squeezed it all into a large caulking tube and then used that to fill in between each piece or coring like it was the grout.
I also filled in around the entire outer edge of the cord area with a little thicker mixture so the glass would lay down in next step without bubbles.
. At this point my weekend was over so I had to wait a few days to get back to it all. I used my belt sander to make it all smooth on top and rolled on a layer of vinyl ester to coat the top of the coring. After that became tacky I rolled on another layer of resin along with 3/4 CSM, followed by a layer of 1708 again with Vinyl Ester.
That is where I am at now and will be doing the next section over the next 2 weeks hopefully.

Any comments or feedback?

Resizer_15945166691700.jpg
Resizer_15945166691702.jpg
Resizer_15945164347180.jpg

I will upload a picture of the final results after I laid the top skin later today.
 

Hot Rod 66

Recruit
Joined
Aug 26, 2022
Messages
1
Was the 454 already installed or did you put it in? Mine has the 350 magnum which means nothing. Lol
 
Status
Not open for further replies.
Top