76 Starcraft Holiday resto

kenj06

Cadet
Joined
Jun 26, 2021
Messages
10
Hey Everyone,
I've been lurking around for a while now and thought it was time to post since I'm starting (and maybe ending) restoration of my 1976 Starcraft Holiday IO.
History on the boat - It belonged to my Father-in-Law and was handed over to us back in 1995 I believe. he purchased it around 1986 we think. It's always been a Lake Erie boat as far as we know as it was purchased from a local dealer.
Not sure what all was done by the dealer before my FIL purchased it, but it has been repainted at some point before then
It's been a very low maintenance boat for all those years, just taking care of the routine items, replacing part of the floor under the battery, replacing wood in the seats, rebuilding the carb, and other minor issues. It was stored outside for a few years before that and not used while my kids were young. Always done my own maintenance and repairs except for the exhaust and shift cable boots back in the late 2000's. About 4 years ago, we had an overheating issue, failed impeller, and burned up the motor. Had a local marine shop pull it and another local shop rebuild it. The gimble housing was replaced with a newer piece and the hydraulics updated inside and out. The MerCruiser 120 has been running great since. The kids tube, wakeboard, and ski though not as much as they are getting older, but we still get out, cruise and discover new areas around the lake.
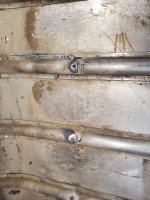
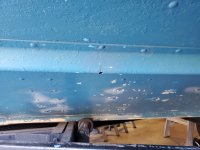
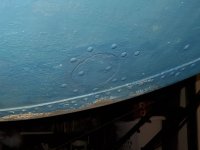
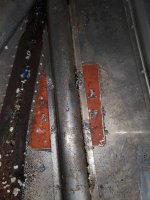
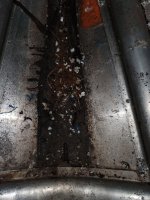
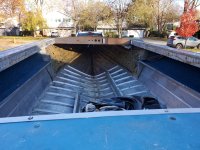
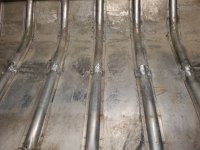
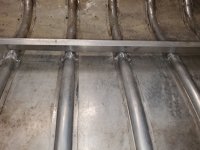
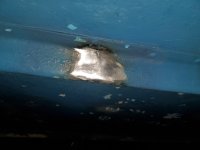
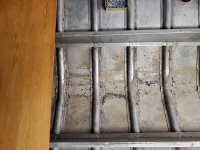
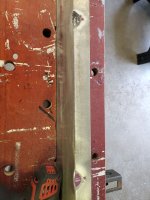
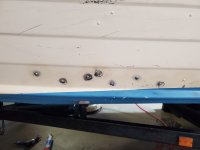
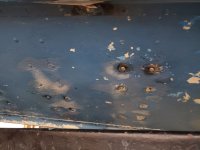
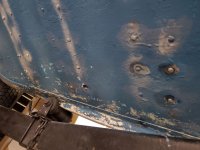
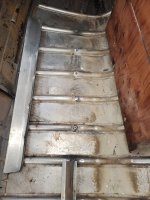
The last few years the floor has been getting soft, the seats had seen better days, some of the gauges starting to fail and the bilge pump has been running more. We've always checked for leaking rivets and nothing major, just a couple more each season. So at this point I thought it was a good time to fix the rivets, replace the floor, replace the seats, and make a few changes that I've seen on the forum. Was planning to have a local guy paint and maybe replace the leaking rivets and hopefully be back on the water in the summer. The last couple weeks I've been removing parts, documenting as I go. I pulled the floor today, the styrofoam was surprisingly clean with just a little dark staining on the bottom pieces towards the stern. As I was pulling the floor that would be under the front seats, I noticed the runner was leaned over. Removing that section of floor was when my worst fears were realized. 8 cracked ribs and broken runner on the port side. The ribs are cracked right where the runner attaches. I know 3 of the ribs were really loose as that's where most of the leaks were. I saw one patch on the inside starboard side towards the bow, must have been done before the family's ownership. I don't see any stress cracks in the skin while looking from the inside. Can't see anything from the outside as there are several coats of rubberized paint on the bottom. The strake on that side does have a crack where the front weep hole is and there are a few really loose rivets
Not sure I want to take this on myself since its structural in nature. I searched around the forum and didn't find anything on cracked ribs or repair. We've got a call out to a friend whose brother has been in the boat repair business to see if he knows anyone who could do the repair.
Fortunately, the only thing I've purchased so far was the front seats so I'm not out a lot of money yet should it be unrepairable. Obviously, the Captain has sentimental attachment so that is a huge factor.
This forum has been great over the years with helping me maintain the boat and hoping to get your perspective on if this is worth repairing.
20231105_141915.jpg

20231105_141936.jpg

20231105_155516.jpg
 

Bob_VT

Moderator & Unofficial iBoats Historian
Staff member
Joined
May 19, 2001
Messages
26,046
It's repairable with a good friend with the proper welding skills then some Gluvit. Possibly Bondo will pipe in since he had to weld his Starcraft Chines a long time ago. It's the nature of the beast I guess.
 

jbcurt00

Moderator
Staff member
Joined
Oct 25, 2011
Messages
25,034
Chine cracks are normal in less then well cared for boats. Running w compromised decking and transom doesn't help. Starcraft added rib end bracing to reduce it in later years. @classiccat & @Watermann both added plates at the rib ends to mimic SCs fix
 

kenj06

Cadet
Joined
Jun 26, 2021
Messages
10
It's repairable with a good friend with the proper welding skills then some Gluvit. Possibly Bondo will pipe in since he had to weld his Starcraft Chines a long time ago. It's the nature of the beast I guess.
Thanks for the reply. Much relieved today, the Captain called around to places today and found a guy who was recommended to weld the ribs. Not a friend, yet, but he has fixed plenty of Trackers, was reasonably priced, can do it next week and is close by. Can't beat that.

Some shots of the existing patch mentioned above.
Outside
20231107_204123.jpg
Inside
20231107_195952.jpg

Hard to see but nails? And that bolt just in front of the rib is stuck in there good. Must be some sealer they used when it was repaired 35+ yrs ago. It will remain there.20231107_195945.jpg

Seeing that patch has me wondering if the latest damage found started back then and just took this long to progress to the point of cracked ribs and broken stringer.
I'll be checking with my welder to see if he can bend up a new stringer for me. The existing one, besides being in 2 pieces is worn through in places and tinfoil in others. At least I can use it to practice my riveting skills.

The Captain has also been busy cleaning up the contact cement off a lot of the trim pieces. Going to hold off cleaning the glue on inside until we get it welded up. No need to stress things more than they have been already.

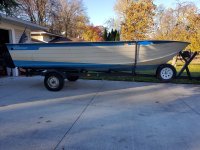
I'll have to get some better shots of the whole boat when its out of the garage. Little tight in there right now.
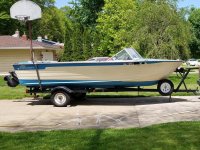
Here is how it looked a few years ago.
boat.jpg

Going to start ordering supplies this week, get the wood for the floor, side panels and other misc. pieces and get that cut.
 

kenj06

Cadet
Joined
Jun 26, 2021
Messages
10
Off to the welders yesterday and he was going to fix 'er up today. Hoping to hear from him tomorrow and get 'er back home.
20231113_153642 - Copy.jpg20231113_153603a - Copy.jpg

Checked with the welder to see if he knew of anyone to bend up a new stringer. He had a metal brake but not big enough for the length needed and would need to piece it together. I'm thinking I'll just do that with what I have and a couple patches and rivets.
Have a rivet remover on order along with a pneumatic rivet hammer.
Got the garage cleaned up with the boat gone and organized everything a little better.
Also had a neighbor come over tonight and welded up a motor mount for his Barracuda. Wasn't pretty but nothing a little grinding and paint won't hide. Definitely not talented enough with welding to try it out on the boat.
 

kenj06

Cadet
Joined
Jun 26, 2021
Messages
10
YOU WILL FIND A WEALTH OF KNOWLEDGE AND HELP ON THE IBOATS STARCRAFT FORUM PAGE, HERE: https://forums.iboats.com/forum/starcraft-boats.131/


Looks like a worthy project. Keep us updated.
Thanks Roscoe! I've been looking around at a lot of the Starcraft rebuild threads and getting ideas. Glad so many have shared their knowledge and work.

Back from the welder tonight. Came out pretty good I think. He ground down the tops of the ribs so I could get the stringer back on there. He had trouble with the chine since he couldn't clean it out inside and crud was coming out.
20231115_182339 - Copy.jpg20231115_182332 - Copy.jpg20231115_182414 - Copy.jpg
Found a place with marine plywood, damn, its quite expensive but the cheapest place I could find it within 20 miles. I only plan on doing this once so doing it right. I figure once I'm done with the floor, it will outlast me.
Planning on taking 1/2 day Friday and getting the plywood and get it cut over the weekend so I can seal it before it gets too cold in the garage for it to cure. I'll put the Captain to work cleaning up the interior glue from the carpeting. She did a pretty good job on the pieces I removed already. She's also been contemplating the color schemes for the interior. We're going with the same paint scheme outside. Blue, gray, white on the inside just not positive exactly where each goes yet.
 

kenj06

Cadet
Joined
Jun 26, 2021
Messages
10
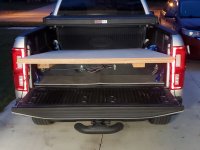
Didn't get the flooring Friday and had some other tasks to complete around the house before the weather gets too cold. I did seal the sideboards and back supports to the transom. Got the flooring today and cut the support for the back tonight. Tomorrow I'll seal that piece and hopefully get it installed. Tried out the rivet remover and it works OK. I think it will help with the number of rivets that need replaced. Pneumatic rivet hammer on due in this week.
3 of 5 sheets still in the pickup.
20231120_173239 - Copy.jpg

Yes, its flipped 180 degrees, matched up pretty well though it is about a 1/4" short top to bottom.
20231120_202344a - Copy.jpg
Little bit each day...
 

kenj06

Cadet
Joined
Jun 26, 2021
Messages
10
Well after a long weekend away for Thanksgiving, we have some more progress. Picked up some aluminum to repair the stringer and practice riveting. Rivet hammer arrived, rivets delayed so not able to test it yet.
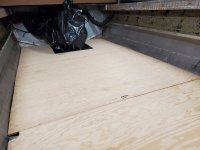
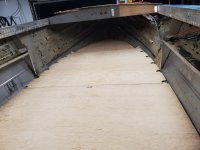
Got the floors cut and fit.
20231203_181418 - Copy.jpg

20231203_181357 - Copy.jpg

1 more full sheet of plywood left for the dash and upper trim boards. I think I'll be able to get the lower dash shelf, motor box, and possibly the center steps out of what I have left over from the floor. Will work on that this week. Supposed to be in the 50s next weekend and with a little heat in the garage, I'm hoping to get them all sealed.
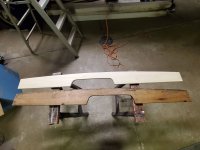
I swear the instrument panel is disintegrating while its sitting on the shelf. It had a few cracks when I took it off which caused a couple more but the more I look at it, not sure if I'll be able to save it. I think its beyond JB Weld at this point and was thinking I may just fiberglass over it inside and out. I've seen some of you have made instrument panels out of wood, not sure I'm crazy about that.
Anyone ever repair a plastic instrument panel?
 

kenj06

Cadet
Joined
Jun 26, 2021
Messages
10
Thanks for the tip on starboard, I'll look into that.
With a warm Friday and Saturday in the forecast, I took Friday off work and spent 2 days cleaning up the garage and sealing the wood I have cut so far.
Pulled the boat out Friday swept the floor and had the garage full of stands and wood. Door closed 1/2 way and a kerosene heater and small electric heater to circulate the air and garage was 72 with mid-50s outside.
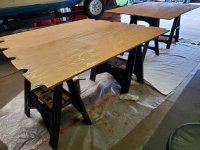
This was the last 2 flooring pieces on Saturday.
20231209_150254 - Copy.jpg

Instead of watching urethane dry and inhaling more fumes, I went outside and got some riveting done on the stringers.
20231209_150218 - Copy.jpg

That took a toll on the knees so took it easy Saturday and just finished up sealing the wood. Finished up the riveting today and cleaned up the broken stringer and planned out the repair.
20231210_160354 - Copy.jpg

While moving the wood for the trim around on Saturday, I noticed its a little heavier with 2 coats of urethane on it. The lighter seats up front ought to offset that.
I swear I spend 1/3 of my time just moving things around the garage to work on something else. I think the captain is realizing I need a bigger garage.
Plan on practicing some solid riveting this week with hopes of being able to get that done this weekend.
 

kenj06

Cadet
Joined
Jun 26, 2021
Messages
10
OK, the big holiday out of the way and had time to get some riveting done.
I did some test riveting since the last post only to discover I had a 3/16" dome head rivet tool instead of the 3/16" brazier head rivet tool. You'll know the difference when you see 'smiles' all over the rivets. I'm amazed how quickly the rivets are set. I practiced with the captain and we knocked out 29 rivets yesterday.
Got the garage up to 65 so it was not bad working out there.

I had the side rivets above the waterline all drilled out and put some screws and washers in every other hole to keep things aligned and tight. We'd test fit the rivet for size, put some 5200 in the hole, push the rivet in with a twisting motion, yell at each other when we were ready (hearing protection necessitated the yelling), hit the rivet, check it and hit it again if needed.
20231227_214111 - Copy.jpg

The rest of the rivets went a little slower. I had some drilled and ready to go. We hit those first repeating the process above. I then drilled out some more I could reach, cleaned them up, and we did those.
I found another screw used to replace a rivet; the head was missing but looked like threads inside. I managed to drill it out without too much problem and the shavings did end up sticking to the magnet on my portable light. Also found one rivet with the head intact outside but broken off inside. Will be inspecting all the rivets inside and outside before putting down the floor.
There were at least 10 rivets I couldn't either drill out or set due to the trailer being in the way. I couldn't move the boat around on the trailer the way we were positioned front to back as you would park a car in the garage. Fortunately, my garage is almost 3-car wide and we moved parts around and repositioned the boat sideways in there. This allowed me to back the boat off the trailer enough to reach the rest of the rivets. I knew I wouldn't need to back it off too far and put jack stands under the rear of the trailer and kept the straps on the front and back as a precaution. Used a floor jack and some V-shaped blocks of wood to take up some weight off the trailer and slid the boat backwards and trailer forwards. I did this incrementally so as not to get the boat too far off and moved it only far enough to get to all the rivets. Cranked the boat back on the trailer and got the last rivet we had missed and it was time for a beer.
20231227_214147 - Copy.jpg20231227_214157 - Copy.jpg

Unfortunately, while working on the bottom, found a crack. Will be searching for how to fix that up and cleaning that up today.
20231227_214208 - Copy.jpg

I've only replaced the rivets I found to be leaking so far and the few on the sides that were loose or I didn't like the looks of. I'll be leak testing after fixing the crack and letting the 5200 cure. And yes, it doesn't look all pretty with the old paint still on there but I'm going for function over form. If it doesn't leak when I'm done and looks good from 20ft, I'm happy. Had that discussion with the captain during our beer after we finished, I said if we strip it down and paint it so it looks good close up, that leads to rechroming the vents, replacing the rub rails, new cleats, having the seats professionally done... not to mention probably sacrificing a summer of boating. We are going to be using the boat, not showing it and want to keep the budget as low as possible and still keep it safe and reliable. She agreed with that not wanting to give up a summer of boating.

Now off to fix the crack...
 

airshot

Vice Admiral
Joined
Jul 22, 2008
Messages
5,085
Your cracked ribs are a classic example of running aluminum hulls in rough water at high speed thus pounding the hull until the ribs crack. Been an aluminum hull boat fan for over 60 years. On big lakes like Erie, it is not uncommon where folks run hard in big waves. After welding you wil still have some compromise in those ribs so take it easy and she will last you a long time.....can't wait to see the finnished product !!
 

kenj06

Cadet
Joined
Jun 26, 2021
Messages
10
Your cracked ribs are a classic example of running aluminum hulls in rough water at high speed thus pounding the hull until the ribs crack. Been an aluminum hull boat fan for over 60 years. On big lakes like Erie, it is not uncommon where folks run hard in big waves. After welding you wil still have some compromise in those ribs so take it easy and she will last you a long time.....can't wait to see the finnished product !!
Thank you. We are 2ft or less boaters and not on the open waters of Erie for the most part. If the waves got big, we were crawling along. Could have been the years of skiing and tubing took its toll. Won't be much of that anymore as the kids are adults now and we'll do more pleasure cruising and may start fishing again.
 

kenj06

Cadet
Joined
Jun 26, 2021
Messages
10
More work completed yesterday.
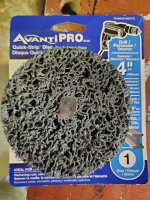
Needed to run to the local home big box depot for some supplies and found this stripping disc which worked well on removing the bottom paint. It was taking several coats of paint stripper and still not removing all the paint.

20231228_171922 - Copy.jpg

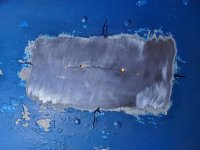
Got the crack prepped for patching. Its barely visible on the inside, The 2 inner holes are the outside of the ribs. 2 outer are the crack stop holes.
20231228_181727 - Copy.jpg
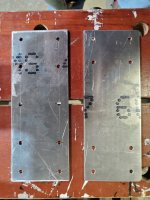
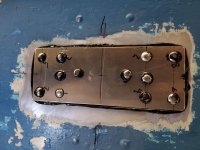
Made up the patching plate. Twice, but that why I bought extra materials. While fitting it and thinking through the process of riveting it in, I realized I wouldn't be able to rivet the center holes which would end up under the rib. Also noticed the second set of holes from the outside would hit the edge of the ribs so moved them 1/4" out. Patch is 3"x8"
20231228_180951 - Copy.jpg

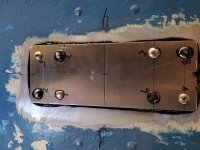
Next, I lined up the patch on the bottom using the centering lines I had marked, and center punched one of the outer holes. drilled that and attached with screw and nut. Marked a diagonal hole, drilled that and attached the plate with screw and nut. marked and drilled the other 6 holes, deburred them all and test fit rivets. Next was the 5200, I circled each hole, the outer edge of the plate, and the crack, put a screw through one of the outer holes, raised it into place and secured the screw. Added the second screw and tightened them down. at that point 5200 started oozing out of the holes and edges. I then proceeded to add rivets in an alternating pattern removing the screws and finishing those.
20231228_190533 - Copy.jpg

I then moved inside and drilled out the rib holes and the crack stop holes. Back outside and finished the riveting.20231228_192519 - Copy.jpg

As rivets were added, the 5200 oozed out more so I'm pretty sure the whole bottom of that patch is cover in it as were the captains rubber gloves while bucking the rivets.
The patch looks a little odd since there are no rivets in the middle but again, that is under the center of the rib and no way to buck them.

Off to get more kerosene to keep the garage warn and then will probably do some cleanup work on the inside while the 5200 is curing.
 
Top