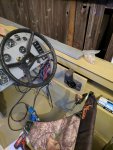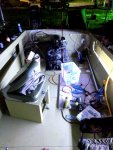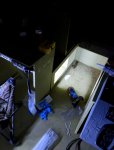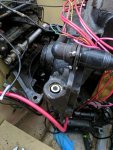
'76 Holiday i/o 18' Fishing Rebuild (pic heavy!)

Watermann

Starmada Splash of the Year 2014
Joined
Jan 12, 2013
Messages
13,800
Cut a patch piece of AL, paint it the same, cover holes and clamp it on with some 5200. Put a matching one on the other side to make it look factory :lol:
 

italianstal27

Chief Petty Officer
Joined
Feb 18, 2017
Messages
403
Any chance you have a good written description of how to install the throttle linkage, steering, etc.?

Hard to find any youtube videos starting from scratch...
 

italianstal27

Chief Petty Officer
Joined
Feb 18, 2017
Messages
403
We're still in it... barely. Running on fumes

IMG_20170924_235347.jpg

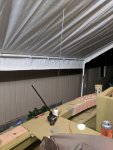
Antennas installed. They'll be just in front of the windshield. Hopefully the VHF dosen't whip the windshield too hard. If it does, we'll add foam.

IMG_20170924_234213.jpg

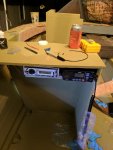
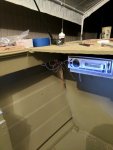
Radios mounted. They're in there SOLID but still removable. Mounted them level with the floor, then added 1/8" slope for water to run off if it happens to get inside. Highly doubtful. Both radios are covered.

IMG_20170924_234218.jpg

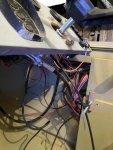
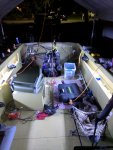
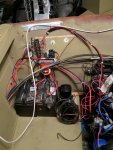
Almost done with wire management... I wish I had taken a picture of how much wire was hanging out. All of it is hidden behind the gunnel & zip tied down. Makes it clean + easy removal. Still have a little to do obviously, but much much much better than it was earlier today. Will have to remove everything to run fish finder cable, but the hard work is done. Now it's just removing 1 zip tie at a time to run another cable.

IMG_20170924_234223.jpg
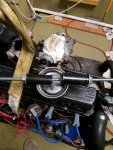
Will need to redo the wire management under the console. We got the throttle linkage mocked up and it clears the steering wheel and driver seat! Huzzah! Need to take the linkage apart and clean it. It's super gritty past half throttle.

IMG_20170924_234229.jpg

Progress! There'll be a 2x2 that goes between the throttle wood and the gunnel to help seal it off.

The new bushings for the rear engine mounts arrive today. So we'll be pulling the engine hoist out... again... and hopefully having the new bushings gets the engine alligned!

-John
 

Attachments

  • IMG_20170924_235347.jpg
    IMG_20170924_235347.jpg
    121.2 KB · Views: 2
  • IMG_20170924_234213.jpg
    IMG_20170924_234213.jpg
    112.6 KB · Views: 1
  • IMG_20170924_234218.jpg
    IMG_20170924_234218.jpg
    98.8 KB · Views: 1
  • IMG_20170924_234223.jpg
    IMG_20170924_234223.jpg
    124.7 KB · Views: 1
  • IMG_20170924_234229.jpg
    IMG_20170924_234229.jpg
    152.8 KB · Views: 2

italianstal27

Chief Petty Officer
Joined
Feb 18, 2017
Messages
403
Still having problems with the LED strip lighting I did. I think the problem is using 16 AWG wire. Whenever the wire moves it really pulls on that small solder pad. You can see starboard is off but port is on. Trying to determine best course of action to fix. Right now, I'm at cutting to the next solder pad and soldering some 22 awg wire and then butt splicing to the existing connection.

I also have slight concerns that the ground wires may be touching the painted hull. So both sides may get redone. Sucks, but it's how you learn.

Lighting.jpg

lighting2.jpg

Now the good news.... the led strip lighting I can no longer get to DOES work! Thank God. 100% would have been hosed if those had decided to intermittently work.

Also decided we need to light up the bow as well. So ordering some more white lighting. Going to also add some lights in the engine bay. So plenty of opportunities to practice soldering these wires again lol.

We decided not to add red lighting to the bow. However, making it happen would be very easy. So we don't have to decide now!
 

Attachments

  • Lighting.jpg
    Lighting.jpg
    157.8 KB · Views: 0
  • lighting2.jpg
    lighting2.jpg
    98.1 KB · Views: 0

italianstal27

Chief Petty Officer
Joined
Feb 18, 2017
Messages
403
We got the bushings out last night for the rear mounts, and boy was that challenging.

Using a 15/16" socket with a hammer finally did the trick. Although we did take an air hammer to it hoping the vibrations would help work things loose...

Tonight we'll try and get the bushings back in. New mounting hardware arrives Thursday. Sierra part # 18-2141 for anyone interested.

-John
 

italianstal27

Chief Petty Officer
Joined
Feb 18, 2017
Messages
403
More progress.

Use the mechanical connectors for LED strip lighting. It saves SO much time. We also got the new bushings in and our old ones were DEFINITELY sagging. Easily the reason why our engine coupler wouldn't go in.

IMG_20170926_185143.jpg
And here's how I pulled the bushings in. Used a 7/16" rod and 2 sockets. 1 socket on each side of the flywheel housing.

IMG_20170926_192525.jpg

IMG_20170926_210806.jpg

Both sets of LED lights work now, and I'd say it gives PLENTY of light in the boat to see where you're stepping. More strip lighting arrives tomorrow, and I'll use that to light up the bow.

Today, we'll inspect the stern drive, replace water pump, attach bow cap and anchor caddie, and install blowers, horn, and bilge pumps.

Day after, when mounting hardware arrives, we'll allign engine, attach stern drive, and then start building the scaffold for the stern deck to sit on.

Quick question for people who've done this before, how easily removable is your stern deck and the supports under it? If we need to do an engine swap, will we have to come up with a clever way to lift the engine out? Or is there a method for having a removable stern deck?

-John
 

Attachments

  • IMG_20170926_192525.jpg
    IMG_20170926_192525.jpg
    152.8 KB · Views: 2
  • IMG_20170926_185143.jpg
    IMG_20170926_185143.jpg
    143.6 KB · Views: 2
  • IMG_20170926_210806.jpg
    IMG_20170926_210806.jpg
    137.3 KB · Views: 2

Watermann

Starmada Splash of the Year 2014
Joined
Jan 12, 2013
Messages
13,800
When talking about a "stern deck" I assume you're referring to the transom cap that goes under the rubrails and end caps. No way I know of to make it removable quickly, you have to dismantle the cross brace, supports, rubrails, trim and end caps again.

The section with the vents on it in my Chief pic below is the transom cap.

y4mzGAMvpzbfFYjct7RjhERjcGtIB_PMC5O4ch84CTdtW4pEtnl-IwDEcCgak8j8ylZRqIsI9b-wZ9uxKagjMaYyJ3GDlmpmSKCQCODfTFuJC5sgnG2SxI_eZ9AfdK_dqfQO1TLmdzA5J7Uszk66xv_1Ricf3ylIowRt4BEk21Rjxo_wBUjobP_A4o-h0simRlGFeUas8kZq4qT11IHK9AJjQ
 

italianstal27

Chief Petty Officer
Joined
Feb 18, 2017
Messages
403
Hmmm ours is enormous compared to yours. Like 17" wide. In that case we'll just have to get creative on pulling it next time ;)
 

Watermann

Starmada Splash of the Year 2014
Joined
Jan 12, 2013
Messages
13,800
No my motor is enormous compared to yours, :lol: the transom cover is around 1-1/2' wide.
 

italianstal27

Chief Petty Officer
Joined
Feb 18, 2017
Messages
403
OH SWEET JESUS THING IS YUGEEE.

Watermann if you were to pull your engine how much would it suck? Especially because you're rocking that chieftan which I'm sure is taller than our Holiday... but say you had an engine hoist tall enough... would you be able to pull it?
 

Watermann

Starmada Splash of the Year 2014
Joined
Jan 12, 2013
Messages
13,800
Yeah easy enough to pull the motor, I know a guy who has a couple boom trucks so it'd be a morning job.
 

italianstal27

Chief Petty Officer
Joined
Feb 18, 2017
Messages
403
Anchor caddie and bow cap installed. Also attached the bow deck 1x4" supports to the aluminum.

IMG_20170928_091823.jpg

BowCap..jpg

We bout those green/red LED strip lights for bow markers. those'll go under the rub rails. already have 2 holes drilled in the boat :'( from previous construction of course, so we'll route the wires through that.

Decided to add white / red lighting in the bow.

We also realized that a 1/4" bolt fits perfectly into the windshield mounts. We just need to grind down the height of the hex head 1/16". Most people use weather stripping from home cheapo to put their windshields on right?

-John
 

Attachments

  • IMG_20170928_091823.jpg
    IMG_20170928_091823.jpg
    160.8 KB · Views: 1
  • BowCap..jpg
    BowCap..jpg
    153 KB · Views: 1

Watermann

Starmada Splash of the Year 2014
Joined
Jan 12, 2013
Messages
13,800
I used the EDPM marine WS rubber from HD for my SS and it worked just fine.
 

italianstal27

Chief Petty Officer
Joined
Feb 18, 2017
Messages
403
Huge progress!

IMG_20170929_194037.jpg
Trim pump in! Although I think I have it hooked up backwards.... so we'll flip 'em.

Dual batteries fit, but need to start thinking of what battery tray can I fit back there. 2" of space between the edge of the deck and the hydraulics.

IMG_20170929_212806.jpg

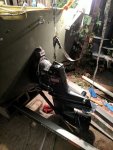
And sterndrive in!!! The alignment with the new mounting hardware fit 'kinda' close, but we had to release tension on the rear mounts. Not torqued to 25 ft-lbs. After raising them a little, the alignment bar went right in.

Next we replaced the water pump. (remember to drain your oil!!! We learned that one the hard way).

Had difficulties getting the stern drive on. Decided to try the engine lift, and BAM slid right in. No problems, had to barely even push it in. Shoot it almost slid right on... So even though our alignment wasn't picture perfect (took 3 fingers to push it in), we did pretty good!

-John
 

Attachments

  • IMG_20170929_194037.jpg
    IMG_20170929_194037.jpg
    148.2 KB · Views: 2

Watermann

Starmada Splash of the Year 2014
Joined
Jan 12, 2013
Messages
13,800
It's not how easy it is to push the alignment tool in and out, it's that the grease marks are even top and bottom.

So you split the OD case open with it still full of oil? :lol:

How'd the oil look any water?
 

italianstal27

Chief Petty Officer
Joined
Feb 18, 2017
Messages
403
Outdrive good! Only a small sliver of chocolate milk came out. Which is weird cause it should be blue... So someone must have mixed lubes before us...

Got the Home Depot seal. Found it by all the window sealants. Basically the only one available for marine or automotive.

Huge progress today. Electrical is done... Except the washdown pump which will come later. Horn in and it is LOUD. Getting to spray the corossion protection is SO satisfying...

Tomorrow we may get to hooking up throttle and shift interrupter etc.
-John
 

italianstal27

Chief Petty Officer
Joined
Feb 18, 2017
Messages
403
IMG_20170930_165220.jpg

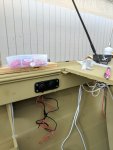
Added a 12V outlet and 2 USB plugs... located next to radio. One is 1A the other 2.1A, so basically one person can charge their phone and the other gets a trickle charge. Have a lot of stuff on 1 16AWG ground running from starboard to port. I have it fused at 20A, so we'll see if it blows. If it does, we'll run another wire and split the load in half.
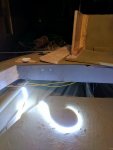
IMG_20170930_193756.jpg

And the tales of sadness continue. I didn't leave enough wire to hide it under the gunnel :(. Whatever distance you think you need, add 8" to it... Being a couple inches short sucks.
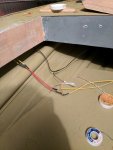
IMG_20170930_200318.jpg

So, ended up soldering and heat shrinking a 7" splice into both wires. No problems.
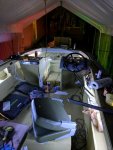
IMG_20170930_211930.jpg

Bow now lit up! So there's plenty of light in the boat now for those early early mornings... Also, we added the port/stern lights in the front. LED strips below the gunnels.
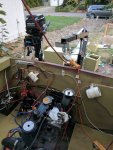
IMG_20170930_172917.jpg

Blowers and both bilge pumps installed. We got a second blower for $5 so we decided to put 2 in. No reason, just wanted it to sound like a tornado when we turn them on.

We have the trim pump reversed, so tonight we'll fix that, test if the limit switch works, and then start hooking up the shift, throttle, and steering cables.

Probably splash this weekend if the stern drive shifts into Forward / reverse and the engine runs fine?

-John
 

Attachments

  • IMG_20170930_165220.jpg
    IMG_20170930_165220.jpg
    103.7 KB · Views: 2
  • IMG_20170930_193756.jpg
    IMG_20170930_193756.jpg
    99 KB · Views: 2
  • IMG_20170930_193756.jpg
    IMG_20170930_193756.jpg
    99 KB · Views: 2
  • IMG_20170930_193756.jpg
    IMG_20170930_193756.jpg
    99 KB · Views: 2
  • IMG_20170930_200318.jpg
    IMG_20170930_200318.jpg
    105.3 KB · Views: 2
  • IMG_20170930_211930.jpg
    IMG_20170930_211930.jpg
    135.1 KB · Views: 2
  • IMG_20170930_172917.jpg
    IMG_20170930_172917.jpg
    169.5 KB · Views: 2
Top