'74 Chieftain 21' I/O is home, the rebuild begins !

Status
Not open for further replies.

Watermann

Starmada Splash of the Year 2014
Joined
Jan 12, 2013
Messages
13,786
Yeah that would be way easier than trying to spray something on it, we have some mental super powers among the group as a whole. ;)
 

FrankenCub

Petty Officer 1st Class
Joined
Dec 29, 2015
Messages
296
What a miserable day, stuck in my truck driving the wife around to appts. I did get some marine ply ordered so that was good, but to repay myself for driver duties I took the sawzall to that nasty glasser again muhahahahaha. The floor was replaced at one time not too long ago but it was soaked, as was every other piece of wood in it. They had spots at least 1/4" thick with FG over the floor ! Fought me every bit of the way but that glass sure does have a sweet smell as it cuts lol.
I cut the V/P 270 for new pics to add to Craigslist so I can build more Chieftain funds and cut the belly tank out of her. I was hoping it was bigger than it is :( I really wanted to use it in the Chief but it's only 19 gallons, or at least that's what it looks like on the sticker. Sad thing is, I think this would drop right in. What would you guys suggest as a minimum for a 21' Chief ?
So far the only tanks I've seen on CL have either been way too small or way too big to fit without substantial mods.

IMG_0444.JPG
 
Last edited:

Watermann

Starmada Splash of the Year 2014
Joined
Jan 12, 2013
Messages
13,786
Yeah admirals account for more lost boat work days than the weather :lol:

19 Gallons is pretty good sized, I guess it all depends on the motor and how you plan on using the boat. It sure looks bigger than 19, maybe it's just the pic but you could take some measurements anyway and plug them into an online tank volume calculator. With my boating habits that would be fine for all but the long 100+ mile runs I take occasionally.
 

FrankenCub

Petty Officer 1st Class
Joined
Dec 29, 2015
Messages
296
I'll be running the 165 L6, which I don't have much experience with other than in trucks so not really sure how many gallons she'll use cruzin. The sticker looks like it says 19g, I will take some measurements in a bit and see if I can find one of those volume calculators. Looking at it in front of me though, it just seems smaller. The stock tanks don't leak but man do they have some nasty bad gas crud in them. Not sure the best way to proceed to get that crap out short of pouring in some acetone to try to cut it.
 

FrankenCub

Petty Officer 1st Class
Joined
Dec 29, 2015
Messages
296
Wow...$50 a gallon :eek: I can't figure something out on the cheap I might give that a try.
Looks like it is 19 gallons, filled to the max. Mounting it fill towards the rear will never get 19g in it when the transom will sit lower in the water. I'll take a look tomorrow and see if there's any way I can move it forward, fill facing forward, and see if there's a way to route the fill and vent hoses. If not I guess it goes up on Craigslist with the rest of the glasser parts. She got demo'd today lol. The "Attitude Adjuster" got a Milwaukee attitude adjustment :D
Better pic to come tomorrow when there's enough light for a photo. Was getting dark when I finished. Glad I decided not to fix her, nasty rotten old hag.
Decided not to go the tannerite route once I figured how much tannerite I'd need to get good results ie: bits galore. I'd likely had broken windows from the shock wave at some of the neighbors. Not good lol.

IMG_0450.JPG IMG_0449.JPG IMG_0447.JPG
 

Watermann

Starmada Splash of the Year 2014
Joined
Jan 12, 2013
Messages
13,786
Bahahaha... sorry I couldn't help myself. :happy:

You ever see my glasser video where the rotten bugger gets crushed with the big steel wheeled compactor at the dump?
 

FrankenCub

Petty Officer 1st Class
Joined
Dec 29, 2015
Messages
296
Yeah I watched it, and LMAO :laugh:
Well I just went and measured the belly of the Chief, plenty of room width wise for that tank to fit, but the tank is 1/2" too tall. I really don't want to raise the deck even though it would be simple, especially for a measly 19g. I bet I can pick up some aluminum sheet and weld up a decent sized tank though. The prices of new ones scare the hell outta me lol. The use of the TIG is free.
 

FrankenCub

Petty Officer 1st Class
Joined
Dec 29, 2015
Messages
296
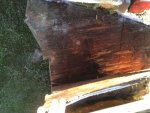
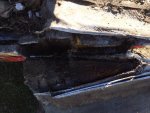
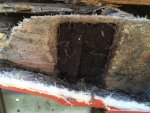
Here's the promised pictures of what a glasser should look like after a tune up ;) The water would just pour out of the wood when you push a finger into it...nasty ! Whatever is left is now on Craigslist to help the Chieftain funds. Might sell the trailer too, unless I decide to put a deck on it for hauling my tractor lol..

IMG_0458.JPG IMG_0459.JPG IMG_0457.JPG
 

Watermann

Starmada Splash of the Year 2014
Joined
Jan 12, 2013
Messages
13,786
Whoa!!! talk about some pent up glass anger there! :pound: I think we've created a monster, hmmm lets see... I know GDS short for Glasser Dexter Sydrome.:lol:
 

FrankenCub

Petty Officer 1st Class
Joined
Dec 29, 2015
Messages
296
Wow, I ordered the ply on Wednesday and just got a call, it's in ! Wohooo !!! Ok, so how many of the big bottles of TB3 do I need, two ? Guess I better buy some quality jigsaw blades while I'm there too, and some Spar :)
 

Watermann

Starmada Splash of the Year 2014
Joined
Jan 12, 2013
Messages
13,786
Better to have too much than not enough as the saying goes and that goes for glue as well. :D

Don't forget the top of the transom has a 15 degree angle cut.
 

FrankenCub

Petty Officer 1st Class
Joined
Dec 29, 2015
Messages
296
Guess I'll grab 3 then, it's not like it's expensive. Good time to buy a new blade for my circular saw too. Did you cut the curved top part of your transom with a circular saw ? Not really much of an arch so I hope so. My jigsaw is a POS lol.
 

Watermann

Starmada Splash of the Year 2014
Joined
Jan 12, 2013
Messages
13,786
Yeah I used the circ saw, you're going to have fun with that keyhole if your jig saw is a POS. :lol:

On that note another tip for when the time comes, the beveled top ends of the keyhole for the steering should be done before cutting it out. Take your collection of hole saw drill bits out to the old transom and find the one that's closest in size. Then hold the edge of the bits teeth as deep as it needs to go, mark the bit for depth. Wrap some tape around the bit for a depth gauge and drill into the marked out spot on the the new transom. You'll have to best guess on the angle unless you use a T-bevel to transfer the angle. It's still going to be tough not to let the bit walk on you unless you have a longer center bit to start into the wood.
 

FrankenCub

Petty Officer 1st Class
Joined
Dec 29, 2015
Messages
296
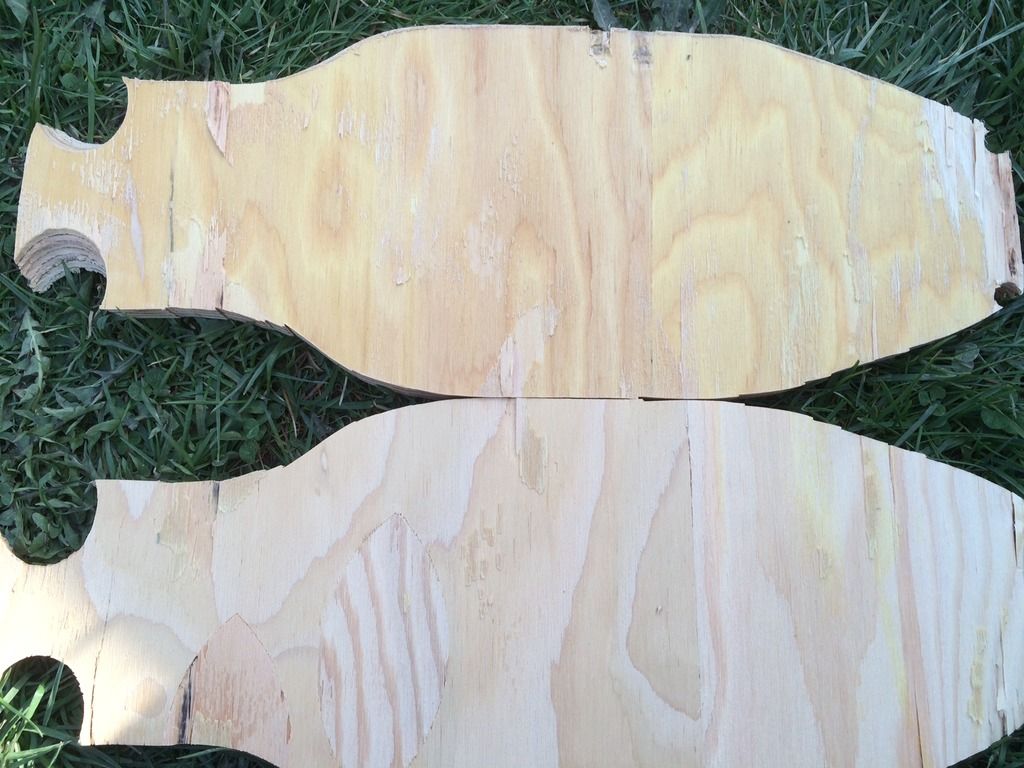
I am not a happy camper today. I git the transom glued together yesterday and today drilled out the angled steering clearance with the hole saw. The plug came apart at the glue joint so I decided I better cut the keyhole out with my POS jigsaw. It actually cut good. Now the problem, I was able to split the glue joint with two screw drivers :mad:
So now I'm questioning the integrity of the whole transom. I'm thinking I should drill 4 alignment holes and split the whole thing apart and make sure the glue cures, sand it all down and epoxy it together. I used Titebond 3.


oldhaven

Chief Petty Officer
Joined
Aug 30, 2015
Messages
576
I feel for you. Rather than worry about it for the foreseeable future, you should trust what your intuition tells you after a few non destructive separation tests.

Ron
 

Watermann

Starmada Splash of the Year 2014
Joined
Jan 12, 2013
Messages
13,786
No I wouldn't try to split it apart just yet, how long did you let it set up before cutting into the transom wood?
 

FrankenCub

Petty Officer 1st Class
Joined
Dec 29, 2015
Messages
296
It's sat for probably 12 hours or so. It looks to me like the glue stuck to one piece of the transom but not the other.
I have to run to town real quick so I'll hold of on splitting it for now and check back when I get back from the store.
 
Status
Not open for further replies.
Top