'69 offshore rebuild- BMerr

Watermann

Starmada Splash of the Year 2014
Joined
Jan 12, 2013
Messages
13,753
Not sure what sort of expansion your expecting but that size and shape of tank most likely won't have much. What is under the tank for padding?
 

BMerr509

Petty Officer 2nd Class
Joined
Jun 28, 2016
Messages
167
Not sure what sort of expansion your expecting but that size and shape of tank most likely won't have much. What is under the tank for padding?


I was planning on using a thin rubber matt- what would you recommend? I have 1.5" thick memory i could lay under it too, but it will absorb water.
 

Watermann

Starmada Splash of the Year 2014
Joined
Jan 12, 2013
Messages
13,753
I've used neoprene either 1/4" or 3/8" depending on if the tank lays on ribs or flat. On the belly tank I used 3/8". Under the hold down brackets too. Rubber would work too I suppose just nothing that's open cell for water.
 

BMerr509

Petty Officer 2nd Class
Joined
Jun 28, 2016
Messages
167
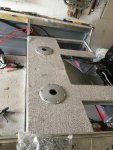
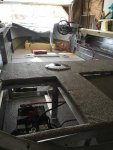
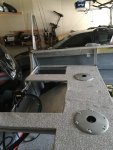
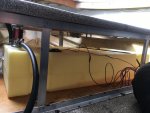
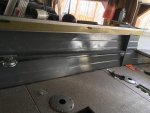
Hey guys- while waiting for my fuel parts to come in, i completed the rear casting deck, although i have not secured it yet. Here are some pics of it. Turned out terrible, air bubbles everywhere, and black 5200 everywhere. i should be able to hide most of them when i rivet it to the framing though. Secured my rear battery and cables. Question on the wiring- i'm running two batteries with a battery switch as you know, and planned on connecting the two negative terminals together of the batteries. Will that effect anything? as i understand it, that would run everything at 12v until i have my switch in the "both 1+2" position, as that would run everything at 24v. Let me know if i'm incorrect or if i need to change my plan.all my electronics will be 12v. one of your questions might be "why would you want to run in the "both" position? The reason is if i'm heading back to the truck and want to charge both of my batteries simultaneously.

Have a great day! IMG_0085.JPG IMG_0086.JPG IMG_0087.JPG
 

ezmobee

Supreme Mariner
Joined
Mar 26, 2007
Messages
23,767
I think I know what you did wrong, did you try to wrap and staple the vinyl right after you glued it down? You need to wait until the glue is dry on the flat parts before you start wrapping it or it'll bubble up just you're seeing.
 

Watermann

Starmada Splash of the Year 2014
Joined
Jan 12, 2013
Messages
13,753
So why are you wanting there to be 24v, trolling motor batteries?
 

BMerr509

Petty Officer 2nd Class
Joined
Jun 28, 2016
Messages
167
Thanks EZ- that's exactly what I did wrong. I figured I would wait a night before stapling the front casting deck to ensure our theories.

WM- I'm wanting to avoid 24v. But I have to make sure the grounds are connected.
 

Watermann

Starmada Splash of the Year 2014
Joined
Jan 12, 2013
Messages
13,753
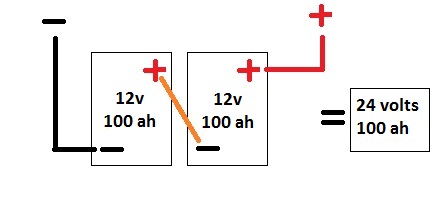
What your describing is parallel and it won't make 24v. To avoid 24v don't hook the batteries in seried like in the schematic below.

12-volt-series.jpg
 
Last edited by a moderator:

knezzer

Petty Officer 1st Class
Joined
Apr 8, 2012
Messages
214
Your build looks great btw. I really dig the back deck. I think you are on the right track with the battery grounds being connected. In a parallel set up the voltage stays the same but you double amp hours. You should be able to charge both as long as they are similar in ratings.
 

Watermann

Starmada Splash of the Year 2014
Joined
Jan 12, 2013
Messages
13,753
What your describing is parallel and won't make 24v. To avoid 24v don't hook the batteries up in series like in the schematic below.

12-volt-series.jpg

That's right for the description, that post was a fiasco for some reason as I had some sort of issue with the post and my browser took a dump. It reads now like I meant.
 

jbcurt00

Moderator
Staff member
Joined
Oct 25, 2011
Messages
24,885
Corrected the parallel vs series in the original post Rob. And to make sure that AVOID and DONT stood out, bolded and underlined more then you did originally
 

BMerr509

Petty Officer 2nd Class
Joined
Jun 28, 2016
Messages
167
Perfect, thanks for clearing that up guys. That's the original plan anyways.

Thanks Knezzer for the complements. I see you have a real nice boat just like mine. Hopefully you can find the time you need to get it done!

This weekend should be a big work weekend for the boat. I hope to get the fuel tank installed permanently, along with all the fuel components, and the front casting deck in.

Have a good weekend guys! btw, the ice is back here in NY so that will push back my splash date :(
 

BMerr509

Petty Officer 2nd Class
Joined
Jun 28, 2016
Messages
167
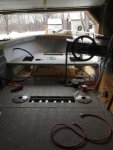
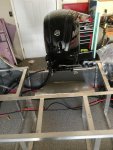
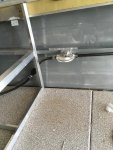
Got the front casting deck on (not tacked down yet though) and finished the fuel line assemblies. Man that Moeller kit is not worth it. I don't mean to bash on it but it was not worth it at all. The vent upset me the most. You cannot put the vent through plywood if you plan on using the back nut for it. Anyways... Here is some pics. Note how close my fuel cap came to the inlet of the tank- they were touching which is perfect. I put Neoprene under the tank too. My only concern is the fuel outlet. For some reason, the barb i bought did not thread in the way it should. it was not stripped or cross threaded. i got 4 threads and 5200 on it so i think it is fine. I put the primer bulb between the motor and filter. I had just enough fuel hose (2 10' pieces), think i had 1 foot left over.

Happy Monday guys. I'm thinking about painting the gunwhales grey and the trim black- how do y'all think that would look? IMG_0097.JPG IMG_0099.JPG IMG_0101.JPG IMG_0102.JPG IMG_0104.JPG
 

Watermann

Starmada Splash of the Year 2014
Joined
Jan 12, 2013
Messages
13,753
Oh I like the gray and black as you can tell by my SS paint scheme. You've got lots going on in the pics you posted, lots of work done there.. wow.

I have a couple experienced suggestions on the fuel system.

Is that the fuel filler line or vent line there from the hatch to the side of the hull and is it attached to a thru hull fitting yet? It would be best to put the filler cap on top of the gunnel so the line goes straight down the side of the boat and is out of the way not too mention it will take fuel better not being turned down on the side of the bow V. If it's the vent line it needs to be higher up and under the gunnel with an upward loop to keep water from entering the tank.

fetch
 

BMerr509

Petty Officer 2nd Class
Joined
Jun 28, 2016
Messages
167
Rob- Thanks, it didn't take too long once i got all my tools in the boat.

The picture you have attached was before i got the vent line in, but yes, that is it in the picture as opposed to fuel line. It is not attached to the haul as portrayed in that picture- it actually just goes up to the casting deck. Believe it or not, it was confusing which was the vent fitting vs. fuel line fitting. I assumed the swiveling fitting was the fuel pickup. If i'm wrong, well, that sucks haha.

If you look at the picture you posted, you can see the filler cap in the casting deck. After i took this picture, i installed the vent cap that came with the Moeller kit about 3 inches toward the bow from there. I hope that's not an issue. Sorry about the optical illusion hahahah
 

BMerr509

Petty Officer 2nd Class
Joined
Jun 28, 2016
Messages
167
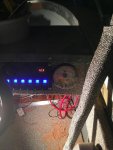
did some electrical work last night. I'm hoping to have a pic of my nav light and LED's tonight but i'm not sure how far i'll get. Here is my switch panel and MercMonitor... Anyone know if i can plug my sender unit wires from my gas tank directly to the merc monitor or does it have to be a seperate switch?

IMG_0107.JPG
 

Watermann

Starmada Splash of the Year 2014
Joined
Jan 12, 2013
Messages
13,753
Instructions come with that fancy schmancy Merc? :lol:

I don't have any idea but have to wonder how a fuel tank level sender would be used by the monitor unless it has a fuel level gauge too, that would be fancy.
 

BMerr509

Petty Officer 2nd Class
Joined
Jun 28, 2016
Messages
167
Haha thanks WM, come on i'm a guy- i dont even know how to spell this "instructions" word you speak of until i break something or can't beat it into place! :lol: I figured i would need a new gauge. Anyone have a gauge that has worked with these moeller tanks? I hear there are certain ones that are not compatible with their tanks.
 

Watermann

Starmada Splash of the Year 2014
Joined
Jan 12, 2013
Messages
13,753
I'm partial to Faria and hope it works with my custom made Moeller tank, that might be true for old gauges. I know they didn't say anything about special gauges when they made the tank for me.
 
Top