'69 offshore rebuild- BMerr

Watermann

Starmada Splash of the Year 2014
Joined
Jan 12, 2013
Messages
13,787
When I had my tank custom made I had them put the fuel pick up in the aft end of the tank with the level sender. The fill and vent were on the forward end. I wouldn't open up the tank or try to modify it, I would just put the tank in with the fitting end aft. If you need the fittings forward for some reason like deck clearance for the lines then I guess you could swap ends but the fuel pick up will starve with the tank is low on fuel and the gauge will read empty sooner. Also the tank has baffles in it, so it won't slosh and I doubt you can shove a longer pick up into the tank past them. I think the pick up is a rigid tube with a screen on it too rather than a flexible hose type set up.
 

BMerr509

Petty Officer 2nd Class
Joined
Jun 28, 2016
Messages
167
WM- what if i put it so the fittings are on one side or the other, rather than fore/aft? would there be any potentional for starving the engine of fuel then?

Also, for the staples i used for the vinyl, do i need to seal them in any way or no? i'm unsure if the staples penetrated the wood or just the epoxy.
 

Watermann

Starmada Splash of the Year 2014
Joined
Jan 12, 2013
Messages
13,787
I would say there shouldn't be a problem with starving the motor of fuel unless you're really low.

Not much a guy can do about the staples penetrating into the wood and if the deck covering is wrapped the staple holes are on the bottom so gravity will help keep the water from being able to stand and penetrate, nothings perfect.
 

BMerr509

Petty Officer 2nd Class
Joined
Jun 28, 2016
Messages
167
Thanks for the help on the tank. I'm going to just run it fore to aft. It will be more simple that way.

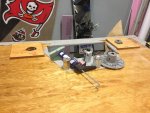
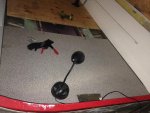
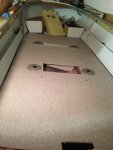
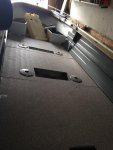
Got the flooring in today with the exception of the casting deck and gas tank floor. Looks great considering i've never worked with any of the things i used for it lol everything fit well with no hickups. One thing i dislike about the stringers on this boat is they run right up the part of the boat you'd like to put seats. So i just moved my bases to the outside. 5200 does literally get everywhere- how can i get it cleaned off my vinyl?

Here's some pics. I will be doing the console tomorrow and the interior paint if i get ambitious. Thank you all for your help thus far!

IMG_0887.JPG IMG_0888.JPG IMG_0889.JPG IMG_0890.JPG IMG_0891.JPG
 

jbcurt00

Moderator
Staff member
Joined
Oct 25, 2011
Messages
25,034
Mineral spiritscleans up uncured 42/5200 and shouldnt harm the vinyl. Nautolex, correct?
 

BMerr509

Petty Officer 2nd Class
Joined
Jun 28, 2016
Messages
167
Hey JB, that's right- nautolex. Made the mistake of getting black 5200. Lesson learned lol

Still looks good enough for this redneck!
 

Watermann

Starmada Splash of the Year 2014
Joined
Jan 12, 2013
Messages
13,787
Oh heck yea your making some good progress, lookin good!
 

Decker83

Commander
Joined
Apr 5, 2011
Messages
2,593
All you have to do is open the cap on the 5200 and it's everywhere..
Good looking work your doing..
 

Pusher

Lieutenant
Joined
Sep 2, 2014
Messages
1,273
Can you clean up 5200 with gasoline too?

Looking good! That's a nice shade of gray.
 

Watermann

Starmada Splash of the Year 2014
Joined
Jan 12, 2013
Messages
13,787
I've used Xylene before too, it's an adhesive reducer and seems to take 5200 off most surfaces. I would be very careful using any solvent on vinyl deck covering.
 

BMerr509

Petty Officer 2nd Class
Joined
Jun 28, 2016
Messages
167
Yea i'm not sure how the vinyl would take gasoline. However i'll use care!

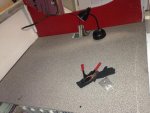
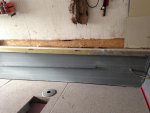
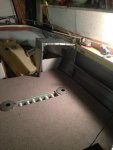
Here are two more pics. first coat of grey on. i cannot put the console in until my paint job is complete.

IMG_0893.JPG IMG_0894.JPG
 

Brackett221

Petty Officer 3rd Class
Joined
May 27, 2015
Messages
75
Looking good! Nice progress. Far as the 5200... If it drys it's hard to remove. WM suggestion of Xylene will help, but it will absorb in your skin(from prolong use of it or soaking your hands) so be a little cautious. I try to clean up as I go and still get it everywhere.
 

BMerr509

Petty Officer 2nd Class
Joined
Jun 28, 2016
Messages
167
Thanks guys. I'll probably wait until this summer to remove the 5200. I used Dawn and hot water to remove as much as i could before it cured. If its still there oh well. I'm looking for a functional boat, not a showroom boat! I will be leaving the country next tuesday for three weeks so i will try to get as much done as i can, but i'll be focused on getting my house ready for a new temporary owner. Thanks to my Cuz mike for watching the house for me and keeping the boat safe :) Next steps are console, dashboard, casting deck and fuel tank install with flooring. I'm super stoked about how it's coming out and am so grateful for all the help from all of you. Turns out there is some good folks left in the country!!!!
 

BMerr509

Petty Officer 2nd Class
Joined
Jun 28, 2016
Messages
167
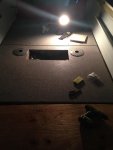
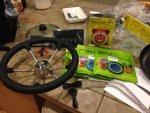
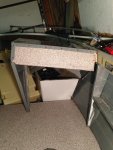
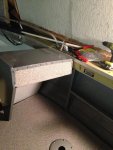
Bit of an update. I had my caulk gun break on me so i had to quit a bit earlier than i wanted. But i got the transom all bolted in and the console/steering panel tacked on. Also ordered my motor (2017 90 merc) this past week and it arrived at the marina today!!! Should be all hooked up, rigged and ready to rock by next next Tuesday. Once i get that back i can begin electrical and splashwell work. You'll notice in the picture that most of my stuff came in the mail yesterday. Scored on that wheel, i like it. The console is a bit dented since it is original. My one concern is that my capt seat will be too close to the steering wheel. I hope not. i didn't have much choice because that is where two floor boards meet and i wanted to base to be all on one piece of ply. I know some seats can be moved back so i'll just buy one of those. I have to prime/paint the rear of the boat next. I bought the same front red/green LED's that you bought WM, but how do you know which is red and which is green aside from testing them out???? Seems like a stupid problem but i couldn't figure it out last night!!

IMG_0897.JPG IMG_0902.JPG IMG_0903.JPG IMG_0904.JPG
 

ezmobee

Supreme Mariner
Joined
Mar 26, 2007
Messages
23,767
That pedestal mount does look a little close to me. Make sure you get your windshield up on there and aligned before you do anything permanent with the consoles. Lesson learned on that one for me :faint2:
 

Watermann

Starmada Splash of the Year 2014
Joined
Jan 12, 2013
Messages
13,787
The nav lights, yeah you have to strip the wires back and test them first before installing and I marked on the back of them which was which. Would hate to put them on and have one not work or have both be the same color :eek: so test them both to be sure.

If need be you can get a slider for the seat to move it back from the helm. The face of the console insert should go on the outside rather than the inside.
 
Top