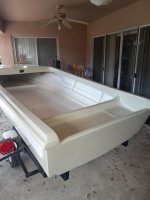
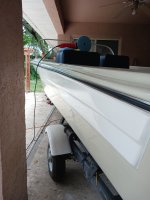
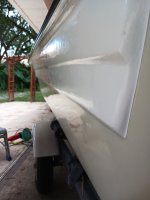
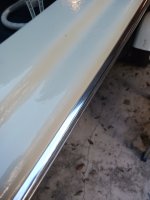
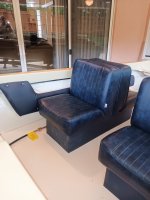
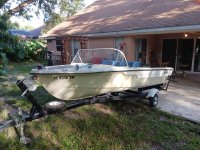
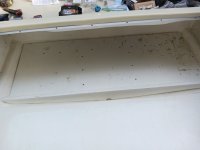
'65 Lyn Craft Seabreeze 1500 Sport Runabout

buxmj

Petty Officer 1st Class
Joined
Jun 9, 2018
Messages
294
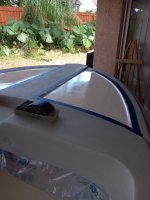
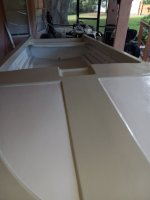
More teaser pics! I have been very busy with work which is good but still managing to find time to work on this project. I got delayed a bit needing to fix some divots and pin holes so had to fix those and then finish with 2nd coat of primer. Now I need to put one more coat of white on and wet sand and the white will be done. The primed area that is left will be the same as the hull. The dark blue painters tape is not the edge, I actually have striping tape I bought at a car paint store so I should have a good edge after I use an exacto knife to cut the paint at the edge of the tape.

Has anyone used the WOG method for paint mixing and only mixed one cup instead of 2? I can do the math for the reducer and hardener, just wondering if the cook time would be different. I definitely will only need 1 cup at a time from here on out.
 

Attachments

  • 20221031_145606.jpg
    20221031_145606.jpg
    3.1 MB · Views: 13
  • 20221031_150430.jpg
    20221031_150430.jpg
    2.6 MB · Views: 13

buxmj

Petty Officer 1st Class
Joined
Jun 9, 2018
Messages
294
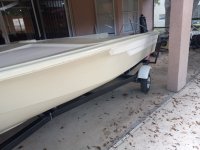
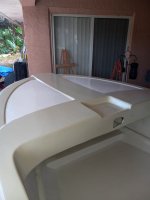
The painting is finished! I have some tiny touching up to do but found out today that Tractor Supply carries Majic rattle can paint in the same colors I painted, will be easy to touch up. Started cleaning the rubrail rail and will start putting stuff back in now, woo-hoo!
 

Attachments

  • 20221106_135729.jpg
    20221106_135729.jpg
    2.6 MB · Views: 17
  • 20221106_135548.jpg
    20221106_135548.jpg
    2.7 MB · Views: 18
  • 20221106_135509.jpg
    20221106_135509.jpg
    2.6 MB · Views: 18
  • 20221106_135402.jpg
    20221106_135402.jpg
    2.5 MB · Views: 18

buxmj

Petty Officer 1st Class
Joined
Jun 9, 2018
Messages
294
Thanks guys, I really appreciate it! I definitely could not have done it without everyone's help and expertise on this forum. Even though I am still a bit away from splashing I feel really good about taking my time (sooooooo much time, lol) getting to this point. Hoping to get going on the installation of trim, lights, steering, seats, engine and other things, hoping to show progress often from here on out.
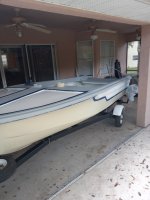
 

88 Capri (2022 SOTY)

Master Chief Petty Officer
Joined
Aug 25, 2019
Messages
819
The painting is finished! I have some tiny touching up to do but found out today that Tractor Supply carries Majic rattle can paint in the same colors I painted, will be easy to touch up. Started cleaning the rubrail rail and will start putting stuff back in now, woo-hoo!
That looks beautiful, I love the color combination.
 

buxmj

Petty Officer 1st Class
Joined
Jun 9, 2018
Messages
294
Hello everyone! Sorry for the short absence, being a musician my busiest time of year is the end of the year and the last 2 years it has spilled over into January and I can't complain about not being able to work on the boat, I now have more money to shoot the parts cannon at the boat! Even though I have been collecting stuff over the last few years I am realizing I still have quite a bit of small stuff to get. I have been working a bit here and there on the project, hoping to post some pics soon. I made a cardboard template of what was left of the side storage panels and was surprised I still had the template after 5 years. I just finished making those panels and have already found material that closely matches the seats, will hopefully finish those soon. No sewing needed, just get some foam and staple the material to the plywood panels. I found the rubrail insert online and it is ready to go in after I get the rubrail polished and installed. I have the old windshield at a plastics fabricator and should get the sticker shock for a new one tomorrow and a mechanic is working on the '71 Evinrude 50hp on Fri. Things are moving forward, just no pics right now, sorry!

Buck.
 

buxmj

Petty Officer 1st Class
Joined
Jun 9, 2018
Messages
294
Wow it has been a while since my last update. I have been working on the boat since my last post and really ramped up in the last few weeks. What slowed me down was my decision to put a clear coat on the outside of the hull. I am happy I did it but it did add a ton of hours to the work. I don't have a spray set up so I decided to go with KBS Diamond. It is a great product but since I am doing all the work on my back patio I had to wait til our live oaks were finished dropping all the pollen for spring. I am almost finished cutting and buffing the clear, the boat will be protected more and will be so much easier to keep clean.

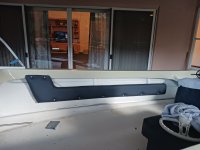
I finished the interior side panels and installed them. I put 1/2 inch nylon spacers between the panels and the rail so water and dirt don't get trapped. I will take them off to add motor controls and edge trim and then put 4200 in the holes when I reinstall.

The rubrail was a total PITA. Getting the old anodized clear off just about drove me crazy. I used citrus strip several ways, even wrapping it in cellophane for a few days, didn't even soften it. Airplane stripper didn't work either, finally went the sanding route, 220, 400, 800 and 1000 and then wheel polish and more elbow grease. Happy with the result and ironically had been dreading installing the new rubber insert in and that part went quick!

I gave up on trying to predict when I will be able to splash, just going to keep plugging away little by little. I am hoping to get started on mechanical stuff soon, electrical, steering and motor install and then maybe I can start thinking about a splash date.
 

Attachments

  • 20230708_150133.jpg
    20230708_150133.jpg
    1.2 MB · Views: 11
  • 20230708_135419.jpg
    20230708_135419.jpg
    932.5 KB · Views: 11
  • 20230627_193824.jpg
    20230627_193824.jpg
    825.4 KB · Views: 11
  • 20230709_194306.jpg
    20230709_194306.jpg
    914.3 KB · Views: 11
  • 20230709_165101.jpg
    20230709_165101.jpg
    1.1 MB · Views: 12
Last edited:

sphelps

Supreme Mariner
Joined
Nov 16, 2011
Messages
11,462
Wow ! She’s really looking good Buck ! We have our next meet at Yellow Jacket in Sept and then the RRR meet at the end of Oct .
Hope you can make it to one of those ! Your getting real close !
 

Reserector_

Chief Petty Officer" & 2021 Splash of the Year Win
Joined
Oct 15, 2019
Messages
607
She's really looking good!! I like the clear coat. The trim looks fantastic, as well.
 

buxmj

Petty Officer 1st Class
Joined
Jun 9, 2018
Messages
294
Thanks guys, getting there slowly. Sam, I already was looking at the meets coming up, hoping to be there with this boat!

She should float now! It is amazing how things go well until they don't and then everything slows to a crawl. I was dry fitting the screws into the transom for the drain plug and one broke off, uggghh. Tried everything and even broke 2 drill bits getting the screw out. I took my time so I wouldn't end up with 2 drain plug holes, lol.
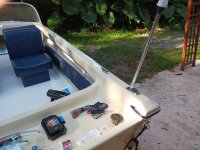
I also got the 24 feet of trim on the bottom edge of the gunwales. I bought new trim because the old trim was in rough shape. It was easier than I thought except after using SS sheet metal screws I realized that over half of the 50 screws needed to be replaced with machine screws and nuts because the sharp points were exposed on the back side and would have torn some hands up at some point.
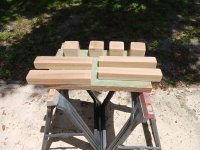
The last pic is the blocks I made to secure the back to back seats. I had some cypress scraps laying around and cut and glued them up. The square blocks will be glued with 5200 to the floor and the longer boards go side to side inside the seat base grid and then screwed to the blocks. No chance for water intrusion into the floor. Got the idea from jmink YT project. They got painted today and will be installed when I am finished crawling on the floor of the boat.
 

Attachments

  • 20230724_144040.jpg
    20230724_144040.jpg
    1.5 MB · Views: 7
  • 20230724_143616.jpg
    20230724_143616.jpg
    1.4 MB · Views: 8
  • 20230724_143828.jpg
    20230724_143828.jpg
    1.3 MB · Views: 7
  • 20230728_123038.jpg
    20230728_123038.jpg
    2.5 MB · Views: 6

buxmj

Petty Officer 1st Class
Joined
Jun 9, 2018
Messages
294
We need a splash this year, and I think you're the guy! :)
That is the plan Reserector! Hopefully sooner than later, I am shooting for the end of Aug but don't want to do it Labor day weekend, being a newbie on the water. I don't have a pic yet but got all the cleats installed Sat and came into a snag with the manual air horn install yesterday, it came off a different boat so the fit under the dash was frustrating me to no end so that is why I stopped before I broke something...
 

buxmj

Petty Officer 1st Class
Joined
Jun 9, 2018
Messages
294
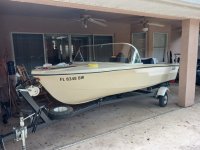
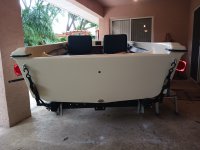
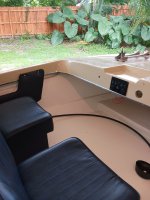
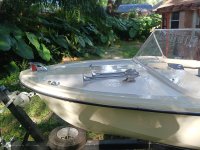
I can finally say that this project is ready for power! I still have to mount the step pads and bimini top (same navy blue as the seats) but will do that after the seats are fixed to the deck. I just installed the windshield yesterday as it has been frustrating. I still have the original in the attic and a plastics company here in Central Fl made a new one. I took it back once after scribing the bottom edge to have them cut it and I have trimmed it 2 more times since. I realized yesterday they didn't put the same curvature on the front edge and that created the fitment problem. I ended up putting the center hardware on the front side and other 2 sets of hardware on the back side of the windshield. The manual airhorn needed a pedestal to get the horns off the surface of the front deck. The Admiral donated a plastic cutting board and I will redo that with something thicker or tapered later, still barely touching.

Saturday I made the shelf insert to go in the bilge so the battery and gas tank sit flat and dry. It is made of pvc so no rot worries. I will cut a hole for the bilge pump later.

Going to start wiring this week but should be easy. I am not putting a stereo system in so for right now I only will need switches for navigation lights, stern light and bilge pump. I have a 5 switch panel so I can add 2 more things down the road when needed. The switch panel also has volt meter, 2 usb outlets and cigarette lighter type insert. The air horn is manual and it is LOUD!

Getting closer!
 

Attachments

  • 20230806_182401.jpg
    20230806_182401.jpg
    3.3 MB · Views: 9
  • 20230806_182957.jpg
    20230806_182957.jpg
    1.2 MB · Views: 9
  • 20230806_182850.jpg
    20230806_182850.jpg
    2.1 MB · Views: 9
  • 20230806_182704.jpg
    20230806_182704.jpg
    2.3 MB · Views: 9
Top