1996 Bayliner 2050 LS 5.7L 40th Anniversary Restore

Status
Not open for further replies.

produceguy

Lieutenant Junior Grade
Joined
Sep 30, 2010
Messages
1,243
Re: 1996 Bayliner 2050 LS 5.7L 40th Anniversary Restore

Keep up the hard work. That's great news on the stringers and transom. You lucked out.
 

fngboater

Petty Officer 2nd Class
Joined
Jun 9, 2011
Messages
181
Re: 1996 Bayliner 2050 LS 5.7L 40th Anniversary Restore

yeah thats good to hear about the transom and stringers. see there is some good.lol as far as the price on the engine work, thats awsome. im into it about the same on my motor and its just a 4 cyl. keep workin at it (i need a guiny pig to learn from)
 

sjohnson44

Petty Officer 2nd Class
Joined
Aug 30, 2011
Messages
186
Re: 1996 Bayliner 2050 LS 5.7L 40th Anniversary Restore

Im getting to where Im losing focus. Finding it hard to figure out what to do next sometimes.
I got the front deck lips ground down yesterday. Still got to get the seat boxes cut back to where I need them and then sanding the deck and hull. I am probably going to need a new outer gimbal plate, mine is just beat to hell. I got some pics of what I got done so far. Also took my upper unit cover off, and gears look fantastic!

DSC01947.jpg

DSC01948.jpg

DSC01949.jpg

DSC01950.jpg

DSC01951.jpg


DSC01952.jpg
 

sjohnson44

Petty Officer 2nd Class
Joined
Aug 30, 2011
Messages
186
Re: 1996 Bayliner 2050 LS 5.7L 40th Anniversary Restore

DSC01953.jpg

DSC01954.jpg

DSC01955.jpg

DSC01956.jpg

DSC01957.jpg


I know this looks rotted, but its actually oil stained. I have took core samples all over this transom and everything checks out.
DSC01958.jpg
 

sjohnson44

Petty Officer 2nd Class
Joined
Aug 30, 2011
Messages
186
Re: 1996 Bayliner 2050 LS 5.7L 40th Anniversary Restore

Been working on the boat pretty hard, just havnt took a lot of pics because its all been messy glassing work and didnt want to get it on the camera. I stopped today and took a step back and got some pics of what Ive got done so far.

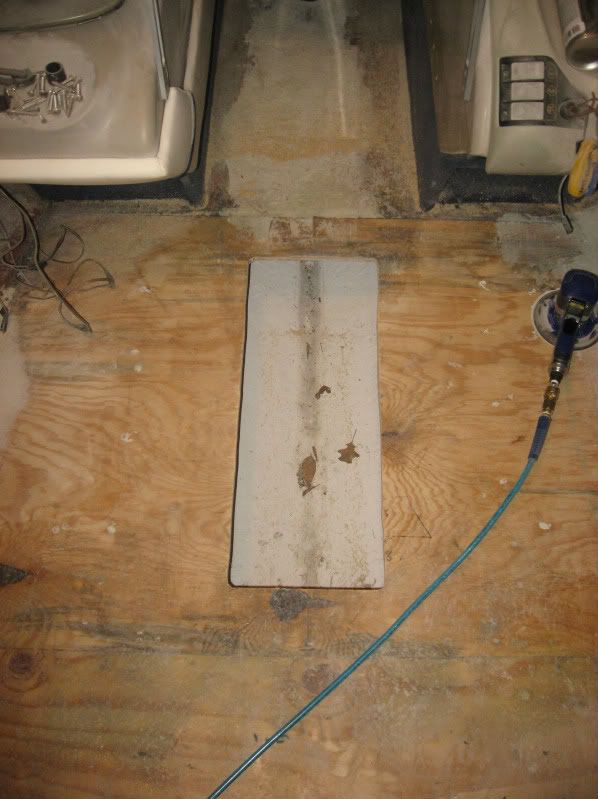
First Id like to thank Jay again for the idea with the cut up floor mat under the gas tank, and adding cleats to the bulkheads. Props to you sir.

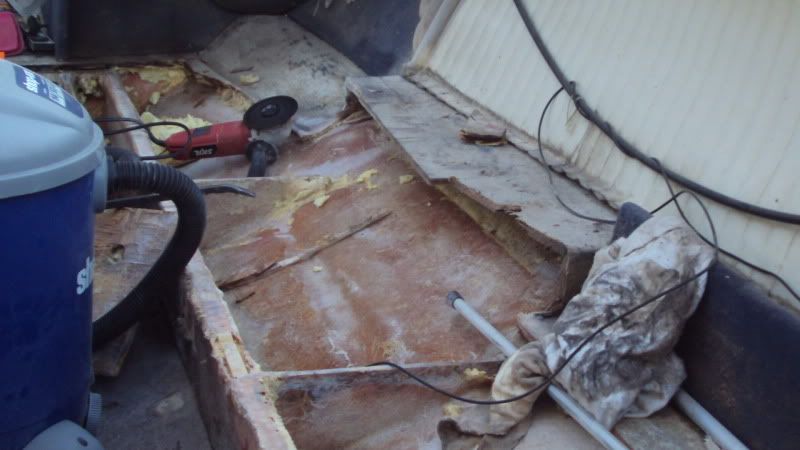
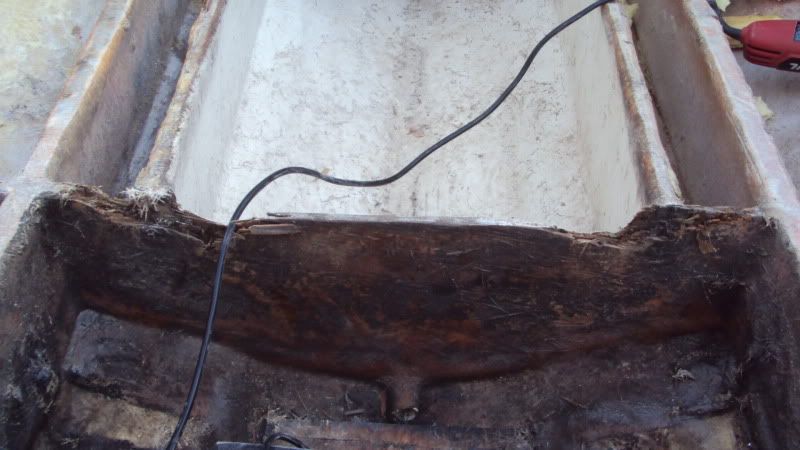
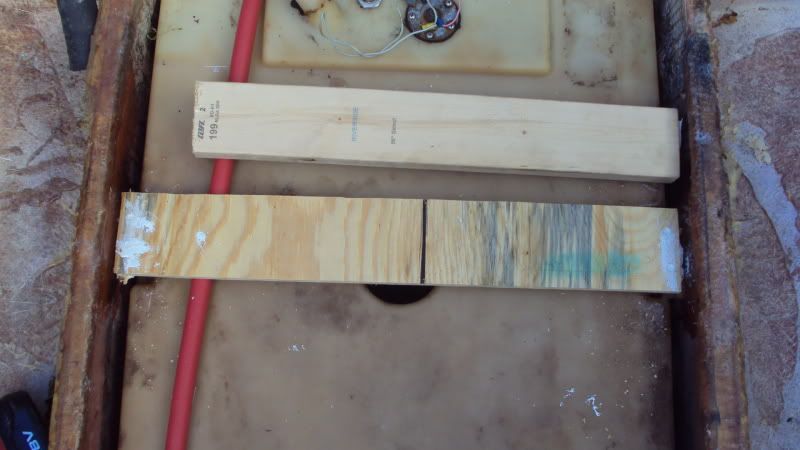
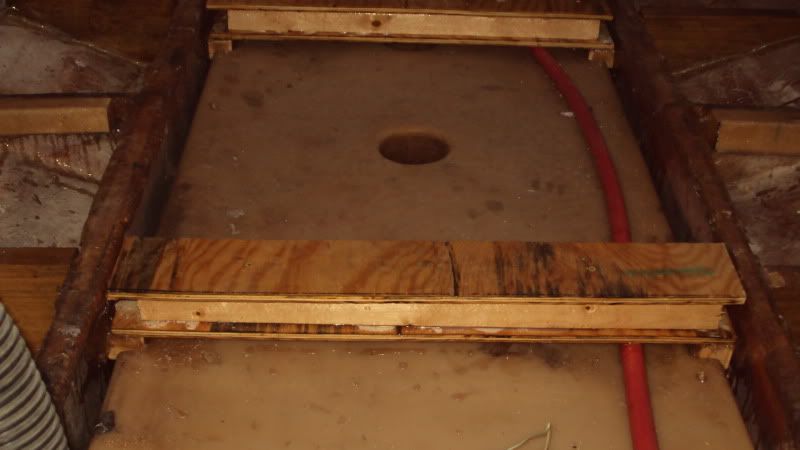
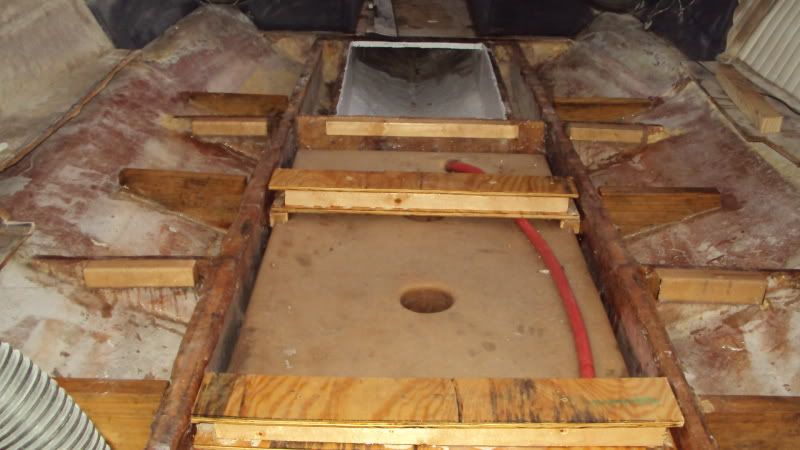
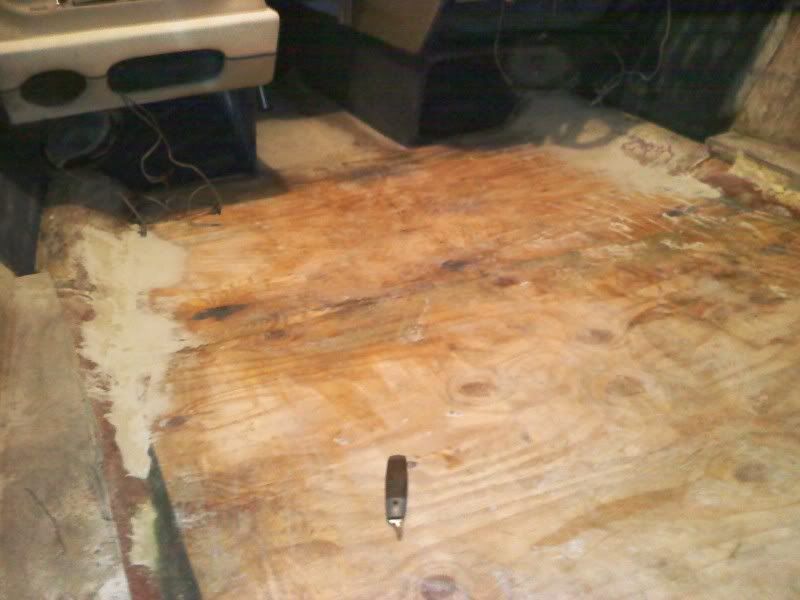
So far, the tank is installed and glassed in, and I also did something different than what came from Bayliner. This boat came with two layers of plywood over the gas tank. I guess it was for support but it didnt give much support if any at all. So my dad and I came up with this idea with some wood I had left over.

The tank is held down by 2x4 cut down to a 3" block and then glassed to the stringer. We then took some 1/2" ply and went across from either block and screwed it down to the block. Then took a 2x4 cut down and screwed it to the plywood and then screwed another piece of ply on top of it. Everything was soaked in resin real good and then sandwhiched together. Crude im sure, but it made it rock solid.

DSC01966.jpg

DSC01969.jpg

DSC01977.jpg


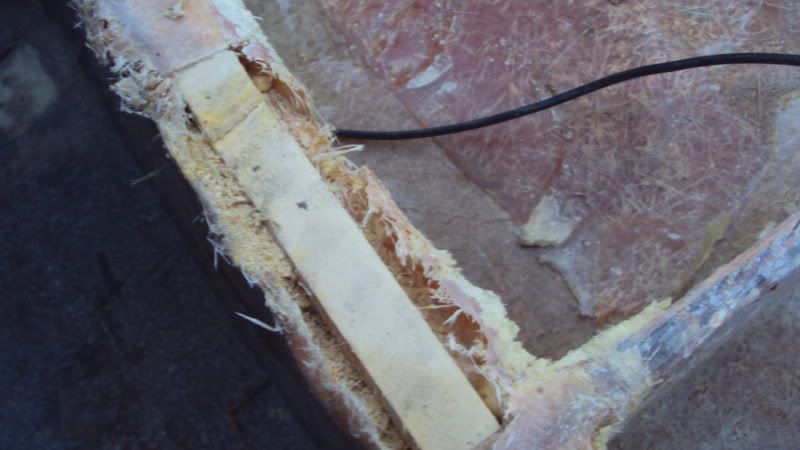
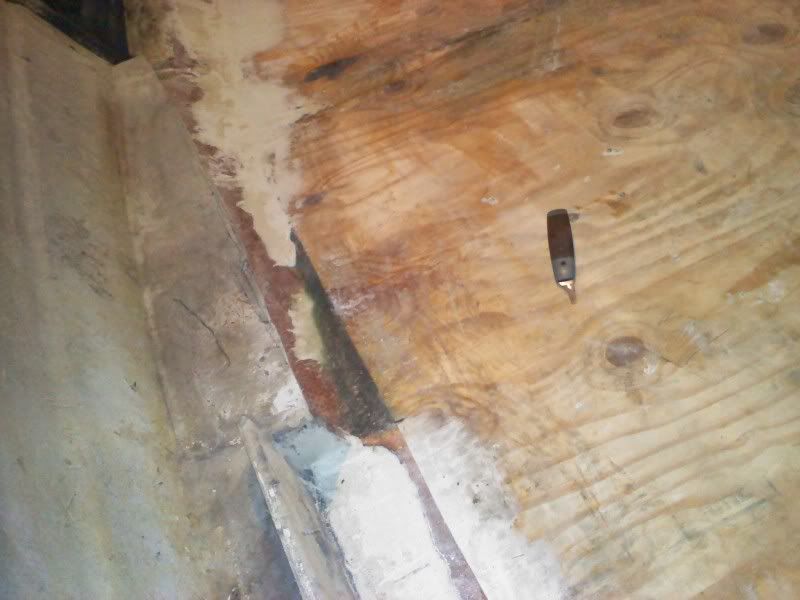
We also added some more bulk heads made out of cut down 2x6s, those alone made all the difference. I have them glued in with PL and got a coat of resin on them. I got to wait on another 5gal of resin to finish tabbing them in to the hull.

DSC01976.jpg


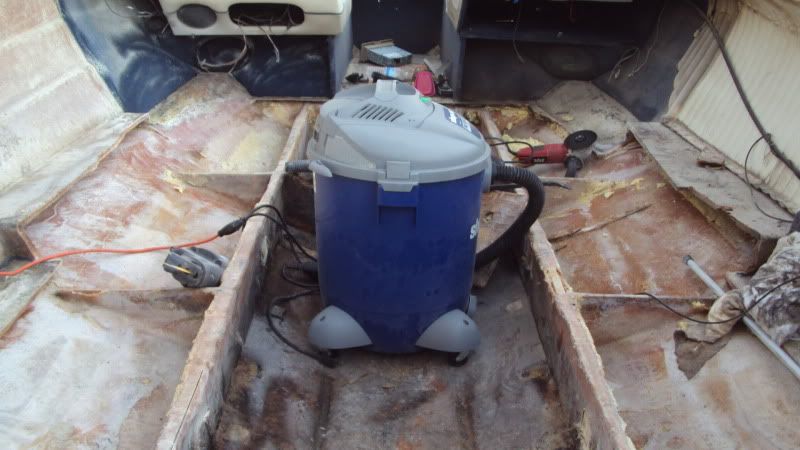
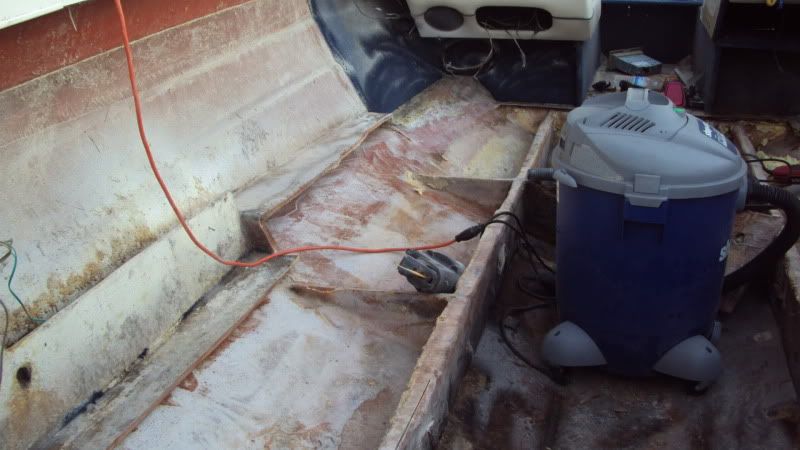
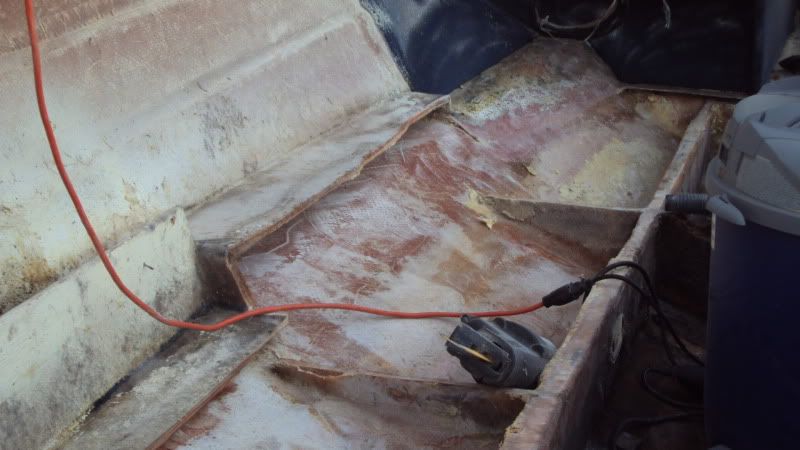
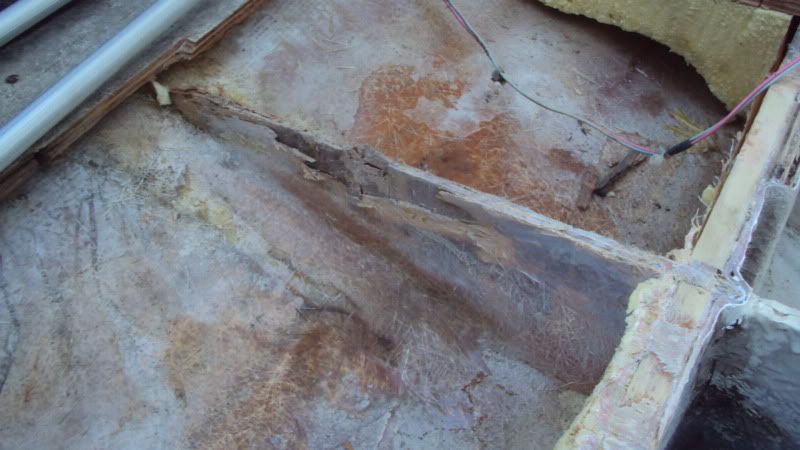
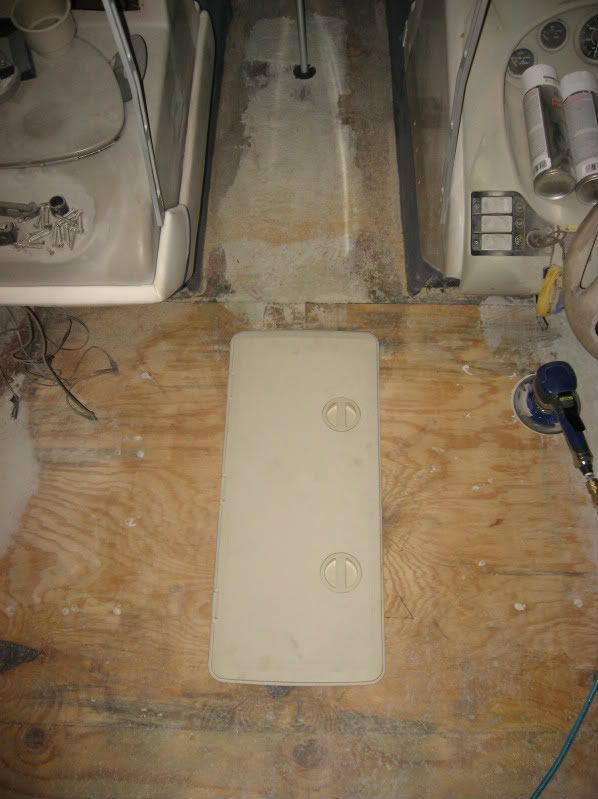
We also got the floor cut out and I got the bottom sides glassed and letting them cure.

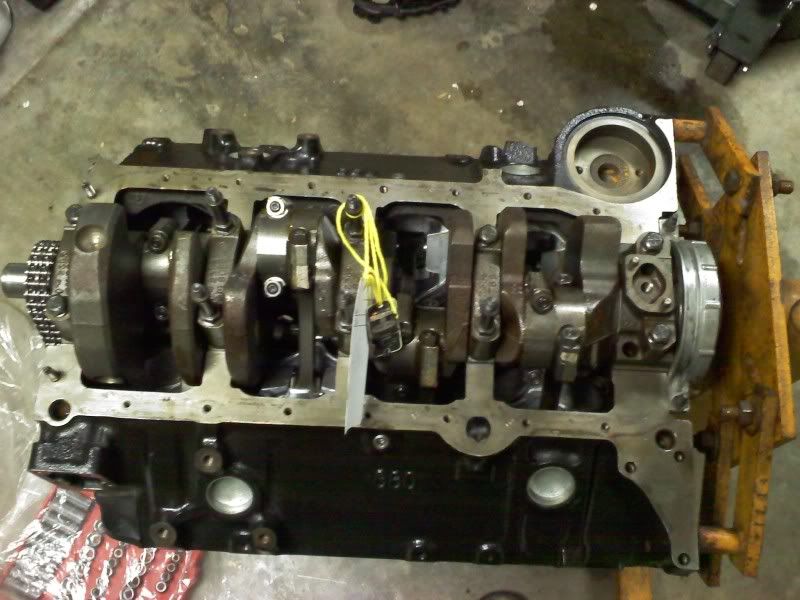
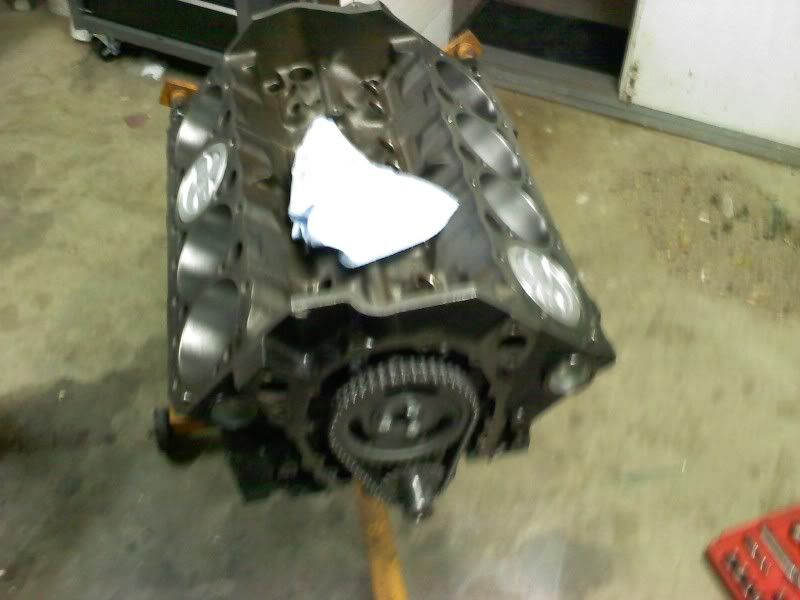
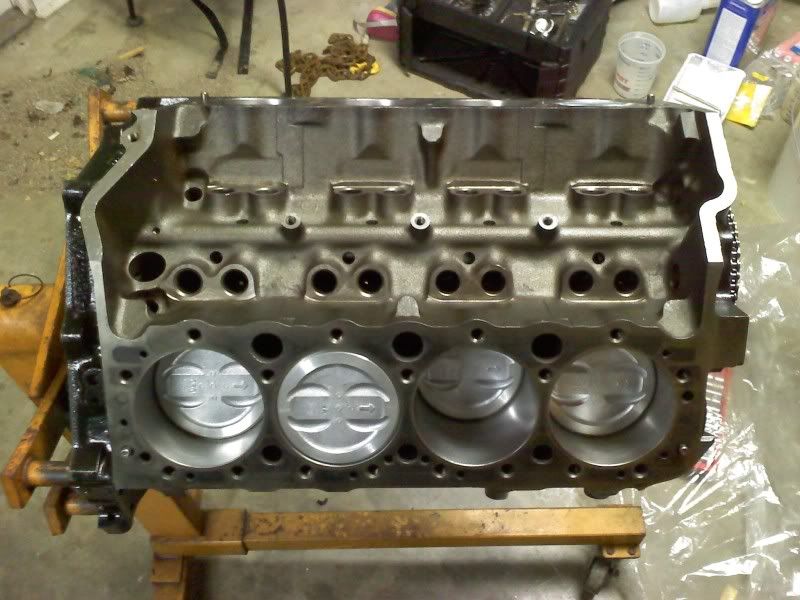
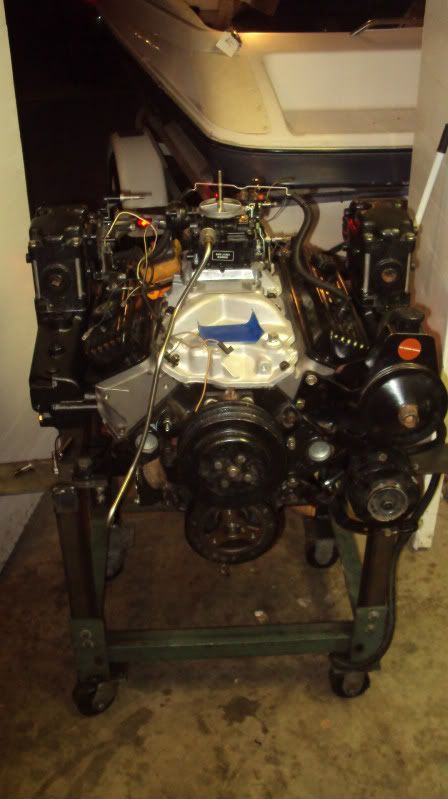
Had a disappointment with the motor, went to go pick it up the other day and it looked great. He said that after inspecting it, the motor did not have many hours if any at all on it, just rusted up. No cracks, no nothing. He bored it out to a 355 and revalved the heads and "played" with them a bit ;)
Theeeeeeeeeen came the bill...yeah, wasnt expecting it to be as much as it was but after talking with a lot of guys about it, they all said I got a steal on it.
Ended up being $1180. I gave him half of that and told him Ill pay the other when I get ready for it.

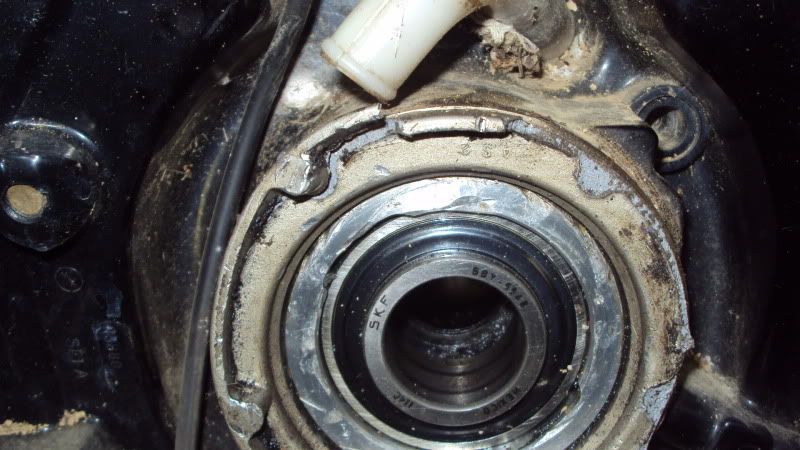
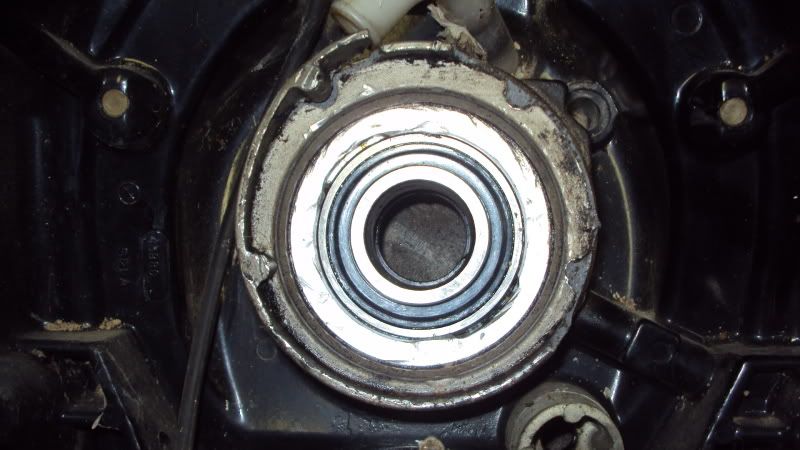
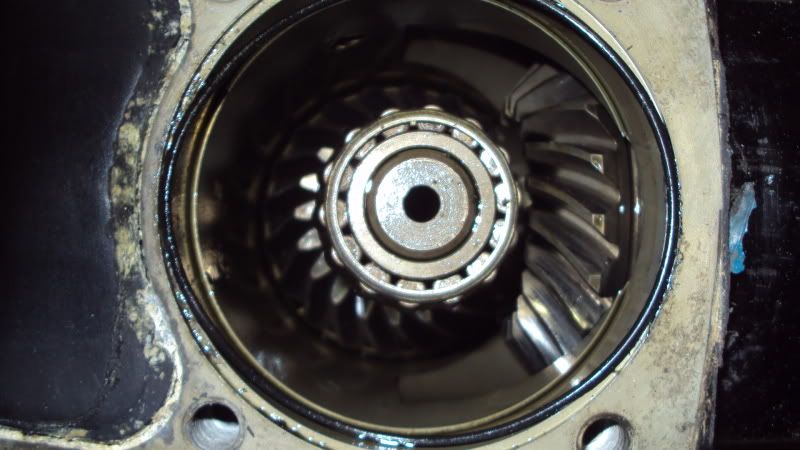
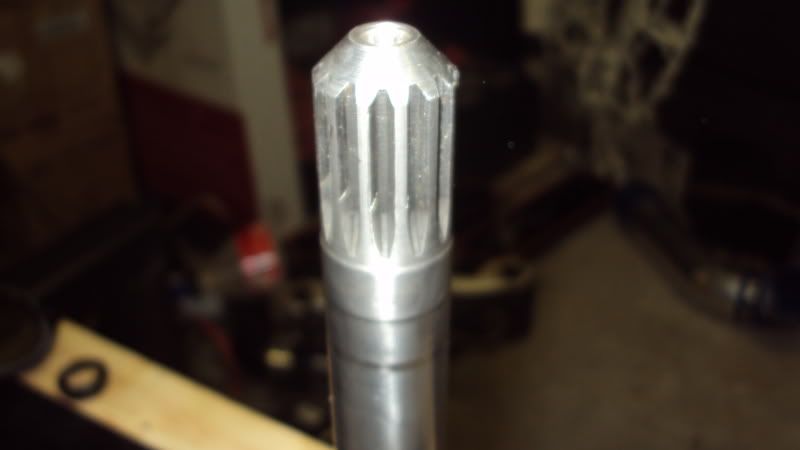
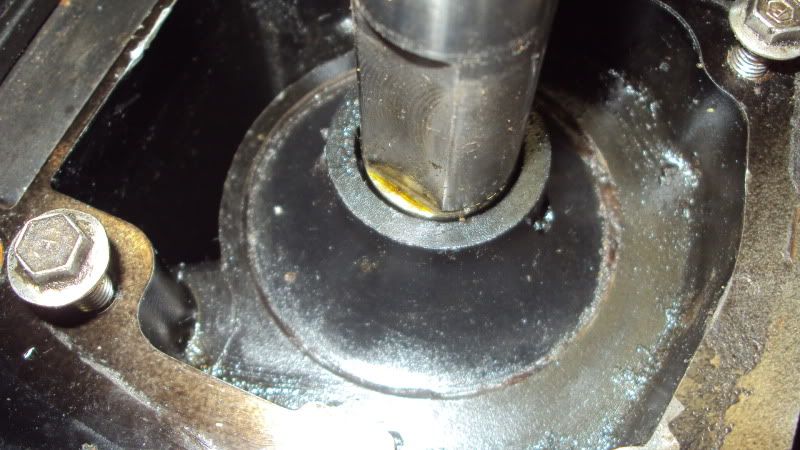
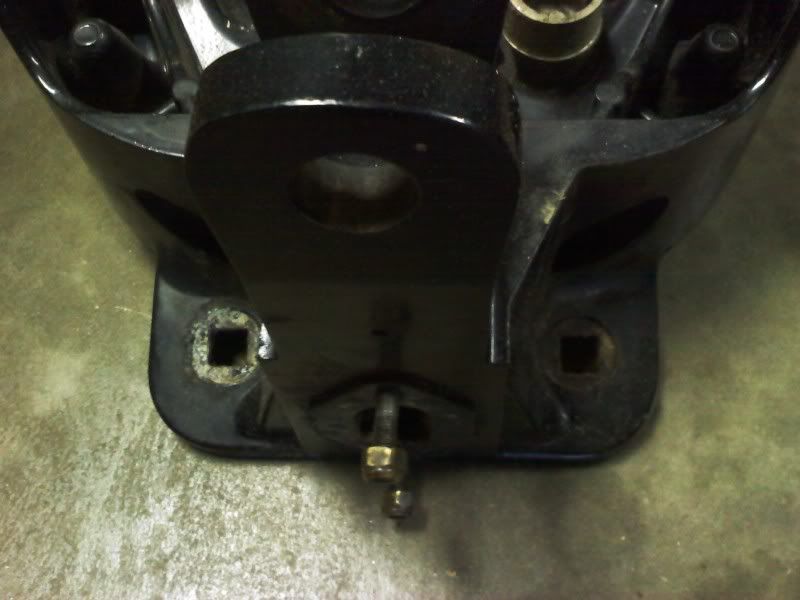
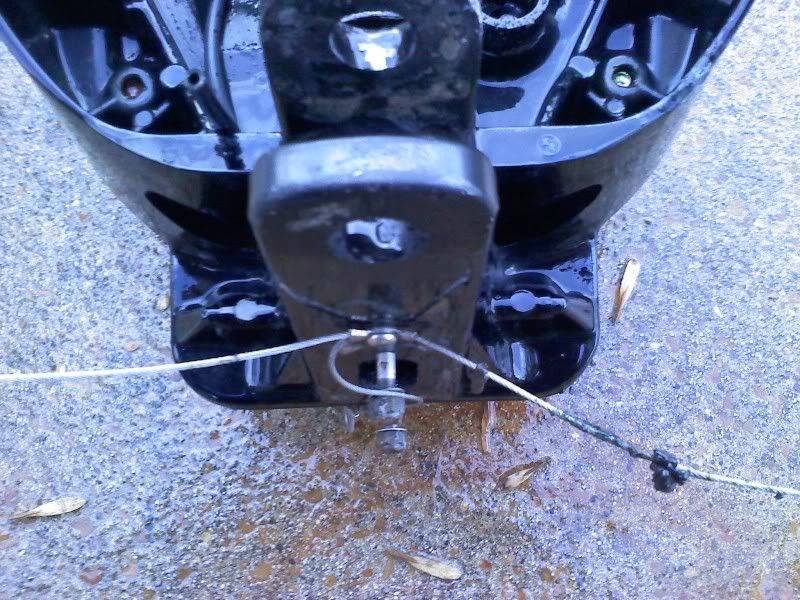
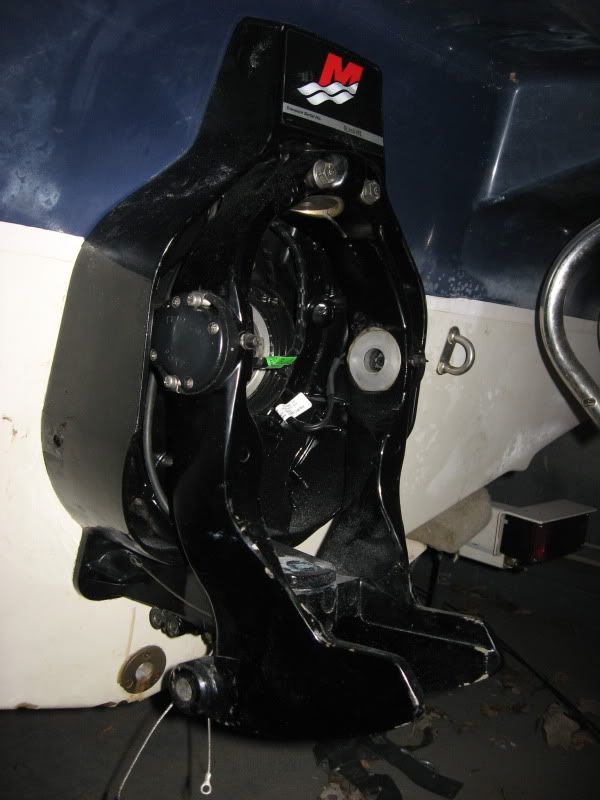
Outdrive has new water pump and carrier with new gaskets and orings.

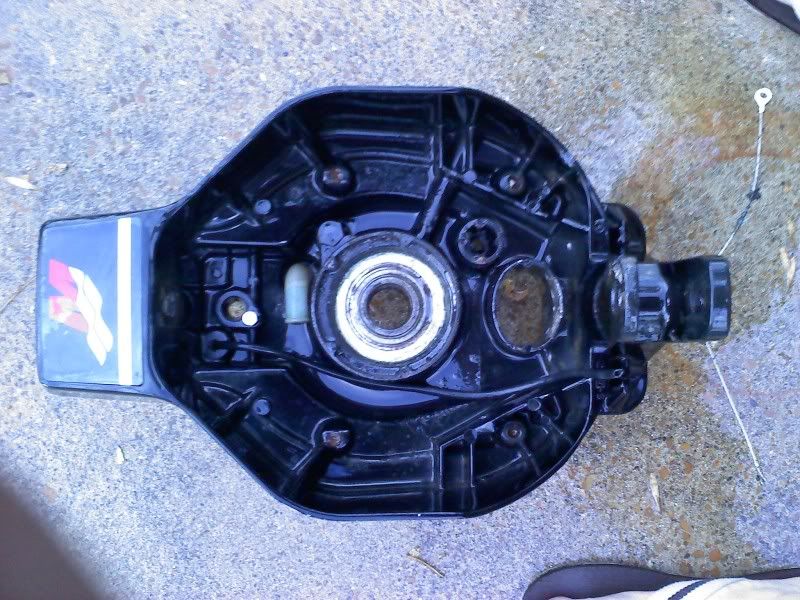
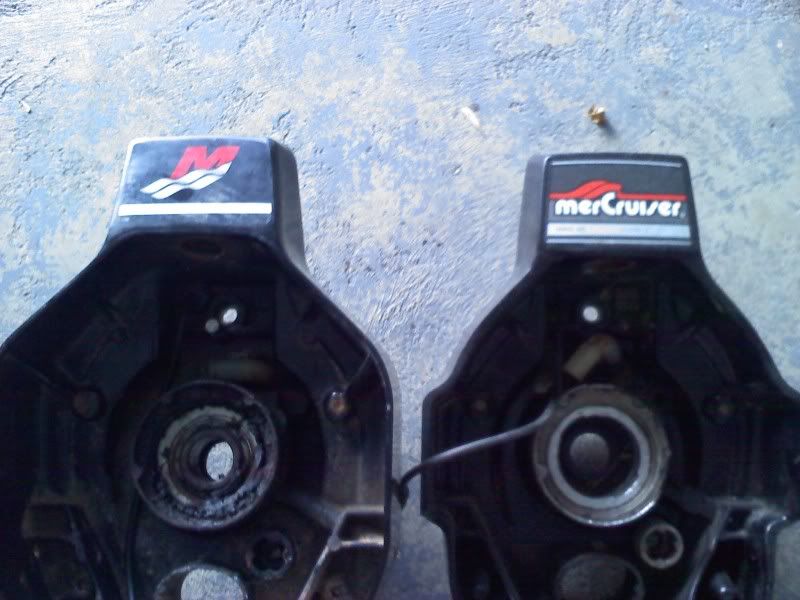
I bought another gimbal housing to replace my broken one. I found one from a 2000 model boat, its an Alpha 1 Gen II. The guy said that it was the one everyone wanted, can anyone say whats so special about it? Anyways, it wont be in till Monday.

Thats about it guys, not much else to show. Out of resin and hardener has got me stuck for now. Gonna paint the bilge and the transom tommorrow.

Take care.
 

ezmobee

Supreme Mariner
Joined
Mar 26, 2007
Messages
23,767
Re: 1996 Bayliner 2050 LS 5.7L 40th Anniversary Restore

Looks good. With all your reinforcements there you shouldn't have any problems finding good "meat" to secure the deck to when you install it.
 

produceguy

Lieutenant Junior Grade
Joined
Sep 30, 2010
Messages
1,243
Re: 1996 Bayliner 2050 LS 5.7L 40th Anniversary Restore

Yup, She looks really good.
 

Struc

Chief Petty Officer
Joined
Jul 27, 2011
Messages
409
Re: 1996 Bayliner 2050 LS 5.7L 40th Anniversary Restore

Are you putting drain holes in each of those little compartments you made? That would be my only concern, is that if water gets in there, it would be trapped.
 

sjohnson44

Petty Officer 2nd Class
Joined
Aug 30, 2011
Messages
186
Re: 1996 Bayliner 2050 LS 5.7L 40th Anniversary Restore

thanks guys, i appreciate the kind words.
 

sjohnson44

Petty Officer 2nd Class
Joined
Aug 30, 2011
Messages
186
Re: 1996 Bayliner 2050 LS 5.7L 40th Anniversary Restore

Are you putting drain holes in each of those little compartments you made? That would be my only concern, is that if water gets in there, it would be trapped.

No I didnt, floor is installed now with 5200 and PL. I was going to opt for some RedGard but my local lowes had an off brand version and it was $50 for a gallon!

Shes solid as a rock now, those extra 2x6 bulk heads really helped.
 

sjohnson44

Petty Officer 2nd Class
Joined
Aug 30, 2011
Messages
186
Re: 1996 Bayliner 2050 LS 5.7L 40th Anniversary Restore

Im back workin on the boat. I took most of november and december off from the project b/c I got lazy. lol

So to catch back up from last year...
Motor is assembled about 85%. I lack new manifolds, thermostat, crank pulley, and then bolt the alt. and power steering pump on.

New gimbal housing is now installed with a small gremlin...
When I was torquing the transom plate down (25ft-lbs), I got to the last nut on the bottom left. It started to tighten and then I heard a loud BANG. Immediately my stomach feel into the bilge and thought holy crap...that stud just blew out the gimbal housing. Got out and checked it out, and thankfully couldnt find anything wrong. So I gathered myself and gave it another ever so gentle turn and BANG. Oh yeah somethings not right...the next day I looked around and found the transom plate was cracked around that stud. So, thankfully its not one of the more expensive parts. Ordered a new one the other day.

Got the solenoids replaced and rewired the trim pump and hooked the rams up to see how they would act. No leaks from the seals, however the braided lines leak. Still got to order them.

Ordered my new ski locker door. Instead of going back with the OEM wooden door, I got a plastic hatch door with cam locks and a rubber seal around the lid. I plan on recessing the deck a little and mounting it in the recessed portion. Once thats done, I can then finish glassing the floor FINALLY, and then install the motor. THEN...start getting measurements to start my bench seat and sun deck.
I really wish I could find more information on the bayliner SS model's rear bench seat. I'm going to build mine as close to OEM as possible.

No new pics as of yet. I got a few of the motor on the floor just not uploaded. Just swinging in before bed time.
 

sjohnson44

Petty Officer 2nd Class
Joined
Aug 30, 2011
Messages
186
Re: 1996 Bayliner 2050 LS 5.7L 40th Anniversary Restore

I really wish I would have took more pictures but I get so busy when working on this boat that I dont think about it. The fiance gave me a deadline of June 2 (wedding day), she wants to take it out that day. Plus working 12 hour night shifts and being up 30 hours at a time really takes it out of me. lol

Floor is glassed and painted, only thing left is to finish glassing over where the back2back seats were connected to the hull. I did take pics of that. Hopefully it will give others an idea.

New transom plate is in. Figured out why it cracked in the first place. I repaired the drain hole below the plate because it had delaminated from the wood. Doing so, I ended up going a little too high with the 1/4oz CSM. A quick grinding and sand and it fits perfectly.

Gimbal housing is mounted, I upgraded to a newer one without the thru bolts at the bottom. I believe its a 1998+ model.
Gimbal ring installed, and bellows installed. I opted for the exhaust tube instead of the exhaust bellow.Ease of installation mainly. Plus the local marine shop said it would be a week before he could do it, after he done told me it would only take him an hour.

Bell housing installed, waiting on funds for alignment tool and that tool for driving the ujoint bellows ring in. Also need bushings and clips for the trim rams and then pressure test outdrive.

Motor is almost ready to fire up. I got new exhaust manifolds installed, risers installed, alt. & power steering pump. Got all wiring ran and fixed. Distributor stabbed and new cap will be here today.
I believe I am going to need a fuel pump. I installed it today and a bunch of crud came out of the small pipe on the side. It has a yellow tube that runs from it to the carb. Book says if any fuel is in it, then to replace it. I can compress the arm and air blows out and sucks in from the tube, so I guess it is bad. Still need thermostat gaskets and a crankshaft pulley.
 

produceguy

Lieutenant Junior Grade
Joined
Sep 30, 2010
Messages
1,243
Re: 1996 Bayliner 2050 LS 5.7L 40th Anniversary Restore

Congrats on the wedding, Keep at it my friend and take some pics for us.
 

BlkY2k

Chief Petty Officer
Joined
Aug 20, 2010
Messages
583
Re: 1996 Bayliner 2050 LS 5.7L 40th Anniversary Restore

I dont know if you have access to a machine shop but there are dimensions in the outdrive section to make your own alignment tool and these guys sell a driver that can be attached to it to drive your bearing. This going to be a sharp boat when you get done, thats from a fellow bayliner owner.
http://www.mercstuff.com/index.htm
 

sjohnson44

Petty Officer 2nd Class
Joined
Aug 30, 2011
Messages
186
Re: 1996 Bayliner 2050 LS 5.7L 40th Anniversary Restore

Thanks guys. I appreciate it. :)

I do in fact have access to a machine shop, lathes and mills. I was hoping to find specs on the tool but never really did any searching. Glad you said something before I bought the tool. I'll definately check it out.

I forgot to mention that I have bought some Attwood bucket seats. I spent a good 3 weeks trying to find some in my price range that were decent and had a sporty look to them. The last place I had thought to look was Walmart.com, they had them for the cheapest, picked up two for $600.
 

sjohnson44

Petty Officer 2nd Class
Joined
Aug 30, 2011
Messages
186
Re: 1996 Bayliner 2050 LS 5.7L 40th Anniversary Restore

Finally got some pics uploaded.
These were took when I brought the motor home from the machine shop. In order to save the block it had to be bored .030 over. The shop said that the motor did not have many hours on it, if any at all. He had said it looked like it had been overhauled and then the cylinders rusted up. Still not 100% sure why the motor had rusted cylinders, but I am leaning toward a bad head gasket or the old exhaust manifold that had JB Weld on it.
1121011902.jpg

1121011901.jpg

1121011858a.jpg


Here is the old and new gimbal housing. My old housing had a broken lip around where the ujoint bellow attaches. They make a kit that fixes this sort of thing specifically, but its gonna cost you $300 which compared to a brand new one from Mercury is a hell of a deal. I opted to find a good used one and spent less than the cost of that kit. I found my new one on ebay and from what I understood the seller salvaged it from a boat who sank from a hurricane. It is the newer style without the carriage bolts at the bottom. Which I have no idea why Mercury did that in the first place. Even though it was quite a bit wider and different and newer, everything bolted up perfectly. The serial number shows this new one as a 98 model and mine was a 96. I rebuilt the entire housing and gave it some paint on the inside. It has new bushings for the steering pin, new seal, new grease seal behind gimbal bearing, and new gimbal bearing.
Here are some pics of the differences.
DSC01949.jpg

1017011754a.jpg

1017011754.jpg
 

sjohnson44

Petty Officer 2nd Class
Joined
Aug 30, 2011
Messages
186
Re: 1996 Bayliner 2050 LS 5.7L 40th Anniversary Restore

Pics cont..
1017011753.jpg

1017011722.jpg


Here is the gimbal housing installed with gimbal ring. It has new trim senders, new shims for gimbal ring and new washers for steering pin. Also you see the new transom plate, and yes there is a motor mount washer missing, it fell off in shipping and I have it put up until it is needed. I also ordered all new motor mount hardware (bolts, washers, nuts, etc). Y-pipe is installed and bell housing installed with new bellows. The bellows kit came with a standard exhaust bellow but after a frustrating 2 hours trying to fish it on to the bell housing, I bought an exhaust tube. For $25 compared to the bellows tools at $50, and getting the local marine shop to put it on for $140 and it take them a week, it was the better choice.
Only thing left is to install the ring on the inside of the ujoint bellow.
Also you see the latest pic of the motor as it sits now. The stock intake was too rusted up and cruddy for me, and I could not order a new one just like it because its obsolete and no longer made. With my motor, the 4 middle intake bolts go straight down to the heads, all the others were to the side. It was because the intake and heads were produced for a EFI application, but I needed an intake for a carb. This new aluminum intake accommodates both old and new styles. It comes with inserts that allows you to bolt the intake straight down or at the older angle. It does have a taller rise than stock and is actually a 4bbl intake. I had to buy an adapter to install my 2bbl Mercarb on it. I hope I made the right choice with it. I ended up finding it locally and the guy has been providing engine parts in this area for more than 20 years. I was skeptical of it because it was only $140, but he assured me it would work with my marine application. I suppose we will find out soon. It also has a new timing cover which was also hard to find, ended up having to order from the local chevy dealership. It is plastic and it recommends replacing if it is removed. These were also used on newer EFI engines, however it had the deleted crankshaft positioning sensor. That is why it was so hard to find. It has new OEM exhaust manifolds, and I reused my old risers. I have a new fuel pump ordered, spark plugs, thermostat gaskets, and a crankshaft belt pulley. Old one was busted.

IMG_1771.jpg

IMG_1766.jpg

DSC02763.jpg

DSC02764.jpg
 

sjohnson44

Petty Officer 2nd Class
Joined
Aug 30, 2011
Messages
186
Re: 1996 Bayliner 2050 LS 5.7L 40th Anniversary Restore

Here are pics of the floor. The white stuff you see is me trying out the 3M phenolic glass bubbles. Definately not something you would want to use to fill large gaps. However at the time I was out of cabosil and was really trying to make some progress on the floor. It did come in handy filling smaller dips and seams, and sands very nicely. I did eventually buy more cabosil and finished the floor. I didn't take pics of me glassing the underside of the floor, but I assure you I did. I bought a new ski locker hatch door. I did not like the OEM wooden door and found this one from GreatLakesSkipper. It has the cam latches and a rubber seal around the inside lip of the hatch. The door can also be took off if needed.

0205021816b.jpg

0205021816.jpg

IMG_1768.jpg

IMG_1772.jpg

IMG_1774.jpg

IMG_1773.jpg
 
Status
Not open for further replies.
Top