1995 Larson 174 SEI Complete Rebuild

Mechanicalmike08

Petty Officer 1st Class
Joined
Aug 29, 2018
Messages
308
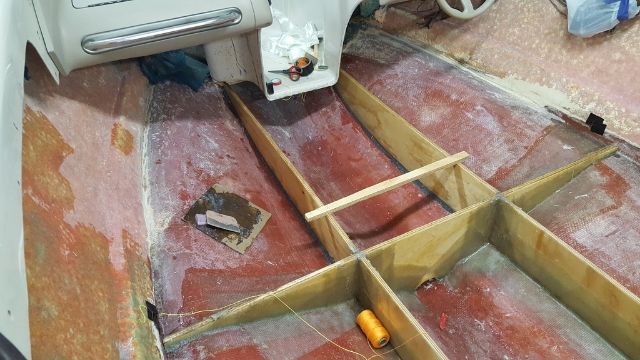
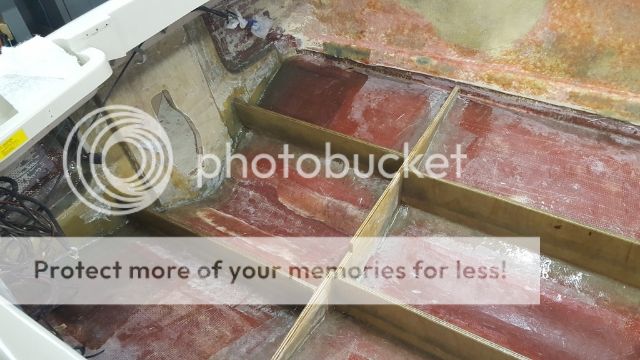
Well small set back tonight. Well 2 actually. Decided to test fit the gas tank again and my thick pile ups in the corners have some interference I will need to grind a little. Not that bad. Then I was planning on glassing in the last 2 bow stringers, but there was just no good way to attach and glass the same night so I just bed them in PB but left enough for me to do some fresh fillets for glassing tomorrow. Decided to go check it out later and one on the stingers fell in the back corner about 1/2". I think I'll just glass a filler peice on top to bring it flush but the really crappy part is the hardened bulge of PB I will have to deal with before glassing. 😩
 

tpenfield

Moderator
Staff member
Joined
Jul 18, 2011
Messages
17,711
Bummer. I hope it all works out. The fuel tank compartment must be really tight.
 

Mechanicalmike08

Petty Officer 1st Class
Joined
Aug 29, 2018
Messages
308
Bummer. I hope it all works out. The fuel tank compartment must be really tight.

It's just the corners, the tank goes about 3/4 in no problem but then I got some high spots from the corners meeting the mating glass running down the hull. I also have some high spots from working with the way PB fillets as it's sometimes squirts up into the glass.

the bigger one is having to grind the big bulge of PB from the stringer falling down. I looked a little more and my spacer slide down somehow causing it to have no support other than the half kicked PB.
 

Mechanicalmike08

Petty Officer 1st Class
Joined
Aug 29, 2018
Messages
308
Do you have the tank sitting on a base of some sort?

I'm not sure what you mean, if you mean like rubber strips on the bottom and sides there not in there yet but will be once it's gel coated. That's not enough to get it there though. The biggest issue is the push out of PB from doing wet on wet layups. I'll just have to grind a little. Down the sides and front and back I have almost 1/4" on both sides. The glass just got real thick in the corners.
 

kcassells

Fleet Admiral
Joined
Oct 16, 2012
Messages
8,600
I was not able to see what the base of the fuel tank was sitting on, that's all.

Moeller plastic requirements. Typical
[h=1]How to Install Moeller Permanent Fuel Tanks[/h]
sm-share-en.gif


For your safety and for best results, read the following instructions completely before installation. [h=3]Before you install:[/h]
  • Organize all the hand tools you will need to complete installation of your permanent fuel tank. Necessary tools may include a tape measure, a flat-blade screwdriver, and pliers or wrench.
  • For best results and ease of installation, we recommend using Moeller's Permanent Fuel Tank Installation Kit (35723) not included. This kit provides the additional hardware and hoses, including a a stainless steel deck fill and chrome-plated brass thru-hull vent, suggested for a proper below deck tank installation.
  • Determine the best placement of your fuel tank, positioning it where the vent and fuel hose connections to deck wil form the shortest line. Make sure that the electrical sending unit is still accessible in this location.
  • Replace an existing fuel tank by removing the old unit.
[h=3]Proper Fuel Tank Installation[/h]
  • Secure fuel tank into position. We recommend using our stainless steel Permanent Fuel Tank hold down kit (35710), may not be included with your tank.
  • IMPORTANT: Do not use foam to secure tank in place. Resin fuel tanks require a multidimensional expansion area of 2.3% at all times; foaming a tank in place removes the chance for hydrocarbon expansion and will void tank warranty.
 

Mechanicalmike08

Petty Officer 1st Class
Joined
Aug 29, 2018
Messages
308
This boat originally had a entire access panel the length of the gas tank. Then 2x4 screwed into the stringers to hold the tank down and a few more for supporting the access panel. I plan to keep the access panel as I will be doing a snap in carpet that will hide it. I plan to do something similar for holding the tank down but I am going to fab some brackets to better secure the supports and hold downs. Then just foam strips under the tank and support it from being directly on the hull.
 

Mechanicalmike08

Petty Officer 1st Class
Joined
Aug 29, 2018
Messages
308
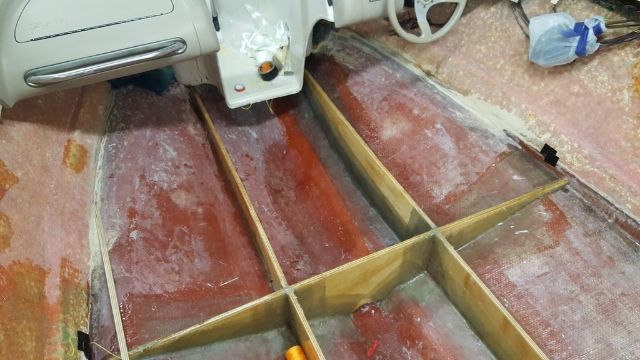
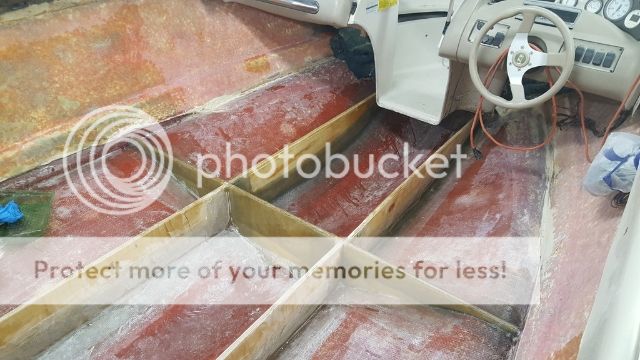
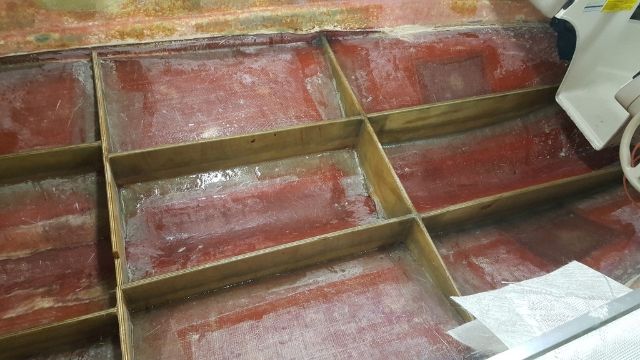
Well tonight I glassed in the good side so it was done and solid and didn't have to grind or sand anything to prep it later. Wet on wet again and went very smooth.
First picture is when I finished yesterday and all was good, or so I thought. Looking at the picture now I don't know why I didn't just put a piece spanning from the solid bulkhead to the new stringer to support it.


Here is the picture from tonight after finishing the glass work.


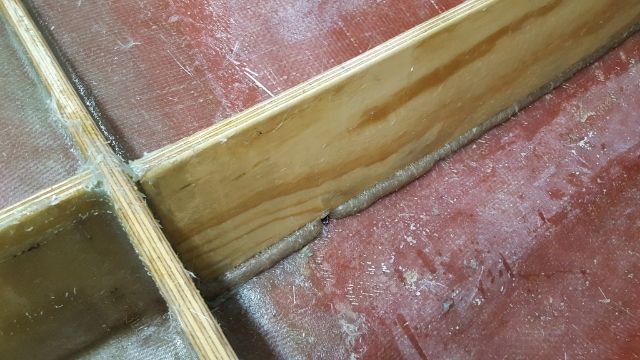
and I don't even want to post this picture but it is what it is and I will just have to deal with it. Its still off the hull, so I think I'm going to sand the bulge to a fillet then cut a wedge to bring the top flush and feather out to the edge and glass that in. It should be plenty strong just not ideal.
 

dezmond

Senior Chief Petty Officer
Joined
Jul 21, 2010
Messages
760
You will make it look great. No worries ;). I just got a really cool tool that would work great for knocking that done. $45 bux from Amazon. Black and decker 1/2” belt file sander thingy. I used my brother in laws and wow does it knock down glass quick! You could make some nice fillets from your boo boos :)
 

Mechanicalmike08

Petty Officer 1st Class
Joined
Aug 29, 2018
Messages
308
Well no big buck to report but was a nice break. Planning ahead for this week going to pull it out Wednesday for some warmish weather and finish what shoyld be the last of the grinding. Question I have is prep for new gel coat on the fresh glass, is it the same as the rest of the resin. Meaning good to put down within 2 days otherwise sand and prep?
 

Mechanicalmike08

Petty Officer 1st Class
Joined
Aug 29, 2018
Messages
308
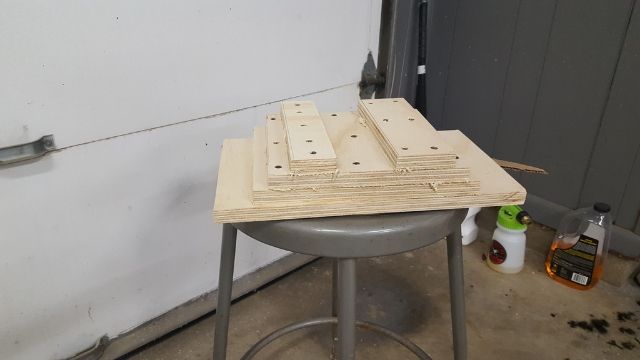
Well had a half day from work and the weather was decent so rolled it out for one more grinding session. Got all the new glass prepped, ground out my mistake and feathered any edges for the capping to lay down nice. Also got my spacer on the one stringer to fix the heoght issue. Lastly cut the space for the gas lines oh and the gas tank fits perfect now.
 

Mechanicalmike08

Petty Officer 1st Class
Joined
Aug 29, 2018
Messages
308
Got out today for a little bit and got the last front stringer fully tabbed in. I had some left over resin so I quick capped the first bulkhead. Went pretty good, didn't have to use plastic or clips. The only area that fought me a little bit is out at the tips where there wasn't much material. The rest had enough that it seem to hold it in place and not air bubble.
 

Mechanicalmike08

Petty Officer 1st Class
Joined
Aug 29, 2018
Messages
308
Another very successful day today. Got everything capped except for the back bulkhead. Waiting on that one till I get the motor mount in and tabbed. Might do the wings as I have left over resin. Also got a layer of CSM and then 18oz cloth over the spots where the rollers sit. Should stiffen those areas a bit now. Went very smooth my method was to wet out the stringer a bit, then wet out the CSM on cardboard and lay it in place. Using the roller start at the top at one end and waterfall over to one side all the way down that side. Then came back and waterfalled over from the top down starting where I started before on the other side. This method lead to almost no air bubbles and very little work to prevent them because I was basically pulling the fabric down toward the wood preventing any air from being trapped.


I also got my motor mount roughed out and glued and screwed. Tomorrow I should be able to shape and wet this out. Then the entire motor floor is getting a layer of CSM and 18oz cloth because I removed a entire layer when tearing this thing apart. I should have just enough resin to finish that and tab in the motor mount and then I will be out of my original 10 gals and time for a new order. Next order should be more resin, cabosil, foam and gelcoat. I was really hoping to be around 15 gals of resin but looks like I probably need 20.
 

Mechanicalmike08

Petty Officer 1st Class
Joined
Aug 29, 2018
Messages
308
LOL good luck the more resin you use the more you need.

I was looking good on resin or so I thought, I didn't kick the first 5 gal pale until almost everything was tabbed in. O well. I knew I'd need more was just really hoping I could have had the bottoms of the deck done before needing to order more.
 
Top