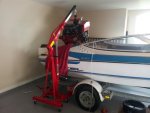
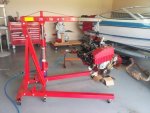
1992 Wellcraft Excel 18sx custom rebuild. Project name "Aqua Rover"

Status
Not open for further replies.

Jared9220

Seaman
Joined
Dec 29, 2010
Messages
59
Hello All,

I am new to the forum and new to the boat world so please take it easy on me if I don't know all the basic boating terms, I'm still learning. My boating experience may be near zero, but I am no stranger to turning a wrench and DIY auto repairs/rebuilds which is why I feel comfortable in starting a boat rebuild project. I have been reading the different rebuilds on here for the past few months and this forum has been a great source of knowledge in preparing for this project. Now on to the good stuff...

The boat is a 1992 Wellcraft Excel 18sx. I am big into the Land Rover world and this boat is going to be rebuilt to match my D2 as much as possible, hint the project name "Aqua Rover". The exterior will be an Epsom Green with tan interior, black trailer, all black trim, and so on. Of course things may be changed along the way due to the budget but hopefully I can make this idea in my head reality. I'm sure I will have a ton of questions as I get further along so any and all help will be very much appreciated, Thanks.

This is my rover that I want to rebuild my boat to match so you can get an idea of the green with black trim I will be going for.
jared9220-39733-albums-my-01-disco-633-picture-100-2334-5023.jpg


Day 1:
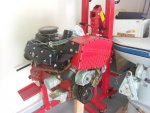
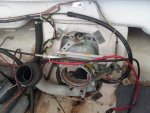
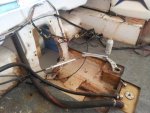
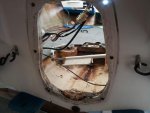
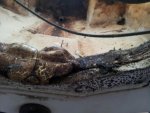
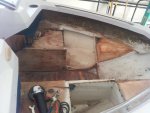
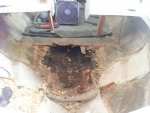
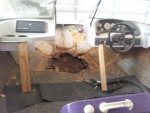
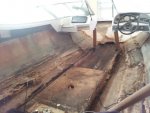
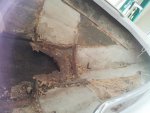
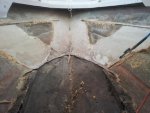
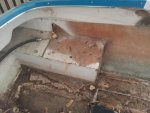
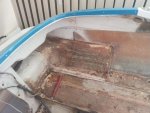
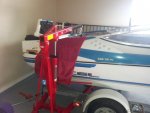
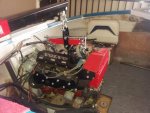
Pulled the drive, engine, transom shield, interior, and got it ready to start cutting out all the wood. 100% of the wood is coming out and being replaced. I want this boat to be in like new condition when finished.
20140916_152227.jpg

20140916_152234.jpg

20140916_155033.jpg

20140916_181214.jpg

20140925_145547.jpg

20140921_144340.jpg

20140921_162153.jpg

20140921_162204.jpg

20140921_162209.jpg
 
Last edited:

Tnstratofam

Commander
Joined
Aug 18, 2013
Messages
2,679
Seriously!:eek: All that in day 1. Great start to a nice looking boat. Good luck on your resto. I'll be tagging along if that's okay.
 

Jared9220

Seaman
Joined
Dec 29, 2010
Messages
59
Seriously!:eek: All that in day 1. Great start to a nice looking boat. Good luck on your resto. I'll be tagging along if that's okay.

Thanks for the interest in my project and do please follow along as I'm sure I'll need help along the way.
I was really surprised at how easy it was to pull the drive and engine out. 3 hours after starting and the engine was out on the stand and I was having a beer. I hear that the really fun stuff is coming up next when I have to cut and grind all the old glass away. I bought all the protective gear and respirator to start the job first thing in the morning. The bow storage compartments seem to be the only good wood left on the boat so I'm expecting the worst from them. The floor feels like I could rip it up by hand. I figure I'll get the hard part out of the way first.
 

sphelps

Supreme Mariner
Joined
Nov 16, 2011
Messages
11,468
Maybe you should paint the rover to match the boat .. :joyous:
Welcome aboard J ! You have come to the right place .. Good luck !
 

Jared9220

Seaman
Joined
Dec 29, 2010
Messages
59
Day 2:

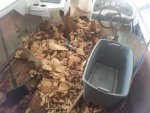
I started the morning early around 9am and started tearing out the bow storage compartments. Like I thought they were a PITA to get out. The wood up there was still pretty solid but the rest of the boat was not to bad. The motor mounts were mush and it's amazing that the engine hadn't dropped through. I ended the day with a big pile of rotten wood and 8 trash bags of foam. The boat had been sitting in my garage for the last 4 years and the foam was still soaked with water. The smell was pretty heavy. I have a lot more respect for the guys on here pulling wet foam down inside enclosed spaces, that must be pure hell. I tip my hat to you.

I won't be able to work on the boat again until after the weekend because I'm going up to hidden falls off-road park in Marble Falls, TX for some fun. Here is the progress from the day. Enjoy

20140924_112136.jpg

20140925_145801.jpg

20140925_145856.jpg

20140926_124333.jpg

20140926_135438.jpg

20140926_143834.jpg

20140925_145842.jpg

20140926_132230.jpg
 
Last edited:

Tnstratofam

Commander
Joined
Aug 18, 2013
Messages
2,679
Again you've done allot of work in a single day. I can't believe there was still water under that mess after sitting in your garage for that long. Just goes to show you water can get under the deck easy, but sits there rotting everything because it is harder to get out. My Stratos has been in our garage since last October with part of the interior removed. I was thinking maybe some of the water might have evaporated, but now I'm sure a nasty mess is awaiting me when I start back tearing out the deck. Crazy how the fiberglass delaminated to the point you could peel it up like that. I'm finishing up a bathroom, then I'll be getting back on our Stratos. All this work you're getting done is really motivating me to get my behind in gear.

By the way My mom and stepdad live on the highway between Lago Vista, and Marble Falls. That's some pretty country out that way. I've tried for years to convince my mom to move back to the mountains here in Tennessee, but after the first time I visited I understood why she stays. I've got a sister who lives in Cedar Park, and works in Austin. She's even more of a Texan than my mom has become. Have a great weekend. Can't wait to see more progress.
 

Jared9220

Seaman
Joined
Dec 29, 2010
Messages
59
Again you've done allot of work in a single day. I can't believe there was still water under that mess after sitting in your garage for that long. Just goes to show you water can get under the deck easy, but sits there rotting everything because it is harder to get out. My Stratos has been in our garage since last October with part of the interior removed. I was thinking maybe some of the water might have evaporated, but now I'm sure a nasty mess is awaiting me when I start back tearing out the deck. Crazy how the fiberglass delaminated to the point you could peel it up like that. I'm finishing up a bathroom, then I'll be getting back on our Stratos. All this work you're getting done is really motivating me to get my behind in gear.

I totally agree that once water gets in it has no where to go. Is there a reason that stringers are not built with drain holes? It seems like putting drains holes in the stringers could be a double edge sword. On one hand, if water ever does get in there it has a way to get out and dry. But on the other hand, if you put drain holes in then you are making an easy way for water to get in and possibly get trapped. I guess with a properly sealed deck, water (in theory) shouldn't get in to begin with. So what do you guys think? Are drain holes for the stringers a good or bad idea?
 
Last edited:

Rickmerrill

Senior Chief Petty Officer
Joined
Mar 13, 2014
Messages
686
Bad, for the reasons you said and encapsulate all the wood down below to waterproof.
 

nurseman

Lieutenant Junior Grade
Joined
Jun 2, 2013
Messages
1,045
If you do a search on this forum for pour in foam, you will find that this is a topic of much debate! There are some boats that have limber holes in the stringers and bulkheads, it just depends on the design of the boat. Personally, I think that a sealed deck and sealed foam compartments are the way to go. Better to try and keep water out than to allow it in and hope that it drains. That is JMO, it is what makes sense to me. On the same note, if there is a possibility of water getting into a compartment, then by all means there should be drain holes, and no foam. Again that is JMO, and some of the more experienced people may shoot me down. Search the forum, do your own research, and go the route that you deem to be the best.
 

Tnstratofam

Commander
Joined
Aug 18, 2013
Messages
2,679
Limber holes in the compartments seem like a good idea, but eliminating water from entering is a better route. Or at least that seams the better route. The problem is trying to place them in such a way that you can be 100% sure the compartments drain is harder than it may seem. Also most of the foam used in older boat construction isn't closed cell. I believe that's why most restorers go with some type of closed cell pour in. At least on fiberglass restores. Check out some of the other rebuilds by the other posters here on your thread. All of them except me are moving right along on their restos, I've gotten some good ideas on where to go with mine. Some people may disagree, but I think if you check out archbuilders completed resto, and frisco boaters completed resto you'll get some great info to help in your resto. I think anyone who is attempting a resto on a fiberglass boat should check out those two threads as a requirement. That is just my opinion though.
 

Jared9220

Seaman
Joined
Dec 29, 2010
Messages
59
I've watched hours and hours of friscoboaters youtube videos and it is a great source of information. I think I actually remember seeing frisco use pvc to make drain holes, I could be wrong. I'll have to go back and check. I still have a good ways to go before I get to that stage so I'll cross that bridge when I get there. Thanks for the input guys.
 

Tnstratofam

Commander
Joined
Aug 18, 2013
Messages
2,679
He did use pvc for the ski locker and I think for the gas tank area. I think he didn't put any in the foam areas. I think he sealrd them up with pb, and redguard. The redguard was supposed to stay flexible if I recall which would help with the hull flexing. Like you said though you've got a ways to go yet. Although you keep up your current pace, and you'll get there pretty soon.
 

nurseman

Lieutenant Junior Grade
Joined
Jun 2, 2013
Messages
1,045
Ditto that bit about friscoboater's and archbuilder's threads. Very good info in both of those threads and videos.
 

Rickmerrill

Senior Chief Petty Officer
Joined
Mar 13, 2014
Messages
686
I should add I was assuming there would be foam in there. Seems like most of us start thinking about ways to get water out of there after we pull up the deck. Oops did has a plan for wrapping the foam in shrink wrap to keep it dry. Friscoboater was dead set on limber holes at first but later decided against it. Towards the end he even said the Red Guard was probably a waste if time. Anyway, most of us figure if the boat lasted as long as it did the first time around, usually with some mfg sloppy workmanship, with a little attention to detail we can expect it to last at least 2 or 3 decades with a little care.
 

Jared9220

Seaman
Joined
Dec 29, 2010
Messages
59
Well guys after a fun weekend with some Land Rover buddies off-road, I was finally able to get back to the boat today. I almost talked myself out of working on it today, but I'm really trying to put at least 1 hour of work in each day to keep chipping away at this project. It's so easy to say "I'll do it tomorrow" and before you know it you haven't touched your project in months.

I didn't do to much today. I just finished cutting out the big stuff in the bow to get ready for the grinder (not looking forward to that) and I cut out 1 of the 2 (I don't even know what to call these things) good for nothing boxes?;) There was foam in them so I assume they are just there for support and/or buoyancy? Any input would be appreciated.

Day 5:

20140929_114505.jpg

20140929_131900.jpg

20140929_131844.jpg

20140929_141822.jpg

20140929_141831.jpg
 
Last edited:

Woodonglass

Supreme Mariner
Joined
Dec 29, 2009
Messages
25,928
Hopefully you took a lot of Pre-Demolition measurements so you'll have them for reference when you're ready to go back with the new stuff???;) Just curious but the pics LOOK like some of that bow material is corrugated material. Is it? Or are my Old Okie eyes playing tricks on me?
 

Jared9220

Seaman
Joined
Dec 29, 2010
Messages
59
Hopefully you took a lot of Pre-Demolition measurements so you'll have them for reference when you're ready to go back with the new stuff???;) Just curious but the pics LOOK like some of that bow material is corrugated material. Is it? Or are my Old Okie eyes playing tricks on me?

No there was no corrugated material. I think you may be seeing where I used a large drill bit about 100 times to cut out a small piece of wood. Not my finest moment:D. This is my first time cutting out fiberglass so I was giving every tool in my garage a shot in the beginning because I had no idea what would work best. You live, you learn. The grinder is my new best friend.

As far as measurements go, I have taken ZERO thus far. The stringers and motor mounts are still in and I plan to measure those before they come out. All of the interior layout is being changed so measuring will not really help me. There were jump seats on each side of the engine but those are coming out and I'm going to put in a bench seat in front of the engine. I want to make a large flat area over the engine so my wife has somewhere to lay out and tan, I very much enjoy the view of her laying out in the sun;). Then there used to be back-to-back lounge seats, and those are coming out and a bucket seat for the driver and passenger in there place. With 3 on the bench, 2 bucket, and 2 seats up at the bow, the boat will still hold 7. Since it's just me, my wife, and our 2 dogs, there should be plenty of room.
 
Last edited:

kcassells

Fleet Admiral
Joined
Oct 16, 2012
Messages
8,737
Good work and progress. WOG is referring to the structural aspects under the floor as they existed. The stringers/bulkheads/deck structures will end up being a result of putting back what was there.....in a better fashion and the deck mods will at some point tie back to the under deck replaced structure.
So then if you are contemplating like a long bench etc for "sunning" in addition to the existing structure being replaced you will want to consider modifying whats under the deck to accept the deck/bench mods. for strength and integrity.
Pics/meas etc will refresh your memory cause these rehabs last longer than your mind remembers. They end up being great references.
 
Status
Not open for further replies.
Top