1991 Force 120 HP rebuild project

j_k_bisson

Lieutenant Junior Grade
Joined
Oct 6, 2010
Messages
1,082
Re: Update 11-8-2011 Continued

Re: Update 11-8-2011 Continued

WAY over my head, but a great thread. Could you potentially square the ports to get some extra HP?

forgive my newbie ? but where are the valves? are they the UFO looking things?

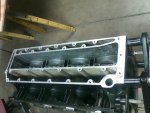
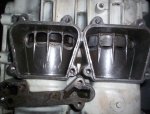
Actually I have not posted any pics of the Reed Valves. So I went and took a couple of pics and here they are.
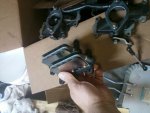
SSPX0054.jpg

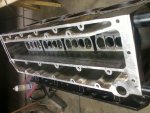
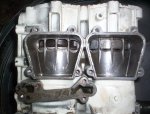
They are located in these motors right behind the carbs before the intake side of the block. Here is the cover plate behind the carbs that they are located under.
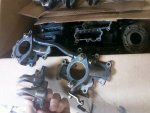
SSPX0055.jpg

Hope this helps. Ask any questions you want. I'm not an expert at all. Just a guy trying to fiddle on something in the winter time. It keeps me from going crazy. It's my hobby.
 

jerryjerry05

Supreme Mariner
Joined
May 7, 2008
Messages
18,036
Re: Update 11-8-2011 Continued

Re: Update 11-8-2011 Continued

No valves!! They use reeds behind the carb.Yes cleaning up the ports will give more HP.
Ask FrankA for some pics and info on cleaning up the ports.
He put out a really good thread about that a while ago.J
 

j_k_bisson

Lieutenant Junior Grade
Joined
Oct 6, 2010
Messages
1,082
Update 11-9-2011

Update 11-9-2011

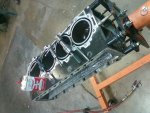
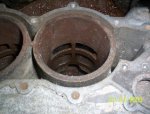
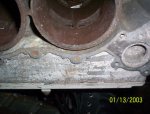
Well last night I started with washing the block down. I went ahead with the gasoline wash down. And Man did that work! Wouldn't recommend it to anyone due to the safety hazards, but if you want to remove all the crap in the exhaust chamber then this is the way to do it. A stainless brush and a pail of old 2 stroke gas and a way you go. I did not take any pics of the set up I used, sorry. It was basically a squar 5 gallon chain pail that the block fit into perfectly and about 3 gallons of gas. I would dunk the block and let it stand for 5 minutes then remove and flip end for end. Only could get 2 cylinders submerged at a time. While the two where not submerged I would scrub with a toilet brush from the dollar store and a small stainless brush. It came out great after a 1/2 hour or work. Here are some picks.

SSPX0057.jpg

SSPX0058.jpg

As you can see it works great. But be careful if you do this. Extremely flamible. I worked outside and away from flames. Then after done I left the area for a good Hour before doing anything in it.

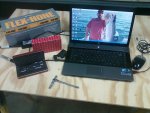
Next I started Measuring the block. Here is a pic of the work cell. I used my trusty old fasioned bore mic. If you need a bore mic, the dial indicator ones are on sale at Production Tool Suppy for $50. Seeing I have old faithful, Not spending the money.....

SSPX0059.jpg

The results are these....

Top Hole @ top is 0.0008" out of round @ bot below ports is 0.0011" OoR, and the max Taper is 0.0005"
2nd from Top is Scored. Needs boring
2 from Bot @ top is 0.0002" out of round @ bot below ports is 0.0008" OoR, and the max Taper is 0.0006"
Bot Hole @ top is 0.0016" out of round @ bot below ports is 0.0016" OoR, and the max Taper is 0.0003"

But with looking at the holes and arounf the intake and exhaust ports there is considerable wear between the ports. This is more than the allowable 0.0020" wear limit. So ever hole is going to need professional boring and honing. The walls need to be cleaned up and squared especially in the port areas. So the block will be off to the machine shop after I am done cleaning it up and inspecting it.

Next after inspecting it I started with cleaning up the taped holes. Here is a pic of the tools used for this.

SSPX0056.jpg

Not a fun job, but one that needs to be done. This will occupy my time for the next couple of days. Cleaning up the parts and packing them away for long term storage other than the two block halves. They are off to the Machine shop.

The plan now is to completely rebuild the motor with new pistons and rings. Reuse the conecting rods and other parts where I am able to. I will be going thru everything and measureing them. I'll post as I go. But this project just got more expensive than I was planning on. Looks like Ebay will be getting more of my buisness on oversized pistons in the upcoming months.

No work tonight. I finally can get out of the house, so nothing for tomorrow.
 

j_k_bisson

Lieutenant Junior Grade
Joined
Oct 6, 2010
Messages
1,082
Update 11-10-2011

Update 11-10-2011

Last night only worked on the block for anouth 1/2 hour. Finished running the tap thru all the holes on the intake side and then got half way thru the ones on the crank split side. Will finish tomorrow night.

I know Frank has been watching this thread, as there is not much going on here in the Force area. Frank can you post the link to porting this block that "jerryjerry05" mentioned. Specifically what size of rad in the corners for the ports squaring. I need to make sure that I have the right size carbide burr. I have 3/8 and 1/4" carbide burrs currently. Also on the intake side I noticed a rather large mismatch on the transfer ports from the split line to the intake ports. How thick is the wall stock in this are. Can I clean up this as well?

That's it for today....
 

Frank Acampora

Supreme Mariner
Joined
Jan 19, 2007
Messages
12,004
Re: Update 11-10-2011

Re: Update 11-10-2011

I got my eye on you---LOL

DO NOT port the exhaust side. All cylinders dump into a relatively low volume common exhaust chamber. Since #3 and @2 fire sequentially -- 1 3 2 4 and since exhaust ports are open for about 120 degrees and crankpins are 90 degrees apart, there is a 30 degree overlap with blowback. Exhaust porting an engine not modified for racing will result in less horsepower than stock.

Bypass side can be ported. I use a 1/8 diameter carbide bit in a Dremel. For aluminum roughing I use a christmas tree shaped high speed bit run at low speed and constantly dipped in oil and cleaned. The carbide is for the steel liner.

The liner is approximately 3/32 thick and the aluminum it is cast into is about the same, maybe a little thicker. You can see it by looking into the bottom of the block on the bypass side. rough casting and flashing can be cleaned but will not result in increased horsepower--at least not that you can notice.
 

j_k_bisson

Lieutenant Junior Grade
Joined
Oct 6, 2010
Messages
1,082
Re: Update 11-10-2011

Re: Update 11-10-2011

I got my eye on you---LOL

DO NOT port the exhaust side. All cylinders dump into a relatively low volume common exhaust chamber. Since #3 and @2 fire sequentially -- 1 3 2 4 and since exhaust ports are open for about 120 degrees and crankpins are 90 degrees apart, there is a 30 degree overlap with blowback. Exhaust porting an engine not modified for racing will result in less horsepower than stock.

Bypass side can be ported. I use a 1/8 diameter carbide bit in a Dremel. For aluminum roughing I use a christmas tree shaped high speed bit run at low speed and constantly dipped in oil and cleaned. The carbide is for the steel liner.

The liner is approximately 3/32 thick and the aluminum it is cast into is about the same, maybe a little thicker. You can see it by looking into the bottom of the block on the bypass side. rough casting and flashing can be cleaned but will not result in increased horsepower--at least not that you can notice.

So to summarize then:

Don't touch the exhaust side other than possibly cleaning up flash in parting lines. Don't make holes bigger as it will decrease in low end Hp. On a Offshore fishing rig this is bad!

On the intake side, I can clean up flash but will not see any kind of HP increase with this alone.

For the porting of the intake holes I can make the holes semi square, but leave a crown on the top and bottom for ring travel. Flat/horizontal edge could cause the ring to catch and break. As to the vertical walls, again don't change the web thickness.These vertical walls can be semi square up untill the corners. This is ok for the two inside ports. The two outside ports, outside walls stay round like they are due to the run out of the port into the piston cylinder bore.

As to the moving up and down the hole opening, leave it alone. It affects the power ban and possibly raises it.

Now questions; A crowning of the horizontal and vertical walls, what is acceptable? Like a 0.030" crown in the center of the flat on the port? Or can this be smaller? Or does this work with eveer you want? As long as it is understood that the less crown equals less longevity in the rings and bore. They will wear out faster as there is less contact surface with the cylinder walls in these areas.

Lastly what size of chamfer do you put on opening into the cylinder bores? Right now they are razor sharp. I want to break this but to what size? I do understand that this will be done after bore and honing.
 

Frank Acampora

Supreme Mariner
Joined
Jan 19, 2007
Messages
12,004
Re: Update 11-10-2011

Re: Update 11-10-2011

102_6496.jpg102_6497.jpgYou can square all the bypass ports and as you said, the outside walls of the two outside ports are already approximately square. You don't need crowing of the top of the ports. They are much to small for rings to catch as long as there is a slight chamfer. The ports can be actually twice as wide as they are now without danger of ring catching. I had an old answer to a post about the chrysler 60 that shows the ports. If I can find the photos---- Look at the size of these bad boys.

Inter-port wall CAN be thinned and airfoil shaped since this is the "cold " side of the engine. It will not warp into the cylinder due to heat. You can also grind out the aluminum from the bottom of the ports to ease the gas flow. In essence, this changes the direction just a little and the engine "sees" a bigger opening than there actually is. The chamfer does not need to be great at all. All you really need to do is break the sharp edge. Look at the factory chamfer on the first two photos--almost non-existent.

The white two cylinder in the second two photos was my first effort from about 1969 and is a little sloppy.

100_6184.jpg100_6183.jpg

But really, JK, why bother? You are selling the engine and have nothing to gain. Indeed, if a ring should break, he will blame you. In this case, it is better to leave it stock.
 

Faztbullet

Supreme Mariner
Joined
Mar 2, 2008
Messages
15,902
Re: Update 11-10-2011

Re: Update 11-10-2011

Unless your going to turn it more rpm than the factory specs,leave it alone and save yourself some time. Cleaning up the intake side helps by a few of hp but stay on the lower side (skirt) of sleeve as raising the upper changes the time/area values of the porting map.
 

j_k_bisson

Lieutenant Junior Grade
Joined
Oct 6, 2010
Messages
1,082
Re: Update 11-10-2011

Re: Update 11-10-2011

Ok it stays the way it is. I'll clean up any flash I see but no porting and enlarging the openings. It stays the same. I need this motor to be dependable for a long time. So factory specs is where it stays!

No work other than lifting a few pops with the guys last night, so nothing new to report.....
 

j_k_bisson

Lieutenant Junior Grade
Joined
Oct 6, 2010
Messages
1,082
Re: Update 11-10-2011

Re: Update 11-10-2011

Ok now that we got thru the porting issues. How about wear limits for these blocks.

The factory service manual says anything over 0.002" in size, out of round, and taper is resson for rebore to 0.010" bigger. I have the one cylinder that is scored so that is a rebored already, but none are over this 0.002" tolerence. I have one bore that is 0.0016" out of round. I fear that is I use the flex hone to put the cross hatching back in that it will be over tolerence.

On Evinrudes it is 0.004". Extactly double the wear limit. If I used the Flex hone than I would not be over this size limit.

Any thoughts???? If I am at the high end of the Force spec but unter the Evinrude spec you think it will work? Again I am selling this, not using it for myself. It just have to work for a couple of years with limited use. Hell the guy that is buying it only put 10 hrs on his boat this year.
 

Frank Acampora

Supreme Mariner
Joined
Jan 19, 2007
Messages
12,004
Re: 1991 Force 120 HP rebuild project

Wear limit has been .002 since Chrysler bought the business. I doubt that honing with a fine stone will put you very much over if at all. Even if you do go over by a couple of 0001, I doubt that there would be any performance problems.

Don't fix it if it aint broke!
 

j_k_bisson

Lieutenant Junior Grade
Joined
Oct 6, 2010
Messages
1,082
Re: 1991 Force 120 HP rebuild project

But what to hone it with? A flex hone or a adjustable, three "flat" stone hone? That is the question.........

I am under the impresion that the flex hones only increase the inperfection or out of round ness of the cylinders. The flat hone stlye some what fixe the uneveness of teh wear when honing.

Never used a flat three prong hone before. I have visited Sears this past week and they have a fairly nice setup and would work for the flat three stone one.

I also have a 95mm or 3 3/4" Flex hone already. But this size is a bit oversized for this application.
 

Frank Acampora

Supreme Mariner
Joined
Jan 19, 2007
Messages
12,004
Re: 1991 Force 120 HP rebuild project

I always use the three stone Craftsman hone. You just need to be careful because the cylinders are considered closed. If you go too deep, you will bang the stones against the main bearing seats and break them. I tyr to set the block in my drill press and regulate the depth so this will not happen. I use the lowest speed setting and regulate my stroke to get a 60 degree crosshatch
 

j_k_bisson

Lieutenant Junior Grade
Joined
Oct 6, 2010
Messages
1,082
Update 11-12-2011 - Putting it in storage for a while......

Update 11-12-2011 - Putting it in storage for a while......

I always use the three stone Craftsman hone. You just need to be careful because the cylinders are considered closed. If you go too deep, you will bang the stones against the main bearing seats and break them. I tyr to set the block in my drill press and regulate the depth so this will not happen. I use the lowest speed setting and regulate my stroke to get a 60 degree crosshatch

Thanks Frank, I have always worried about using one of those type. All I see is honing something a bit more out of taper. How much does one of those actually take off?Also I had planned on doing what I did with the flex hone I cut a thick piece of cardboard in a circle the same size as the bore. Then place it in the bottom of the bore. This protects the hone and makes a hard stop. Or will this work here? Also how tight is this the 0.002" over sized dimension tolerence? If after i am done honing and I remeasure the block, if it comes out to +0.003" will it still work" I'll be using new rings that will have no wear so the ring end gap should be in tolerence, correct?

I want to still pick your brain to help me formulate my plan of attach on this, but this motor has just went to the back burner untill closer to spring. I talked to the wife and with our finances I can not get into a project like this and be 2 mounts away from x-mas and have 4 kids.. You know what I mean. I was hopeing to get the block out and done before x-mass. That way I could cherry pick Ebay for the parts I need for it over the holidays for a steal! But the plan has changed. My wife gave me the go ahead on re-finishing the garage. we have been talking about for years about moving to a possibly larger house. But we know we would reather not bind our selves into a larger payments so we are staying. Meaning that I get to finally get the garage I always wanted/needed.

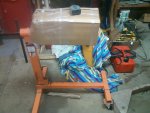
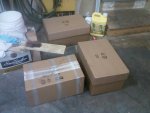
That means to this project everything is going into the attic till spring. after oiling up the block and packing away the parts, here is what this project looks like till spring...

SSPX0063.jpg

SSPX0064.jpg

This afternoon I need to go up in the garage attic and make some long term storage shelf and get these boxes and block up there. That should be fun!

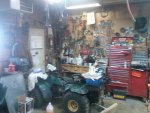
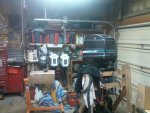
Sorry to all that where hoping to follow this. But the way I see it, if the wife is giving me a budget for the garage then I am going to use it before she changes her mind. Hell I need the organization and storge it would generate. My garage is getting a bit over crowded. I am planning on doing the garage in stages as I do not have anywhere to put all my tools while I work. So the so the worse wall get done first. Here are a couple of picks of the first wall I am going to be tackling:

SSPX0061.jpg

SSPX0062.jpg

I am planning on building in cupboards, tool boxes and pull out selves. I have a basic plan but I am looking for ideas on layout and nifty little ideas. I plan on making all my own cupboards. I do know this is a tall order, but being the son of a master carpenter, and having a ton of time on my hands this should be a fun project. I figure for what a couple of 52" stacker tool boxes costs, I redo my whole garage. If anyone has an links/websites what are like this one, but for garage guys please let me know. I need some insperation...... My canvas is semi blank!

Also I probably will not be posting this project as this is a boat site and not a garage site..... That is unless you want me to put this into one of the off topic thread areas... I know you guys love projects with lots of pics.... And this onbe should be a good one. Also any ideas on usefull ideaswill be welcome!
 

eddy622611

Petty Officer 3rd Class
Joined
May 27, 2008
Messages
76
Re: Update 11-12-2011 - Putting it in storage for a while......

Re: Update 11-12-2011 - Putting it in storage for a while......

Try Garage Journal.com great site I'm sure you will enjoy. What shores of Erie are you on? I live near Erie, PA Good Luck,Brian
 

j_k_bisson

Lieutenant Junior Grade
Joined
Oct 6, 2010
Messages
1,082
Re: Update 11-12-2011 - Putting it in storage for a while......

Re: Update 11-12-2011 - Putting it in storage for a while......

Try Garage Journal.com great site I'm sure you will enjoy. What shores of Erie are you on? I live near Erie, PA Good Luck,Brian

Great garage foarm. I will b e deffinately hanging around there for the next little while. Alot of great ideas. Now I will be deffinately be going warp speed on this garage project.

As to where I live, I'm on the north shore of Erie at the mouth of Detroit River. My main fishing area is right at the gap between the Western Basin and Central Basin, but on the North Shore side of things. Sorry for being a bit criptic but you never know who is asking. If you are a Lake Erie fisherman you will know where I am at......
 

eddy622611

Petty Officer 3rd Class
Joined
May 27, 2008
Messages
76
Re: Update 11-12-2011 - Putting it in storage for a while......

Re: Update 11-12-2011 - Putting it in storage for a while......

Glad, you liked the forum. I only asked in case you lived in PA.
 

j_k_bisson

Lieutenant Junior Grade
Joined
Oct 6, 2010
Messages
1,082
Re: Update 11-12-2011 - Putting it in storage for a while......

Re: Update 11-12-2011 - Putting it in storage for a while......

That is the best garae/tool forum I have ever seen. I might have to jump ship here and switch........

Alot of very good ideas for storage and tool usage.
 
Top