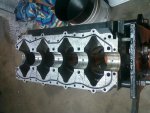
1991 Force 120 HP rebuild project

j_k_bisson

Lieutenant Junior Grade
Joined
Oct 6, 2010
Messages
1,082
For those that followed my other two projects, this is one of this winters projects. I always get into a couple every winter due to having tons of time out in the garage after the kids go to bed and the wife is at work.

The plan is to restore/rebuild this 1991 Force 120 hp fresh water motor that came with my 1991 Bayliner Trophy and sell it to the neightbour. The #3 cylinder is scored badly and requires boring. This is from the common porblem with these motors of a ring braking and a piece flying around in the cylinder. All other 3 cylinders are mint. So the plan is to pull the sleeve and put a new on in at a cost of $200 total for the sleeve and work. Buy a pistion kit for the cylinder. Then hone and re-ring the other three cylinders. Making this a rebuilt short block. Basic plan and one I think I can get away with for under $600 total without labour. Thats always free. Most of the parts are going to be coming off ebay, love discount pricing anywhere I can get it.

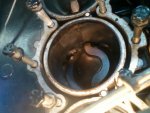
One other thing, this motor runs and runs well. Just idling it does not. The compression in the cylinders are as follows #1 135, #2 135, #3 125, #4 145. This is starting at the bottom and working up. I have taken the head off and looked at the cylinder and the only one that does have damage is the #3. Can not explain the #4 numbers being high, figure it is due to the #3 being so low. Will find out when I get it appart.

I already have all three factory service manuals for this motor, the full gasket set. All I need is the sleeve ring sets and pistion kit. I'll take my time between now and X-mass and spread out the work. I have decided to have Chip's Head and Hole Shop in Michigan do all the sleeve work as all the local marine dealers have him doe theirs. Also when I was talking with LA Sleeves they recommended him for the work as well. So three marine dealers and a sleeve supplier recommendations is good enough for me!

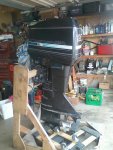
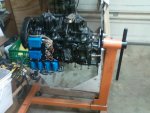
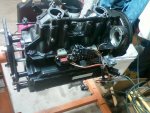
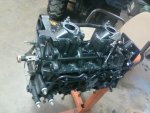
Here are some picks of the motor as it stand today/last night. Will probably get the cowlings, electrical, and carb's off in the next couple of days. Then the really fun parts starts this weekend. Block disassembly!

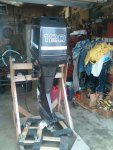
SSPX0077-1.jpg

SSPX0078.jpg

SSPX0079.jpg
 

Frank Acampora

Supreme Mariner
Joined
Jan 19, 2007
Messages
12,004
Re: 1991 Force 120 HP rebuild project

Well, you have it backasswards. The top cylinder is #1 and it is what timing is taken from.

Now: At 125 PSI what you call #3 cylinder can't be all that bad. At worst, I would guess a .010 overbore would be sufficient. Certainly, a new liner is not warranted---unless there is something else you are not telling. Even if a ring flipped out and damaged the exhaust ports, you still could dress them without re-lining.

AND, those liners are cast in. They must be bored out then the new liner press fit back in. Not a small job at all.

As for the other three cylinders, at 135 and 145 PSI they don't need rings. A simple honing and the original rings will very likely bring them to like-new condition
 

j_k_bisson

Lieutenant Junior Grade
Joined
Oct 6, 2010
Messages
1,082
Re: 1991 Force 120 HP rebuild project

Frank I'll take your work on the top to bottom numbering scheme. I did not know which one was which. That is why I listed the orientation.

As to the honing and reusing the rings. I'll do that. It will save me more money! But the grooves in the wall is deeper than 0.010" More in the neighbourhood of 0.020"-0.030" deep. That would require a 0.060" over bore. Not going to do that with leaving the other cylinders alone.
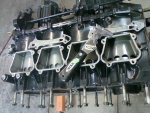
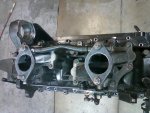
I'll take pics tonight of the cylinder with the head off.and post tomorrow. It' will help clear up the confusion.

Need to remember I am selling this to a Neighbour I like and get along with!!!! I want him to keep talking to me after I sell him this motor.
 

Frank Acampora

Supreme Mariner
Joined
Jan 19, 2007
Messages
12,004
Re: 1991 Force 120 HP rebuild project

Something doesn't jive with what the compression number is and the wall scoring. You wrote 125. Did you mean 25? At any rate, let the machine shop tell you what it needs.

Maximum recommended overbore is .030 although Wiseco does make an .040 over piston.
I do think that unless you can get a really cheap sleeve, it will cost more than 200 to resleeve one cylinder. That takes a lot of labor.

I suspect that you will really enjoy rebuilding the engine and once done, you should have no worries in selling it to your neighbor. HOWEVER: There are limits! Be certain that he understands that it is a rebuilt and not a new engine. Make it crystal clear that once the engine leaves your hands you can not be responsible for damage. For example: If he messes with the carbs and melts a piston, that's not your fault. If it is damaged due to improper oiling, that's not your fault. If it throws a rod THAT would most likely be your fault for incorrectly installing rod caps and incorrectly torquing cap bolts.

By convention, outboards are numbered top to bottom with the top cylinder being #1. Even the vees are the same with one side being odd and the other being even.
 

zopperman

Lieutenant Commander
Joined
Jun 22, 2011
Messages
1,551
Re: 1991 Force 120 HP rebuild project

take a lot of pics! Looking forward to this one -- I'm with frank, why is the compression so good?
 

j_k_bisson

Lieutenant Junior Grade
Joined
Oct 6, 2010
Messages
1,082
Re: 1991 Force 120 HP rebuild project

take a lot of pics! Looking forward to this one -- I'm with frank, why is the compression so good?

The compression is so good is due to I am perinoid about blowing a motor.

We I got the boat I went thru the motor. I rebuilt the carbs, fuel pump, chg'd plugs, and lower unit oil. Had a problem stalling when coming into a dock. So compression check every time and discovered the spread on the compression of the top two cylinders. The second from the top kept dropping 5psi every time I ran it. So I pulled the head off and discovered the scoring/ring problem. So I stopped using the boat and rebuild the Evinrude I am running now. I wanted more power and went with a 1987 Evinrude 225hp. So now it's time to get rid of the 120hp motor.

So to summarize the compression is good because I did not destroy the motor by running it. I stopped and investigated before that happened. So now the repair is minor/major. If I was not selling it to a neighbour I would not be doing enything.

Hell I was thinking of keeping it and looking for a 1990's Bayliner 2302 with twin 120's and use this one for parts. But that is not to be. The wife has told me no new boats for a couple of years..... Plus If I really wanted to I could take the Evinrude and put it on the 23' Would use the same amount of gas.....
 

j_k_bisson

Lieutenant Junior Grade
Joined
Oct 6, 2010
Messages
1,082
Update 10-29-2011

Update 10-29-2011

Well forgot to take pick of a few of the steps to get the power head off. So I'll give a rough list of what comes off and how.

First took off the rear lower shroud buy taking the 6 5/16" bolts that run vertailly along the split line on both sides of the motor. Then there where 6 more 5/16" bolts inside the pan run along the rear horizontal split line that runs rear ward from side to side. This gave me access to the 7 3/8" bolts from the bottom of the mid drive unit that secure the block to it. also had to take 4 3/8" bolts front top. but had to remove the carbs, and shift linkage to get at them. removed the carbs as a unit without touching the linkages so thing will be easier to identify where things go. Also put the bolt in the holes that they came from. no trying to figure out what length went where.

After these items where off I also started into the wring harnes. I remove all the screws that secired the harnes to the lower pan. Next I removed the starter. This was to make the block more manageable and give me a lifting point to the chain. Then I zipped tied the harness up to the side of the motor. I did the same with the zip ties with the spark plug wires. Do not need any one of the wires coming out of the coil or getting pinched on the block separation step. Could of removed all the elctrical from the power head like it said in the manual but I did not want to be working off a step ladder or milk crates. I'll wait until the block is on the stand.

Next I lifted the block and tried to separte the block from the mid housing. It was glued on perfectly. Would not let go. I used a light pressure with a pry bar between the two piece along the front of the block on the start side. there has two heavy duty flanges that where strong enough to aid the separation. after the vacuum whas broke they camer apart freely. here is a pick of what they look like after I was done.

SSPX0087.jpg

SSPX0089.jpg

This is what the mid unit looked like after getting the block off. I did not even pull the lower unit ont his. The drive sfat did come out, but I will be able to just drop it back in and be running.

SSPX0088.jpg

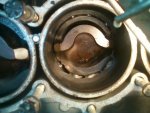
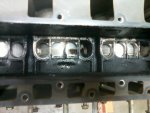
As to the cylinder that is scored, I looked at it again and it only needs a 0.010" over bore and new piston. I'll hone the other cylinders with a flex hone and re check the end gaps. if they fall in spec they go back in. Here is the pics of the pistion and wall.

SSPX0084.jpg

SSPX0086.jpg

Tonight the it gets mounted to the engine stand and then the relectrical comes off. That is if I get the ATV done in a short time. Wish me luck.
 

jerryjerry05

Supreme Mariner
Joined
May 7, 2008
Messages
18,036
Re: Update 10-29-2011

Re: Update 10-29-2011

I bought a 125/88 for parts.Got it running and found 150# on all 4 cyl.
Had it sold and was checking it out(don't wanna sell any problems)I found one of the cylinders scored enough to need a re-bore.So good compression can be had even if it needs repair.
My 88/85 started missing at high rpm's.Comp was 150# on all 3. The head and gasket needed repair and replacing.
It's good you found the problem before it really trashed anything.
Re-sleeving the cylinder??? Buy another powerhead.I've never found a shop that would even think about it.
While you have it this far apart,replace the impeller and change the oil.That way your sure the motor will have NO problems.J
 

j_k_bisson

Lieutenant Junior Grade
Joined
Oct 6, 2010
Messages
1,082
Re: Update 10-29-2011

Re: Update 10-29-2011

I bought a 125/88 for parts.Got it running and found 150# on all 4 cyl.
Had it sold and was checking it out(don't wanna sell any problems)I found one of the cylinders scored enough to need a re-bore.So good compression can be had even if it needs repair.
My 88/85 started missing at high rpm's.Comp was 150# on all 3. The head and gasket needed repair and replacing.
It's good you found the problem before it really trashed anything.
Re-sleeving the cylinder??? Buy another powerhead.I've never found a shop that would even think about it.
While you have it this far apart,replace the impeller and change the oil.That way your sure the motor will have NO problems.J

If a new power head is needed then this is going to a scrap yard for the aluminum value.

But with looking at it visually it could probably only need a bore and hone job to 0.020" If it is larger than that, then it's a sleeve. This is due to the rule of anything larger than 0.020" over bore more then the other cylinders, then they all need to be bored. I'm not boring every cylinder and then buying new pistons for every cylinder. It's not worth the cost of rebuilding then for what I am selling it for. Or is this the rule?
 

j_k_bisson

Lieutenant Junior Grade
Joined
Oct 6, 2010
Messages
1,082
Update 10-30-2011

Update 10-30-2011

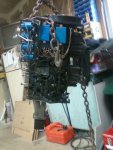
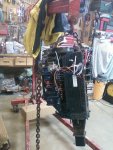
Didn't get much done last night, only remove the bottom housing adapter plate from the bottom of the block. Then mounted the motor to an engine stand. here is the pics of the finished product. It's on hold until the Atv is put back together.

SSPX0091.jpg

SSPX0090.jpg

So it maybe a while to my next post. Probably a week or so. See you then....
 

Frank Acampora

Supreme Mariner
Joined
Jan 19, 2007
Messages
12,004
Re: 1991 Force 120 HP rebuild project

All size replacement pistons are balanced to factory weight. The displacement is so small that even a .030 overbore only adds 1/2 cubic inch. The engine will never notice it. SO: you can bore a single cylinder on three and four cylinder engines up to .030 without worrying about imbalance or cylinder wall thickness.

Since the machine shop needs to set up the block in a jig to bore (and hone), there is an up-charge for only one cylinder. Multiple boring on the same jig costs less per hole. My rule of thumb is if only one cylinder needs boring--do it. If two or more need boring, while the block is in the boring jig, might as well do all three or four and have a rebuilt engine.
 

j_k_bisson

Lieutenant Junior Grade
Joined
Oct 6, 2010
Messages
1,082
Update 11-5-2011

Update 11-5-2011

Well have not be working on this project as I have been getting both my vehicles maintence done before the snow flies. I have been letting these things slide all summer inorder to go fishing. So nows the time to catch up! So last night after two oil changes, plugs in the truck, and a rear wheel bearing in the car, I finally got back into the motor rebuild project.

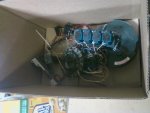
I finally got the 1/4-20nc hardened bolts to remove the flywheel. I have the Harbour Frieght puller. It does not come with the required size bolts for this job. So make sure you get the hardened bolts for this. the regular ones will not do. Also a couple of thick washers. Anyways after I torqued up the tensioner on the puller and gave the fly wheel a wack with my trusty 3 lb soft dead blow hammer, she came off with a bang! Then off came the entire electricl system. Did not disconnect anything. Also I used three zip ties to bond together the trigger and stator for removal and transport to the box. Here are a couple of pics of after I was done.

SSPX0097.jpg

SSPX0100.jpg

SSPX0101.jpg

Tonight when I get to it, it comes apart. I'll post the aftermath tomorrow.
 

j_k_bisson

Lieutenant Junior Grade
Joined
Oct 6, 2010
Messages
1,082
Update 11-6-2011

Update 11-6-2011

Really got into this last night. The work on the car went without problems so It left a ton of time for theis project. Here is how it went;

Started with the exhaust cover removal. I always use a impact gun on any bolts that I think might break. This might be the wrong approach to some people, but I find that the impact seams to break loose the bolts instead of my mighty hands trying to break a bolt loose with constant pressure. I tend to alway snap bolts due to not knowing how much pressure to use. The impact tends to know better than I do. Also I always start low with the pressure on the impact and work my way up when trying to loosen stuburn bolts. Anyways they all came out without breaking. Not bad I think for a 20 year old motor..... Here are the pics of this step;

SSPX0106.jpg

This is what the holes that the ring broke on look like.

SSPX0107.jpg

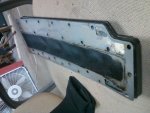
One thing poped up when looking at the part/manifold that came off. Are these mid plates reusable? Or do I have to get a new one? It's not corroded but warpped alot! Here is a pic...

SSPX0102.jpg

Next I moved over to the intake/transfer port side of the block. This side I did not expect problems with the bolts. This is due to no water or heat contact with the bolts. They came out just a smooth as can be. I made a point of taking a lot of pics of this side. there is a ton of bolts with different washers and brackets in different places. When it goes back together this will solve a ton of questions. Here is a couple of more pics.

SSPX0117.jpg

Also another little trick I do when taking things apart. When it comes time to split apart anything being held on by a gasket only, I use my trust painters scraper/knife from Home Depot. I use this but placing it on the center of the gasket thickness and taping thescraper with a little hammer to split the gasket in two. This splits the pieces apart without damaging the surfaces on either part being separated. If you use a screw driver or prybar then the face of the parts get damaged and will need to be cleaned up after with alot of work. Here is a pic of my tusty scraper...

SSPX0114.jpg

Continued next post......
 

Frank Acampora

Supreme Mariner
Joined
Jan 19, 2007
Messages
12,004
Re: Update 11-6-2011

Re: Update 11-6-2011

The stainless exhaust plate will warp the first time you run the engine. Yes, it is reuseable. The gaskets that sandwich it usually are toast but I see that the one on the block is in good condition and the one on the cover appears to be OK too. If I were building the engine for myself, I would re-use them. Someone else gets all new gaskets.

And, you are correct: An impact gun if used correctly will "shock" bolts off without snapping them. It can save some work on the exhaust side but some are so corroded that nothing will get them out.
 

j_k_bisson

Lieutenant Junior Grade
Joined
Oct 6, 2010
Messages
1,082
Update 11-6-2011 ... cont'd

Update 11-6-2011 ... cont'd

Next I stated with splitting the block at the split line. I had to take off the intake covers that hold the reed assemblies in. Was hoping not to touch this section of the motor but there are main bolts under them that need to be removed to split the blocks. Again did not expect any corrosion on these bolts so things came apart quite nicely. Again more pics of before so I know where all the brackets gor and what bolts had what washers on them. Here is the picks of the progress....

SSPX0115.jpg

A pic of the different size bolts for the mains. They are different lengths so orientation is important.

SSPX0109.jpg

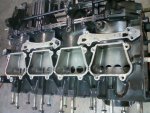
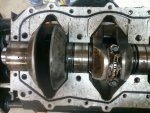
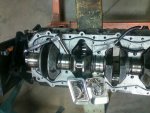
Next I split the halves by remove the bolts on the split line and mains. Here is what it looks like split.

SSPX0110.jpg

I stopped when I got to this step as to go forward I would need a bunch of little ziplock bags to put all the needle bearing that where to come out. My wife would be pissed if If I used all the sandwich bags for the kids lunch on this project. So this afternoon off to the dollar store for bags... Little does she know thou I have already raided the stash for my bolt bags...... Here is the evidence.....

SSPX0119.jpg

Everything nice and organized and labled so when I come looking for a bolt I can find the right one. Nothing worst than digging thru a bucket of bolts looking for the right one.

Continued next post....
 

Attachments

  • SSPX0108.jpg
    SSPX0108.jpg
    135 KB · Views: 0

j_k_bisson

Lieutenant Junior Grade
Joined
Oct 6, 2010
Messages
1,082
Update 11-6-2011 ... cont'd - 3

Update 11-6-2011 ... cont'd - 3

Well after I was done for the night, and after circling the project and cleaning up the place. I decided to tune this project a bit to get as much HP as I can out of this motor. It will not add much but it will help a bit. Say 1-2 hp. How I plan on doing this is before I start cleaning the block by dipping and scrubbing I am going to clean up all the mismatchs on the split line and clean up the transfer openings in the intake and exhaust side of the block. This will help make fuel and exhaust pass throu the hole system at a fast rate and be more effient. Thus creating HP. Here is how i plan on doing it.

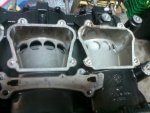
One place is the split line. If you look at the marks where the flange sealant shows the mismatch around the crank journals. I will clean this mismatch to be smooth. A little spoting blueand this will be perfect. Here is the pic of the mistach.

SSPX0108.jpg

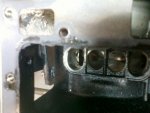
The second is the intake ports. At the factory they have a drilling/milling jsetup that machines these opening every day back in the day. I will make the openings, away from cylinder walls smooth and round the opening that lead into these areas. If you look at the pic you will see again missmatch from the casting to the opening. Just a little clean up with a carbide burr. here is a pic...

SSPX0103.jpg

The third place is on the exhaust side. This side is worst for mis match than the intake. Again the same process....

SSPX0105.jpg

So not much to clean up but every little bit helps. I will also go throu the intake half and clean up all the flash from molding parting lines. Anything that can cause air flow disruptions will be cleaned up.

So now I am off to the dollar store for bags... Will post more tomorrow.......
 

j_k_bisson

Lieutenant Junior Grade
Joined
Oct 6, 2010
Messages
1,082
Re: Update 11-6-2011

Re: Update 11-6-2011

The stainless exhaust plate will warp the first time you run the engine. Yes, it is reuseable. The gaskets that sandwich it usually are toast but I see that the one on the block is in good condition and the one on the cover appears to be OK too. If I were building the engine for myself, I would re-use them. Someone else gets all new gaskets.

And, you are correct: An impact gun if used correctly will "shock" bolts off without snapping them. It can save some work on the exhaust side but some are so corroded that nothing will get them out.

Well Frank, Seeing I bought a complete gasket set from ebay, I'll be using all new gaskets. I have learned from painfull experence that old gaskets are normally the difference between a finely running machine and good running machine. I don't like doing it unless I absolutely have to. I absolutely hate air leaks!

Thanks on confirming the impact. That is something I learned the hard way over the years. Again I hate broken bolts! Never the same after you break one. At least not for me.
 

j_k_bisson

Lieutenant Junior Grade
Joined
Oct 6, 2010
Messages
1,082
Update 11-8-2011

Update 11-8-2011

Well got around to finally working on this project again. This was due to needing a specialty socket for removing the connecting rod bolts. I needed a 1/4" 12 point socket. Try finding one. The only place that was resonably priced was Sears. A whole $4.02 for the sucker. But now I have it. All socket sets come 6 point today for the most part. Anyways. I started removing the bolts from the caps. With them removed I used a saw horse under the block to rest the freed pistons. That was untill I was able to remove the needle bearings and cages from aroudn the crank. Here is how the set up worked along with the tools used.

SSPX0048.jpg

I used a micro set of needle nose pliers, again from Sears, to remove the the needle bearings. Make sure everything is not magnatized. That way you will not magnatise the bearings.

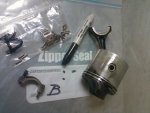
AWhile removing the pistions I found the bottom Pistons' tapered ring broken as well into four pieces. But the pieces did not damage the block thank god. Here is a picture of the piston and pieces.

SSPX0053.jpg

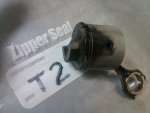
Also I took a picture of the broken piston and ring that scored the block. Here it is.

SSPX0049.jpg

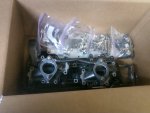
After they where all removed and packaged away in nice dollar store zip lock baggies everything went into a boxe nice and snuggly. Here is another pic....

SSPX0047.jpg

If you notice my work area is very clean. I plan on reusing as many parts as I can. That is including the bearings. So dirt and acid are not freindly to these parts. So rubber gloves and 2 stroke oil for every parts bag before sealing them up. That way nothing goes bad. Don't know when this will be touched again.

Continued next post..........
 

j_k_bisson

Lieutenant Junior Grade
Joined
Oct 6, 2010
Messages
1,082
Update 11-8-2011 Continued

Update 11-8-2011 Continued

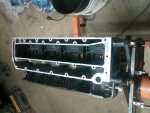
Next I started into the block clean up. I was going to dip the block in a pail of Varsol, but could find my couple of jugs of Varsol. I did have the thought of using Gas I removed from the boat for dipping it. I will probably do it after I finished scrubbing the exhaust port. I did start though in cleaning up the flanges for the intake, exhaust, and the head sides of the block. I use a flat razor blade scraper gingerly to remove the large portions of the old gaskets. Then I use a smooth cut 12" long file to finish the cleaning/dressing of the face. Here are some pic's of the finish sides.

SSPX0042.jpg

SSPX0043.jpg

SSPX0044.jpg

I do not touch the crank split line flange. That will be cleaned up with flange gasket stripper from Locktite along with very light touch of a file right before assembly. For now it stays as it is. Here it is.

SSPX0041.jpg

Next I started cleaning up the exhaust chamber. I sprayed it down with PB Blaster penetrating oil. Let it sit for 20 minutes. Then I used a round wire brush I got from Harbour Freight in a electric drill. It cleaned it up nicely. Now only have to do the corners and the ports. I will probably dip it in the gas and see if that cleans it up with a wire brush and some compressed air. Yes I will do it out side and away from sparks. I'm not an idiot, just like to play like one every once and a while.....

Here is how the exhaust port came out after the wire brushing.

SSPX0040.jpg

So tonight I finish cleaning and then the bore mic comes out. I hoping for the best with the numbers. I'll post the outcome tomorrow. I also looked into the Flex Hone I had from doing my Evinrude 225 last year. It is a 95mm or 3 3/4" modle. Can I use this for this block where the holes are 3 3/8". Can not remember the size of the holes for the Evinrude. Might be able to answer my own question later today when I look it up.

Well wish me luch when measuring. If I need to bore any more holes than one then this becomes my motor and it is not for sale......
 

zopperman

Lieutenant Commander
Joined
Jun 22, 2011
Messages
1,551
Re: Update 11-8-2011 Continued

Re: Update 11-8-2011 Continued

WAY over my head, but a great thread. Could you potentially square the ports to get some extra HP?

forgive my newbie ? but where are the valves? are they the UFO looking things?
 
Top