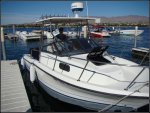
1991 Bayliner Trophy 2002 Transom Repair

Status
Not open for further replies.

wiltop

Cadet
Joined
Mar 2, 2011
Messages
19
Re: 1991 Bayliner Trophy 2002 Transom Repair

Awesome, able to squeeze the family in with what you've done to that boat and most especially taking them on a derby, priceless!!
 

j_k_bisson

Lieutenant Junior Grade
Joined
Oct 6, 2010
Messages
1,082
Re: 1991 Bayliner Trophy 2002 Transom Repair

Thankyou everyone for the kind compliments. My intention when I started this thread was to make a hard core Lake Erie fishing machine that my family could fish from. Seeing that me and my buddies have grown up and started our own families, we don't get together as much to fish. But I wanted to get my kids into fishing so that was the reason for the project. Like I said before, we are keeping it for the next couple of years or until we not longer fit into is as a family. $ kids you know.

Ok now on to maintainence/fixing question. My hand rail is very loose. It seams as the constant pounding of running and grabbing of the hand rail has caused the rail to strip the screws. Could be from the previous owners too. But anyways, I stopped on my way home last night to pick up some #11 self tapping screws to replace the stripped out screws. They didn't have any. Only #12's. Anyone know if there is such a monster as a oversized #10 self tapping stainless screw on the market. Or how do you tighten up loose screws without jumping up to the next size.

Any thoughts on this would be great. I'm sure others have this same problem. The #12 screw head does not fit in the recess for the screw head. I checked last night.
 

proshadetree

Lieutenant Commander
Joined
Jul 19, 2008
Messages
1,887
Re: 1991 Bayliner Trophy 2002 Transom Repair

It seems like these projects are never done. Starter is out on my Baylinner. Glad to see you are getting good use out of her anyway. When are you coming to Tennessee to wax mine? Fish must love it as they just jumped into your boat for the tournament.
 

j_k_bisson

Lieutenant Junior Grade
Joined
Oct 6, 2010
Messages
1,082
Re: 1991 Bayliner Trophy 2002 Transom Repair

Proshadetree nice to hear from you. I hope you are having as much fun as I am this summer. I'm giving her a pretty good shot at it. All safe and clean fun. But a ton of fishing. The boat is looking abit wrough and not shinny at all. I'm thinking of taking it to the bay washer her in the water. Seeing It's hot as hell and the boat is full of scales. Probably tomorrow night. We'll see. Only thing that will hold up that plan is my buddy coming over to figure out Saterdays and Sundays fishing plan.

Can't decide which way to fish. There is a local tournoment going right now. Week long event in Erieau. First prise $3000 for both heaviest Walleye or Lake Trout/Rainbow. Seeing I just finished fishing for Eye's I'm thinking of going that way. I think I have the big ones zeroed. But The leading fish is 11lbs 2oz's. Basically the fish I just won my last tourney with last week. That took a week to get. I only will have two days and the weater is going to be perfect for fishing. So a Ton of boats to beat. Hard fishing there. Need to do some thinking into the next couple of days.

So needless to say a wash and wax and some serious thinking at the bay washing the boat might be right up my alley. We'll see.
 

ron1261

Recruit
Joined
Sep 22, 2011
Messages
1
Re: 1991 Bayliner Trophy 2002 Transom Repair

jk im just curiouse hom come yo didnt go thru the rear of the hull rather than all the work of pulling the deck as i am getting ready to start the same project, same boat was it the stringers? mine are fine. ron
 

j_k_bisson

Lieutenant Junior Grade
Joined
Oct 6, 2010
Messages
1,082
Re: 1991 Bayliner Trophy 2002 Transom Repair

Because I have never done gel coat repair. and my top was in great condition. Also as an engineer, I did not like cutting apart all the structure of the transom to get into the area and then just glass from one side. I would not be as strong in my opinion.

Also I knew that I would be hanging a bigger motor than recommended. About twice the weight. So I really needed to reinforce the area. Also not room to work unless you make a huge hole.

It was not that hard to do actually. Just the lifting of the top and putting it back on was the difficult part.
 

Sea-Alice

Cadet
Joined
May 7, 2009
Messages
10
Re: 1991 Bayliner Trophy 2002 Transom Repair

Jeff,

Great job on the boat and especially on the forum write-ups. I found it amazing that you could work "all night" on the restoration and then put together such high quality write-ups. I missed the details on the solution you finally settled on for the windshield moldings (my current repair issue), did you finally purchase from Bayliner or some other source?

Congrats on the success you and your family have had fishing. I too enjoy fishing from my 1991 Trophy 2002, its a very seaworthy craft with a hard top and its powered by a saltwater series Yamaha 150 2-stroke.
 

j_k_bisson

Lieutenant Junior Grade
Joined
Oct 6, 2010
Messages
1,082
Re: 1991 Bayliner Trophy 2002 Transom Repair

Yes I dod end up purchasing from Bayliner rep. You can still order all molding for these boats. It was like $1.80/ft I think. But you will need a lot of it to do the whole windshield. Around 50'. Just go to the dealer and ask their parts counter to look it up.

Did yours come with the hard top or did you add it after the fact?
 

Sea-Alice

Cadet
Joined
May 7, 2009
Messages
10
Re: 1991 Bayliner Trophy 2002 Transom Repair

Thanks for the info on the molding. I was fortunate to find a used boat locally that included the hard top. I was unable to find a manufacturer's plate or any ID on it. It sure makes it handy to reach out and grab something solid when fishing in rough seas, or just getting aboard in the driveway! I've attached a photo to give you an idea on its design; while on the trailer the top of the Furuno's radome is a bit under 13 ft. above the ground. I'll gladly provide additional details if you want.

View attachment 115552
 

j_k_bisson

Lieutenant Junior Grade
Joined
Oct 6, 2010
Messages
1,082
Re: 1991 Bayliner Trophy 2002 Transom Repair

Unfortunately your pic did not come thru. Must of done something wrong.... But anyways, right now my main projects reguarding the boat this winter are the following;

-Fix the gel coat on the bottom of the hull. Its starting to flake off in a couple of areas.
-Fix the impact/stress cracks in the side on the cap. 6 spots total.
-Add a table mount inder the shelf in the cabin like newer models.
-Install a trax system for rod holders and downriggers.
-Get the lower unit on the 225 resealed.
-Rebuild the original 120hp force that came with the boat. Have a guy that wants to buy it.
-Save money for the fuel bill next year for a couple week long fishing trips on Lake Erie and Lake Ontario. Two derbies That I want to get into.

It will be a slow winter this year compared to last years. But now need to finish paying the boat off and saving for a new car for the wifey. She let me get the boat running now it is her turn.
 

VISACK

Recruit
Joined
Jun 30, 2021
Messages
2
Update 9-23-2010

Update 9-23-2010

Here is the pics of the boat before I started the project.

View attachment 62881View attachment 62882

Here is a pic of the cap removed from the transom splash well. You can clearly see that the cap and hull have separated and the wood has swelled.

View attachment 62888

I have disassembled most of the interior to get acess to under the floor. I took pictures every where to see is anything was glued or screwed together. Nothing but at the transom. There was a globb of epoxy the glued together the cap and hull at the splash well.

Last night I took a sawall with a 12inch wood blade and cut along the transom crack at the splash well and split the two halfs. Later we lifted off the cap from the hull. I will post pics tomorrow. They are a bit frightening from a safety standpoint. Wife kept the kids in the back yard during all this.

Thanks Jeff
I have a 1999 bayliner trophy 1802 I have same problem. I would like to know how take top part of the boat off the hull. do you have video or more picutures how you separate them and what to you use to left out. thank you and awesome work..
 

VISACK

Recruit
Joined
Jun 30, 2021
Messages
2
Update 11-27-2010 It's Done!!!!!!!!!!!!!!!!!!!!!!

Update 11-27-2010 It's Done!!!!!!!!!!!!!!!!!!!!!!

Well here is the good news and bad news of what happened last night. No one got hurt, and nothing on the boat got broken. The booze got drank, and my head hurts now.

The only thing thing that went wrong, that I can figure out is the camera was broken.:mad: So for all you people out there who are addicted to the level of detail my pics provide, will have to do with my camera phone pics. At least until the good camera gets fixed. The dam camera has a lens error. The lens will not move when you press the power button. There a hundered buck down the drain.:( I hate Nikon cameras!

As to how the boat went. Here is some pics of the process before the camera issues started. In these pics we are lifting the top and getting ready to slide the hull under. We used three cherry pickers on all three corners. On the ***** end I slung a 10,000 lb ratch strap under the hull to get it up high enough. Here the pics.

View attachment 66962
View attachment 66961

Here are some pics of the top at full height and we are tucking the hull under it. We lowered the cap in place and set it on some 6x6 I had around while we reset the cherry pickers to the rear cleats. Then we lowered it the rest of the way down. At that point we stopped. Today I need to see if everything is lined up down below. Make sure no hoses are pinched. Then I can glue the transom and rivet it together. Here are the pics.

View attachment 66963
View attachment 66964
View attachment 66965

The camera broke before I could get a pic of the finished product. All the old rivet holes line up. So I think we have it right where we need it.

Today I plan on working on my hangover. And thats it!!!!!
it's hard to take them apart. the screw that hold them together are easy to remove. i look at my it bolt nut in.
 

j_k_bisson

Lieutenant Junior Grade
Joined
Oct 6, 2010
Messages
1,082
I have a 1999 bayliner trophy 1802 I have same problem. I would like to know how take top part of the boat off the hull. do you have video or more picutures how you separate them and what to you use to left out. thank you and awesome work..
I used 3 engine lifts that where very shaky and dangerous.

I cut the transom with a Sawzall on a 45 degree angle so i would not cut the splash well. Drilled out all the rivets, and took out the screws in the cabin rear wall holding the Upper and Lower halves together. Then other than wiring, and scupper drain tubes, nothing else was holding the 2 halves together.
 

popye

Recruit
Joined
Oct 16, 2021
Messages
4
Thanks for posting.I'm going to be doing transom and stringers on 1976 hourston glass craft 18 ft.have been reading as much as I can before project but feel I'll need as much advice as I can get
 
Status
Not open for further replies.
Top