1990 Sea Ray 180 OB - Refit project by a newbie

gsxrdan

Petty Officer 1st Class
Joined
Aug 28, 2016
Messages
317
That all looks very familiar! Good luck! Im doing the same type o job atm, and from what ive read and seen you probably need to take it all out... all the foam, all the deck and stringers and other bits - and be prepared to drill test holes in the transom to be sure of its soundness.

And welcome to the unholy world of grinding :lol:

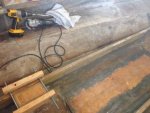
My fav tool for cutting the glass seams down low was thin stainless steel cutting discs for the grinder, only used 2 for the whole boat, and then 12 of the 32 grit flappy discs to grind grind grind - knock out the dust from your respirator frequently or ull get light headed - and then grind grind grind
 

DeepBlue2010

Lieutenant
Joined
Aug 19, 2010
Messages
1,305
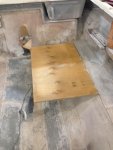
To be able to get to the rotted stringers, the foam needs to go even if it is dry. The area in the middle that you called it the top side of the hull is - I believe - nothing more than a piece of plywood glassed on top of the V shape of the hull to provide a flat bottom for the ski locker storage and gas tank. It is not part of the hull itself. Don't worry yourself with it right now, when you dig out the bulkheads (the cross members) it will be clear.

Regarding what goes and what stays, IMO, every piece of wood on the boat needs to go. Rot is infectious and it starts in the middle of the wood where the glue layers are. The glue itself is what catches the rot first, not the wood and it spreads from there. I have pictures of ply that looks sold on the surface but if you use a hole saw and cut through it you can easily see the two black bands on the sides of the hole. So, keep demoing but be smart about it, take a lot of pictures and measurements.

When the foam and deck are all out, stop and post pictures so we know how the under deck structure is configured.

The edges on the side will go except a very narrow lip - like an inch or so - to act as a guide and height indicator for the new deck.
 

Mr.Stickney

Petty Officer 3rd Class
Joined
Oct 1, 2014
Messages
94
image14.1.JPG image32.JPG

Keep cutting along your current line. The shoulder goes up and meets the hull sides and that is the bottom of the boat which you do not want to cut through. I left the edges on the deck as deep blue mentioned to get an indicator of deck height and profile but eventually took them off so that the fairing of the transition from the deck to the shoulder didn't look so chunky.

As deepblue is suggesting, just keep pulling stuff out, there is no point on going half way now. Make it all new and you'll be more than happy you did. I can attest to that!

The "top side of the hull" is indeed a piece of ply below the fuel tank and in the ski locker, mine was rotten as well, make note of the height of it relative to something that is staying in the boat as the fuel tank is a tight fit below the deck.
 

DeepBlue2010

Lieutenant
Joined
Aug 19, 2010
Messages
1,305
With the gas tank is now out, inspect the heck out of it. The total thickness of the aluminum sheet should be on the label or you can measure it with a digital caliper. I believe it is 30 thou. Use the depth gauge side of the caliper to determine the depth of the deepest corroded area. IIRC, the coast guard regulations allows for no more than 20% of total thickness for the tank to be considered salvageable and treatable. Measure and report and we can take it from there. Also pressure test the tank while you are at it.
 

SeattleHawki

Cadet
Joined
Aug 22, 2016
Messages
17
Dumb question... What is the best way to remove the side panels? If I don't break them, I should be able to reuse as they are in pretty good shape. I think with the dust storm brewing, they should probably come off now.
 

DeepBlue2010

Lieutenant
Joined
Aug 19, 2010
Messages
1,305
Look carefully under the vinyl where it is pleated (bent to make an overlapping layer) you will find screws. Also if you look inside the opening for the cup holders/storage inside the panel you might find some mechanical fasteners

Side Panels.jpg
 

Mr.Stickney

Petty Officer 3rd Class
Joined
Oct 1, 2014
Messages
94
Mine were held in with a 7/16" nut on the back. I had to reach up underneath and undo them with a ratchet, I believe there is 4 along the top and then two on the bottom that go through the little shelf that's there. Just about the entire interior is held in with a 7/16" nut on a stud
 
Top