1990 Force 120HP trim and tilt not keeping motor up no leaks

topgun3690

Ensign
Joined
May 7, 2019
Messages
973
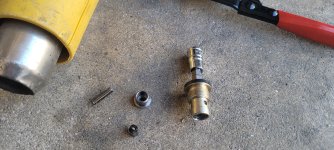
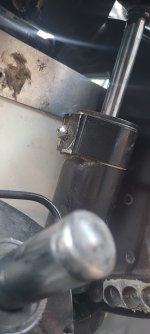
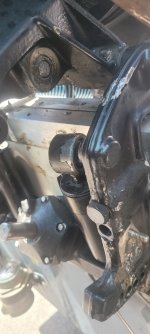
https://forums.iboats.com/threads/some-hints-on-the-t-t-repairing-the-relief-valve.697972/ Look at this thread by Jerry....the valves have to come apart.....without damaging them. He used some panel clip pliers, washers, and heat to get them apart. It's all in that thread.....if the check valves get damaged they will be no good, that is the hardest part of the whole deal. I bought the pliers from Harbor Freight.....they were pretty useless. There are better ones out there.
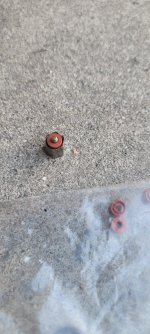
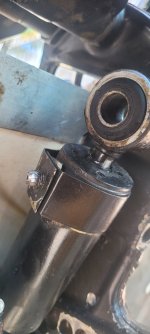
Take the black o-rings off and save them....before using heat. You will need them when putting back together.
 

topgun3690

Ensign
Joined
May 7, 2019
Messages
973
So they pop out not unscrew. Good to know
Yes. Be careful because when the cap lets loose if will fly away.....put a towel over it or something to catch it. Member 59Hustler did this not too long ago. He was outside....when the cap came flying off he had a heck of a time finding the parts. Using the panel clip pliers, washers, and heat will be the best chance of getting them apart without damage.
 

gica

Petty Officer 1st Class
Joined
Feb 24, 2016
Messages
393
Ok one done. I use a heat gun. Safer.
The black are is tye old seal I guess.
 

Attachments

  • 20230807_162646.jpg
    20230807_162646.jpg
    2.5 MB · Views: 3

topgun3690

Ensign
Joined
May 7, 2019
Messages
973
Good job! The little black seal in that hexagon shaped part....use a pick to get it out....then put one of those red ones in there.
Three more to go......and great idea using the heat gun.
 
Last edited:

gica

Petty Officer 1st Class
Joined
Feb 24, 2016
Messages
393
In the link it showed flat side out for the little seal
 

Attachments

  • 20230807_171249.jpg
    20230807_171249.jpg
    1.1 MB · Views: 2

gica

Petty Officer 1st Class
Joined
Feb 24, 2016
Messages
393
Wanted to point out that there is a lip on the contact area and it is not flat with the surface so it will press against the seal.
I hope that's the way it should be.
 

Attachments

  • 20230807_172249.jpg
    20230807_172249.jpg
    1.3 MB · Views: 1

topgun3690

Ensign
Joined
May 7, 2019
Messages
973
I didn't get this far with mine, lol. Jerry will probably see this early in the morning if you want to be sure and ask him.....but I don't see any other way to do it.
 
Last edited:

gica

Petty Officer 1st Class
Joined
Feb 24, 2016
Messages
393
I put it back and even without bleeding it stays put. So it should be right.
But as I staryed to do the second engine
the line that goes to the tilt cylinder broke off the cylinder. Wtf.
The little part that's left spins and it might come off. I was trying to remove the cylinder by taking out the 4 big nuts but the bit bolt s won't come out even hammered. Looking for pointers.
 

Attachments

  • 20230807_193650.jpg
    20230807_193650.jpg
    1.1 MB · Views: 2
  • 20230807_194050.jpg
    20230807_194050.jpg
    1.1 MB · Views: 2
  • 20230807_194041.jpg
    20230807_194041.jpg
    889.7 KB · Views: 2

topgun3690

Ensign
Joined
May 7, 2019
Messages
973
Maybe use some penetrating oil and heat......salt water probably has them solidified in there.....
may be able to find that fitting and a new line on ebay.....
 

gica

Petty Officer 1st Class
Joined
Feb 24, 2016
Messages
393
So it's supposed to come out on eithwr side right? I will do it tomorrow
 

topgun3690

Ensign
Joined
May 7, 2019
Messages
973
So it's supposed to come out on eithwr side right? I will do it tomorrow
Either side......if threaded on both ends.....
If you could bang em out towards the port side, would only need to move them a couple inches to get the tilt cylinder out......
 
Last edited:

topgun3690

Ensign
Joined
May 7, 2019
Messages
973
Maybe after penetrating oil and heat, try putting double nuts on one end and try to twist it to break it loose....when beatin on it try not to mushroom or deform the ends of the shafts.....FYI
 

jerryjerry05

Supreme Mariner
Joined
May 7, 2008
Messages
17,927
Did you bother to read the sticky (post #4 ???)
It covered a lot of these things for the T@T
Pic# 193650 shows a broken Banjo bolt, can be expensive!! last one I bought was over 25$. Take the top of the ram and get it loose and the banjo bolt will fit over the top.
Taking the bottom bolt out is an almost impossible job, Most times they get damaged and need replacing.
An acetylene torch will help, just remember it gets so hot the aluminum will melt and it will NEVER come out.
 

gica

Petty Officer 1st Class
Joined
Feb 24, 2016
Messages
393
Sticky in post number #4? of the main Force forum?
 

gica

Petty Officer 1st Class
Joined
Feb 24, 2016
Messages
393
I moved the top one. The bottom is stuck. That nipple is pretty bad I tried to spin it to remove at it did a few turns really hard to grab.
 

Attachments

  • 20230808_141741.jpg
    20230808_141741.jpg
    824.1 KB · Views: 3
  • 16915296800514126152715365054572.jpg
    16915296800514126152715365054572.jpg
    1 MB · Views: 2
  • 16915297440473538326178177728979.jpg
    16915297440473538326178177728979.jpg
    875.6 KB · Views: 2

gica

Petty Officer 1st Class
Joined
Feb 24, 2016
Messages
393
That sticky deals with the valves I don't see any references to the broken Banjo bolt. I could be wrong
 
Top