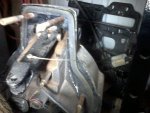
1989 Chaparral Transom Repair

Rick Stephens

Admiral
Joined
Aug 13, 2013
Messages
6,118
I drilled my holes 9/16, then used a soft bottle brush for cleaning paint guns to load the wood in the holes up with resin. Best laid plans, still had to re-drill them 'cause the holes shrunk from the resin.
 

rad1026

Chief Petty Officer
Joined
May 1, 2006
Messages
443
No Title

Thanks for the diagram Dodge. I filled the 5/8" holes with PB and will re-drill them to the required dimension once the transom is installed. I am just seeing what extra protection I can get from any future water intrusion. Not like that is going to happen.

I am going to drill the 1-3/4 diameter angled holes for the steering arm. I guess what I was more concerned with was the additional area that was cut out on the inside. Do I need to worry about cutting that area at an angle to the outside of the transom? Hope I am making sense.
 

Attachments

  • photo243664.jpg
    photo243664.jpg
    136 KB · Views: 2

Rick Stephens

Admiral
Joined
Aug 13, 2013
Messages
6,118
Don't widen the cut until you test fit. The steering cutouts can be fairly shallow on the inside and still clear the steering arm. I over cut mine and had to do some PB filling. That didn't hurt anything since it is outside of the mounting holes that gives the transom strength and a little too much width there didn't effect the overall strength. I would be a lot happier if I had hit my target and not had to fill, just because. I'd bet your transom will fit perfectly with that little bit of added wood you have marked.
 

alldodge

Moderator
Staff member
Joined
Mar 8, 2009
Messages
42,054
Yes I believe so, on my Bravo there is very little room to the left to clear. As Rick says test fit

Photo993.jpg
 

rad1026

Chief Petty Officer
Joined
May 1, 2006
Messages
443
No Title

I had a couple hours Sunday afternoon and got a layer of CSM down on the flat side of the transom. It took more resin then I thought. I used 32 oz. of resin on the one side. It was probably a little more then I needed but I had mixed it up so I used it. I cut the CSM a little larger then the wood thinking I would wrap it around the edges. That didn't work out. I just could not get it to lay down on the edges. So I cut it to the edge and called it good. I really would like to get a wrap around the edges, any tips that might help?
 

Attachments

  • photo244075.jpg
    photo244075.jpg
    136 KB · Views: 5
  • photo244076.jpg
    photo244076.jpg
    130 KB · Views: 5
  • photo244077.jpg
    photo244077.jpg
    140 KB · Views: 5

JASinIL2006

Vice Admiral
Joined
Feb 10, 2012
Messages
5,673
It's really hard to get CSM to lay flat going around sharp corners. If you chamfer or round the edges, you'd have better luck. I have heard of people using a wrap (like sheet plastic or Saran wrap) to hold the CSM down over the corner, but I think the best solution is to round off the corners and then keep working the fiberglass with a roller as the resin starts to kick.
 

rad1026

Chief Petty Officer
Joined
May 1, 2006
Messages
443
You know I saw that Friscoboater did it but the more I think about it, just seems to be overkill. If I PB around the edges and then cover with 1708 I think that will be plenty of protection. I'm going to see if I can pre-fold the CSM to wrap around the edge before I start adding resin, but if that doesn't work I'm not going to worry about it.
 

Rick Stephens

Admiral
Joined
Aug 13, 2013
Messages
6,118
Biax clothe will wrap around darn near anything. Doesn't hurt to mix things. 1708 also wraps nice if you have the patience. Cloth kind a falls into place. I use a heat gun to handle what bubbles occur below and above a tight wrap. Warm it up, use a brush with the bristles chopped off to half their normal length and dab it back down.
 

rad1026

Chief Petty Officer
Joined
May 1, 2006
Messages
443
Okay, I am going to work on the front side tonight. I will give it another try.
 

Woodonglass

Supreme Mariner
Joined
Dec 29, 2009
Messages
25,927
If you SHRED your CSM on the edges it makes it easy to get the edges. Cut your glass 1 1/2" over sized and then tug/tear the edges so they're "Hairy". Then as Rick stated DAB don't brush the Hairy stuff over the edge. It'll lay down really easy with no bubbles. You can tear up some scraps and make "Fuzz Balls" to add more along the edges if you feel the need. But...as you stated, filleting the edges and then laying the 1708 will be more than sufficient.
 

rad1026

Chief Petty Officer
Joined
May 1, 2006
Messages
443
I laid down the top side of the transom last night. I cut the CSM around the edges then took my iron and worked the CSM around the edges until it laid down. Then I took it off and worked the edges until they were nice and hairy. I wet the edges and top really good then put down the CSM. It was only 77 degrees in my garage last night so I mixed the hardener a little more heavy then I have been. It still took nearly two hours to start kicking off. It was a very slow process. I basically rolled the resin on around the edges then got everything good on top. Then used my bubble roller to make sure I had good contact. I wish it would have hardened quicker because I basically walked around it with my roller trying to get a couple spots on the edges to lay down. I kept waiting for it to tack up hoping I could get these couple spots to lay down. There must have been something on the wood in these spots because they never laid down good. Its okay, I will redo those spots. My disappointment came this morning when I went out to check on things and found a spot about 6" in diameter on the top that has air bubbles. I don't know how that could have happened but it did. I didn't see it last night. So tonight I guess I will be grinding that area down and doing it again. My phone was dead this morning so I didn't get any pictures.
 

JASinIL2006

Vice Admiral
Joined
Feb 10, 2012
Messages
5,673
Depending on where you get bubbles, they sometimes are from laying fiberglass over wood that wasn't soaked sufficiently with resin before glassing. I struggled a lot with bubbles on corners and edges when I did my boat. It probably didn't help that the resin took so long to kick. Maybe stuff popped up a bit after you finished working the glass?
 

Woodonglass

Supreme Mariner
Joined
Dec 29, 2009
Messages
25,927
What Catalyst Ratio did you use?? Did you saturate the wood first with resin and let it tack up a bit prior to laying your first layer of CSM?
 
Last edited:

rad1026

Chief Petty Officer
Joined
May 1, 2006
Messages
443
I used a little more then 1/8 oz for 16 oz of resin. No I didn't let it tack up before laying down the CSM. I rolled it out and let it soak in for a few minutes then rolled it again then laid down the CSM.
 

Rick Stephens

Admiral
Joined
Aug 13, 2013
Messages
6,118
If you have a heat gun you can accelerate the kick along those edges. Pretty much everyone gets tired of watching bubbles reform over the couple hours a layup takes. Especially when the problem spots are usually fairly small. Heat them a little and it speeds up the process enormously. WOGs point about an early soaking that is starting to tack is golden.
 

Woodonglass

Supreme Mariner
Joined
Dec 29, 2009
Messages
25,927
I would recommend using the metric system to mix your resin and hardener. It's sooo much easier. Your hardener ratio is way off. You should use 1.5 to 2% hardener ratio. 1/8oz is only 1% That's why it's taking so long to KICK When temps are in the 70's I recommend using a 2% ratio so you should use a bit over 1/4 oz It'll kick in about 30-45 mins if you do. It's always better to let the first coat of resin soak till it kicks. That way if there are areas that Soak up the resin more than others you can apply more resin and avoid dry spots that will STARVE the CSM/Cloth of resin and cause bubbles/air pockets.

http://www.fiberglasssupply.com/pdf/miscellaneous/mekpchart.pdf
 
Last edited:

rad1026

Chief Petty Officer
Joined
May 1, 2006
Messages
443
okay, so much to learn. I thought about putting my heat lamp on it but figured that would set things off unevenly and didn't know if that mattered or not. I figured its like concrete and the longer it takes to cure the better, but I'm finding out that may not be the best strategy. Okay. I will grind and redo the areas I need to and let you all know how it goes. I would really like to get this glued in to the boat this weekend. Supposed to be nice weather, in the low 80's.
 
Top