1989 Bayliner model 1702 Restoration

Ladj679

Cadet
Joined
Apr 23, 2012
Messages
13
Re: 1989 Bayliner model 1702 Restoration

Hi Rickryder,

Thanks for the info on the picture thing. I will adjust accordingly lol.

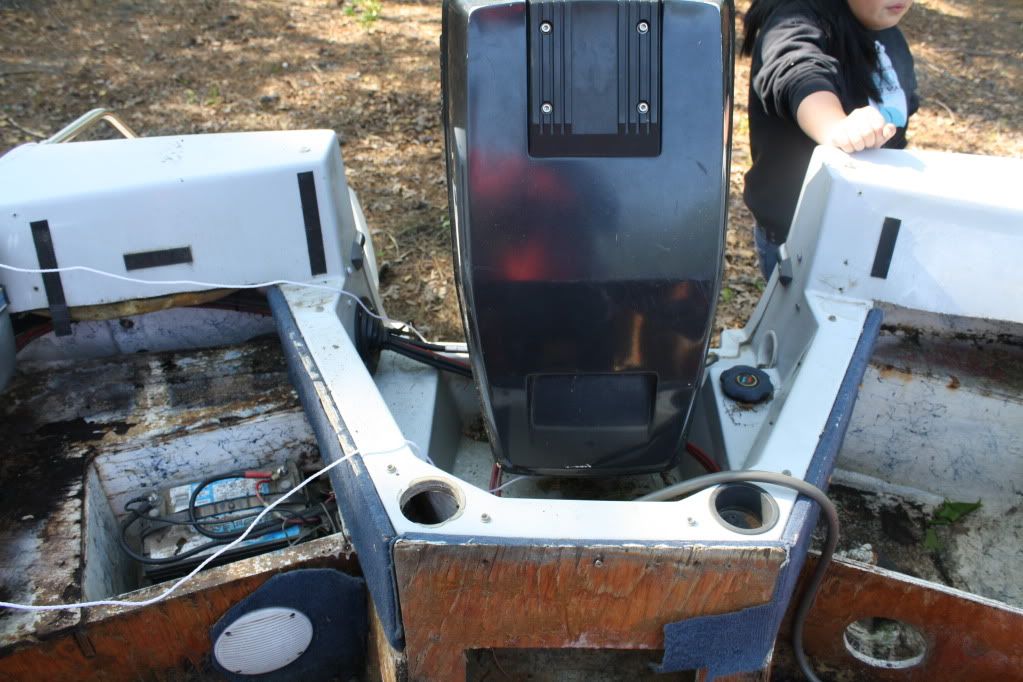
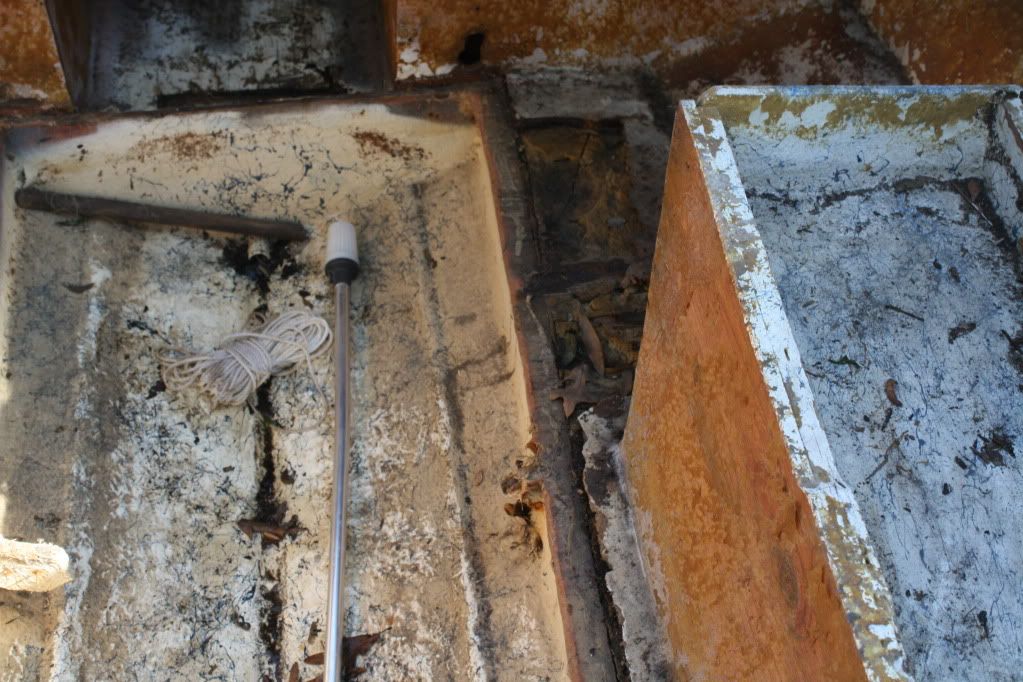
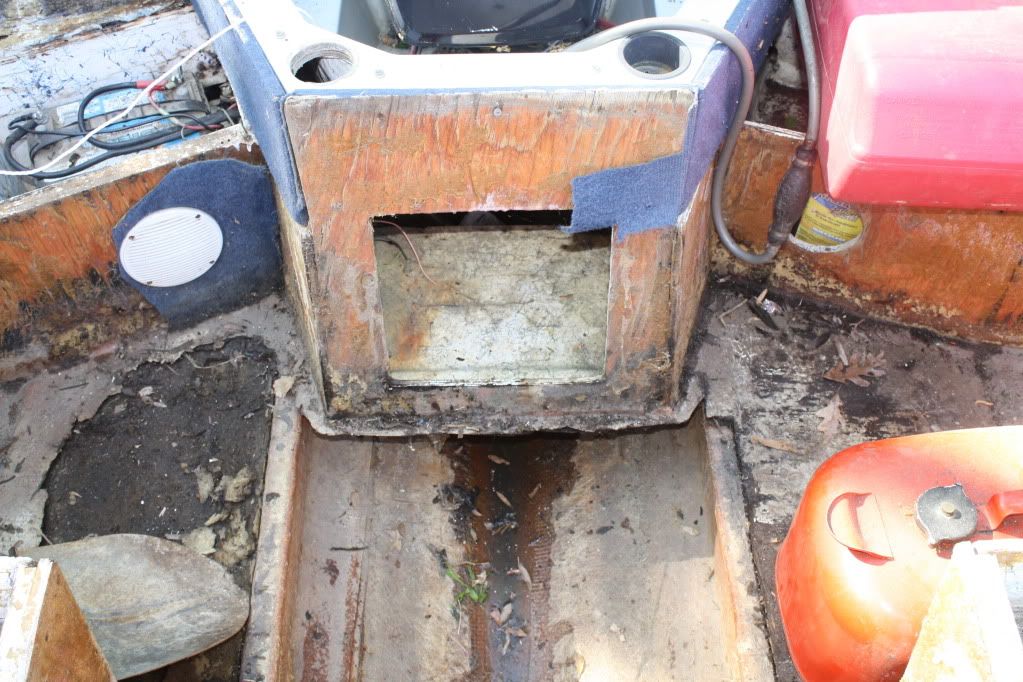
Also another quick question. Reading here on the forums I'm thinking if my floors were that bad then my transom is going to be just as bad. Do I have to take the cap off to redo it. Or is there another way.

IMG_3052.jpg

IMG_3049.jpg

IMG_3050.jpg

IMG_3045.jpg

IMG_3038.jpg

IMG_3042.jpg
 

jbcurt00

Moderator
Staff member
Joined
Oct 25, 2011
Messages
25,072
Re: 1989 Bayliner model 1702 Restoration

IMG_3039.jpg


Delaminating glass that probably was taken up by easily hand. So yep, a complete redo is in order.....

Bayliner's 80's+/- boats were not known for being exceptionally well built originally, but you'll solve that & it'll be significantly better when you finish.

It is unfortunate how many boats end up here after the PO did a spit & polish hack job to make a wreck look bright, shiny & pretty to sell it on to an unsuspecting buyer. I can imagine how many are out there in use, and shouldn't be, tip of an iceberg.....

Congrats on taking the 1st step towards accepting the journey that lies ahead....... The pay off will be worth it when you are finished & off load it at the ramp for the 1st time.....

RE: the seat bases, see the other thread that riptorn suggested, I think there's a video post fairly early that goes over seat base removal, I think there are some screws in places you wouldn't expect. He's vid covers it pretty good....

GT1000000's just started putting the stringers back in his boat & has helpful info on his thread too.

Swing thru the Restoration forum homepage fairly often & read thru some of the threads and you'll pickup info & tips along the way. Once you've read more then you ever thought you'd want or need to know about fiberglass boat construction, tear-down, and put back, read at least that much again.
Be sure to go thru oops' hull extension thread, handy index @pg1
Friscoboater's threads & youtube
WoodOnGlass's all of the links in his signature lines

And the 5 threads the Iboats server deems similar to yours, there posted at the bottom of your thread's page
 

jbcurt00

Moderator
Staff member
Joined
Oct 25, 2011
Messages
25,072
Re: 1989 Bayliner model 1702 Restoration

IMG_3059.jpg

This makes replacing the transom difficult w/ out taking the cap off. The other alternative is to cut the cap a little forward of the front of the splash well, and only remove that part of the cap. The transom runs all the way up into the lip the motor actually sits on. Into a fiberglass pocket, 3-6" tall & the width of the splashwell's back edge, in that picture^^^ I'm guessing 24" +/-.

Your bayliner may be slightly different then some boats, but check the 93 Bayliner thread that riptorn & I both referenced. You'll see he has just about finished putting the transom back into his boat, and he removed the cap. Your's should be very similar to his transom's plywood/fiberglass/splashwell relationship...
 

Ladj679

Cadet
Joined
Apr 23, 2012
Messages
13
Re: 1989 Bayliner model 1702 Restoration

Guys

Thanks for the info. I think I'm going to have to cut it to replace the trasom. I don't have the luxury of a garage so I'll have to adapt and overcome lol. I'm doing all of this outside pretty much like Frisco. Oh well I'll cross that bridge when I get to it. I have to build the engine stands this weekend. Whatever happens I will stay the course. If you guys learn anymore from all the pics pease let me know your opinions. Thank you all
 

jbcurt00

Moderator
Staff member
Joined
Oct 25, 2011
Messages
25,072
Re: 1989 Bayliner model 1702 Restoration

Lots of folks are working outside. I have the narrow, short 1 car garage full of OB's & a FireFlite waiting for more work to be done. The SC is worked on in the short, steep driveway, so I hear you! It's been a tricky winter, hot & sun, cold & rain intermittent:facepalm: snow...

You may have a few options for pulling, storing & working on the cap, but it all depends on your space outside. Many suspend a portion of the boat or cap from a sturdy tree &/or limb... Cutting the back cap off is certainly a frequent choice. So if it gets the job done & possibly back in the water sooner, yep that'd be the way to go.

When you get to taking it apart, you will want to take TONS of pix, TONS of measurements (I find some shots of the tape measure in place & measuring dimensions is also helpful), LOTS of notes & maybe a note or 2 written on the bare hull w/ a sharpie.

You can't have too many references. Even if you intend to put it back different then originally laid out. Save anything that might be useable as a template to match hull contours, shapes & etc.

You can't post too many pix to your thread, just 5 or 6 per posting....
 

riptorn

Chief Petty Officer
Joined
Mar 8, 2012
Messages
433
Re: 1989 Bayliner model 1702 Restoration

Did you check out the thread on the Bayliner cap removal. I think a Bow rider is more difficult than a Cuddy. We don't have the front seat closets to hack at. Your pictures are hard to figure without description. Aside from the hull floor it doesn't seem that bad.
Up front in the cuddy around the little hatch, my floor is flimsy also, they only used quarter inch plywood if that. Must be cheap plywood because no water gets up there.
Oh, how did he get the 10 gallon gas tank out? (David Copperfield?)lol:)
 

Ladj679

Cadet
Joined
Apr 23, 2012
Messages
13
Re: 1989 Bayliner model 1702 Restoration

I don't know how he got the tank out. I do have a question. I know there is a 10 gallon gas tank for a 1989 bayliner cuddy cabin on ebay. Would you guys put in a new tank or should I just stick with the portable. I'm leaning towards portable because If something goes wrong with the tank i'd have to take up the floor again. Also I was reading some other post in the forums and I noticed that if a project is not doable you guys pretty much say so. I guess my boat is not too bad to continue. I'm giving myself a deadline of 6 months to get this thing back in the water. Hopefully I can do it.
 

GT1000000

Rear Admiral
Joined
Jul 13, 2011
Messages
4,916
Re: 1989 Bayliner model 1702 Restoration

Just a heads up...we will guide you with knowledge to get it done right...just don't get down on yourself if the timeline you have set doesn't pan out...unfortunately sometimes "life" gets in the way of our plans and can really put a damper on our progress...

That is not to say that you can't do this in even less than six months...just don't tie yourself to it and if it doesn't happen it will be much less disappointing if that crazy thing called life gets in the way...

I can tell you from my personal experience, I never thought I would be as far along as I am, and that is because I have not put a target date on this restore...so it makes me feel good that I am "ahead of schedule" so to speak...

Best Regards,
GT1M
 

riptorn

Chief Petty Officer
Joined
Mar 8, 2012
Messages
433
Re: 1989 Bayliner model 1702 Restoration

I don't know how he got the tank out. I do have a question. I know there is a 10 gallon gas tank for a 1989 bayliner cuddy cabin on ebay. Would you guys put in a new tank or should I just stick with the portable. I'm leaning towards portable because If something goes wrong with the tank i'd have to take up the floor again.
If your boat it the same as mine. There is no way to take out or put back in that gas tank without taking off the cap. It's pretty tight on the deck to be jumping over gas tanks.
 

Attachments

  • Side view.jpg
    Side view.jpg
    89.3 KB · Views: 0
  • Back.jpg
    Back.jpg
    138.6 KB · Views: 0

Ladj679

Cadet
Joined
Apr 23, 2012
Messages
13
Re: 1989 Bayliner model 1702 Restoration

Rip, we do have the same boats. I really like yours, ill trade ya. I was thinking of using the right back seat area as a place for the tank by not rebuilding that part when i destroy it all. I was thinking of leaving those areas flat for the portable tank and the battery. The tank i was looking at got sold. I am only putting in three captains chairs on swivels on the deck. One for the driver, one on the right side and maybe one in middle. It's only me, my daughter and my wife. I really don't want to take the cap off but it looks like I'm going to have too. I've been watching 93Bayliners videos and he says it isn't that bad but I know with me Mr. Murphy will be in full effect lol, so I don't want to take the chance. Does that sound doable or should I rethink my design? I have re-thought my position after GT1M's comments. I just wanna finish this thing so I won't put a timeline because those comments are def right. I am active duty Navy and there's no telling what's gonna come up even on shore duty lol.
 

riptorn

Chief Petty Officer
Joined
Mar 8, 2012
Messages
433
Re: 1989 Bayliner model 1702 Restoration

Lol. She needs a bit of work too. Is there enough room in that hatch for a gas tank? Looks tight. Should look good with three captain chairs. Don't forget that they swivel and adjust for leg room. Have a look at the cap for signs that it was removed in the past.

The only picture of my captain chair I have right now. I have the boat out in the sun drying out with the chairs out in the garage.
Good luck
 

Attachments

  • Driver.jpg
    Driver.jpg
    143.6 KB · Views: 0

riptorn

Chief Petty Officer
Joined
Mar 8, 2012
Messages
433
Re: 1989 Bayliner model 1702 Restoration

Hey Ladj679, I was out puttering around the boat and doing yard work. While I was weather stripping the hinge on my wind shield I was checking out the cap. You don't need to take the cap off. With the old gas tank out you should be able to see the transom to see if ok. You can always take the cap off later. Not like the bow riders. If the transom is alright go for fixing the floor. Summer is creeping up soon.
You mentioned of getting a brand new outboard motor. Get one with the same weight or lighter as the Force 85hp (i think 285 lb) maybe 95-100hp.
Oh, Do you have the cap for the ign safety kill switch to run the motor?
 

Ladj679

Cadet
Joined
Apr 23, 2012
Messages
13
Re: 1989 Bayliner model 1702 Restoration

Hey guys. I want to share with you my first near disaster that almost happened involving my boat and the neighbor?s house. Well I went to get the boat from my buddy?s house and bring it to mine. I got the boat into my driveway which has a small slope. My neighbor and I unhooked the boat and I get the bright idea that we can move it just the two of us so I can get it in a better position. It still has the engine attached. Well needless to say we moved it and it was further down the slope than I anticipated. It started rolling down the hill straight towards my fence the neighbors fence and his house. We were trying to stop it but I learned real quick that was not gonna happen. I got lucky because my wife had moved one of the chocks while I was backing in. So before the boat goes down the hill it caught on the chock and spun the boat 180 degrees and stopped. If the boat had of went down the hill It would have caused a major amount of damage to his house, fence and possibly my house because it was all downhill from there and there is no way we could've gotten it back up the hill. It wouldn't have stopped moving. I was super lucky. What have I learned from this experience? Chock your tires before you disconnect the boat from the truck and if you have to adjust the position because of a tight fit remember it cannot be done by hand with two people and hook it back up and use the truck. I?m sure you guys already knew this but I didn?t because I'm a noob. I thought I'd share in case there are any other noobs that read this and learn from my near disaster.

Riptorn, Thanks for the info about the cap. That makes me feel much better for now. It's funny you bought up motors, I was talking to a buddy and he was telling me that instead of buying a new motor I should just try to make a deal with a mechanic to fix one of my two Force motors and give the mechanic one of the motors in trade for making the other work. I have a 85 that worked last year and is not locked up and a Force 70 that worked six months ago but will not run now. I was also thinking of selling the two motors as is and using the money to do the restore. A couple of people have told me I can at least get 400 to 500 for both motors even though they aren't running right now. If you tell me where this cap is for the ign safety switch I will have a look tomorrow. Is it a bad thing if I don?t?
 

jbcurt00

Moderator
Staff member
Joined
Oct 25, 2011
Messages
25,072
Re: 1989 Bayliner model 1702 Restoration

Glad a boat~house~fence disaster was avoided. I had a similar 'What was I thinking' moment a while back, and still think of that every single time I move the boat in & out of the garage.

I'm not sure how committed you are to this project: you didn't mention the possible damage to the motor or hull, not even once...:eek: Ok, just kicking ya while your down, sorry..... Good no damage was done to anyone or anything and that you & your neighbor weren't in harms way today too.
 

Brenn

Petty Officer 1st Class
Joined
Jul 10, 2011
Messages
251
Re: 1989 Bayliner model 1702 Restoration

happy to hear you didnt take out anything in your near diaster,looking forward to reading more on your rebuild.
 

riptorn

Chief Petty Officer
Joined
Mar 8, 2012
Messages
433
Re: 1989 Bayliner model 1702 Restoration

Your lucky there man. You got a good wife to cover your back. Must be one hell of a slope.
Ok, The cap goes on the safety start button just to the lower left of your steering wheel, and you can only start the engine if it's pushed in. You could disable it but I wouldn't recommend you do. The cap is like a bottle cap that snaps on it to push in the button. Suppost to strap it to your wrist in case you fall out of the boat. I wouldn't worry about it right now,just rig something up later on. Just a heads up in case you try to start.
This was all new to me when I bought the boat.:)
 

Ladj679

Cadet
Joined
Apr 23, 2012
Messages
13
Re: 1989 Bayliner model 1702 Restoration

Hey guys,

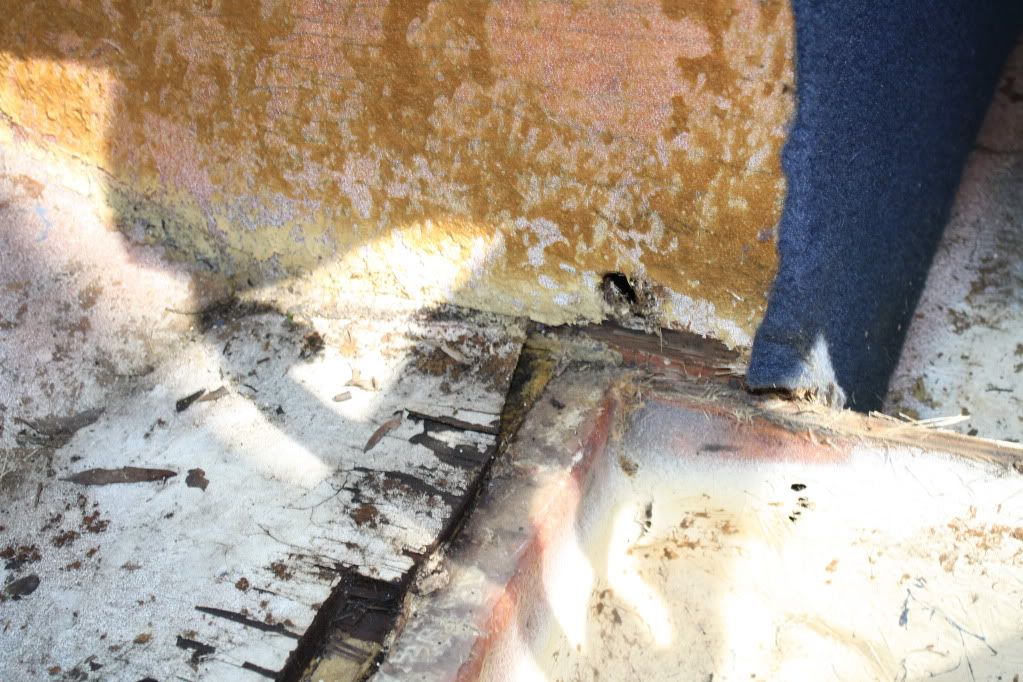
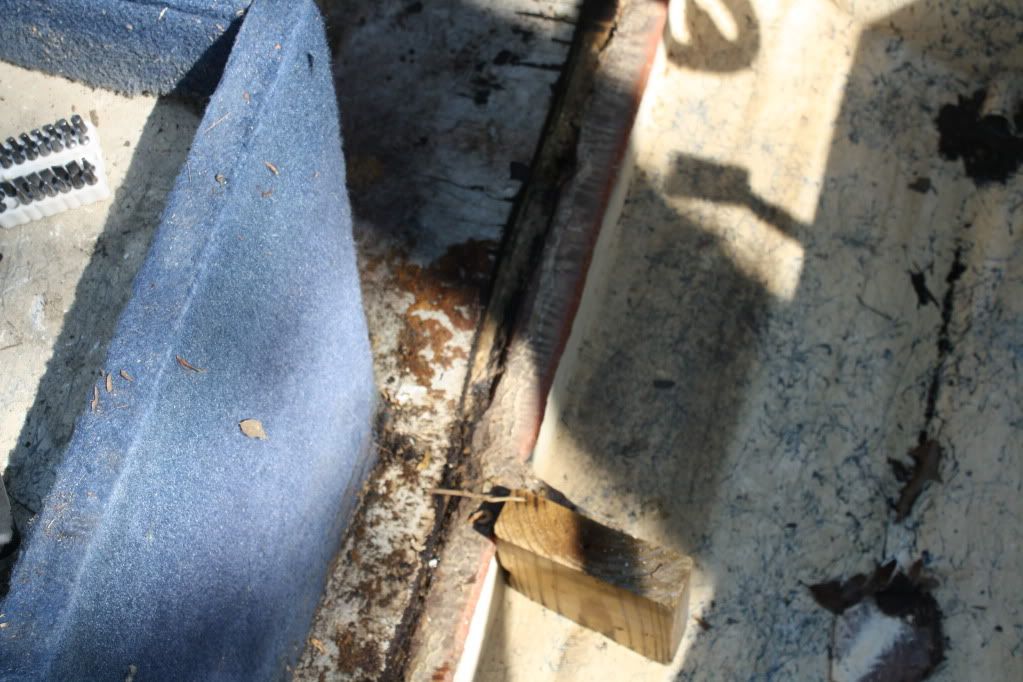
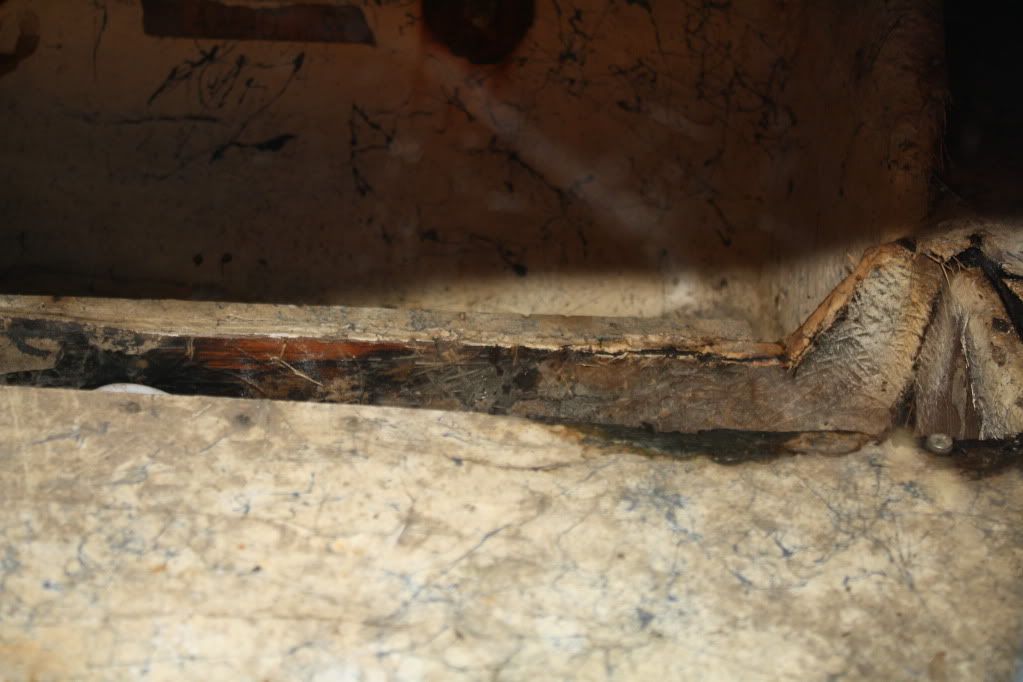
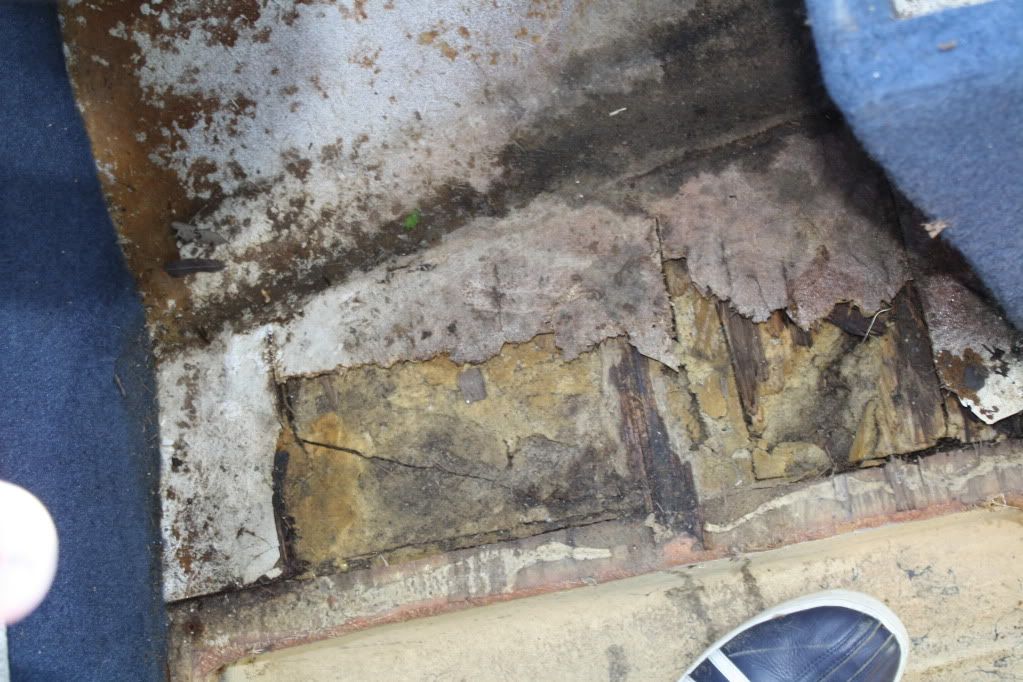
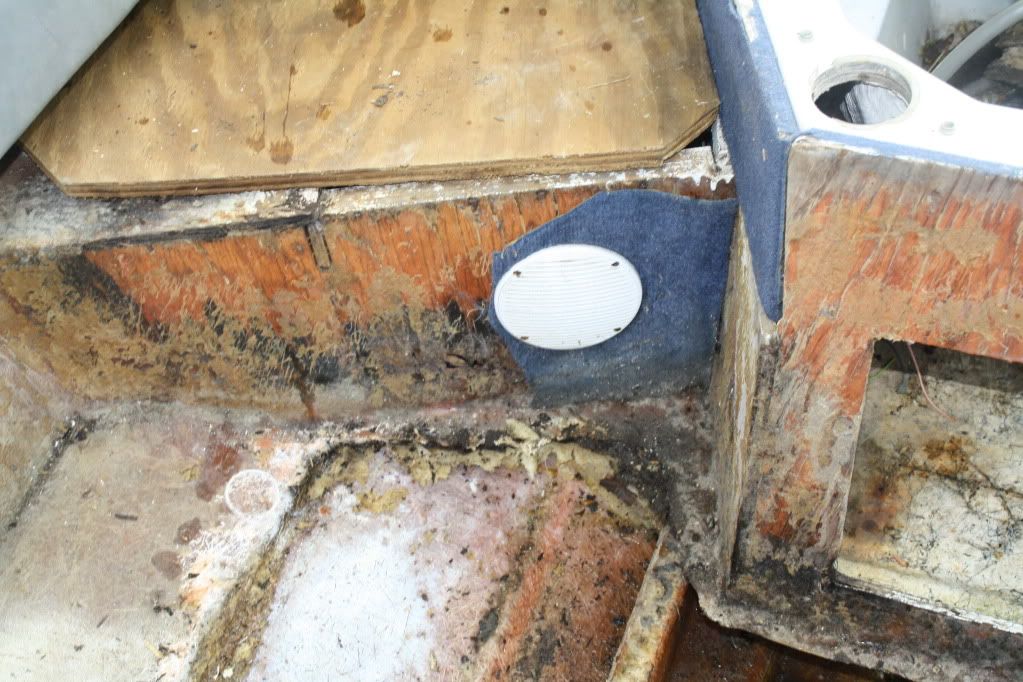
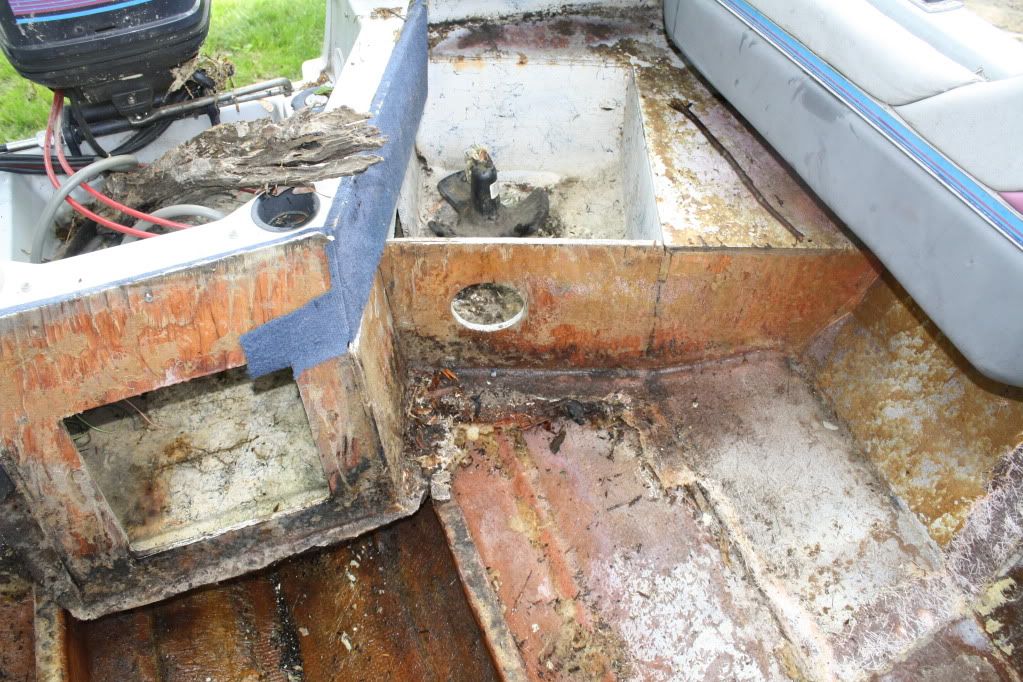
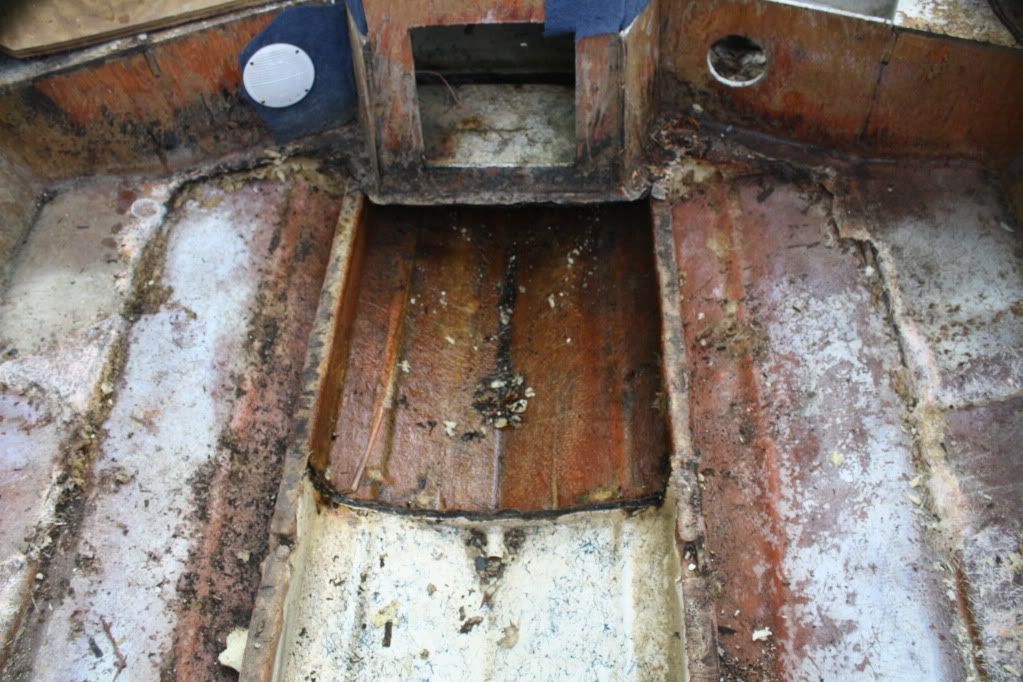
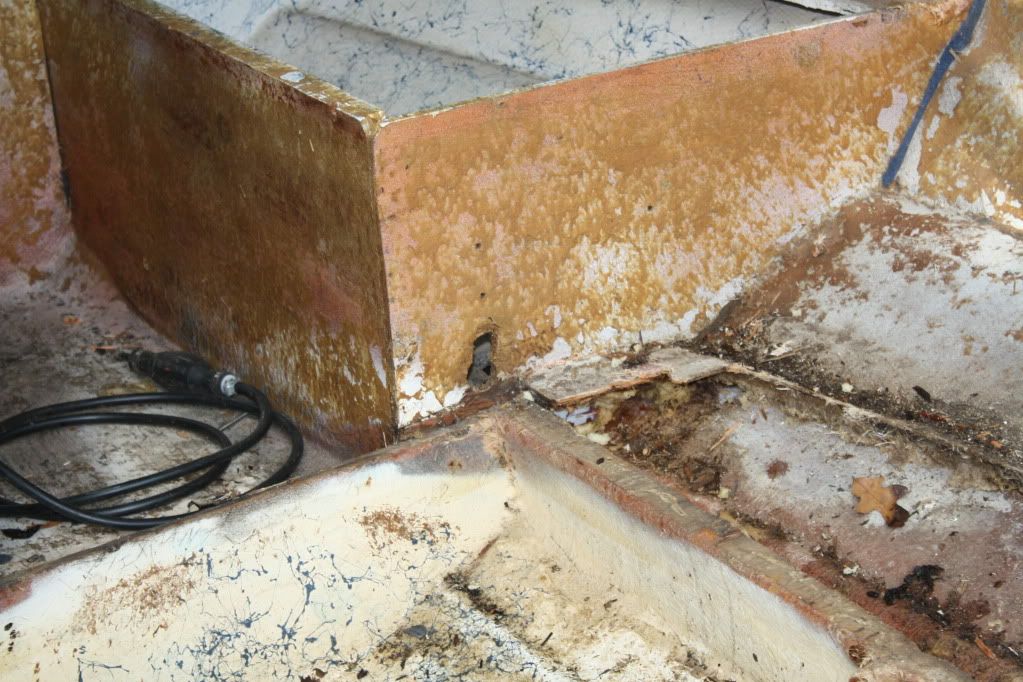
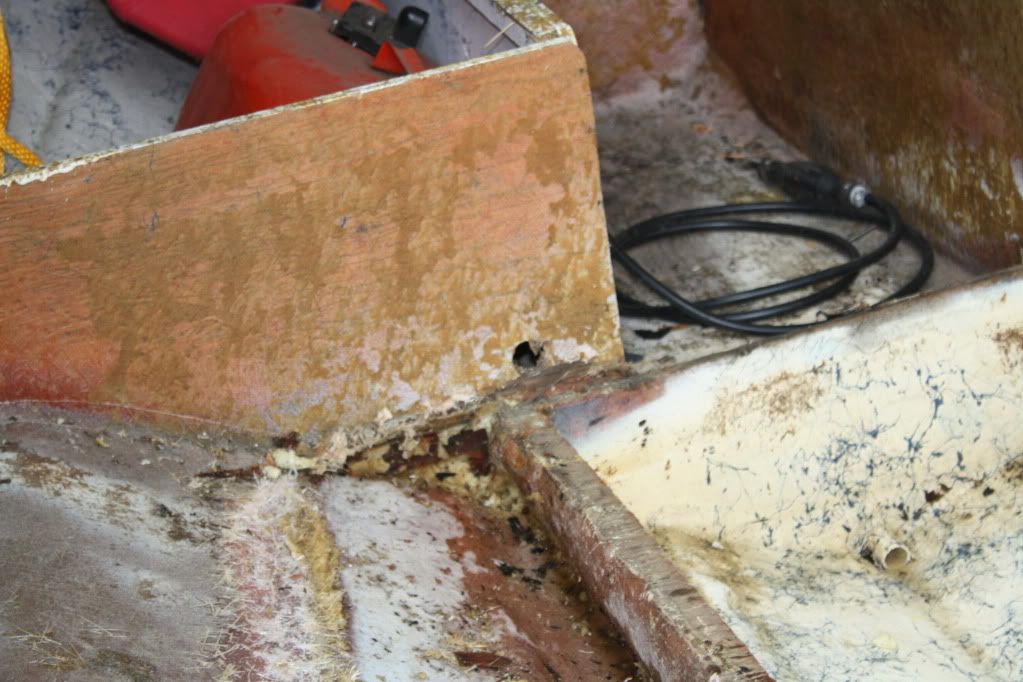
I know its been a few days but I had to play grown up all this week lol. Got to get into the boat today with the wife, we managed to take out both seat bases and get all the foam out. We don't have power tools so we did it all by hand. (my wife is awesome). It took us five hours but we did it and we had alot of laughs. Okay so here's my first question. We found a hole very small in the boat after we removed the foam it's smaller than a dime I'd say it you could get a pen through it. Is that an easy fix since it's not big at all or is this a projet killer? Any guidance would be appreciated on that. Second question is what do we do now up in the cabin area it doesn't look so bad so we were thinking of not replacing that stuff up front. What are you guys opinions after looking at the pics? Third question is what should I do with the wood in the stern area? We don't quite understand how to fully expose the stringers that go back towards the transom. I really don't want to try to take off the cap. The pics below show what I'm tryin to figure out. Thanks everyone. I stil cannot believe I'm doing this but everyting I've done so far is because of you guy's help. Can't say thanks enough.

http://s1167.photobucket.com/albums/q623/ladj679/Boat floor/


IMG_3071.jpg

IMG_3070.jpg

IMG_3068.jpg

IMG_3062.jpg

IMG_3063.jpg

IMG_3060.jpg


http://s1167.photobucket.com/albums/q623/ladj679/Boat floor/
 

GT1000000

Rear Admiral
Joined
Jul 13, 2011
Messages
4,916
Re: 1989 Bayliner model 1702 Restoration

Any holes are easily fixed, just grind around it 3-4 times the size of the hole creating a dished area, clean it inside and out with acetone, put some duct tape on the outside, cut several progressively larger discs of CSM and 1708 to fill it...after you are done with the interior work, you will repeat the procedure on the out side of the hull, and touch-up the gel coat, done...


generalholerepair-1.png


Awesome progress, Kudos to you and the Mrs...
 
Top