1989 Australian Flightcraft 18XLT Deck/Stringers/Upholstery Resto

vincentkm

Seaman Apprentice
Joined
Jan 22, 2013
Messages
31
Finally decided to break down and post up after months of lurking. Too many questions to keep hijacking threads so I decided to start my own. I will be writing this up more once I get to my computer to upload a bunch of pictures. Stayed tuned for a lengthy read coming later today.

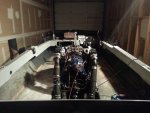
Basically I am a first timer that got duped into the rotten boat story. All started when I wanted to replace the upholstery. Now the motor is out, decks are up, and there is a circular saw cut through the hull, haha ha.

This thing is so far over budget it isnt funny. I am going to need some help getting materials estimated, I will be getting more pictures and measurments today.

Vinnie.
 

GWPSR

Senior Chief Petty Officer
Joined
Jul 25, 2012
Messages
758
Re: 1989 Australian Flightcraft 18XLT Deck/Stringers/Upholstery Resto

No pun intended, but you are in the same boat as many of us. OK, maybe I did intend to pun. :)

I enjoy following along on other folks restos. The process is just as interesting as doing my own, but I don't have to wear a respirator or bunny suit while I read.

Good luck on your project.
 

vincentkm

Seaman Apprentice
Joined
Jan 22, 2013
Messages
31
Re: 1989 Australian Flightcraft 18XLT Deck/Stringers/Upholstery Resto

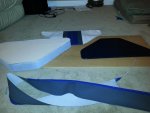
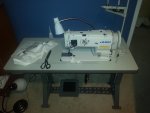
So I bought this boat last June and had a lot of fun with it over the summer. I decided around probably November to try and learn upholstery and re-do the faded and worn out seats. The boat kind of smelled musty and I figured the seat foam must be the culprit. I bought an expensive sewing machine figuring it would be a nice winter project. If I liked upholstery, I would try and do some side jobs. If I didn't, I figured I would sell the machine and still come out on top of what an upholsterer would charge.
20121111_134435.jpg


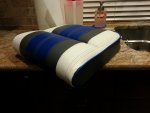
So of course I did a ton of research and here was my first two attempts at the upholstery. This is the drivers seat cushion:
20121119_011205.jpg

20121119_204416.jpg


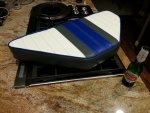
And one of the passenger seat cushions:
20121123_192800.jpg

20121124_195112.jpg

20121126_165748.jpg
 

Attachments

  • 20121119_204416.jpg
    20121119_204416.jpg
    137 KB · Views: 0
  • 20121124_195112.jpg
    20121124_195112.jpg
    151.2 KB · Views: 0
  • 20121130_162151.jpg
    20121130_162151.jpg
    145.8 KB · Views: 0
  • 20121111_134435.jpg
    20121111_134435.jpg
    152.6 KB · Views: 0
  • 20121126_165748.jpg
    20121126_165748.jpg
    147.1 KB · Views: 0

vincentkm

Seaman Apprentice
Joined
Jan 22, 2013
Messages
31
Re: 1989 Australian Flightcraft 18XLT Deck/Stringers/Upholstery Resto

20121126_165846.jpg


20121126_165952.jpg


Not perfect by a long shot, but I was pretty pleased considering I had never sewn so much as a button in my life.

I went to go down and rip more pieces out to continue the upholstery, and thats when I began to discover dampness and soft spots.

So the rest of the upholstery and the carpet came up.

20121202_182300.jpg


And then it was obvious to me that I had some problems. There were big dark spots visible underneath the fiberglass on the decks. I could also see that there were some (bad looking) repair patches in the deck. I was already having that gut-wrenching feeling about all this and I was impatient so I went straight for my old Makita to start cutting out the decking.

.....and knowing nothing about deck-hull joints or boat construction (and being in a little rage)....I cut through the boat

20121209_042504.jpg
 

Attachments

  • 20121202_182300.jpg
    20121202_182300.jpg
    144.7 KB · Views: 0
  • 20121209_042504.jpg
    20121209_042504.jpg
    117 KB · Views: 0

vincentkm

Seaman Apprentice
Joined
Jan 22, 2013
Messages
31
Re: 1989 Australian Flightcraft 18XLT Deck/Stringers/Upholstery Resto

At that moment I knew I was in for a ride. Still knowing nothing about boats, I kind of thought that this meant I was going to have to repaint (gel) the whole boat. So I went through of a couple weeks of denial, complete confusion, completely lacking purpose. I would go out to "work on the boat" and basically end up walking around Home Depot and other stores buying random crap and looking for ideas. I really don't know why I didn't get on the internet sooner, but I think I was reluctant to hear how much I was really in for. So I was stupid, because I wasted a lot of time (and went over the (over budget) budget before I even started buying stuff I really needed) getting not a whole ton accomplished.

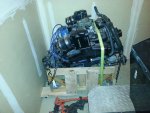
So I took a little tool cart I had made a long time ago out of 2x4's, flipped it on its back, slapped some reinforcements and castors on and voila! I had a little engine stand/cradle. Yeah I know, not pretty, and I had no idea if it would disintegrate under 900lbs, but has worked great. I get a chuckle everytime I look at it because it is dumb luck. It was pieced from scraps in that mostly arent longer that 1.5ft long. No engineering what so ever. Built it like a lego. Ha ha.

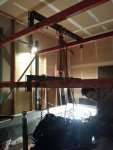
I got the idea for the hoist and crane walking around Costco one day. So yeah, I yanked the motor one night:


20121208_131715.jpg

20121208_233733.jpg

20121209_042552.jpg
 

Attachments

  • 20121208_131715.jpg
    20121208_131715.jpg
    137.4 KB · Views: 0
  • 20121208_233733.jpg
    20121208_233733.jpg
    143.5 KB · Views: 0
  • 20121209_042552.jpg
    20121209_042552.jpg
    146.9 KB · Views: 0

vincentkm

Seaman Apprentice
Joined
Jan 22, 2013
Messages
31
Re: 1989 Australian Flightcraft 18XLT Deck/Stringers/Upholstery Resto

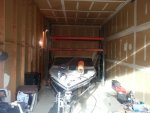
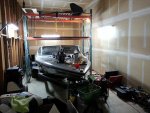
Now, a couple of things about my work environment are noteworthy. I am working out of a rental storage unit.

1. While doing this type of work there is not strictly prohibited, I have to be careful not to draw attention to myself. I am usually there at night and there is rarely anyone anyone near. I can't risk having to deconstruct my "workshop" and skip town. I am in a "green" region and respirators and bunny suits just might get the enviro police on my six. lol.

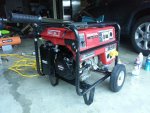
2. The unit has an outlet and a light bulb but I can't take out more than 12-15amps and thats pushing it. The electrical is clearly not up to snuff. Starting up the circular saw badly dimmed the light bulb so I know it is at the end of a long run. I solved this problem by picking up an older Honda 3500 watt generator on the cheap and I completely went through and restored it. It is not a ton of power, but it is good on gas and I am able to run say, a shop vac and a circ saw or grinder simultaneously and have power to spare. This is useful because I have been putting the shop vac outside and running a long long hose inside. I am able to catch almost all grinder dust and I even find it useful for extracting resin fumes and sending it all outside.

Side note- The Shop Vac fine particle disposable bags work awesome also. I had about 10lbs of grinder dust in one without losing hardly any suction.

20130118_161000.jpg

If this was a generator forum I could start a thread just on that. It was in horrible shape and now its as good as new.

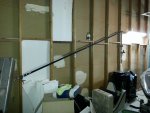
I can also run 2 my two small air compressors at once with it. That is awesome because I have set up a black iron pipe manifold system that combines the air from both of them and I am *thinking* I could probably run a paint gun continuously if needed. So I use the land power to run lighting and small stuff and run the genny for the tools.
20121226_204156.jpg
20130120_004208.jpg


3. Heating. It has been in the 40's lately here, although we were dipping below freezing a couple weeks ago. I have a little 60,000btu forced air heater that runs on a barbeque LP tank and 120v for the fan and another small "Mr.Buddy" radiant propane heater that also runs on a 20lb tank. With these two heaters, I can probably heat the entire unit up to say 80+ degrees----with the door closed. So I have heat or ventilation---but not much of both. It is expensive and I am spending a lot on the LP. Also it makes me extremely nervous to leave them on overnight while I am not there (obviously an unsafe scenario). However, I have done it with success several times (thank goodness) when I need to cure resin or whatever.
20130130_164207.jpg


I picked up some florescent light fixtures at Lowes. With the bulbs included I spent $20 each. I am pleased and I think that this is lot of light for 60 bucks and 240 watts total consumption.

20130120_004039.jpg
 

Attachments

  • 20130118_161000.jpg
    20130118_161000.jpg
    146.2 KB · Views: 0
  • 20130120_004208.jpg
    20130120_004208.jpg
    148.3 KB · Views: 0
  • 20130120_004039.jpg
    20130120_004039.jpg
    146.3 KB · Views: 0

vincentkm

Seaman Apprentice
Joined
Jan 22, 2013
Messages
31
Re: 1989 Australian Flightcraft 18XLT Deck/Stringers/Upholstery Resto

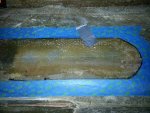
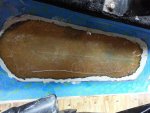
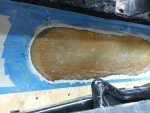
Skipping forward to last night. I began attempting to repair the sawn cut in the hull. The hull in this boat is extremely thin, maybe about 1/8" it appears. Based on varied opinions, I decided to grind out 3" all around the cut on the BOTTOM or exterior of the hull. I am not experienced in fiberglass or auto body work, and it was very difficult for me to gauge the depth of my grinding. I attempted to get a concave "dished" grind in the 3 radial work area.

I put a mylar backer on the exterior/bottom of boat and filled the the actual "kerf" of the cut with peanut butter made with TAP Plastics Bond Coat Poly and colloidal sillica from the top.
Looking down from inside the boat:
20130123_005333.jpg

Then I began trying to lay up glass working underneath the boat. It was miserable and slow going. I needed about 5 more hands to help me hold everything. At first I couldn't get the 1.5oz CSM to stay stuck under there. I ended up reducing several of the patchs I had pre cut into festering blobs of goo. I thickened the resin a bit with colloidal silica to ketchup and I was able to get some 3/4oz CSM on there. I let that kick off a bit.

Then I layed up some 7oz cloth. I don't know why I did this. I don't know if it was a good or bad idea.
20130123_005434.jpg

I let that kick for about an hour and then tried to knock down some of the bumps and drips with a 40 grit flap wheel. Cleaned with acetone

and layed up some more mat.
 

vincentkm

Seaman Apprentice
Joined
Jan 22, 2013
Messages
31
Re: 1989 Australian Flightcraft 18XLT Deck/Stringers/Upholstery Resto

Looking from above with a light underneath I can see air bubbles:
20130123_034415.jpg

I still need lay more cloth to achieve the required buildup, but I dont know what to do about these air bubbles.

I was so careful and did the best i could. I don't know what layer is trapping the bubbles but I just don't think I could do any better even if I started over. I mean, air rises, and I am underneath this thing. Any ideas?
 

vincentkm

Seaman Apprentice
Joined
Jan 22, 2013
Messages
31
Re: 1989 Australian Flightcraft 18XLT Deck/Stringers/Upholstery Resto

20130123_034530.jpg

This is the last picture I took last night. This is with 1 layer 3/4CSM, then 1 layer 7oz cloth, then 1 layer 1.5CSM. I needs more build still in the center, but I quit because I don't know about those air bubbles.
 

vincentkm

Seaman Apprentice
Joined
Jan 22, 2013
Messages
31
Re: 1989 Australian Flightcraft 18XLT Deck/Stringers/Upholstery Resto

Deleted
 

vincentkm

Seaman Apprentice
Joined
Jan 22, 2013
Messages
31
Re: 1989 Australian Flightcraft 18XLT Deck/Stringers/Upholstery Resto

deleted to shorten thread
 

mrdjflores

Lieutenant Junior Grade
Joined
Apr 1, 2009
Messages
1,169
Re: 1989 Australian Flightcraft 18XLT Deck/Stringers/Upholstery Resto

good work so far.
keep it all in one thread.
also, please read the sticky thread at the beginning of the forum, about using photobucket and linking photos in your thread (usually resized to 800x600) for better viewing
 

Woodonglass

Supreme Mariner
Joined
Dec 29, 2009
Messages
25,928
Re: 1989 Australian Flightcraft 18XLT Deck/Stringers/Upholstery Resto

Back off a bit with the camera. I'm not quite sure where this patch is located. Air bubbles are NEVER good and usually need to be ground down and more resin added. What resin are you using?? What Mat and Cloth and where did you purchase it?
 

vincentkm

Seaman Apprentice
Joined
Jan 22, 2013
Messages
31
Re: 1989 Australian Flightcraft 18XLT Deck/Stringers/Upholstery Resto

Hey thanks guys for the replies.

Woodonglass- I will have to try and get some better pictures. The cut is about 6inches long where it went completely through the hull. There is about 12 more inches that didnt make it through the gelcoat, but still cut deeply into the thin hull. This cut is right at the old deck-hull joint, maybe 6inches inboard of the port gunwhale. It is parallel to the gunwhales and starts about 12inches fore of the transom and ends about 30inches fore of the transom. The ground out area is basically 3 inches all around the cut. If that makes sense.

I did grind out all of the layup that I did with air bubbles. Now I am wondering if it is possible to do any better if I re-attempt. That picture shows the ground-out area which is on the underside/exterior/bottom of the hull. The black thing on the left of tbe picture is a scissor jack I am using to support the very edge of the hull, and the black thing on the right is a trailer bunk.

I am using Tap Plastics poly resin and I have different cloths and mats to work with. I was most sucessful with 3/4ozcsm (1.5oz was to heavy and kept falling off). My plan is to alternate CSM and a thin cloth, but I dont know if I can do the layup from underneath without trapping air.
 

GT1000000

Rear Admiral
Joined
Jul 13, 2011
Messages
4,916
Re: 1989 Australian Flightcraft 18XLT Deck/Stringers/Upholstery Resto

Morning Vincent,
You are doing a great job considering your very humble beginnings...

For someone who has rarely sewn a button on, your upholstery work has turned out very professional looking, Nice Job!

I have just caught up with your thread and find it enjoyable, entertaining and most of all it is going to be a valuable educational tool for any who come along...
So, don't fret...we are going to jump aboard, but with so many threads about so many of us duped noobs getting in way over our collective heads, it may take a bit before all the experts around here chime in with good suggestions on how to proceed...

The last couple of suggestions by "mrdjflores" and "woodonglass" are spot on...

Get a Photobucket account and do the pics with that...

Air bubbles are definitely never good, but they will happen...my personal preference is to avoid them as much as possible when doing structural layups, such as stringers, bulkheads and transoms...even then they happen...my solution, if the air bubble isn't too huge, is to use a rotary type tool with a small rounded carbide bit, to grind out the offending air bubble, then re-fill the cavity with thickened resin [aka, Peanut Butter]...then lay some mat over the area...

Also, when working in less than comfortable positions, such as a vertical or upside down section, you can set your self up with some temporary type of clamp/support system using a variety of any or all of the following...

Cardboard covered in wax paper or as you stated earlier, mylar, to lay against the repair, some wood backers to hold up the cardboard to the repaired area, C-clamps, straps, or even some screws through the first repair to hold everything together, then when it is set up, filled with PB, and additional layers of matting/cloth...

Not sure if you are aware of the technique of using your chip brush as a primary tool when applying cloth, but you can use it to gently jab, jab, jab at the matting to help pop bubbles and make it settle, you can also get what is known as a bubble buster roller...it looks like a bunch of pizza cutting wheels mounted on a common shaft and used to gently roll over the wet area and "Bust Bubbles"

Even though it will never work as well as having 12 limbs, you can usually get creative ways to support your repairs in progress with some of the above ideas...

Just try and do a couple of dry runs/rehearsals with your intended repair, before actually going in for the kill...that way you will know what to expect...well, sort of...:rolleyes:

Best of luck on your journey and we'll be along to help any way we can...

Regards,
GT1M
 

jbcurt00

Moderator
Staff member
Joined
Oct 25, 2011
Messages
25,059
Re: 1989 Australian Flightcraft 18XLT Deck/Stringers/Upholstery Resto

Really nice job working in stealth & in less then ideal conditions.

Interesting & very creative air manifold, esp running it up hill w/ a drop to a water/filter and regulator. Should help minimize water settling in your manifold, and make it almost impossible for water to contaminate your paint, great job.

I can't really see the bubbling in your close up pix. Are they really small suspended in the resin, like you 'whipped' the resin when you mixed it. Introducing very small air bubbles that didn't migrate out & off gas as the resin cured? I think this layup looks pretty good:
attachment.php


I've been by before, and you didn't ask any questions, so I hadn't posted anything....

1 for now: Great work so far!

And 1 for earlier to: Looks good, nice work on the engine hoist & stand.I can't really see the bubbling in your close up pix. Are they really small suspended in the resin, like you 'whipped' the resin when you mixed it. Introducing very small air bubbles that didn't migrate out & off gas as the resin cured.


Good luck completing your stealth mission......:cool:
 

vincentkm

Seaman Apprentice
Joined
Jan 22, 2013
Messages
31
Re: 1989 Australian Flightcraft 18XLT Deck/Stringers/Upholstery Resto

Thanks for the replies, I apprieciate them. I had not thought of using cardboard and wax paper. That might be the ticket. The mylar was too flimsy on it's own to hold the layup tight to the hull while it cured. I do have a fiberglass roller, have not tried it yet. I was using the chip brush with the bristles cut in half. Trying to scoop resin out of the cup and glob it up onto the area and then poke. I think I am going to try using resin at 70* instead of 85* and catalyze it a little less to give me more working time.

Yes, the air bubbles were pretty small (about the size of a match head), but there were a lot of them. You can sort of see them in the picture looking down with the light underneath.

I caught pneumonia so I have taken the last few days off. When I get back down there, I will get some better pictures with a real camera instead of my cell
phone, and I will redo the thread with embedded pictures from photobucket.

Again, I apprieciate the the responses. It sure helps with my motivation levels to get down there and work.
 

cofooter

Cadet
Joined
Jan 29, 2013
Messages
13
Re: 1989 Australian Flightcraft 18XLT Deck/Stringers/Upholstery Resto

Vinnie,

Following your thread with great interest. I just dove into the restoration of a similar boat. Mine is a 1992 US version 20XLT but it is an outboard built by Malibu. I think Malibu acquired Flightcraft in 90/91. Likely same exact construction as your boat.

Anyways, interior is all out. Most of the floor was mush and only thing supporting it was the saturated foam underneath. I just removed the first stringer the other day. I sawed off the fiberglass tabbing at the hull and the whole thing came out. Nothing left of the wood at all. All dry rot and the whole thing just fell apart. Still saturated with water after sitting for 5 months now.

I'll be posting up some pics and asking for advice as well. My plan is to have it ready for the lake in April.

Good luck on your restoration!!!
 

vincentkm

Seaman Apprentice
Joined
Jan 22, 2013
Messages
31
Re: 1989 Australian Flightcraft 18XLT Deck/Stringers/Upholstery Resto

Cofooter -great to here we are in it together man! I am really Interested to see the stringer layout on your boat. I am not sure mine has the original setup. I will probably need to bounce some ideas off you here shortly about the construction layout plan for my boat. Specifically interested in comparing the major differences in design after the malibu acquisition as well.

Thanks
 

vincentkm

Seaman Apprentice
Joined
Jan 22, 2013
Messages
31
Re: 1989 Australian Flightcraft 18XLT Deck/Stringers/Upholstery Resto

How did the stringers come out? Cakewalk? I hope you maybe snapped some pics. I am trying to decide if I wanna copy what was in mine or see if there is a more factory stringer setup than mine. Somebody has done some work on mine and its hard to tell what was the original plan.


Vinnie
 
Top