1988 Bayliner Cobra 1800 restoration.

Status
Not open for further replies.

Boatman Brown

Recruit
Joined
Jul 17, 2009
Messages
3
Re: 1988 Bayliner Cobra 1800 restoration.

If you insist on using wood, go to an appliance store, their shipping box's and duct tape will make excellent pattern's, Do one quarter at a time then when all fit properly, duct tape them together to form complete pattern. If you really value your boat, I personally would pour the stern with sea cast, then stringers of the same material! After which a closed cell foam bilge, and a high density foam floor glassed into place! the foam is expensive, but when finished will out-last your Grandchildren!! Good luck! Boatman Brown.
 
Last edited:

jhs5150

Seaman Apprentice
Joined
Jul 5, 2009
Messages
34
Re: 1988 Bayliner Cobra 1800 restoration.

My Force is uglier than yours. I've got an '87 Bayliner Capri.
 

hotrod4303

Cadet
Joined
Mar 11, 2010
Messages
12
Re: 1988 Bayliner Cobra 1800 restoration.

your cobra looks as bad as mine. but i love this boat so i have to do this. i'll love it more when i'm done. good luck on the floor.
 

foobash

Cadet
Joined
Aug 25, 2010
Messages
16
Re: 1988 Bayliner Cobra 1800 restoration.

Hey,

What ever happened with this project? I am new to iboats and purchased the same exact boat, but its a 1987 with a 135HP Mercury BlackMax.

After mastering the search engine on this forum, I will start my own thread soon after taking more pics.

Richard

Philadelphia, PA
 

Kylehartley

Recruit
Joined
Feb 19, 2011
Messages
2
Re: 1988 Bayliner Cobra 1800 restoration.

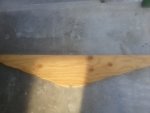
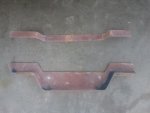
Ok, so. This is 88bliner's little brother. He dosnt have internet or anything right now, but he almost has the boat ready for the interior again. but he needs some help. he removed the fuel tank from the back and there is like a board that is under the tank. we need to know if that is for structual suppor, otherwise he is going to remove it to make room. anyone know if that board is improtant? its in a V shape
 

Kylehartley

Recruit
Joined
Feb 19, 2011
Messages
2
Re: 1988 Bayliner Cobra 1800 restoration.

here is what im talking about:

attachment.php
 

MAXXIE

Chief Petty Officer
Joined
Feb 26, 2009
Messages
556
Re: 1988 Bayliner Cobra 1800 restoration.

I've subscribed to this thread because I'm planning on doing the same job myself. If you could keep this thread up to date for your brother it would help me out for sure. Sorry, can't help with that v-board question, kind of new here myself.
 

dorelse

Chief Petty Officer
Joined
Feb 24, 2003
Messages
624
Re: 1988 Bayliner Cobra 1800 restoration.

I've been thinking about your question...I just don't see how that could be structural. Without some ribs or something to give it any rigidity, I just don't see how that's anything more than protection from the tank damaging the hull.
 
Last edited:

MAXXIE

Chief Petty Officer
Joined
Feb 26, 2009
Messages
556
Re: 1988 Bayliner Cobra 1800 restoration.

88Bliner, any updates on you project? I keep checking back & don't find any updates. I'm now at the point of going to buy the ply for the deck & order the glassing stuff. I'd like to know where your at on your boat.
 

88BLiner

Petty Officer 2nd Class
Joined
Mar 22, 2009
Messages
172
Re: 1988 Bayliner Cobra 1800 restoration.

Hello to all my fellow iboaters, I am finally able to get back on here and also fnally able to work on the boat again. I can't believe it has almost been 2 years. I must appologize to all of you who follow my thread waiting for an update, but don't worry you did not miss anything. I was not able to work on the boat in all that time either. Back in august of 09 I had a bad house fire and lost absolutly everything includin my truck, 10 gallons of epoxy, 30 yards of 1708 glass, and all my tools. Luckaly the boat was parked at storage so it was the only thing I had left. I even had to live on the strets for a few months because no truck= no work. Then because I had no job or address it voilated my probation so I had to be locked up for another few months. I tell you I it wasn't for bad luck I wouldn't have any luck at all. Anyhow I finally got anew house last month and got the boat parked in my drve way 2 weeks ago and I am now ready to get back on her. I am going to work on it all day today and will haved a new update tonight. By the way, does anyone know what happened to Lowkee?
 

88BLiner

Petty Officer 2nd Class
Joined
Mar 22, 2009
Messages
172
Re: 1988 Bayliner Cobra 1800 restoration.

Hey guys, no I didn't disappear again I was just really tired from working on the boat on saturday and went to bed as soon as I was done.i worked on it sunday too so I feel like I got alot done this weekend. I will post my weekemd update monday morning when I get up. I just got home from a easter get together and it is 2am so I need to get to bed. I have lots of pics to post also, so this will be a big update. Thanks for being patientwith me!
 

88BLiner

Petty Officer 2nd Class
Joined
Mar 22, 2009
Messages
172
Re: 1988 Bayliner Cobra 1800 restoration.

Okay, here is the up date for 4/23/2011. I have lot of picks so I will have to do multiple posts.

First off let me tell you the story of my adventures just getting th boat to my house from storage. I lost my truck in te house fire, so I neded to rent one to tow the boat. Soi figured I would rent one from hom depot for $19.95 per hour because it should not take that long. But they told me that they do not rent trucks with hitches:confused:. That made no sense to me because they rent trailers. Oh well off to uhaul. I only needed a pickup but the smallest thing the the local uhal hd was a 15 foot box truck which was over kill but I got it anyway for $60 the whole day.

As I arrived at the storage place I could see that the tarp on the boat had roted and/or ben ripped off the boat:facepalm:. As I walked up to the boat my fears were confermed. The boat was full of water, al the way up to the top of the new transom I had put in over a year ago because I had not gotten a chance to drill the drain hole before the fire distroyed al my tools. Well, I am glad that I did not get he truck from hd because it took me about six hours to get the water out and also load the engine into the back of the truck, all with no help. I also had to rewire the lights on vthe trailer because they were all rotted and brittle. I also found the plug for the lights about 10 feet away so I think the guy who mows the grass must have run it over:mad:. Anyhow I finally got the boat home and everything was fine, UNTIL I had the wife return the truck. She got to uhaul just in time, But she did not replace the gas we had used. So they charged us $160 because of $10 in gas. Oh well, the boats is in the drive way ad I finally get to work on her again:D

The first thin I wanted to do Saturday morning was to take a couple hours to inspect the nedw transom and stringer that I had put in over a year agobecause of all the water that was in the boat. To my surprise they both were dry. I also remember reading in a boat building boat that the fungi or mold that causes wet wood to rot needs air to grow soit can't grow if the wood is totally submerged in water. So maybe that actualy helped, I don't know.
I also wanted to reaquaint myyself with the boat and where I had left off.

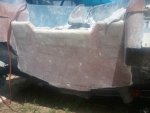
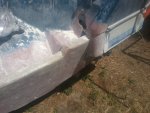
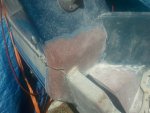
Here are some pics of the boat before I get started back on her. It has just been sittingin the drveway for two weeks now drying out.
 

Attachments

  • Leslie 046-1.jpg
    Leslie 046-1.jpg
    67.1 KB · Views: 2
  • Leslie 047-1.jpg
    Leslie 047-1.jpg
    73.3 KB · Views: 2
  • Leslie 053-1.jpg
    Leslie 053-1.jpg
    59.5 KB · Views: 2
  • Leslie 054-1.jpg
    Leslie 054-1.jpg
    59.3 KB · Views: 2

88BLiner

Petty Officer 2nd Class
Joined
Mar 22, 2009
Messages
172
Re: 1988 Bayliner Cobra 1800 restoration.

After I had looked over the boat for about two hours, I decided to cut into the main stringers near the bow to see if I may be able to get the old stringer out in god enough shape to be able to use them as a template to get the curve of the bow onto the new main stringers.

Leslie 044-1.jpg

Leslie 045-1.jpg

I guess not!

The last pic shows what happened to my cutting wheel while I was cutting. WEAR EYE PROTECTION!!!!!

Leslie 043-1.jpg

After that I decided to take a break and then try to take some measurements and make the three bulkheads that were in the boats. I sure I'm glad I took pics from when I started over a year ago because I do not think I would have remember how many there were or where they went. The next post wil show how I took the measurments to get shape of the hull for the bulk heads.

For some reason it will only let me post 3 or 4 pics in each post. Sorry for so many posts just for one days of work.
 

proshadetree

Lieutenant Commander
Joined
Jul 19, 2008
Messages
1,887
Re: 1988 Bayliner Cobra 1800 restoration.

Post away man. Sorry to read about your stroke of luck but glad to see you back on her. All Baylinners need to be saved before they are used for parts for some old tinny. Look forward to more updates man.
 

88BLiner

Petty Officer 2nd Class
Joined
Mar 22, 2009
Messages
172
Re: 1988 Bayliner Cobra 1800 restoration.

Thanks proshadetree, I will keep them coming.

I wanted to try to make as many part as I could ahead of time so that when I am ready for them they are already cut and ready to install. Plus I am probably stalling all that grinding I am going to have to do:redface::rolleyes:.

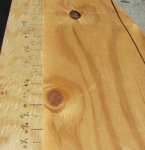
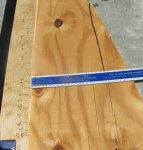
Anyhow, I wanted to make the bulkheads next and I needed to get the shape of the hull. So I found a straight piece of wood that was long enough to sit on top of the outer most stringers. Then I taped it to the stingers just aft of where the bulkhead will sit so I can get a measurment of where the actual bulkhead will be placed. I also added a litle wieght to the board because I have the bow sitting high and the board kept wanting to fall back, that is what the clamp is for in the pic. I am doing rear most bulkhead first which goes between the fuel tank area and the bilge area.

Leslie 186-1-1.jpg

Then I took a ruler and measured from the bottom of the boat to the bottom of the board. I used the level to make sure the ruler was level straight up and down. I took a measurment every half inch from outer most stringer to the other. This was kind of tedius and I had to almost stand to accuratly read the ruler, but as you will see later on it came out right on.

Leslie 188-1-1-1.jpg

This is a close up of the board when I was done measuring.

Leslie 187-1.jpg

Next I took the board and secured it to the top of a piece of ply wood that was large enought to make the template. I then measured from the bottom of the board I used for the measurements from each line and put a dot on the template wood how ever far the measurement said. I did this untl eash mark on the board had a corresponding dot on the template wood. Then I just played connect the dots and cut along the line.

Leslie 191-1.jpg

Leslie 192-1.jpg

The next post will show pics of the finished template after being cut.
 
Last edited:

88BLiner

Petty Officer 2nd Class
Joined
Mar 22, 2009
Messages
172
Re: 1988 Bayliner Cobra 1800 restoration.

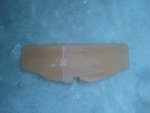
These are some pics of the finished template and how I had the measurement board secured to the template.
Leslie 189-1.jpg

2011-04-25 18.34.29.jpg

I may change the cut out for the drain tube from fiting so close to the drain tube and just cut a 3 to 4 inch arch to keep water from getting trapped in the fuel tank area. I read about a coupl people doing that in one of the threads here on iboats. I would love to say thanks to the person who gave me the Idea but I can not remember which thread it was. It is a very good idea so thanks if you read my thread you will know who you are. I think it was on lowkee's thread. By the way does any one know what happened to lowkee, he has not post in months. Hopehe did not have some bad luck like I did.

As far as the next bulkhead just forward of the fuel tank area that seperates the ski locker and the fuel tank I did the same as the first bulkhead for measurements. This time I used a short piece of 2x4 because there are only 2 main stringers in this area.

Leslie 035-1.jpg

The same process as the rear bulk head was used to cut this second bulkhead except this time I used a piece of wal paneling like they use in moble homes, it was much easier to cut and work with.

2011-04-25 19.49.10.jpg

That is it for the first two bulkheads templates. All that needs to be done now is to trace them on to whatever material you are going to use for the actual bulkhead and cut it out, which will be. 3/4 inch ply wood.

The next post will show the third and final bulkhead in the ski locker.
 
Last edited:

88BLiner

Petty Officer 2nd Class
Joined
Mar 22, 2009
Messages
172
Re: 1988 Bayliner Cobra 1800 restoration.

Okay now for the third and final bulkhead. It is the forward most bulkhead and it is just forward of the ski locker hatch,and because it is in the ski locker it does not go down to the hull. It pretty much just braces the two main stringerfs together. So I don't need to measure for the shape of the hull and I don't ned to make a template. All I needed to do was measure from the outside of one stringer to the outside of the other and cut a piece of wood to fit. Here is a piece of the final bulkhead.

2011-04-25 19.50.20.jpg

All three of the above bulkheads will be notched as well as the stringers so they all fit together like jigsaw puzzle, but the stringers are not in the boat yes so I am not sure exactly where to make the notches, that will have to wait.

By then it was getting dark so I decided to start cleaning up the drain plug for when I am ready to install it into the transom. To clean it up I just decide to sand it wth some 240 grit sandpaper. You can see the big difference in the next pic.

Leslie 195-1.jpg

That about all I got done on Saturday. In the next couple of post I will show Sundays progress.
 

88BLiner

Petty Officer 2nd Class
Joined
Mar 22, 2009
Messages
172
Re: 1988 Bayliner Cobra 1800 restoration.

Alright so here are the first couple things that I got done on Sunday.
I figured that I might as well get some dreaded grinding done. So to get in the mood I decided to start by grinding the top piece of the transom and the splashwell piece that I had cut out in order to replace the transom. I am not sure yet if I will replace the top piece for the transom or not because there is already three layers of 1708 there from the transom replacement. Then there will be two more layers of 1708 there after I replace the splashwell piece, so I do not think I even need to put it back.

2011-04-26 15.16.18.jpg

Then I started grinding on the outside of the transom area to blend in the new glass from the transom replacement. There were also a lot of epoxy runs so I just ground that whole transom section. I am also thinking of putting a piece of stainless steel in this section. It will not be for structure or strength, but just for looks. I just think I would look cool:cool:. As you can see from the pic I also cut out the hole for the drain, no more boat full of water for me. For the drain hole I use a 1 inch hole saw and a borrowed drill because I have not been able to replace mine that burned in the fire.

2011-04-26 15.12.15.jpg

I also ground the splashwell area for when I am ready to replace the section that I cut out. I ground about 6 or 7 inches all around this area for two lyers of 1708 with a 3 inch overlap.
2011-04-26 15.12.55.jpg

2011-04-26 15.12.25.jpg

Next post will the grinding I did in the boat that day. I'll have it up in a couple hours.
 
Status
Not open for further replies.
Top