1988 Bayliner Cobra 1800 restoration.

Status
Not open for further replies.

88BLiner

Petty Officer 2nd Class
Joined
Mar 22, 2009
Messages
172
Re: 1988 Bayliner Cobra 1800 restoration.

Happy Easter everyone, I do not have anymore progress updates today. I had to work all day yesterday. Today we are having a big get together for Easter so probably no work on the boat today either. I did have some time to try to come up with a budget but seeing the way things happen to people on this site that budget will probably go right out the window real quick. But anyhow I figure on not trying to spend more than $2500. Times are tight right now so it will take a lot of buying little things here and there. Luckily, I have been gathering up supplies for the past six months, so I do have some stuff to keep me busy for a while.

The list of stuff I have so far includes:
3 gallons of epoxy $160
10 yards of 1708 biax $90
10 yards of 6oz. cloth $60
2 metal fiberglass rollers $20
2 sheets of 3/4 inch plywood $40
3 sheets of 1/2 inch plywood $40
8 cutting wheels for the grinder $30
2 tubes of 3M 5200 $25
4 4 1/2 inch flapper sanding disks for the grinder 40grit $20

Well I am going to go for now. If I do make any progress later I will post it tonight.
 

lowkee

Lieutenant Commander
Joined
Dec 13, 2008
Messages
1,890
Re: 1988 Bayliner Cobra 1800 restoration.

Hey BLiner, looking good! I feel your pain with the foam and crumbling decking. Sometimes I would rejoice in just getting a 6 inch piece to pull up without breaking.. so much rot! I had pretty good luck with a long crowbar, a scraper (the ones on the shovel handle) and a sawzall to pre-slice the foam (doing that made it come out in big sections rather than one 3" chunk at a time).

I am about 70% through the sanding stage (post-grinding) and can safely say.. you have easier work ahead. I think the wood was the worst part. Grinding is delicate and tiresome work, but almost relaxing as it isn't back breaking and sanding is tougher, but still easier than the wood removal.

One tip for the grinding/sanding part (that i wish I did). Cover EVERYTHING with platic drop cloth, as dust goes truly and absolutely everywhere, and we're not talking a sprinkling.. we're talking 1/4" of dust on everything.

Keep at it and pace yourself. We'll both get there!
 

88BLiner

Petty Officer 2nd Class
Joined
Mar 22, 2009
Messages
172
Re: 1988 Bayliner Cobra 1800 restoration.

Hey guys, I was supposed to work today but the job feel threw, so I got to get some work done on the boat. I actually think that I got a lot done today but it also seems like the more I get done the more I find that needs to get done.

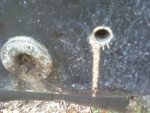
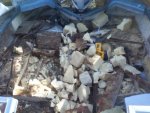
Any how, the first thing I did was drill a hole in the transom to have a look at the wood that came out. I knew what to expect from the looks of that drain hole, but I tried anyway, wishful thinking I guess. The first picture is of the transom and what came out of the hole I drilled. Look it is liquid wood:eek:
To bad the whole transom did not just pour out!

IMG00043.JPG

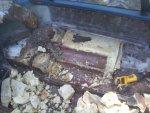
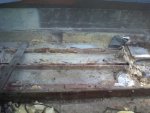
Oh well, on to digging out the foam. I was going to test the foam under the seat boxes and rear floor but there was a whole threw the foam in one area and I could see two more stringers under all that foam that I did not know were there. I thought that there were only two stringers running the length of the boat. Now I know there are six, the two under each seat box are only about 67 inches, so that is not too bad I guess.
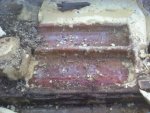
This next two pictures are after digging some of that fun foam out and showing the two surprise stringers.

IMG00044.JPG
IMG00045.JPG

So on I went with cutting out more foam!

IMG00046.JPG

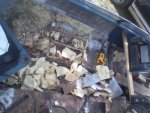
And then MORE Foam!

IMG00047.JPG

Until I finally got all the foam cut out. I saved all the dry foam that I removed in the hopes of coming up with some way to reuse it when I put the boat back together again. Maybe like crumbling it up and putting it back so I do not have to buy as much new foam. So now I have 7 50 gallon garbage bags full of foam.:eek: I have also thought about using plastic soda bottles or the foam sheets you can buy at Home Depot. I do know how the foam sheets will react with the epoxy though. I would really like to not have to put any foam back in to the boat. I think it just causes to many problems, plus it is so expensive.
I do have a question that I hope someone can help me with.
I know that the foam is for flotation if the hull gets breached, but does the foam help the boat float or sit higher in the water in an everyday situation?:confused:

Well I better close this post now before you all fall asleep reading it.
Until next time.
 

88BLiner

Petty Officer 2nd Class
Joined
Mar 22, 2009
Messages
172
Re: 1988 Bayliner Cobra 1800 restoration.

Real quick, here is a picture of all the bags of foam.
IMG00085.JPG
 

88BLiner

Petty Officer 2nd Class
Joined
Mar 22, 2009
Messages
172
Re: 1988 Bayliner Cobra 1800 restoration.

Hey lowkee, I was wondering if you had any ideas about how you are going to create templates for your new wood. It seems that we are having the same problem with the rotted wood. Everything I touch either turns to dust or mud.
 

lowkee

Lieutenant Commander
Joined
Dec 13, 2008
Messages
1,890
Re: 1988 Bayliner Cobra 1800 restoration.

Hey Bliner,

On the foam, I hear quite a few people have used the pink sheets of foam you find at Lowes. I'm on the fence as to whether I'll do it. I think if my boat sinks I'd rather it never come back to haunt me! Who knows, I may change my mind. I do know I will never use the pour-in foam that was in it ever again.

For the templates.. heh, not sure yet. I may just buy a few 1x8 boards, cut them into 1x1 strips, then make a framework of the deck, so I can just draw the outline onto the plywood. Some people used big pieces of cardboard, but I have no idea where to find cardboard that big, let alone enough to make a deck template! Would be nice if you have some place to get them, though.

Maybe even buy a few thin sheets (1/8") of cheezy plywood and just cut to fit. Likely the most difficult method, as if cutting to fit was so easy we wouldn't be making templates.

I have some web work to do the next few days, but hopefully I'll be back in the boat sanding by Thursday. As for you, you are getting close to cutting out those stringers! I used a cutting disc on my 4" grinder to pre-cut the glass in order to get the wood to be more agreeable with my prying methods. Ended up working out well. Don't worry about getting really close on your first pass, just concentrate on the wood, then go for a second, much closer, pass with the cutting disc. Then it's on to grinding! Grinding feels like taking a break after that foam, trust me.
 

bear_69cuda

Commander
Joined
Oct 10, 2008
Messages
2,109
Re: 1988 Bayliner Cobra 1800 restoration.

Hey Bliner!

Great progress dude,

Holy foam! I feel lucky my deck and boat were solid, and all I needed to do was glass the topside. But soon with persistence, and hard work your gonna have a new boat! I also have skipped work to work on the boat. Kinda mental therapy in a very warped sense. As for foam, I'm not sure what I would do? The pink foam cut to shape seems easy enough... I do know my Bayliner has foam injected everywhere also.

I second Lowkee with covering everything while grinding. I had 1/4" of dust everywhere in my garage!
 

JaSla74

Chief Petty Officer
Joined
Oct 14, 2008
Messages
506
Re: 1988 Bayliner Cobra 1800 restoration.

The foam will not raise your boat any higher than normal. It is strictly there to keep her afloat should there be an accident. In some cases it does provide structural support depending how the boat is set up.

The benefit to the foam would be safety. It's a good chance the CG would not have found the one NFL player that survived the recent boating accident in FL had their vessel not had foam in it. The other benefit is that it will dampen the noise level & provide a quieter ride.

I would suggest using block foam & make a breather hole in your stringer for any water to escape. Block foam will NOT absorb water & water will inevitably find its way under your deck, now matter how much you glass, so having an escape route would be beneficial.
 

verybayliner

Cadet
Joined
Apr 20, 2009
Messages
7
Re: 1988 Bayliner Cobra 1800 restoration.

Wow Good Luck!

I am restoring a similar Bayliner Cobra. I am working with an '87 1800 with Force 125. My interior is faded and worn. However, I am not going to removed the plywood. This project is hull repair and top paint. Some new interior details will be done to complete the project.

Maybe when your further into the completion/assembly I can help out with the remaining pocket bolts and parts that do not look familiar any more.

My question is about replacement trim. The transom trim is damaged and needs to be replaced to prevent further water damage to the transom. The trim is rivet installed. Wondering if you have any idea how I can find a replacement?

Here is a picture of the transom trim that I am looking for...
 

Attachments

  • Transom Trim.JPG
    Transom Trim.JPG
    72.9 KB · Views: 2
  • 87 Bay Cobra- Force 125.JPG
    87 Bay Cobra- Force 125.JPG
    88.8 KB · Views: 2

proshadetree

Lieutenant Commander
Joined
Jul 19, 2008
Messages
1,887
Re: 1988 Bayliner Cobra 1800 restoration.

Good looking boats check e bay for parts.They pop up all the time.If you cant find cardboard cheap paneling will work for paterns.
 

88BLiner

Petty Officer 2nd Class
Joined
Mar 22, 2009
Messages
172
Re: 1988 Bayliner Cobra 1800 restoration.

Hey verybayliner, Sorry I have not replied sooner but I have been very busy. I know exactly the piece you are talking about. Or in my case Pieces:(, I had to cut the top of my transom off to remove the wood. The Idea I had was to just cover all of it in some diamond plate that I have left over from my truck. I think it will look pretty sharp. As for the original plastic, I am not sure. Maybe you could try calling Bayliner in Washington. They where very helpful with the questions I had on my boat and they even sent me an owners manual and a sales flyer from 1988.
 
Last edited:

88BLiner

Petty Officer 2nd Class
Joined
Mar 22, 2009
Messages
172
Re: 1988 Bayliner Cobra 1800 restoration.

Hello everyone, I know it has been a couple weeks since the last time I posted but I have been very busy. I have gotten some stuff done on the boat also. Fist of all last weekend I cut the tops of the port side stringers off and removed the wood in the two smaller stringers on the outside. I was going to try and leave the sides but they got pretty chewed up and I think it will be easier to take one side off to make sure that when I start sanding I can get all the rotted wood out. But here is a picture.
IMG00050.JPG

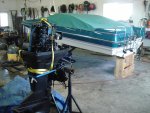
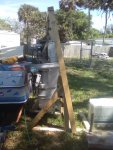
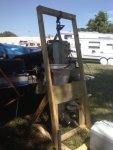
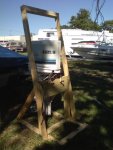
I also needed to cut the knees off of the two main stringers so I could get to work on the transom. But I needed to remove the engine before I could do this just to make sure I did not over stress ant part of the boat. Removing the engine was not the hard part. The hard part was trying to figure out how to do it by myself with out an engine left or engine stand. Finally, I decided just to make an engine stand and lift. I used some extra 2x4s that I had and built the stand, then I made an over head part on the stand and used some ratchet straps to lift the engine off the boat and on to the stand. Here is a picture of what I made. It worked really well.
IMG00056.JPG
IMG00057.JPG
IMG00069.JPG

Well that is pretty much all I got done last Saturday and because I can only put a few pictures in each post, I will write a separate post for each day I worked on the boat. After I eat dinner I will post last Sundays progress.
 

88BLiner

Petty Officer 2nd Class
Joined
Mar 22, 2009
Messages
172
Re: 1988 Bayliner Cobra 1800 restoration.

Okay, I am back and ready to show last Sundays progress. The first thing I did was to cut the knees off of the main stringers and also some of the other complicated looking stuff away from the transom. Here are some pics of this.

IMG00058.JPG

In the above picture you can see the knee and the main stringer on the left of the picture. In the right side of the picture you can see one of the smaller stringers. And in the center near the top you can see two holes drilled for a u-bolt that went threw the transom. I guess as long as I can remember all that I will be alright:confused:

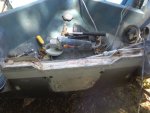
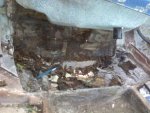
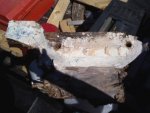
The next couple of pictures are what I found after I cut the top of the transom and the inside fiberglass away from the transom. In one of the pictures you can see some stuff that almost looks like bondo. It was sealing the area between the transom and the splash well. It is hard as a rock and cracks like cement. I was assuming that it was resin with some kind of filler. Maybe someone can help me out with this or at least help me with an Idea on what to replace it with.

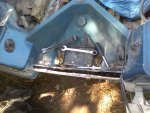
IMG00060.JPG

IMG00061.JPG

IMG00062.JPG

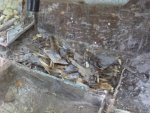
After fighting with this bondo looking stuff and chiseling away at wet wood for about 2 hours I finally decided to quit, regroup and come back another day. Here is a picture of the progress after two hours:(

IMG00064.JPG

Okay, well that is all I got done last weekend. In the next post I will show the progress for this weekend. I will post again after I do some daddy duties, Bye
 
Last edited:

proshadetree

Lieutenant Commander
Joined
Jul 19, 2008
Messages
1,887
Re: 1988 Bayliner Cobra 1800 restoration.

I couldnt see sundays pics but I love the lines on that thing.Keep plugging every thing you do put you one step closer.
 

88BLiner

Petty Officer 2nd Class
Joined
Mar 22, 2009
Messages
172
Re: 1988 Bayliner Cobra 1800 restoration.

Hey just tried re posting the pics. Can you see them now?
 

88BLiner

Petty Officer 2nd Class
Joined
Mar 22, 2009
Messages
172
Re: 1988 Bayliner Cobra 1800 restoration.

Okay, I am back to post yesterdays progress. I think it was the hardest part of the tear down so far. Removing this transom was an all day battle to say the least. That rotten transom was so tough I was thinking to myself that the rotten wood seems to be stronger than the new dry wood. Here are a couple of pictures in the beginning of the fight.
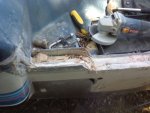
IMG00059.JPG

IMG00065.JPG

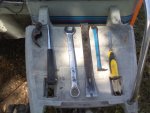
The wood you see removed took me about 2 hours to remove with the tools I had. I posted a picture of the tools here also. Notice the hammer, from this point forward I had no hammer for the rest of the day. I had to use the big pry bar as a hammer. It worked pretty good actually, or atleast it did not break.

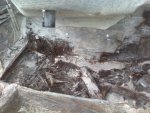
The next three pictures are of the final outcome. The first picture is of the biggest part of the transom that could be saved.

IMG00066.JPG

This second picture is of the rest of the transom. It was a weird setup, The top 3/4 of the transom was 1 1/2 inches of ply. But the bottom part against the hull was a piece of dimetional wood. I do not think I am going to replace this. I am going to just use two pieces of 3/4 inch ply wood laminated together.

IMG00067.JPG

The last of the pictures is an above shot of the top of the transom.

IMG00063.JPG

Well thank goodness that part is over. I called it quits for the day after that. The next post I write will be for today April 26th. I will be back in a few.
 

88BLiner

Petty Officer 2nd Class
Joined
Mar 22, 2009
Messages
172
Re: 1988 Bayliner Cobra 1800 restoration.

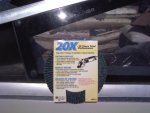
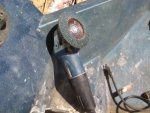
Alright fellow iBoaters, this post is for my progress on April 26th. If you have been keeping up with my thread you know that I just got my transom ripped out and I think I am ready to begin sanding on the port side of the boat. I have decided to complete one side at a time. Which means that I have not removed the stringers on the starboard side of the boat yet. I am doing it this way because I want to make sure that the hull does not change shape. Once again I am probably being overly cautious but I am trying to get this done with as little work as possible. But like I said I think I am ready to start sanding. I am going to use my grinder with a 41/2 inch flap disk at 40 grit as the next two pictures show.

IMG00071.JPG

IMG00072.JPG

I hope these tools are going to work okay. If anyone has any reasons why I should not use these flap disks for the sanding part please let me know. This sanding part for some reason is making me nervous. I think hat is because I know that if I do not do it right everything could come apart on me.

I was also wondering exactly what outcome should I be looking for while sanding? For example should I just be roughing it up a bit or should I be trying to get it totally smooth? I already did some sanding and it sands pretty good but you can feel some hills and grooves with your hand that were left by the grinder. I really hope that is alright because I really do not have the money to go out and buy a sander right now.
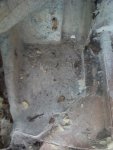
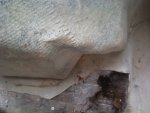
I also noticed some areas in the factory glass work that seemed dry and not have much resin. These areas are very hard to smooth out with the surrounding glass and I was wondering if I could leave them. I was thinking that it may actually help the epoxy and new glass stick better, but I may be wrong. Can someone please give me their opinion on this? I have included some close up pictures of a couple of these areas. I am not sure if you can tell what I am talking about but they are the light colored areas in the next pictures.

IMG00090.JPG

IMG00091.JPG

I was really hoping to get more sanding done but I am worried that I am doing it wrong and I want to make sure am getting the right results before I continue.:confused: All Opinions and suggestions are welcomed. I will talk to you guys again soon!
 

JaSla74

Chief Petty Officer
Joined
Oct 14, 2008
Messages
506
Re: 1988 Bayliner Cobra 1800 restoration.

Flap discs are fine, but I would be very careful with that 40 grit. You can breeze through you hull in a hurry. I used 80 grit on mine. I wouldn't worry about getting it too smooth, just something for the glass to bite on. I would switch to a grinding brush every now & then to help get out the foam.
 

proshadetree

Lieutenant Commander
Joined
Jul 19, 2008
Messages
1,887
Re: 1988 Bayliner Cobra 1800 restoration.

You just cutting the top layer of junk off to get a good bite from the new resin your putting in.$0 grit is fine just dont keep in one spot long and when you start to cut you want to blow that grinder out every day to keep it clean.Also put a fan in your boat pointing out so it will help get rid of some of the dust.
 

88BLiner

Petty Officer 2nd Class
Joined
Mar 22, 2009
Messages
172
Re: 1988 Bayliner Cobra 1800 restoration.

I think I am finally ready to at least test some fiberglass work. I do have one question. I have read countless restore projects here on I boats and everyone of them says to apply multiple layers of fiberglass starting with the thinnest strip on the bottom and add a couple inches with each next piece of glass. My confusion comes in because I downloaded the west system manual and it said to do just the opposite. It says to put the widest piece down first and work your way to the thinnest piece. Can some one please give me some info on this? I am just wondering which way is stronger or is there even a difference.:confused:
 
Status
Not open for further replies.
Top