1988 Bayliner Capri Cuddy Rotten Resto Project - UK

1066

Cadet
Joined
Apr 18, 2012
Messages
11
Re: 1988 Bayliner Capri Cuddy Rotten Resto Project - UK

Hi again Funkiegh_g
Seems like you have been busy! Sorry for the late reply but I've been working away up in Suffolk this week fitting out a boat for a client. Just seen your Tank photos, looks like those repairs worked out nicely!
I know what you mean regarding the cuddy versions, most projects I have seen seem to be the bow-rider boats.
As far as your Fein machine, what a fantastic tool they are! I use them a lot with my work and there is a whole host of blades and scarpers available for them. I just wanted to let you know that there is a place near me that can re-sharpen the saw blades should you need to get them done. New blades are quite pricey! I think a its about ?8 for a re sharpen and takes about a week to get them turned around.
Anyway I have boat bits to build so will sign off for now before I write another essay !

Happy building!
 

Funkiegh_g

Cadet
Joined
Feb 8, 2012
Messages
28
Re: 1988 Bayliner Capri Cuddy Rotten Resto Project - UK

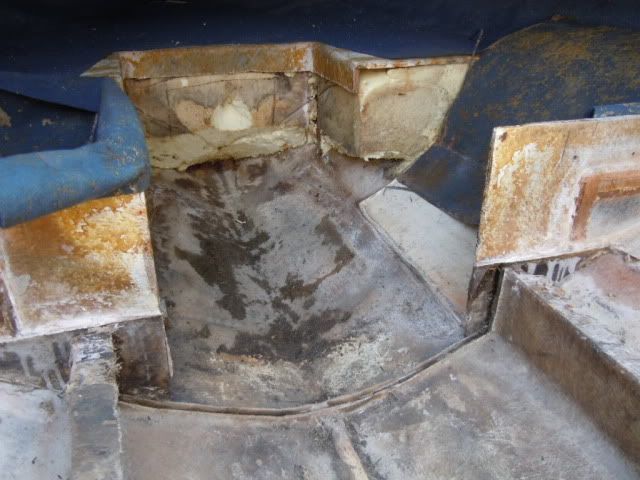
I seem to be putting off the grinding work ... thoughts of that nasty itchy dust and all the gear you have to wear! So I've been getting on with cutting the wooden sections I need to rebuild the cuddy platform. The two verticals have to be profiled to follow the hull contour and are fairly tricky to get right - leaving much of the old (dry!) foam in helps with positioning. I also managed to finish the fore frame between the two stringers. I'm using the glassed grooves left after removing the old wood to locate the new wood - intending to resin them in and glass up the sides when the time comes. I didn't manage to get any pics before the rain came today but this shows the grooves quite well.
DSCN1167.jpg


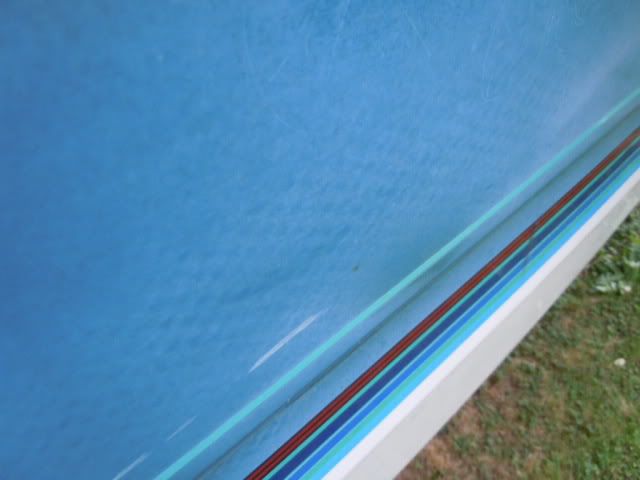
I have a question about the outside of the hull - I notice a checkered pattern showing through the gelcoat. Is this a cause for concern - maybe due to too much buffing?.. should I just overpaint it?
DSCN1210.jpg


Thanks for any help and advice!
 

maddog238

Seaman
Joined
Oct 31, 2011
Messages
54
Re: 1988 Bayliner Capri Cuddy Rotten Resto Project - UK

Well, I've been skulking around the forums for some time now and I'm impressed with the amount of restoration attempts, information and advice on the many varieties of glass/wood craft. They all seem to share a common problem, which to be honest when I purchased mine back in 2005 I was blissfully ignorant of. As this is my first post I'll see how the pics look when it's uploaded. More to follow!

Funkeigh_g everything looks great. I am currently redoing the deck on my 96 Bayliner Capri so I am very interested in your progress. DO you have any pics where you found the transom rot?

My resto is right here: http://forums.iboats.com/showthread.php?t=541713
 

Funkiegh_g

Cadet
Joined
Feb 8, 2012
Messages
28
Re: 1988 Bayliner Capri Cuddy Rotten Resto Project - UK

Funkeigh_g everything looks great. I am currently redoing the deck on my 96 Bayliner Capri so I am very interested in your progress. DO you have any pics where you found the transom rot?

My resto is right here: http://forums.iboats.com/showthread.php?t=541713

Hi there, Yes I've been having a look at your thread already. Posted a couple of times regarding the sealing of compartments or otherwise - I see that you've now decided on what [not] to do. I'm still thinking about draining the side compartments. When I took the whole thing apart and saw there was just so much water collected there I thought there has to be a better way - I think it's actually how the water has got into the sides of the transom. I'm thinking of glassing in a couple of pvc pipes through the stringers at the aft of the boat low enough to drain straight into the engine bay.
I plan to re-foam so need to figure out how to leave a channel clear for any water to get there - I'm not that sold on the idea of cardboard tubing.. For the bilge it should be pretty straightforward - just leave an open channel with well sealed mouse-holes under the frames. I'm going to do this from the entire cuddy area as previously it was blocked at the front - basically anything fore of the bilge cover in the cuddy area has nowhere to drain in the factory version.
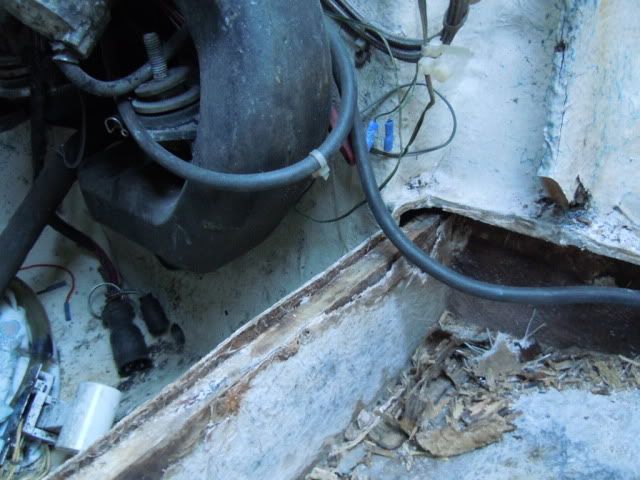
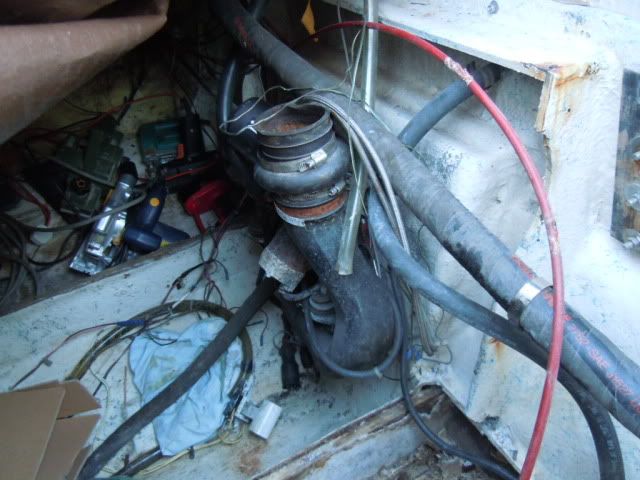
Anyway, here are a couple of pics of the transom area - in the first one you can just see a gap above the stringer and when I poked my screwdriver in the side of the transom there it just kept going!! I made a 1/4" core sample which confirmed the problem. The second pic just shows a bit more of the transom in situ.

DSCN1212.jpg

DSCN1213.jpg
 

jaybeava

Seaman Apprentice
Joined
Sep 20, 2011
Messages
32
Re: 1988 Bayliner Capri Cuddy Rotten Resto Project - UK

Love the pic of the engine out before going any further. It was had for me to visualize what I would be left with after removal.
 

maddog238

Seaman
Joined
Oct 31, 2011
Messages
54
Re: 1988 Bayliner Capri Cuddy Rotten Resto Project - UK

What size deck are you puttin down? 3/4 exterior grade or 1/2 inch
 

Funkiegh_g

Cadet
Joined
Feb 8, 2012
Messages
28
Re: 1988 Bayliner Capri Cuddy Rotten Resto Project - UK

What size deck are you puttin down? 3/4 exterior grade or 1/2 inch

I'm going for 1/2" 'cos that's what was there already and I didn't want any potential problems with a raised deck height. Replacement foam and bulkheads should make it stiff enough.
 

Funkiegh_g

Cadet
Joined
Feb 8, 2012
Messages
28
Re: 1988 Bayliner Capri Cuddy Rotten Resto Project - UK

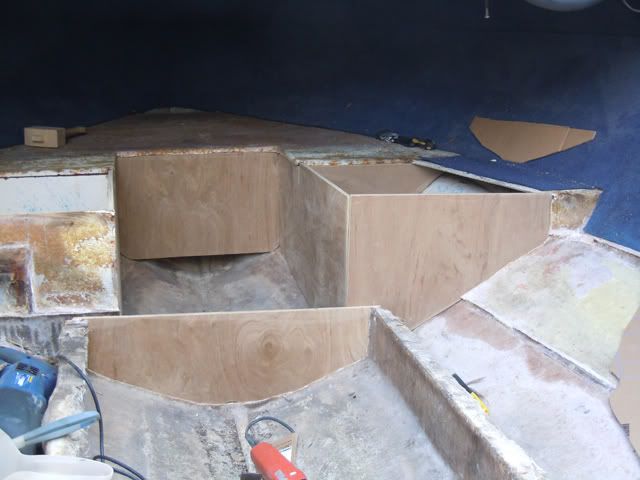
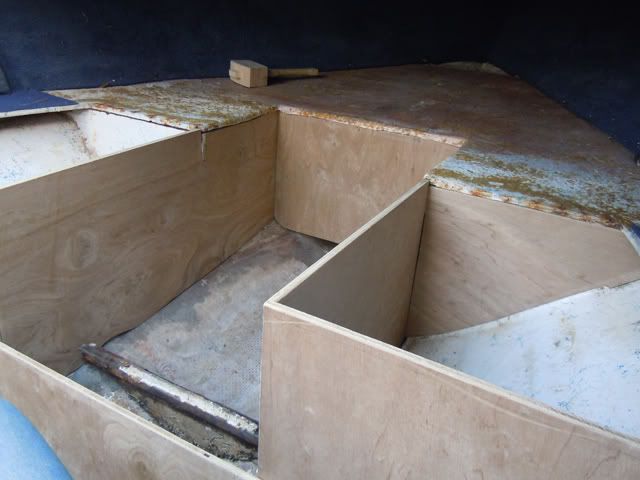
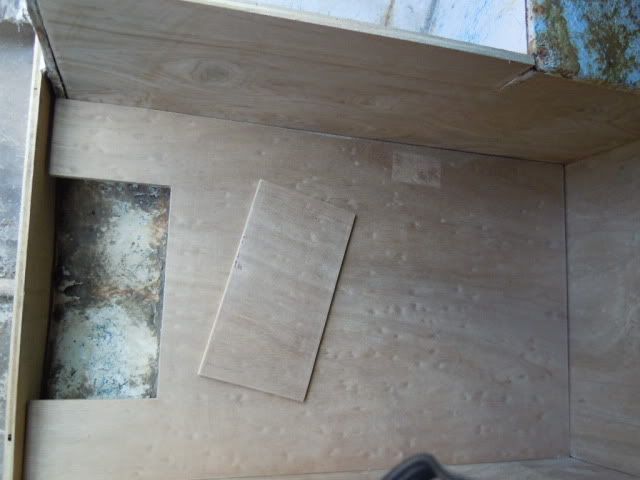
Well it's finally stopped raining here in the UK and amazingly it's on a weekend! The weather here has been rubbish for weeks now so after a forced break I've been able to get on with a bit more woodwork. I'm working from front to back so re-building the cuddy section first and dry fitting the pieces. Here are the new verticals...

DSCN1224.jpg


...but I'm not sure what to do about drainage - the original design has access to the bilge with a small bulkhead sealing off the rest of the fore section. I've put the original piece in place to illustrate but I'd really like to be able to drain the whole of the fore section into the bilge if possible. I don't want water collecting up front and sitting there.

DSCN1223.jpg

DSCN1221.jpg


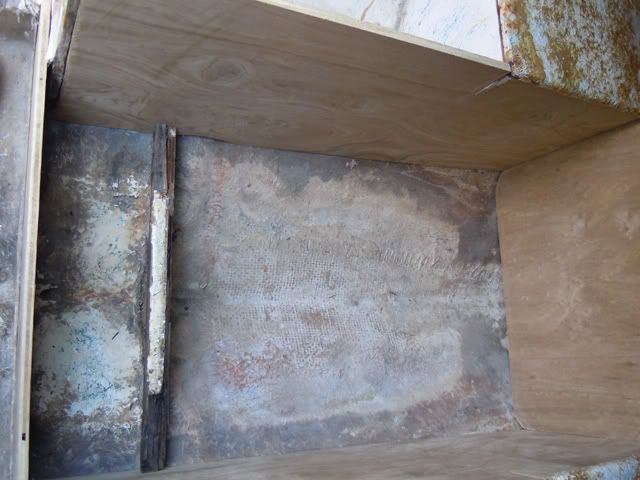
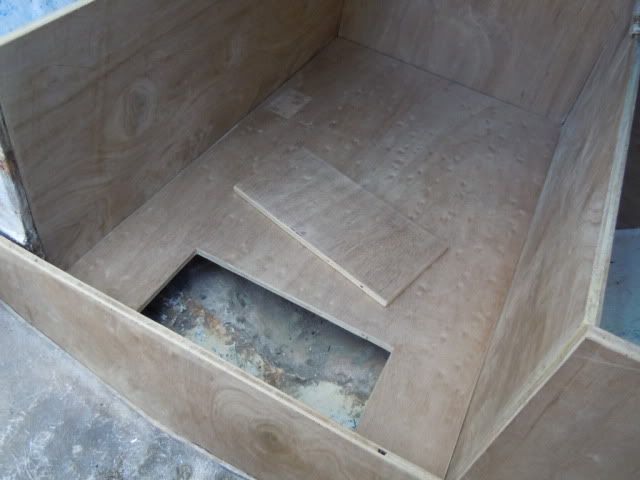
I'm thinking of just putting a mousehole under the new bulkhead but that will just ensure that bilge water will get up-front under the cuddy footwell. Here are some pics of the footwell floor showing the bilge access but with bulkhead removed for the time-being..

DSCN1228.jpg

DSCN1229.jpg


Any advice gratefully received as always :)
 

riptorn

Chief Petty Officer
Joined
Mar 8, 2012
Messages
433
Re: 1988 Bayliner Capri Cuddy Rotten Resto Project - UK

I can't believe your replacing the plywood in the cuddy part. Must of had a hard time taking it all out. I know bayliner uses cheap plywood but how did you cut the glass without going through the hull?
 

Funkiegh_g

Cadet
Joined
Feb 8, 2012
Messages
28
Re: 1988 Bayliner Capri Cuddy Rotten Resto Project - UK

I can't believe your replacing the plywood in the cuddy part. Must of had a hard time taking it all out. I know bayliner uses cheap plywood but how did you cut the glass without going through the hull?

Believe me, I hadn't planned on it!! The footwell floor was all rotten and as I poked around found that the side panels were also soft as water had leeched down from what I assume is a leaky window. For sure, my starboard side storage well was full of water when I came to start work on her so it's definitely getting in somewhere. Anyway, I have a full cover on her now so nice and dry while I work on it.

As for cutting the glass, yes it's a bit tricky but the magical Fein oscillating multitool makes short work of it without damaging the hull :D
 

maddog238

Seaman
Joined
Oct 31, 2011
Messages
54
Re: 1988 Bayliner Capri Cuddy Rotten Resto Project - UK

Believe me, I hadn't planned on it!! The footwell floor was all rotten and as I poked around found that the side panels were also soft as water had leeched down from what I assume is a leaky window. For sure, my starboard side storage well was full of water when I came to start work on her so it's definitely getting in somewhere. Anyway, I have a full cover on her now so nice and dry while I work on it.

As for cutting the glass, yes it's a bit tricky but the magical Fein oscillating multitool makes short work of it without damaging the hull :D

Funk, are you going to rebuild your seats from scratch using plywood or are you going to put in plastic replacements?
 

Funkiegh_g

Cadet
Joined
Feb 8, 2012
Messages
28
Re: 1988 Bayliner Capri Cuddy Rotten Resto Project - UK

Maddog, I'm not sure what I'm going to do about the seats really - I've been considering a captains chair and some bench seating but not decided. My seat bases are actually in pretty good condition so don't need rebuilding and to save on the costs I may well just re-fit them and get the seats re-covered.
 

wcasey5

Petty Officer 2nd Class
Joined
Feb 27, 2012
Messages
197
Re: 1988 Bayliner Capri Cuddy Rotten Resto Project - UK

I have the same boat. Awesome job!
 

timing_ca

Seaman Apprentice
Joined
Feb 20, 2012
Messages
48
Re: 1988 Bayliner Capri Cuddy Rotten Resto Project - UK

Hi, I read your post and was thinking about what you want to do with the mouse hole in the bow, I was wondering if you could make a 1 way valve on it maybe out of plastic on a hinge so the water drains to the bilge but won't back up into the bow.Sorry if I'm not making sense here,I'm trying to think where I've seen something like this before....I'm sure that about 2am it'll come to me in my sleep :eek:
 

1066

Cadet
Joined
Apr 18, 2012
Messages
11
Re: 1988 Bayliner Capri Cuddy Rotten Resto Project - UK

IMAG0270.jpgIMAG0220.jpgIMAG0227.jpgIMAG0228.jpgIMAG0230.jpgHi there Funkiegh! Thank god for the better weather eh! Looks like you have been very busy! I too have been bashing away at mine! it turns out also that my boat is not a 2052 as I had been told but a 1952 :) I got in touch with Bayliner about getting some decals but also asked if they could tell me exactly what model I had form the hull number. Turns out decals are not easy to find so have been painfully trying to recreate them in Photoshop to then be printed on vinyl.
Had the fuel tank out, cleaned and a few minor repairs, pressure tested and now back in. Have bonded in new floor and just tacked in along the new seam areas to keep out the rain. I will be glassing the whole sole of the boat once I have re filled the compartments with foam.
Also made new side panels, and jump seat front panels, under section of the backrest, and the fold up seat back too.
Had the trim tilt motor apart for a clean and a service and re paint but still working on that. There is a lot of surface rust to get rid of, on the plus side the inside is like new!
Also top coated up the upper half of the stern drive after fully striping it back to the bare casting.
I have ripped out most of the original wood in mine as its just rotten under the glass. Going to lift out the engine this weekend and remove transom plate to start preping for paint! YAY! Also while engine is out I will replace the last couple of bits of wood form the transom area and glass in all of the new parts. This is the fun part, Putting it all back together! Whoop!
Its been interesting to see the indie of the cuddy of yours one too, that is a job I have yet to tackle but mine is limited to just the floor thankfully!
I have been trying to upload some photos of progress thus far but not had any luck :(.
Well I look forward to seeing some more updates! Keep up the good work mate!
 
Last edited:

1066

Cadet
Joined
Apr 18, 2012
Messages
11
Re: 1988 Bayliner Capri Cuddy Rotten Resto Project - UK

IMAG0261.jpgIMAG0266.jpgIMAG0268.jpgIMAG0269.jpgIMAG0264.jpg
A few more snaps

I forgot to mention that all the hard external edges will be rounded! You wont get glass to go nicely around a square external angle! A small radius of 8-10mm is enough.
 

1066

Cadet
Joined
Apr 18, 2012
Messages
11
Re: 1988 Bayliner Capri Cuddy Rotten Resto Project - UK

Annnnd a few more :) You can see the new seats, not quite as nice as the original but I just can't afford to have the whole thing re upholstery professionally!
I got these form a guy in Maidstone brand new for ?120 a side! I have cut the bases down so that its the same height as the original. Only thing is I have to make some kind of support for the the fold down support leg.
IMAG0218.jpgIMAG0219.jpgIMAG0227.jpgIMAG0232.jpg
 

Funkiegh_g

Cadet
Joined
Feb 8, 2012
Messages
28
Re: 1988 Bayliner Capri Cuddy Rotten Resto Project - UK

Hi, I read your post and was thinking about what you want to do with the mouse hole in the bow, I was wondering if you could make a 1 way valve on it maybe out of plastic on a hinge so the water drains to the bilge but won't back up into the bow.Sorry if I'm not making sense here,I'm trying to think where I've seen something like this before....I'm sure that about 2am it'll come to me in my sleep :eek:

Yeh, I had some thoughts about that but it's all just a bit too complicated. I think I may just put a drain hole in and bung it up when in use - and open it up when not.
 

Funkiegh_g

Cadet
Joined
Feb 8, 2012
Messages
28
Re: 1988 Bayliner Capri Cuddy Rotten Resto Project - UK

Hi there 1066, well you have been busy!! The photo's show up really well and I'm impressed with your woodworking skills. What ply type & thickness have you used for the floor and seat boxes?.. and how have you bonded in the new floor? Have you put in any new drainage channels to stop water build-up in the future?

I'm putting off the grinding / cleaning aspects for the moment and just concentrating on building the new pieces. I've not done any glassing before so I'm trying to get as much preparation as I can done before setting aside some proper time for it. What was your preparation method - grinding disk, pad? Are you just using CSM and Polyester resin? Are you replacing your transom at all?

Those new seats look great, and not a bad price. I've not looked into that seriously yet but currently planning to re-upholster on the cheap, i.e. get someone to copy & stitch the vinyl pieces and then fix it on myself - no idea of pricing for that yet though :confused:

Anyway, great to have a bit of good weather at last, as you say. I'll get on with some more this weekend and upload some new pics.

Good to see your progress and sorry for so many questions - I think many projects would stall or fail without all the support and mutual motivation on this site. Why not start a thread.. it looks like you've got some good work going on there and I'm interested to see how you get on with it, particularly being a fellow countryman!
 

jbcurt00

Moderator
Staff member
Joined
Oct 25, 2011
Messages
25,034
Re: 1988 Bayliner Capri Cuddy Rotten Resto Project - UK

Copied from Jay's thread:
Hi Jay, I hope you're managing to enjoy that boat after all the hard work you put in... I'm along way from splashing mine unfortunately! I'm just replacing the floor and some cabin sections in my 19' Bayliner and haven't a clue how much stuff to order. Some "ball parks" for the following would be really appreciated:

Polyester Resin
1/4" chopped strand
Cabosil
CSM
Acetone

Also, you used 1508 for tabbing - I assume that's a type of roving - would you recommend that or is just CSM OK?
Thanks.
Mike

1708 is a combination woven mat:
Features:

  • Use 1708 Biaxial Cloth to make lighter, stronger parts
  • 1708 is engineered from two layers stitched at +/- 45o angles to create a low profile, lighter, stronger cloth and replace 24 oz woven roving.
  • Building with 1708 uses less resin with higher structural integrity stronger parts, easily conformable to complex shapes

It is NOT recommended to skip the 1708 & substitute CSM. 1708 is significantly structurally stronger then CSM (which is normally 1.5oz). It also uses more resin to become fully wetted out.

Your hull is much larger then mine (1960 Glastron FireFlite, 15ft) in every dimension, but this is the recommened purchase list for mine as a full gut (transom, stringers & deck):
Prem Poly Resin 3qty 5gal
4" METAL bubble busters (2 ROLLERS )
Biaxial Mat 1708 10YD
CSM, 1.5 oz. 50",25YD
CAB O SIL Filler 5QT
Chopped strands, 1/4" 2QT
MICROBALLOONS 2QT
Milled chopped fibers (powder)

And I may need additional resin supplies, in addition to disposable paint brushes & rollers, mixing 'pots' (2 sizes) and some other supplies & materials.

Here's a free downloadable fiberglassing guide

It's listed at a penny, but when you add it to a cart, it should download for free. Hope all this ^^^ helps.

Best of luck getting out of dry dock sooner then later....
 
Top