1988 Bayliner Capri Cuddy Rotten Resto Project - UK

Funkiegh_g

Cadet
Joined
Feb 8, 2012
Messages
28
Well, I've been skulking around the forums for some time now and I'm impressed with the amount of restoration attempts, information and advice on the many varieties of glass/wood craft. They all seem to share a common problem, which to be honest when I purchased mine back in 2005 I was blissfully ignorant of. The notion of water laden foam encapsulated in undrained and unprotected rotting plywood, covered in a weak and leaky glass layer covered by carpet was far from my wildest imagination as I enjoyed the first couple of seasons powering up and down the south coast. Needless to say, my illusion was shattered when after a subsequent winter in the boat yard I climbed aboard and promptly put my foot through the flooring near the cuddy entrance. This coincided with some problems with the starter and an oil leak so I decided to bring her home for some "maintenance"... well if ever there was an understatement! Anyway, my journeys through the forums have given me the inspiration and encouragement to get stuck in so I thought I'd post my own progress - and I'm sure I'll be needing some help as there's quite a way to go. Being in the UK with a US boat doesn't make it easy with the mechanical parts but glass, resin and WBP ply are in plentiful supply and will be my main job for some weeks. I've never done any glassing before so please help out where you can.
Anyway, here is my pride and joy when I first bought her..
IMG_1129.jpg


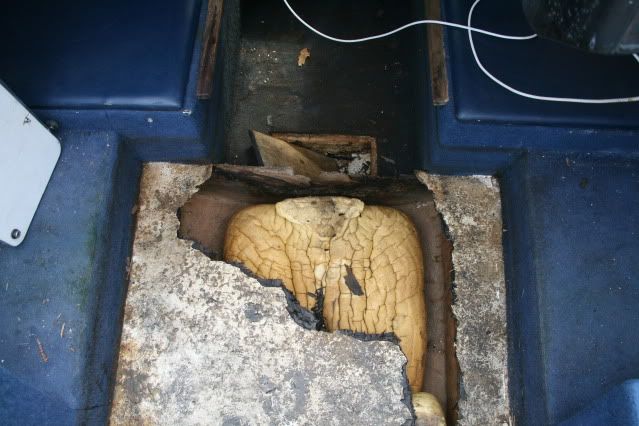
Followed by the first hole..
IMG_5442.jpg


And when I'd lifted all the carpet..
IMG_5438.jpg


As this is my first post I'll see how the pics look when it's uploaded. More to follow!
 
Last edited:

Bob_VT

Moderator & Unofficial iBoats Historian
Staff member
Joined
May 19, 2001
Messages
26,046
Re: 1988 Bayliner Capri Cuddy Rotten Resto Project - UK

It sounds as if you are going to become VERY familiar with restoration.

I hate to be the first one to say it....... your boat built in the 80's are very well known for rotten stringers, transom and decking. It is due to the lower quality standards back then.

There have been many bayliner repairs and restorations here.

I see your future............ grinding, sheets of plywood, resin, fiberglass cloth, flotation foam and allot of patience.

My first words of advice........ be certain you are committed to this project.......... wear the proper safety equipment and have a place to get rid of all the garbage.

That is a very reliable motor you have there.
 

riptorn

Chief Petty Officer
Joined
Mar 8, 2012
Messages
433
Re: 1988 Bayliner Capri Cuddy Rotten Resto Project - UK

I take it is an 18 or 19 ft. I have the same but a 17 ft o/b. Bob_VT is right the floor is not built to last long. On my boat even around the ski compartment the floor is flimsy and it is dry as a bone with no rot.
Hard to see the floor in the picture when you lifted the carpet.
How is you transom? Have you had it checked?
 

ShellBack89

Petty Officer 1st Class
Joined
Feb 18, 2012
Messages
211
Re: 1988 Bayliner Capri Cuddy Rotten Resto Project - UK

Welcome to iBoats dry dock. The MODs here are great. They provide the best information possible and have answer every dumb question put their way. Take a look at Friscoboaters thread on the how to page. I watch those videos over and over again.

Good luck and Bob is right make sure you have the right safety equipment. Fiberglass is horrible on the lungs; not to mention the mold that could be present. A good respirator, tyvex suit, gloves and eye protection are a must. I was also told that baby powder on the arms and neck also helps reduce any itch. I've used it every time I grind and it works.

Good luck and you'll be back on the South Coast soon.....:D
 

Funkiegh_g

Cadet
Joined
Feb 8, 2012
Messages
28
Re: 1988 Bayliner Capri Cuddy Rotten Resto Project - UK

Thanks for the supportive replies and advice so far. Yes riptorn, it's a 19 ft'er - the transom looks perfect so I've been intending to leave it, however, after getting the floor up I was able to poke a screwdriver into the side of it and guess what?.. it sunk in about 8"! So, there goes another delusion :facepalm: I've actually made quite a bit of headway through the teardown now and intend to upload some more pics to complete the story so far. I wasn't happy with the small images in my first post so I've been messing about with hosting sites tonight. I tried to replace the uploads with links to my flickr files but I wasn't able to save the changes - is there a restriction on editing previous posts? Anyway, I'll post new stuff in the next day or two with the links and see how that goes.
Shellback, I've been watching Friscoboaters vid's for a few weeks now and they sure are an fantastic source of information and motivation. So much so that I'm even thinking positively about doing the transom, and yes Bob_VT, I am commited to completing the job.. I just need to make sure my other girl doesn't get too jealous :D
 

rickryder

Commander
Joined
Jun 24, 2010
Messages
2,722
Re: 1988 Bayliner Capri Cuddy Rotten Resto Project - UK

I use www.imageshack.us to upload pics... You upload to that site and get the forum code in the left hand column,copy and past into the reply box here. ;)l
 

ricohman

Lieutenant Commander
Joined
Jul 30, 2011
Messages
1,631
Re: 1988 Bayliner Capri Cuddy Rotten Resto Project - UK

Thats a nice looking cuddy. A bit of hard work and it will outlast you :)
 

Funkiegh_g

Cadet
Joined
Feb 8, 2012
Messages
28
Re: 1988 Bayliner Capri Cuddy Rotten Resto Project - UK

I'm having real trouble figuring out how to get the image to show instead of the link.. any suggestions?
 

Funkiegh_g

Cadet
Joined
Feb 8, 2012
Messages
28
Re: 1988 Bayliner Capri Cuddy Rotten Resto Project - UK

Amazing what a trip to the pub can do... instant inspiration!... so I googled a bit and found that I need to embed the link (URL) to the photobucket image in between two IMG codes as follows:
. Hey presto and it works fine now. Obviously it's not just for the boat restoration that I'm on a learning curve :redface:.

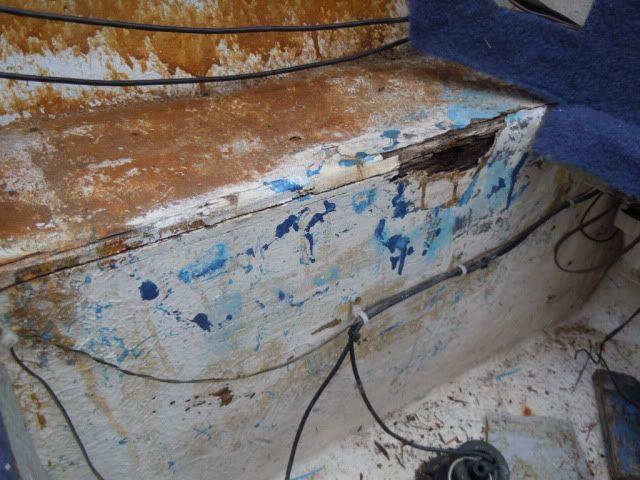
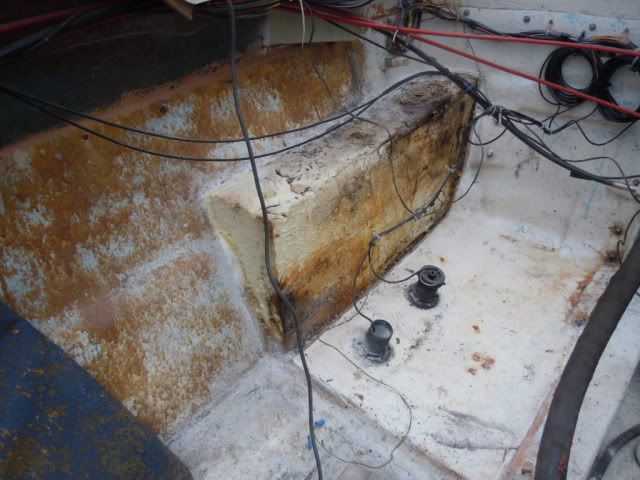
Anyways, after finding the hole and removing the carpets I moved on from thinking I could just get away with replacing the damaged floor area. The more I took out, the worse it got! After ripping out the immediate floor areas the first major decision was to remove the seat structures so I could get to the floor under there. The glassing looked pretty solid all around those areas so I was a bit nervous, particularly as I'd suffered a small "oops" while going at the floor earlier with a 4" angle grinder - yes, there is now a small amount of daylight coming through the hull, but nothing really serious and it'll get sorted when I glass in the new floor. Nevertheless, I didn't want to do it again so I did a bit of research and discovered the Fein oscillating cutter - I got one on ebay for a reasonable price and it did the job fine (or should that be fein? ;)). Here is a picture after removing the starboard side:
DSCN1147.jpg


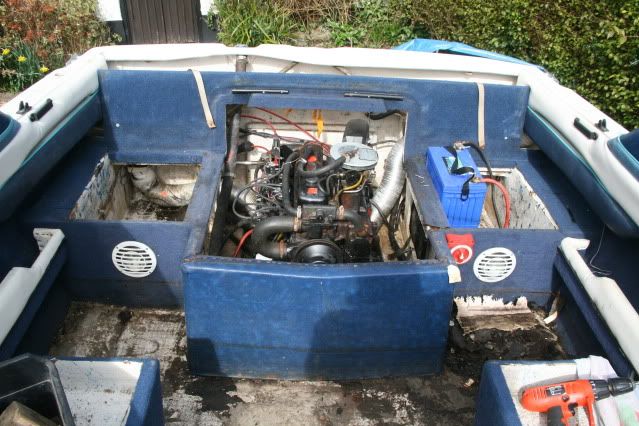
Both lounger seat sides up and then I'm wondering whether to take apart the rear seating framework so I can replace the floor as it extends under the battery compartment and the anchor storage... the answer was yes of course but first I had to take the motor out so got myself a shiny new 2 ton hoist (ebay again - isn't it wonderful!) and spent some time sorting out some engine issues - but more on that later perhaps. Here is the space without the motor:
DSCN1056.jpg


Here you can see some rot in the aft starboard side panels so they had to come out (similar on other side):
DSCN1149.jpg


And this is a view with the woodwork removed.
DSCN1158.jpg


Notice I've left the sponge ... I mean foam... in situ for the moment as it'll make it easier for me to cut replacement wooden bits. Needless to say, it was waterlogged. As was all the foam under the flooring, man was that heavy too. Fortunately it came away quite easy by sawing it into sections and prying it away from the hull, now it's all at the dump.

That's all for now folks. Flushed with success in linking the pictures I'm going to retire for the night. Next post I think I'll talk about the fuel tank...
 

rickryder

Commander
Joined
Jun 24, 2010
Messages
2,722
Re: 1988 Bayliner Capri Cuddy Rotten Resto Project - UK

Glad to see you found a tool that worked well for ya! Those grinders are unforgiving.....the fein is more controllable... Looking good! Just imagine how many MPH you'll gain without all that water soaked foam ;)
 

riptorn

Chief Petty Officer
Joined
Mar 8, 2012
Messages
433
Re: 1988 Bayliner Capri Cuddy Rotten Resto Project - UK

Lookin good Mate. How are the motor mounts? Moving along pretty good. How are the ribs (stringers). You will find that the more solid the boat is the harder it is to remove.
Hard to see from your pictures. Doesn't look too bad.:)
 

oops!

Supreme Mariner
Joined
Oct 18, 2007
Messages
12,932
Re: 1988 Bayliner Capri Cuddy Rotten Resto Project - UK

looks really good...

if i may....id like to save you some time........did you say the transom is rot?

if so.......take all the carpet out....all the mounts ...and just start cutting....get it right down to the hull.

one of the things that takes away major time in the tear down ....is working around every thing in the boat because you dont want to remove it.....well ist all gotta come out.....everything.....
get in there and take it out.....then you can be at the hull and stringers in just a few hours...

then its grinding time !
 

proshadetree

Lieutenant Commander
Joined
Jul 19, 2008
Messages
1,887
Re: 1988 Bayliner Capri Cuddy Rotten Resto Project - UK

Looks like my baby. Take careful measurements and it will be ok. I bought mine torn apart. My transom was rotten at the lower edge. Not a bad job to do the inner section of the transom. My outer edges were fine. Luck had it that it did not have a bunch of extra screw holes around the outsides to let water in. Still need to do the interior in mine but I cant find time in the off months and the summer shes just to much fun in the water.
 

Captain Shikaboo

Petty Officer 2nd Class
Joined
Apr 3, 2012
Messages
130
Re: 1988 Bayliner Capri Cuddy Rotten Resto Project - UK

The Fein tool you are using, is that one of those oscillating cutters? I was wondering how big or small the cutting area was.

Looks like a fun project Funkiegh, it's amazing what a trip to the Pub will do, nothing like some liquid courage!
 

1066

Cadet
Joined
Apr 18, 2012
Messages
11
Re: 1988 Bayliner Capri Cuddy Rotten Resto Project - UK

Hi there Funkiegh and other members:)
Love your project!
I had to join the forum as I am also restoring a 1988 Bayliner Capri Cuddy its a 2052 so a gnats chuff bigger.
I'm in the UK and not that far from you at all!
This forum looks like a wonderful resource for anyone interested in undertaking their own restoration.
We bought the boat about 8 years ago in Mallorca with the intention of restoring it but work prevented me from being able to give it the full amount of attention that it needed. At the time I replaced the engine with a reconditioned 5l v8 and did all the mechanical work to keep it all reliable, with the intention of later doing a full restoration. Anyway years have passed and now I have the boat back in the UK and finally started the project! I have done a fair amount so far and I will be putting together some videos of progress etc.
I have ripped out the floor and seats. All stern drive components have been blasted, etch primed, tie coated and given a nice coat of anti-fouling. I have also been detailing some of the engine components too.
I have also made new floor and stern structure but waiting for some descent weather before I start to glass it all back together!
I would recommend treating all your ply with west system epoxy before you set it back in the boat. This will prevent any degradation for a very long time! Also if you have small areas of rot damage that are 100% DRY a healthy soaking in epoxy with help reconstitute/re consolidate the area that can later be glassed although I do not recommend for major structural components!.
I have much still to do but I will be adding some updates soon :) Currently I am working on cleaning off the fuel tank I took out at the weekend to check for holes (please keep fingers crossed I do not find any!) Man that tar and bilge grime build up is a real *** to clean off! I have used acetone, bilge cleaner, and finally petrol but it is coming off slowly!
Well I better wrap it up as this has turned into an essay!
I wish you all the best with your boat !
 

Funkiegh_g

Cadet
Joined
Feb 8, 2012
Messages
28
Re: 1988 Bayliner Capri Cuddy Rotten Resto Project - UK

Hi 1066. Those Cuddies are a bit of a rarity - I haven't found another restore project of one at all so far so - they all seem to be bowriders - I'll be interested to follow your progress thread when you get it going. Sounds like you've made a good start on the work and are ahead of me. I've lifted engine to fix a few oil leaks, replace the starter and clean it up and have given it a coat of paint so it's ready to go back... but not for some time I fear. Mine's a basic 3.0L GMC power unit - the original I'd imagine but in pretty good condition. I'd been hoping not to have to take off the outdrive but with the recent discoovery about my transom I'm going to have to deal with it :eek:. I'm a bit worried about that as when it all goes back it is supposed to be tricky with jigs and alignment tools being needed - ah well, that's for another day!

I will be treating all the ply but I've read that poly resin and glass should suffice - West system is viewed a bit of an overkill? I'm not quiite there yet but I'm hoping for some more clarity on that from some of the others. The current gold standard in restore projects videos etc seems to be frisco boaters - he's on the foruim but I've found his blog to be easier to navigate http://friscoboater1995searay.blogspot.co.uk/2012/01/rebuild-begins.html. I plan to be using many of his techniques (thanks Frisco!).

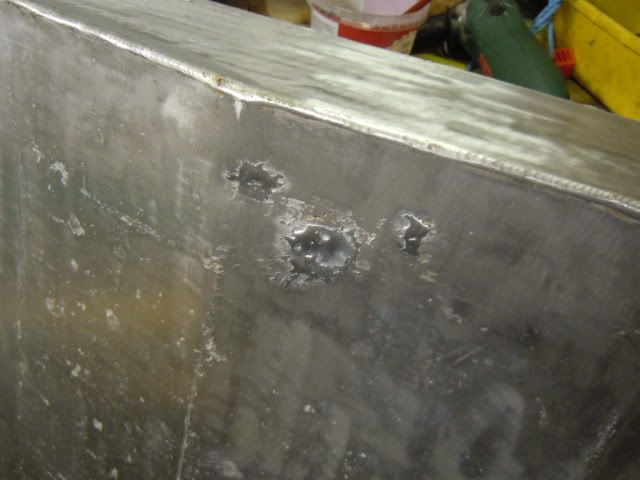
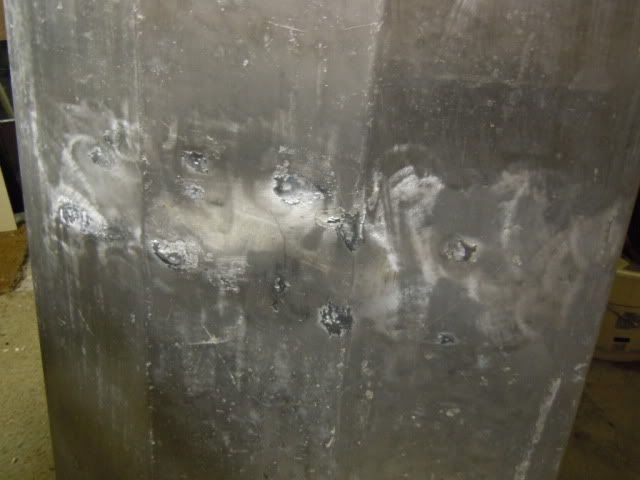
I said I talk about my fuel tank so as you're currently working on yours it is good timing. Once again, I wasn't going to touch it but after reading about problems of pitting corrosion I decided to lift it out. Pretty easy in the end anyway but I hear you about the tar and bilge grime - what a mess! Anyway, it cleaned up pretty well with detergent and aluminium cleaner and sure enough I found the corrosion spots. There were no leaks but some fairly deep pitting on the lower side in areas where some old tape had been trapping water. After a bit of research and finding some courage I used some of this stuff on it http://www.aluminiumrepair.com/more_info.php. It worked a treat but I did need MAPP gas to get enough heat... and made sure the tank was properly drained and dried first!! The localised heat did cause some distortion but it'll be well hidden in the end. I guess I should get it pressure tested before fixing it back. Here are a couple of pics:
DSCN1204.jpg

DSCN1205.jpg


Good luck with the project.
 

Funkiegh_g

Cadet
Joined
Feb 8, 2012
Messages
28
Re: 1988 Bayliner Capri Cuddy Rotten Resto Project - UK

The Fein tool you are using, is that one of those oscillating cutters? I was wondering how big or small the cutting area was.

Looks like a fun project Funkiegh, it's amazing what a trip to the Pub will do, nothing like some liquid courage!

Yes, it's an oscillating multi-tool. The cut depends on the tool you use - they come in many forms but are mainly for control and detail. Look them up on the web. If you need to rip through anything then a grinder or a Sawzall (reciprocating saw in the UK) will be more efficient.
 

Funkiegh_g

Cadet
Joined
Feb 8, 2012
Messages
28
Re: 1988 Bayliner Capri Cuddy Rotten Resto Project - UK

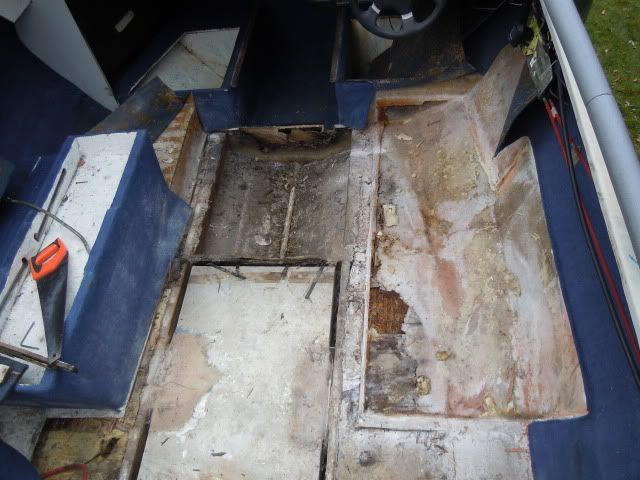
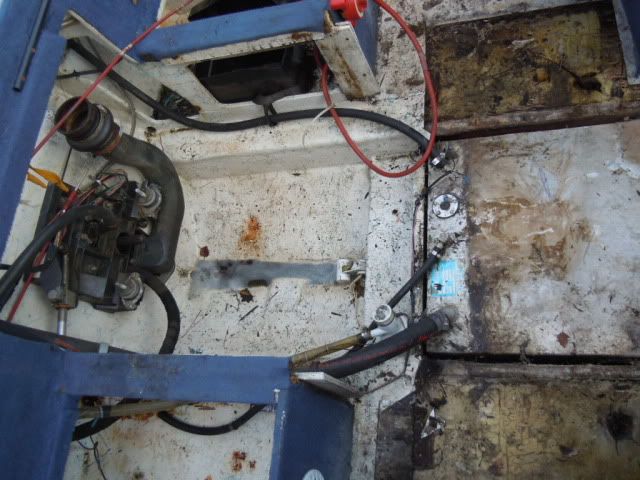
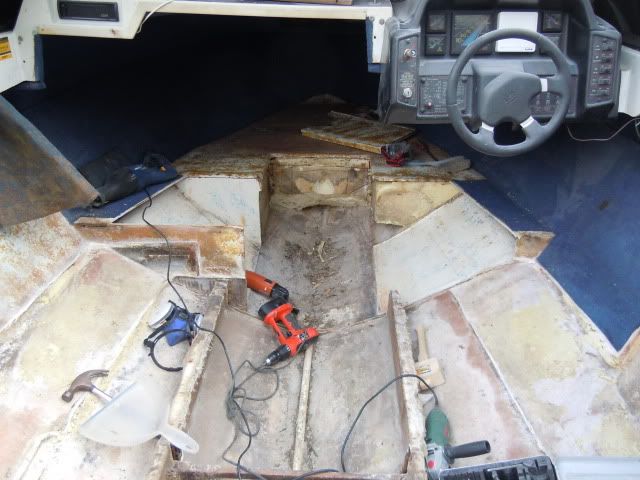
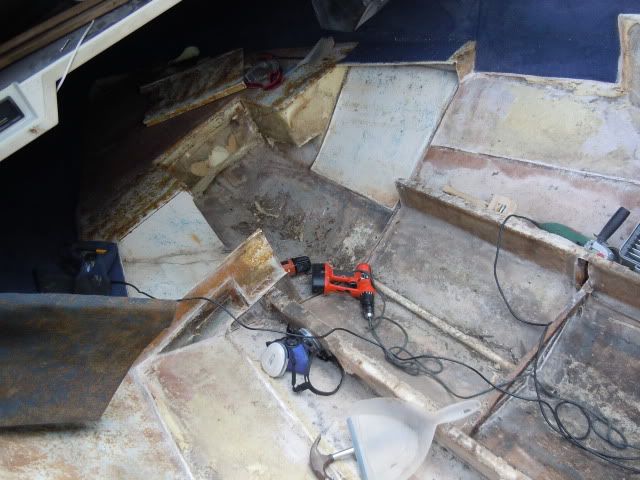
Thanks for the wise words oops! Actually I have done pretty much as you suggest. My early naive thoughts quickly evaporated once I got into the job and couldn't face the prospect of me or anyone else having to go through similar again - best do the job properly eh. These boats are built for fun not for dry dock! So yes, I did take out the rear seat framework and side panels. Also up front I found the cuddy cabin floor was rotten and some of the panelling in the storage compartments so that came out too. Here are some pics as it currently stands:
DSCN1200.jpg

DSCN1201.jpg


I've been looking at the stringers a lot and they actually seem fine. They are well glassed and stiff - I did a couple of core samples and found no rot - they are solid wood rather than ply and I'm pretty confident I won't have to mess with them... a bit of good news :)
 

rickryder

Commander
Joined
Jun 24, 2010
Messages
2,722
Re: 1988 Bayliner Capri Cuddy Rotten Resto Project - UK

That is good news if your stringers are still good....I lucked out with a good transom ;)

You'll be back on the water in no time:D
 
Top