1985 v150 Nautiglass Sportsman restoration

displaced47

Seaman Apprentice
Joined
Aug 26, 2012
Messages
33
Re: 27-10-2012 - Sand Hull and glass the cabin anchor well and seats

Re: 27-10-2012 - Sand Hull and glass the cabin anchor well and seats

G'day mate - another Aussie here reading along.

Great job - great thread! I am planning a repair on a deck soon and learned heaps from your photos and your process.

cheers!
 

xsesiv

Seaman
Joined
Jan 20, 2011
Messages
57
Re: 27-10-2012 - Sand Hull and glass the cabin anchor well and seats

Re: 27-10-2012 - Sand Hull and glass the cabin anchor well and seats

G'day mate - another Aussie here reading along.

Great job - great thread! I am planning a repair on a deck soon and learned heaps from your photos and your process.

cheers!

G'day Displaced47,

Thanks for taking the time to read my thread. I would just like to say that most of what I have done is based on Friscoboaters searay thread (feel like I know him from the amount of his youtube i've watched over and over again) and the great advice from woodonglass and Georgesalmon in this thread.

Once again thanks for reading and even moreso for posting here!

Cheers,

Oliver.
 

xsesiv

Seaman
Joined
Jan 20, 2011
Messages
57
28-10-2012 - Not much....

28-10-2012 - Not much....

Pretty quiet day today. I spent about an hour glassing the other sides of the plywood going under the cabin (anchor well and seat rests etc).

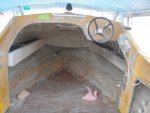
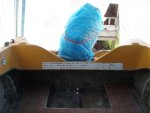
I took a few photo's of the the back of the boat to try and figure out what I am going to do back there in regards to seats, batteriy/ies, live bait tanks/kill tank/esky.... too many thoughts........

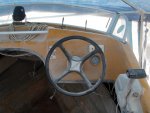
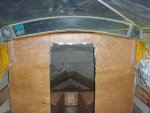
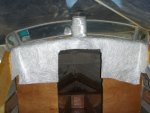
I also took a few snap shots of the dash to try figure out whan I am going to do with it. I would like to tidy it up, put in a switch board, some gauges maybe and possibly mount my lowrance HDS better.... The main thing I want to do is to provide some more cover for the cabin, Maybe a door or wall, I'm not sure as yet TBH..... I am actualy suprised I am up to that stage.... the deck in.... progress is sweet!

Cheers,

Oliver.
 

Attachments

  • dash.JPG
    dash.JPG
    103.7 KB · Views: 3
  • front.JPG
    front.JPG
    121 KB · Views: 3
  • back.JPG
    back.JPG
    97.5 KB · Views: 3

xsesiv

Seaman
Joined
Jan 20, 2011
Messages
57
29-10-2012 - Anchor Well lid supports and fuel tank bay floor

29-10-2012 - Anchor Well lid supports and fuel tank bay floor

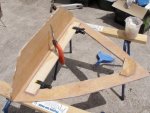
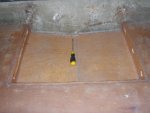
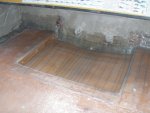
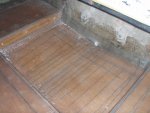
Another 1 and a half on it yesterday. I first cut out some plywood for the anchor well lid supports, sealed them with a couple of coats of resin then glued them with liquid nails and PB. I left it clamped together overnight. I then PB'd in the 2 floor pices of the fuel tank bay. I sealed the edges of them with another layer of resin before hand. They will be sealed very well.
 

Attachments

  • anchorwellsupportglassed.JPG
    anchorwellsupportglassed.JPG
    121.7 KB · Views: 2
  • anchorwellsupportpb.JPG
    anchorwellsupportpb.JPG
    123.8 KB · Views: 2
  • fuelbaypb2.JPG
    fuelbaypb2.JPG
    101.4 KB · Views: 2

xsesiv

Seaman
Joined
Jan 20, 2011
Messages
57
30-10-2012 - Glass the well supports, FT Bay sides PB and glassed

30-10-2012 - Glass the well supports, FT Bay sides PB and glassed

Today I spent about 2 hours on her. First up I glassed the anchor well supports in and tidied up my work with the grinder and flap wheel. I then sealed the sides for the fuel tank bay with a couple coats of resin. When dry I glued them in with liquid nails, predrilled and screwed them in with stainless steel screws coated and sealed in sikaflex291.

I then made up a batch of PB and filleted the sides in and the tops of them to the deck height. When it was all dry I got the grinder and flap wheel out and rounded off the top edges of the sides and smoothed my PB efforts as they were a little lumpy ready for an easy glass.

I then cut up strips of my 600GSM double bias tape to go over all the edges and bottom twice. I then made up about a litre of resin and went to work puttin it in. It all went in great, no bubbles and nice and neat. The whole deck is now pretty much in and sealed. I could hose the thing out if I wanted! Feels so good to be in this position again. I'm stoked to say the least.

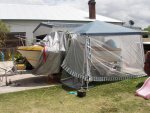
Its been getting a bit hot here so I put up the old cover to try cool things down a bit. Now it's blowing gale force winds trying to blow it away.

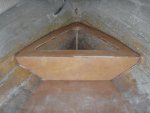
Late this arvo I made up a quick batch of PB and filleted in about 90%(till I ran out of PB) of the anchor well in.
 

Attachments

  • shade.JPG
    shade.JPG
    120.9 KB · Views: 2
  • anchorwellpb.JPG
    anchorwellpb.JPG
    104.7 KB · Views: 2
  • fuelbaypbtabbed.JPG
    fuelbaypbtabbed.JPG
    118.3 KB · Views: 2

chrome dome

Petty Officer 1st Class
Joined
Sep 24, 2010
Messages
303
Re: 30-10-2012 - Glass the well supports, FT Bay sides PB and glassed

Re: 30-10-2012 - Glass the well supports, FT Bay sides PB and glassed

it's looking good mate,
my fibreglass matt turned up yesterday but gotta wait for the resin etc...no where around here that sells it..so hopefully will start putting in the transom/stringers/floor next week,
gotta look at getting some sort of gazebo thingee as mine is outside as well...the nautiglass is in the shed LOL...wouldn't fit anyway,
getting warm here as well...got burnt yestdee fishing down in Port Phillip bay
saw a Nautiglass 130 runabout down there too..didn't know they had made smaller tubs as well,
just a bit for the useless info file..
 

SeaSquatch

Cadet
Joined
Oct 18, 2012
Messages
26
Re: 30-10-2012 - Glass the well supports, FT Bay sides PB and glassed

Re: 30-10-2012 - Glass the well supports, FT Bay sides PB and glassed

Great read! And nice boat!

I lived for a couple years down in Adelaide and loved it (2005-7). Wished I'd stayed! Stubbies! Haven't heard that one in a while. Never got a chance to go out on a boat. Did some fishing on the American river on Kangaroo island. Didn't catch anything. The ferry ride to the island was a laugh. Bad seas. The people didn't like it to much and they started getting sick.. Lots'o memories and I could go on forever.
 

xsesiv

Seaman
Joined
Jan 20, 2011
Messages
57
Re: 30-10-2012 - Glass the well supports, FT Bay sides PB and glassed

Re: 30-10-2012 - Glass the well supports, FT Bay sides PB and glassed

Great read! And nice boat!

I lived for a couple years down in Adelaide and loved it (2005-7). Wished I'd stayed! Stubbies! Haven't heard that one in a while. Never got a chance to go out on a boat. Did some fishing on the American river on Kangaroo island. Didn't catch anything. The ferry ride to the island was a laugh. Bad seas. The people didn't like it to much and they started getting sick.. Lots'o memories and I could go on forever.

Hi SeaSquatch,

Thanks for dropping by and posting! I've heard stories about that ferry ride before. I guess they were true.

If you've got any advice , questions or as chrome would say useless info feel free to post again!

Cheers!
 

xsesiv

Seaman
Joined
Jan 20, 2011
Messages
57
31-10-2012 - Start making rear seat box/esky...

31-10-2012 - Start making rear seat box/esky...

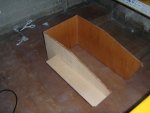
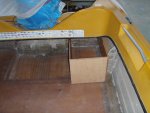
Pretty quiet day today. Was a bit preoccupied with family stuff and work. I started measuring up a rear seat box that will also double as a water proof box for ice/drinks/catch etc. I Initially was going to have the back part just use the transom and the side use the hull but I think I will actually plywood all sides so I can seal it up better/easier outside the boat. I also re-cut out the drain plug in the fuel tank bay with the dremel.
 

Attachments

  • seatbox.JPG
    seatbox.JPG
    90.3 KB · Views: 2
  • fuelbayplug.JPG
    fuelbayplug.JPG
    108.3 KB · Views: 2
  • seatboxplacem.JPG
    seatboxplacem.JPG
    104.1 KB · Views: 2

chrome dome

Petty Officer 1st Class
Joined
Sep 24, 2010
Messages
303
Re: 31-10-2012 - Start making rear seat box/esky...

Re: 31-10-2012 - Start making rear seat box/esky...

little bit concerned about the extra weight your seat box/eskie will add to the bum,
they are good but are also heavy
specially when you add bums and stuff IN the eskie, liquid refreshment/ice/bait/fush,
if you have twin fuel tanks and two batteries there's a bit extra weight there already...plus you've put extra braces in,along with more matt/resin, which is a good thing but it adds a little extra weight at the same time,

just looked at the start again at your first pic, it didn't have a rear bench seat?
just for your consideration as another seating option
l made up a new rear bench seat to replace the cactus one that it came with using an old cut down seat base for the centre support and it also sits on the sipe pockets, 75 mm foam with black vinyl cover, length of treated pine ( all l had in the shed att )..also had the rear transom squab recoved as it had split from the weather
good thing about it is that it can be moved forward so it's under a bit of the canopy if it rains,
also has enough clearance under it to slide tackle boxes,

it can also be taken out altogether if we've only got two POB, more room for fishing,

it also fits into the other two boats as well,

anyway,was just a thought
cheers
 

xsesiv

Seaman
Joined
Jan 20, 2011
Messages
57
Re: 31-10-2012 - Start making rear seat box/esky...

Re: 31-10-2012 - Start making rear seat box/esky...

Heya Chrome.... I'm not too worried. It did have quite a heavy bench seat that used to go accross the back and rest on the side pockets. I think the weight of my replacement single seat boxes will be about the same as it was. Maybe marginally heavier. I've also removed the side pockets which were pretty heavy. I think they were in 1/2 inch plywood with a serious amount of glass on them.

Overal yes I've added weight. I still reckon she'll float! I am adding some more weight up the front atm with a replacement of the dash and closing in the cabin to provide some shade... more pics to come....
 

xsesiv

Seaman
Joined
Jan 20, 2011
Messages
57
02-11-2012 - Cutting out the dash

02-11-2012 - Cutting out the dash

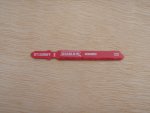
Well today I went to bunnings looking for a blade to put in the jigsaw to cut out the dash. I ended up getting a ceramics/fiberglass grit blade (see photo). I've decided to replace the dash as I want to add some new gauges, add a switch board and close in the front cabin. I also have plenty of plywood left from the initial 3 sheets I bought plus glass and resin. While at bunnings I also bought some 3m masking tape to tape over the gelcoat to hopefully limit and cracks/chipping when I take the jigsaw to it.

So.... I taped it up and roughly marked out what I wanted to cut and off I went with the jigsaw. About 5 minutes later it was done. All I can say is wow about the blade, it cut through so easily, even parts that had some plywood backing. It also left a nice course dust that just fell to the floor. I am so glad I didn't use a cutoff wheel in the grinder or my dremel. It would have made such a mess. No chips on the Gelcoat either!

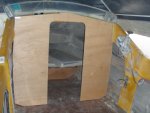
Next I cut out the plywood to make the cabin enclosed and fill the gap of what I removed. I gave it a couple coats of vinyl-ester resin and then put a layer of 450GSM CSM on both sides. When that all set I carried it into the boat and tried to sit it in place. A few area's needed to be trimmed, mainly for the side under cabin shelves and a bit on the top but all in all it fit's as good as it needs.
 

Attachments

  • gritblade.JPG
    gritblade.JPG
    105.4 KB · Views: 2
  • newdash.JPG
    newdash.JPG
    98.1 KB · Views: 3
  • dashdust.jpg
    dashdust.jpg
    146.1 KB · Views: 2
  • dashhack.JPG
    dashhack.JPG
    108.7 KB · Views: 2

xsesiv

Seaman
Joined
Jan 20, 2011
Messages
57
05-11-2012 - Starting to put the dash in

05-11-2012 - Starting to put the dash in

Well I spent an hour on her today. I PB'd in the new dash/cabin wall and added a peice of ply where the old handle used to go. I am not really sure exactly where I am going or what I am doing here.... time will tell....
 

Attachments

  • dashtopoldhandle2.JPG
    dashtopoldhandle2.JPG
    102.7 KB · Views: 1
  • dashcabinpbd.JPG
    dashcabinpbd.JPG
    102.1 KB · Views: 1

Chris72

Cadet
Joined
Nov 13, 2009
Messages
9
Re: 1985 v150 Nautiglass Sportsman restoration

G'day, xsesiv, I've been enjoying reading your about your rebuild, looking good. I have the same boat but mines a half cab and I'm about to start a transom repair and Im thinking about what condition my stringers are in, did have any cracks in the glass or gel-coat on yours as there is a couple around my keel area. I will start my own post on the repairs I do and follow your post with interest. keep up the good work.
Cheers Chris
 

xsesiv

Seaman
Joined
Jan 20, 2011
Messages
57
Re: 1985 v150 Nautiglass Sportsman restoration

G'day, xsesiv, I've been enjoying reading your about your rebuild, looking good. I have the same boat but mines a half cab and I'm about to start a transom repair and Im thinking about what condition my stringers are in, did have any cracks in the glass or gel-coat on yours as there is a couple around my keel area. I will start my own post on the repairs I do and follow your post with interest. keep up the good work.
Cheers Chris
Hey Mate, Thanks for reading and even more so for posting. My boat does not have any cracks in the glass/gelcoat in the transom area. It does however have a fair few along a couple of the ribs that run in between the keel and the stringers on the outside. There was also some spider type cracks on the glass not visible from the outside in those areas as well. I sanded it well back and layed up some 600GSM double bias over them to give them strength from the inside. I still have to deal with the outside/hull cracks on the ribs. This is the primary spot it's been taking on water.
I'll be getting to the hull cracks in a couple of weeks. Taking a weeks off the project and heading up to the Gold Coast with the family for a holiday!
 

xsesiv

Seaman
Joined
Jan 20, 2011
Messages
57
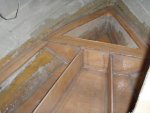
6-8/11/2012 - PB and tab in cabin seats

6-8/11/2012 - PB and tab in cabin seats

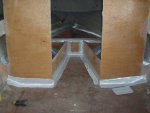
Well this was done what seems like an eternity ago. I PB'd in the seats and then tabbed in all the seat/anchor box framework. I also glassed in and sanded back the dash/gelcoat to attach it. Since then I have been away on holidays for a week in the gold coast doing the theme parks and then this week gone I have been on jury duty.
 

Attachments

  • cabinseatspb.JPG
    cabinseatspb.JPG
    99.9 KB · Views: 2
  • cabinseatstabbed.JPG
    cabinseatstabbed.JPG
    105.5 KB · Views: 2
  • cabinseatstabbing.JPG
    cabinseatstabbing.JPG
    98.1 KB · Views: 3
  • dashglassed2.JPG
    dashglassed2.JPG
    101.4 KB · Views: 3
  • dashglassingprep.JPG
    dashglassingprep.JPG
    108.2 KB · Views: 2

South Paw

Seaman
Joined
Apr 10, 2012
Messages
52
Re: 6-8/11/2012 - PB and tab in cabin seats

Re: 6-8/11/2012 - PB and tab in cabin seats

G'day mate, just wanted to say thanks for posting this thread and keeping me up. I'm sposed to be up in 5hrs to head to Goolwa (about 70 klicks out of Adelaide) to collect cockles/pipis.
Well done on the great job so far.
 

saginawbayboater

Senior Chief Petty Officer
Joined
Mar 8, 2012
Messages
677
Re: 6-8/11/2012 - PB and tab in cabin seats

Re: 6-8/11/2012 - PB and tab in cabin seats

Nice work xsesiv!!!!
 

xsesiv

Seaman
Joined
Jan 20, 2011
Messages
57
Re: 6-8/11/2012 - PB and tab in cabin seats

Re: 6-8/11/2012 - PB and tab in cabin seats

G'day mate, just wanted to say thanks for posting this thread and keeping me up. I'm sposed to be up in 5hrs to head to Goolwa (about 70 klicks out of Adelaide) to collect cockles/pipis.
Well done on the great job so far.

Hi South Paw. Hope you managed to get some sleep before you headed out! Thanks for posting and the positive comments. Where abouts do you fish in Adelaide?

Nice work xsesiv!!!!

Thanks for reading and posting saginawbayboater. Greatly appreciated.
 

xsesiv

Seaman
Joined
Jan 20, 2011
Messages
57
24-25/11/2012 - PB and tab in small pockets

24-25/11/2012 - PB and tab in small pockets

Yesterday I spent about an hour on it. I put some PB on the underside/inside cabin of the dash where is meets the new bit and then joined it to the exisitng top part of the dash with two layers of CSM. I had run out of these foam type rollers (probably to the best thing to use as the resin eats the glue holding them on the roller) I'd been using for vertical layups and when at the fiber glass shop he recommended I use a brush as I might find it easier and less messy. Well they say you find out things towards the end of your project and tha'ts right. This made it sooooo easy compared to the roller above my head and on the vertical layups.

I think this will be strong enough now as I have two layers of 450 GMS CSM on both the top and inside of where the dash meets cap. Should I add a layer of the 600 GSM Double Bias as well??? Now that I think about it... maybe I will put a layer of that tomorrow... advice please!

Today I spent about 4 hours on her. The 1st hour was just looking at it. Looking at what I have done and thinking about how I could have done better or different. Then it was on to what I will do next and how I will do it.

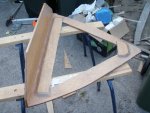
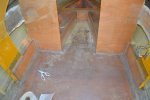
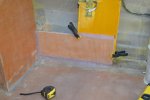
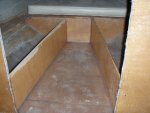
I measured up and cut out some plywood to make small pockets on the sides that will meet up with the new enclosed cabin. Not sure what they will be used for was yet, but they'll be used. I'm not putting the full length ones in as were origninally there as I like having the deck floor a bit wider.

I then layed up a couple of layers of 450 GSM CSM on both sides. I also glassed up some of the new rear seat/eskybox I've been working on in the background with the excess resin I'd made up. I always try to have some other things that need glassing or PB so I waste as little as possible. In saying that I still have made a handful of resin pucks this project so far!

After the glass had dried I next clamped them into place and PB'd (Peanut Buttered) them into the boat. Once the PB had dried I got out the flap wheel on the grinder to smooth them out and get rid of any rough spots (I'm still not coming up with nice smooth PB that I am happy to just glass over). Then i used the flap wheel to remove some gelcoat ready for tabbing them onto the deck and the bits that come down from the boat cap.

After another vacuum of the dust I tabbed the pockets into the boat.

It was so hot today. Nothing worse then sweating from the head while glassing!

Cheers
 

Attachments

  • pockettabbed.jpg
    pockettabbed.jpg
    95.5 KB · Views: 2
  • pocketstabedandseattop.jpg
    pocketstabedandseattop.jpg
    102 KB · Views: 3
  • pocketpb.jpg
    pocketpb.jpg
    91.9 KB · Views: 2
Top