1985 v150 Nautiglass Sportsman restoration

xsesiv

Seaman
Joined
Jan 20, 2011
Messages
57
Hi All,

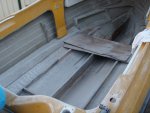
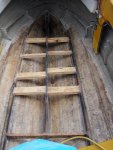
This is a thread about work I am doing on my nautiglass. It's a 4.6mtr fiber glass half cabin boat I bought 4 or 5 years ago. It's always had a pretty spongy floor and has been taking on water for the last year or so. After each trip out water has been coming out of the bottom plug with bits of what looks like rotten black plywood. Not good eh..... Well a couple of weeks ago I decided it was well past being safe on the water and being one to always enjoy doing something once at least though I'd try my hand in glassing etc and fixing it. I'll also be addressing the leaks in the hull :>

I will start adding some posts of what I have done each day.

The Boat. I probably should just buy another one, but I really like this and I think I have that 1st boat thingy!
 

Attachments

  • boat_brewery.jpg
    boat_brewery.jpg
    129 KB · Views: 0

xsesiv

Seaman
Joined
Jan 20, 2011
Messages
57
17-09-2012 - Pulling up the deck to see the extent of the damage

17-09-2012 - Pulling up the deck to see the extent of the damage

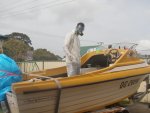
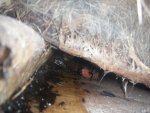
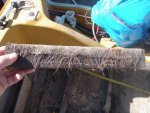
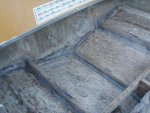
Well today I got started. I spent about 4 hours on it today. Taking my time and making sure not to do any more damage to the hull etc. The boat has had some sort of work done on the deck previously by the looks of it. It felt like the skin had delaminated from the floor underneath. I got kitted up in the appropriate safety gear and got out the dremel to make a start on cutting out the old skin. The skin was quite thick and possibly the only thing holding the boat together!

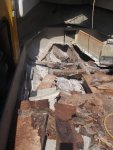
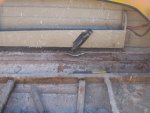
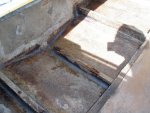
The plywood under the main seats was all but gone completely. I got the front part of the floor, the two front seat boxes removed and the anchor well out.
 

Attachments

  • suited_up.jpg
    suited_up.jpg
    139.3 KB · Views: 1
  • skin.jpg
    skin.jpg
    60.3 KB · Views: 2
  • rotten1.jpg
    rotten1.jpg
    67.2 KB · Views: 2
  • rotten2.jpg
    rotten2.jpg
    71.4 KB · Views: 2
  • rotton3.jpg
    rotton3.jpg
    66.3 KB · Views: 2

xsesiv

Seaman
Joined
Jan 20, 2011
Messages
57
18-09-2012 - Pulling up the rest of the deck and assessing the damage

18-09-2012 - Pulling up the rest of the deck and assessing the damage

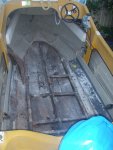
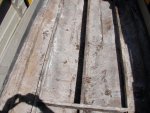
Today I got the major part of the back deck pulled up. About 2 hour work. There was more rotten wood, bad fiber glassing and lots of dodgy looking stuff. Little bits of wood, Masonite etc etc. I really hope it didn't come out of the shop this way....

BTW, if you have any ideas, advice or questions please post. Any feedback would be greatly appreciated.
 

Attachments

  • rotten4.jpg
    rotten4.jpg
    61 KB · Views: 2
  • rotten5.jpg
    rotten5.jpg
    128.6 KB · Views: 2
  • floor_up.jpg
    floor_up.jpg
    61.3 KB · Views: 2

xsesiv

Seaman
Joined
Jan 20, 2011
Messages
57
19-09-2012 - Pulled up the fuel tank bay deck and cut the deck lip closer to the hull

19-09-2012 - Pulled up the fuel tank bay deck and cut the deck lip closer to the hull

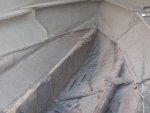
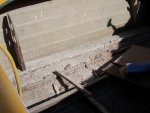
Today I spent about 2 hours on the boat. I am taking it slowly as I don't know what's under the deck and where the hull is etc and I really don't want to cut through it and make more work for myself. I got the deck/bay for the fuel tanks near the transom cut out. I also cut the deck lip back close as I could getting ready to grind/sand it back the last part. The quality of the initial glassing leaves a lot to be desired. It will surely be way stronger when i am finished with it.
 

Attachments

  • fueltank.jpg
    fueltank.jpg
    61.7 KB · Views: 3
  • cabindecklip.jpg
    cabindecklip.jpg
    139.9 KB · Views: 3
  • decklip.jpg
    decklip.jpg
    61.5 KB · Views: 3
  • bulkcap.jpg
    bulkcap.jpg
    70.5 KB · Views: 3

xsesiv

Seaman
Joined
Jan 20, 2011
Messages
57
20-09-2012 - Remove fiberglass on stringers, Rod holder side and clean up

20-09-2012 - Remove fiberglass on stringers, Rod holder side and clean up

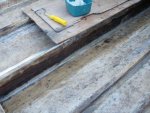
I got about an hour on the boat today. I cut all the fiberglass caps/tabbing off the stringers. Well cut off what hadn't just fallen off. I also decided to remove the sides of the rod holders as the deck went underneath them. This was more of a job than expected. I gave the boat a general sweep and clean out.
 

Attachments

  • cleanstringers1.jpg
    cleanstringers1.jpg
    69.1 KB · Views: 3
  • cleanstringer2.jpg
    cleanstringer2.jpg
    77.3 KB · Views: 2
  • removerodpocket1.jpg
    removerodpocket1.jpg
    54.4 KB · Views: 3

xsesiv

Seaman
Joined
Jan 20, 2011
Messages
57
23-09-2012 - Grind most of the deck lip off

23-09-2012 - Grind most of the deck lip off

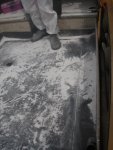
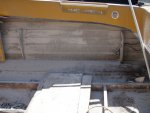
Today I took off the other rod holder side and started to grind off the deck lip. I can't get over the dust created. It was like snow everywhere. Even with the full suit on it was still itchy going. The worst part was it was so hot and my goggles just kept fogging up and sweat running all over them. Not a fun day that's for sure. Another 2 hours today. I still have the bow deck lip and the transom one to remove. I'd had enough for today!
 

Attachments

  • grindlip1.jpg
    grindlip1.jpg
    52.3 KB · Views: 2
  • grindlip2.jpg
    grindlip2.jpg
    140.5 KB · Views: 2
  • backdust.jpg
    backdust.jpg
    61.2 KB · Views: 2
  • grindlip3.jpg
    grindlip3.jpg
    127.6 KB · Views: 2

xsesiv

Seaman
Joined
Jan 20, 2011
Messages
57
24-09-2012 - Grind off transom and bow deck lip. Clean up all the DUST!
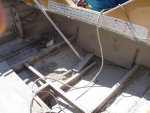
24-09-2012 - Grind off transom and bow deck lip. Clean up all the DUST!

Only got an hour on it today. I fished up grinding the deck lip off the transom and bow. I also gave it a reasonable clean out so I could see the hull again!
 

Attachments

  • transomlip.jpg
    transomlip.jpg
    62.7 KB · Views: 1
  • bowlip.jpg
    bowlip.jpg
    135.7 KB · Views: 1

xsesiv

Seaman
Joined
Jan 20, 2011
Messages
57
26-09-2012 - Cut out rotten stringers and grind hull

26-09-2012 - Cut out rotten stringers and grind hull

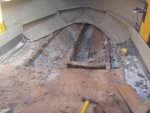
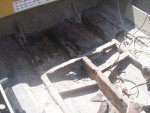
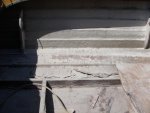
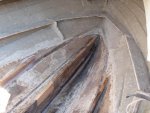
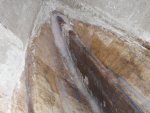
Spent about another hour on it today. I inspected the stringers and removed the rotten parts. Half the port one had to come out and a piece of the main keel in the middle. I also grinded the back of the two main ribs where the hull had been leaking in preparation for a fix.
 

Attachments

  • grindribsandfloor.jpg
    grindribsandfloor.jpg
    70.6 KB · Views: 3
  • removerottenstringers.jpg
    removerottenstringers.jpg
    69 KB · Views: 3

Georgesalmon

Lieutenant Commander
Joined
Apr 14, 2012
Messages
1,793
Re: 26-09-2012 - Cut out rotten stringers and grind hull

Re: 26-09-2012 - Cut out rotten stringers and grind hull

Hey, looks like fun! Have you taken a good look at your transom? Its not unusual for the transom to be rotten, I only say this because of what I have seen in your great pictures. With all the bad wood you have its almost a certainty the the transom is the same inside.
 

xsesiv

Seaman
Joined
Jan 20, 2011
Messages
57
01-10-2012 - Fillet in the transom and cut the replacement stringer

01-10-2012 - Fillet in the transom and cut the replacement stringer

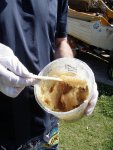
I've been sick for a bit so have not been able to get into the boat for the last few days, but I got another hour on it today. I had my first attempt at making peanut butter. I should point out that I am going with Poly resin for this job. I have purchased most of the stuff I expect I will need. 40KG Polyester resin, I roll of 450GSM CSM (64MTR), 6KG of double bias tape, mixing cups etc etc!

I made the PB with Poly resin, Cabosil (fumed silica) and 6mm chopped strands.

I re-filleted in the transom to the hull as there was a bit of a gap there. I also found that the plug hole was about 12mm above the hull bottom. This cant help with drainage. I will probably build the hull up to make it the bottom I am thinking. I also filleted about half a meter of the stringers and keel. I've also cut the wood for the replacement of the port stringer.
 

Attachments

  • fillettransom.jpg
    fillettransom.jpg
    67.9 KB · Views: 3
  • peanutbutter.jpg
    peanutbutter.jpg
    70.3 KB · Views: 3

xsesiv

Seaman
Joined
Jan 20, 2011
Messages
57
03-10-2012 - Fillet all stringers, put in replacement grind it all smooth

03-10-2012 - Fillet all stringers, put in replacement grind it all smooth

I put in a good 4 hours today. I got the new stringer and the old ones all filleted in with peanut butter. I then grinded it all smooth ready for tabbing and glassing. I also grinded off all the lumps and un-resin'd old CSM that was all over the place. Dam that dust is soo itchy it's not funny. I hope that's the last of it...
 

Attachments

  • refilletstringers.jpg
    refilletstringers.jpg
    79.3 KB · Views: 2
  • filletnewstringer.jpg
    filletnewstringer.jpg
    63.6 KB · Views: 2
  • grinditsmooth.jpg
    grinditsmooth.jpg
    138.1 KB · Views: 2
  • filletcleanup.jpg
    filletcleanup.jpg
    69.6 KB · Views: 2

xsesiv

Seaman
Joined
Jan 20, 2011
Messages
57
04-10-2012 - Tabbed in the keel and added bulkhead/support

04-10-2012 - Tabbed in the keel and added bulkhead/support

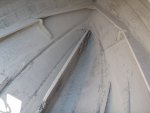
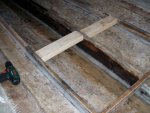
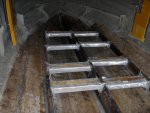
I got about 2 hours on it today. I tabbed in the keel with double bias 600GSM tape. It went down really well. Virtually no bubble problems. I actually really enjoyed the 1st attempt at glassing. I also got a couple of the supports/cross members/bulk heads in. They are in the place the seam will be in the deck when it goes in so it gives it good strength.
 

Attachments

  • keeltabbedin.jpg
    keeltabbedin.jpg
    76.8 KB · Views: 1
  • addcrossmembers.jpg
    addcrossmembers.jpg
    72.5 KB · Views: 1

xsesiv

Seaman
Joined
Jan 20, 2011
Messages
57
Re: 26-09-2012 - Cut out rotten stringers and grind hull

Re: 26-09-2012 - Cut out rotten stringers and grind hull

Hey, looks like fun! Have you taken a good look at your transom? Its not unusual for the transom to be rotten, I only say this because of what I have seen in your great pictures. With all the bad wood you have its almost a certainty the the transom is the same inside.

Hi George, Thanks so much for the reply. I had a pretty good look at it. I drilled some core samples low and up higher and it seems OK. I thought about replacing it long and hard and decided that if I do it it will probably be done from the outside. I know there is alot of debate on inside/outside but I am not keen to take the cap off the boat nor cut out the splashwell. I plan to probably replace it at some stage, just not as part of this job as such. Being my 1st glassing work I don't want to bit off too much.... Make sense or am I just being crazy. The transom feels, sounds very solid and there is no stress cracks in the gelcoat in the area.
 

xsesiv

Seaman
Joined
Jan 20, 2011
Messages
57
05-10-2012 - re-tab in stringers and transom

05-10-2012 - re-tab in stringers and transom

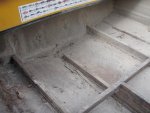
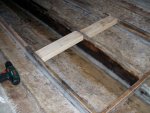
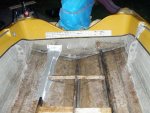
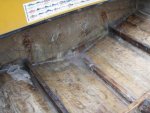
I put in 3 hours today. I got the stringers mostly re-tabbed in to the hull and also glassed the transom to the hull. All this was done with the 600GSM double bias tape. I spent the rest of the afternoon cutting cross members.supports etc. I am putting in over twice the amount that was there before for strength. I have made them slightly offset to allow them to be screwed in. I have used stainless steel screws and capped them with sikaflex 291/2.
 

Attachments

  • addcrossmembers.jpg
    addcrossmembers.jpg
    72.5 KB · Views: 1
  • tabbedtransandstringers.jpg
    tabbedtransandstringers.jpg
    73 KB · Views: 1
  • taperoll.jpg
    taperoll.jpg
    123.1 KB · Views: 1
  • resinandmaterials.jpg
    resinandmaterials.jpg
    121.7 KB · Views: 1

Georgesalmon

Lieutenant Commander
Joined
Apr 14, 2012
Messages
1,793
Re: 05-10-2012 - re-tab in stringers and transom

Re: 05-10-2012 - re-tab in stringers and transom

Glad to hear you checked the transom. As long as your doing all this work now would be the time but only if it needs it. Looks like your doing a bang up job. Are you gonna use that polar white to paint the entire bottom when your finished glassing?
 

xsesiv

Seaman
Joined
Jan 20, 2011
Messages
57
Re: 05-10-2012 - re-tab in stringers and transom

Re: 05-10-2012 - re-tab in stringers and transom

Glad to hear you checked the transom. As long as your doing all this work now would be the time but only if it needs it. Looks like your doing a bang up job. Are you gonna use that polar white to paint the entire bottom when your finished glassing?

I hope you mean good or OK job by 'bang up job' :> The polar white is mean to be flowcoat. The plan was to paint the deck with it when finished glassing before putting down marine carpet. Is that an OK plan?
 

Woodonglass

Supreme Mariner
Joined
Dec 29, 2009
Messages
25,927
Re: 05-10-2012 - re-tab in stringers and transom

Re: 05-10-2012 - re-tab in stringers and transom

If you're gunna carpet the boat, I'd recommend Gelcoating the deck. Much more durable. A bit more costly but if you plan on keeping her for a while it might be worth it.
 

xsesiv

Seaman
Joined
Jan 20, 2011
Messages
57
Re: 05-10-2012 - re-tab in stringers and transom

Re: 05-10-2012 - re-tab in stringers and transom

If you're gunna carpet the boat, I'd recommend Gelcoating the deck. Much more durable. A bit more costly but if you plan on keeping her for a while it might be worth it.

Will it make that much of a difference if I am going to carpet it anyway? I mean that i'm thinking the flowcoat wont be getting much if any direct traffic on it?
 

Woodonglass

Supreme Mariner
Joined
Dec 29, 2009
Messages
25,927
Re: 05-10-2012 - re-tab in stringers and transom

Re: 05-10-2012 - re-tab in stringers and transom

True but carpet gets wet and holds moisture. I think it would just be a better substrate. Heck if you're gunna glue the carpet down, you really only need to lay a couple layers of CSM and wax the last layer for waterproofing then scuff sand just before applying the glue for the carpet No Paint of Gelcoat or anything is required.
 

xsesiv

Seaman
Joined
Jan 20, 2011
Messages
57
06-10-2012 - hull glassed, peanut butter in keel and add supports

06-10-2012 - hull glassed, peanut butter in keel and add supports

I got in about 3 hours today. I am really happy with how things are coming along. I am sure there are better ways and technique's I could have used with more experience but I am confident it will be stronger, better sealed then it ever was before.

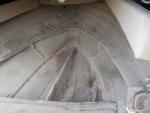
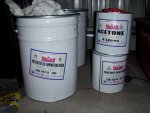
I gave the hull a good wash with acetone all over to make sure it was ready for the glass. I put peanut butter in the back of the floor ribs that had cracked gelcoat on the outside of the hull and then glass the entire hull with double bias tape. This should hopefully give it a whole lot more strength while still allowing it to be somewhat flexible. Cleaned up where the front of the keel meets the hull at the bow and filled it in with peanut butter ready for glassing in. Filleted all the supports with peanut butter to get them ready for glassing. I then stapled the glass on the supports with marine grade staples. I found this makes things a lot easier wetting out when going around corners (I did the same on the last half of the stringer caps).
 

Attachments

  • glassedfloor.jpg
    glassedfloor.jpg
    71.8 KB · Views: 3
  • supportsin.jpg
    supportsin.jpg
    69.7 KB · Views: 3
  • bowkeel.jpg
    bowkeel.jpg
    67.4 KB · Views: 3
  • supportsandfloor.jpg
    supportsandfloor.jpg
    67.6 KB · Views: 3
Top