1985 Bayliner Capri Cuddy Restoration

nick.p

Cadet
Joined
Sep 2, 2015
Messages
7
Hello everyone,

This is my first post here. I'm posting from Rhode Island and I wanted to show you guys where I stand with my project, and get some feedback on it.

The Purchase
It all began when I purchased a 1985 Bayliner Capri Cuddy up in New Hampshire last September. I dragged my girlfriend up and we looked at it, saw it run, and inspected it. Unfortunately, we did not inspect it enough.....but more on that in a minute. We decided to buy it for $1250 and we picked it up the next week.

The drive back to Rhode Island was smooth, and I got to work the next day thoroughly cleaning it up.

IMG_0385.JPG

The Maiden Voyage
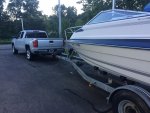
We launched in the local salt pond and started our maiden voyage. The engine started up right away, and we put her right in the water (see the picture below at the dock). Now, this is where to first issues begin.

IMG_0412.JPG

As some of you may or may not know, the Volvo Penta 270 outdrive doesn't have an actual trim, just a drive lift. Therefore, it can either be all the way down or all the way up. Attempting to use it in any other position in reverse will cause it to bounce, unbeknownst to me. This particular pond gets very shallow and requires knowledge of the channels to successfully navigate it. We we able to get away from the dock, and took it to a deeper part of the pond to see what kind of power it had. She ran beautifully and we were cruising across the pond celebrating our purchase.

That's when it all starting going bad. We slowed down and started navigating through the channels. That's when we noticed water in the stern seating area coming up through the floor. Not only was it there, but it came all the way up to the mouse hole in the cuddy. Yikes. The engine was having trouble staying on. So, we were able to get to a dock to offload people and equipment, and decided to make an attempt to get it back to the original dock about 400 feet away. There really wasn't a lot of danger because of how shallow the pond is, but it was difficult nonetheless. We ended up getting it out, and while on the trailer did a thorough inspection in an attempt to find the culprit.

The bad news: the transom seal was cracked at the bottom of the outdrive, and was pouring water out of it. We got it back home and left the trailer jack propped up on blocks overnight to allow it to drain.

The Rebuild
Thoroughly disheartened with the outcome of the maiden voyage, I spent the next day on these forums looking for solace from other Bayliner owners. Luckily, I found multiple threads about complete renovations. Being somewhat handy, and having a decent schedule, we decided that we would completely rebuild the boat from the ground up.

Over the next couple weeks, we completely dismantled the boat. What we found was shocking. When I first ripped up the carpet, the solid floor that I felt when we first bought it was actually just a piece of plywood covering a completely rotten floor. I was pissed at the seller, especially since he definitely knew this, and pissed at myself for not being so thorough. I knew I had a great opportunity to learn a lot more about boat construction, and create a pretty cool boat that I could trust to take friends and family around in.

The next post it this thread will be picture heavy, so that's why I'm breaking it up a little.
 

Attachments

  • IMG_0385.JPG
    IMG_0385.JPG
    94.2 KB · Views: 1

Bayou Dave

Lieutenant Commander
Joined
Dec 13, 2012
Messages
1,780
That really sucks! But, I am not surprised since it is a mid 80's Bayliner. Too bad you didn't read the posts about buying a boat here before you bought it. But, now that you are all in on the project, you will end up with a better than new boat. Good luck!
 

nick.p

Cadet
Joined
Sep 2, 2015
Messages
7
The rebuild began by ripping up the carpet and the floors that were completely rotted (including the plywood that was hiding the floor). This also exposed the foam, which was completely water logged and filled with carpenter ants. Definitely not a fun time. It was pretty easy to get most of it out, as it was so rotted. The tools of choice for this were crowbar, large carpentry hammer, regular hammer, and some putty knives. Every few hours, taking a vacuum to the remnants got the floor clean to analyze where we were. Take a look at the pictures below, and I'll put a caption under each of what you are seeing.

Before the Fateful Maiden Voyage

The driver's area. It wasn't terrible. My biggest complaint is that the pedestal forces me to put one foot on the floor, and one on the "riser". It's very uncomfortable for driving while standing.


The side before the initial cleaning, it had been sitting for a while before I purchased it.


A comparison after washing the boat down with some dawn and a sponge. Got most of the nastiness off.

My trusty copilot staying out of the sun while I get some work done.

IMG_0389 (1280x960).jpg
Right below the shop vac is where the rotting was, and it was covered up by the plywood.....should've known!

IMG_0392 (1280x960).jpg
Definitely some rot and nastiness around that I figured would be fixed over time. All of the seat cushions were stapled over with some vinyl from the previous owner. He didn't put much work into it.

After the maiden voyage

Like I said, I was quite disheartened after the first trip. But, after finding these forums and a couple inspirational projects, I decided to rip the thing apart (part of it was optimism, the other part anger). Below is what I found:

IMG_0418 (1280x960).jpg
Floor looks solid, right? Not a chance. That was just a single sheet of plywood, not sealed or fastened down in any way. Once that came up, I started to see the real problems develop.

IMG_0422 (1280x960).jpg
Rotten floor can be seen under the plywood.

IMG_0467 (1280x960).jpg
That's what I found underneath. Part of why I was so upset was that the owner clearly knew about this, and had he sold this to a family with young children or pets that weren't going to go in a shallow pond, it could have been much, much worse. But, it's all about learning, and I will certainly check for these things on my next boat!

IMG_0469 (1280x960).jpg
I didn't take a whole lot of pictures through the process, but what I can tell you is that everything was rotten. The floor and foam were unbelieveable. We even found carpenter ants in the foam. We chipped everything out, and where it stands now has just the stringers left. The engine still needs to be pulled, which leads me to my next point, and where we are at now.

The engine ran beautifully. I never did a compression check, but we were definitely cruising just fine when we were out on the pond. The biggest issue was that the circuit panel was so old and corroded, I had to spin the fuses to get a good contact. That will definitely need to be changed.

That being said, we left it for the winter.....and it seized. The last week I have been working hard to get it unstuck. I acquired a new starter, and put some liquid wrench in the spark plug holes over the course of a few days, and we were finally able to get it to turn by hand. We are going to do a tune up, and once that is complete, we will try to get it started to see where we stand. If is starts, then we will likely give it a thorough tune up to last the rest of the summer, and decide whether or not to rebuild it over the winter based on the performance.

The Future Plan

The engine is the main concern. We were able to find the actual shop manual for the engine, and got it printed and bound at Staples, as well as the outdrive shop manual. That will definitely help with restoration. The engine will need to be pulled so we can redo the transom, and inspect the bilge for any damages.

Once the engine is back in, we can start building. Now that I have a blank slate, I can completely get rid of the awful stock floorplan. I love the way that the Bayliner Trophy hardtops look, so I was going to design something somewhere between that and a Bayliner Explorer. The ultimate purpose will be to get a nice boat to cruise around Narragansett Bay, and even do some fishing.

There will most likely be a single captain's chair, and then a bench seat or modified dinette on the port side. This boat will never see carpet again. The floor will get a nice paint coat, and the cuddy will be revamped as well.

I don't want to get too ahead of myself, but I'm the kind of person that needs a vision to have motivation in a project. A lot of experienced boat owners and family members tell me to not get too ahead of myself, but again, I need to see the final product to justify all the hell I'm putting myself through!

So there's where I stand. I am going to be working on it this week, and I'll post a current picture of what it looks like now that I have completely gutted it.

Any feedback or comments from you guys/gals out there?

Happy 4th from Rhode Island :happy:

Nick
 

nick.p

Cadet
Joined
Sep 2, 2015
Messages
7
That really sucks! But, I am not surprised since it is a mid 80's Bayliner. Too bad you didn't read the posts about buying a boat here before you bought it. But, now that you are all in on the project, you will end up with a better than new boat. Good luck!

Live and learn! I'm excited to see what I can come up with and to learn about boat construction. It'll be a great boat, and will serve my needs for sure. Thanks for taking the time to look!
 

laurentide

Lieutenant Commander
Joined
Jul 24, 2011
Messages
1,869
Just something to consider before you get too far into this:

•It will be expensive and it won't be worth close to what you put into it.

•Are you certain that this is the hull you want? With an outdrive in saltwater? I have no personal experience with 80's Bayliners but they have a pretty terrible reputation for build quality. Given your location there are likely better rebuild candidates on your local CL. And an outboard has some advantages in salt. If you look at your launch pic, every single other boat is outboard powered, and there are several reasons for that in the salt. You're at the point right now where you could part it out and get all your money back...trailer, engine, and outdrive.

If you're dead set on this rebuild, more power to you. It may be rewarding. But it will be be money and time consuming. Just make sure it's the boat that you really want. Been there and ended up with a good engine and trailer and took the hull to the dump. Good luck! I'm not trying to discourage you, just want to point out some stuff that you may want to consider.
 
Last edited:

Bkok33

Seaman
Joined
May 3, 2016
Messages
72
Good luck with everything. Hope things go well and you are back on the water soon. Look forward to seeing the progress.
 

nick.p

Cadet
Joined
Sep 2, 2015
Messages
7
Just something to consider before you get too far into this:

•It will be expensive and it won't be worth close to what you put into it.

•Are you certain that this is the hull you want? With an outdrive in saltwater? I have no personal experience with 80's Bayliners but they have a pretty terrible reputation for build quality. Given your location there are likely better rebuild candidates on your local CL. And an outboard has some advantages in salt. If you look at your launch pic, every single other boat is outboard powered, and there are several reasons for that in the salt. You're at the point right now where you could part it out and get all your money back...trailer, engine, and outdrive.

If you're dead set on this rebuild, more power to you. It may be rewarding. But it will be be money and time consuming. Just make sure it's the boat that you really want. Been there and ended up with a good engine and trailer and took the hull to the dump. Good luck! I'm not trying to discourage you, just want to point out some stuff that you may want to consider.


The project definitely isn't for resale value, I know that much. The boat is going to be trailered, so even though salt water isn't the best for I/O, it'll be rinsed after every outing.

I have definitely considered scrapping the boat/parting it out. We will see what the motor does this week, and that is going to determine the course. I'm optimistic, and don't mind doing some leg work to get it going.
 

bruceb58

Supreme Mariner
Joined
Mar 5, 2006
Messages
30,758
I would part it out and take this as a lesson learned. Don't throw good money after bad. I would have taken one look at those seats and realized that was just the first hack job you were going to find.
 

fractalphreak

Recruit
Joined
Jun 16, 2015
Messages
5
Welcome! My son and I have just about wrapped up a full rebuild of a 1983 Bayliner Capri 1952 Cuddy. While I haven't posted the saga on the forum, virtually everything we did came from what we learned here. I've attached a link to the photobucket of what I have documented on ours, and here's a pic of our close to final product.


A few thoughts as you get started:

Don't worry about the Bayliner build quality issues. Our boats were built at a low point in quality control. You'll see that as you continue demo; most of the issues are in how the wood cores for stringers, bulkheads, and decks went in. The hull is laid with roving and plenty strong. What you build into it will be a big determiner of its overall quality from this day forward.

Take lots of pictures and measurements. Especially measurements. Once you have everything removed from the bare hull, and the hull ground down to fresh glass, you lose most reference as to what was where. Even if you will be reinventing your floorplan, you'll still need to get the stringers and deck in the right locations.

If you do modify the floor plan think carefully about how the boat is currently built structurally. The cuddy boats only have stringers from the transom forward to the cuddy bulkhead. The seat platforms and v-berth structure provide the reinforcement to the entire front half of the boat. The open bow Capri's of the same size all had more substantial stringers all the way to the bow, there are a few good rebuild pics here on iboats of open bow Capris showing that detail. I considered the seat platforms part of the structure, and built, tabbed, and foamed them as such.

You'll hear a lot about pulling the cap (top half of boat above the seam where the rub rail is) for many rebuilds. There's no need to do that on this boat. We had plenty of room to do everything we needed with the cap on because of the design of the cap. Leaving the cap on will also help keep the hull in shape as you grind it down and install new stringers.

Plan on now to build some sort of cradle/support for the hull. Once you have all the guts gone it flexes. Some build a standalone cradle and remove the hull from the trailer and put it on the cradle. I built my cradle on the trailer, using four 2x10 "outer stringers" on the outside of the hull strapped together with 2x4s. Basically an overbuilt set of bunks added to the trailer.

I spent a good portion of the last year and a half gathering information on Capri especially cuddy rebuilds; I have a lot of pics I've captured from various places on the web if you're looking for something I can either point you to where I found it or share what I have.
 

bruceb58

Supreme Mariner
Joined
Mar 5, 2006
Messages
30,758
I used to own a 1987 Bayliner Cuddy 2150. There is NO way, I would rebuild it. Sorry..not worth the time an money compared to another brand or boat. I took meticulous care of mine and I wouldn't rebuild it either.
 

rotorhead22

Seaman
Joined
May 19, 2015
Messages
74
I don't have your brand of boat but I feel your pain. I trusted the seller also and we were lucky our motor didn't fall off in the gulf. It may seem overwhelming but just set goals and adjust as necessary. Be sure to protect your lungs and eyes. Fiberglass grinding and installation will mess you up if you try to be a tough guy or scrimp on protective equipment. I learned the hard way.
 
Top