1985 Bayliner 2750 Ciera Sunbridge Resto

eggs712

Petty Officer 1st Class
Joined
May 8, 2012
Messages
333
you took my idea did ya.....lol glad to see another fishfinder flush mounted..... your horns are nice btw. I am adding full blown airhorns to mine. keep up the great work and cheers.... when are you splashing?
I love the sleek look, and I'm happy to finally have the dash space to do it lol. These horns are surprisingly loud for electric; they blew my 10A fuse and I had to swap to a 15A fuse. I hope to splash by next summer if I can get a bunch done this winter
 

eggs712

Petty Officer 1st Class
Joined
May 8, 2012
Messages
333
Has anyone here tried insulating their cabins/cuddy? I've been debating on using a closed cell foam like Armaflex or EVA as a headliner, but I'm unsure if the expense is worth it. My goal is to have the cabin more bearable during hot days. Opening hatches and using 12V fans may be the simpler option, but I'd love some opinions.
 

kcassells

Fleet Admiral
Joined
Oct 16, 2012
Messages
8,598
Ya know that is a great idea. I probably wouldn't waste my time or money
unless I was doing ac. Da whole ding is a heat/cool loss.
I don't believe you will have any real gains.
 

eggs712

Petty Officer 1st Class
Joined
May 8, 2012
Messages
333
I've been making a little progress on the weekend, the bow rail and swim platform fittings are all shiny 316 stainless now.
Before:
20230820_115309.jpg
20220604_115359.jpg
The teak shims behind the 90 degree fittings on the swim platform were cracked too, so I replaced them with starboard.
20230910_215145.jpg
I also replaced every cleat and the VHF antenna mount with 316 stainless.
20230827_165129.jpg
I found some small stainless folding steps pretty cheap on Amazon and added them for easier access to the walk-through windshield.
20230916_140913.jpg

20230916_140925.jpg

Since all the above hardware is through-bolted, several pairs of vise-grips to hold the nuts were my best friend, but it was still a lot of climbing in and out of the boat. Everything is rebedded with 4200, and will hopefully last a long time now
 

eggs712

Petty Officer 1st Class
Joined
May 8, 2012
Messages
333
Still plugging away on this on the weekends.
The cooler weather finally let me continue glassing my bow pulpit.
20231008_194516.jpg
Added a couple more layers of 1708 before running out of cloth, then finished the last few layers with CSM to flush out the part that attaches to the hull, sanded that smooth and rolled 3 layers of white gelcoat on.

I also started reworking my gauge panel to make space for a second fish finder/chartplotter. The toggle switch panel is nearly done. I made it out of 1/8" powder coated aluminum and squeezed all the usable space I could out of it plus adding some USB chargers and extra switch holes.
20231022_160252.jpg

Both of my Bomar starboard portlights were broken, but I had enough good parts to make one good portlight and purchased one replacement.
20231008_180017.jpg
They were rebedded with butyl tape. The port side portlights still need reinstalled and bedded.

Most other progress is electrical. I'm adding an emergency bilge pump and a bilge alarm system. Also planning on adding a baitwell at some point, LED cockpit lighting, and raw water washdown. I'm running that wiring now as well as adding a bronze scoop/seacock for the baitwell and washdown.
 

eggs712

Petty Officer 1st Class
Joined
May 8, 2012
Messages
333
I'm slow at this electrical thing... lots of random wires and poor splices have been cleaned up though. Also:
-Emergency bilge pump (3700 GPH) and new thru-hull is installed.
-High water alarm that beeps and flashes at me is installed.
-I'd bought Seaflo electrical sensor waters, but one didn't bench test well. I found the Aqualarm pump switches and used those instead.
-Replaced the main 12V wires to the dash from 10 gauge to 8 gauge
-Eliminated all inline fuses and added a labeled ATO/ATC fuse block and ground bus bars in the dash and engine bay.
-Pulled wires for adding gunwale LED strip lights and engine bay work lights
-Re-worked instrument panel, omitted a speedometer:
20231112_203704.jpg
-Added a VHF with external speaker:
20231112_203927.jpg

20231112_204025.jpg

New Garmin GPSMap 943xsv:
20231118_215232.jpg

Added a stay for the walk-thru windshield for rough seas. It's just two bimini holders with a pin.
20231029_175739.jpg
Lastly, gelcoated the bow pulpit, overdrilled the bolt holes and filled with epoxy, and filled all hairline cracks with thickened gelcoat.
20231029_124733.jpg
 

Attachments

  • 20231112_203833.jpg
    20231112_203833.jpg
    2.4 MB · Views: 2

eggs712

Petty Officer 1st Class
Joined
May 8, 2012
Messages
333
I finally received the Sierra risers for the engine a few days ago. Those were installed with new exhaust hose today. I was ready to start it, but the turning the key didn't engage the starter. I may have messed up a wire during all my electrical tinkering; I'll track that down next weekend.

While installing the risers, I decided some more lighting would be nice in the engine bay, and I already had some extra LED strips:
20231126_174940.jpg
 

mickyryan

Rear Admiral
Joined
Apr 18, 2016
Messages
4,210
when i did my pulpit on the trophy, i ran a small tube through it to feed a wire for search light i mounted on front of it worked great:)
 

eggs712

Petty Officer 1st Class
Joined
May 8, 2012
Messages
333
I added a GT51 transducer for the new fishfinder, and used a Blue Sea Systems horizontal cable gland to run the cable through the transom. I think it gives a clean look:
20231202_203800.jpg

I also added a bronze high speed water pickup with a proper seacock and dual outlet aerator pump:
20231217_201129.jpg

I plumbed a washdown pump from it,
20231217_201327.jpg

And added the washdown outlet to an empty existing hole that happened to be in a great spot:
20231217_200914.jpg
The livewell plumbing will be added later when I decide the deck layout. I'll likely use the plastic tank kind that can be moved around.

Lastly, I added under-gunwale lights:
20240101_204656.jpg

20240101_204701.jpg

As can be seen, my work area is a mess right now!
 

kcassells

Fleet Admiral
Joined
Oct 16, 2012
Messages
8,598
I added a GT51 transducer for the new fishfinder, and used a Blue Sea Systems horizontal cable gland to run the cable through the transom. I think it gives a clean look:
View attachment 393285

I also added a bronze high speed water pickup with a proper seacock and dual outlet aerator pump:
View attachment 393286

I plumbed a washdown pump from it,
View attachment 393287

And added the washdown outlet to an empty existing hole that happened to be in a great spot:
View attachment 393288
The livewell plumbing will be added later when I decide the deck layout. I'll likely use the plastic tank kind that can be moved around.

Lastly, I added under-gunwale lights:
View attachment 393289

View attachment 393290

As can be seen, my work area is a mess right now!
Very busy guy you are. Cool. I need to add a light in my bilge.
 

eggs712

Petty Officer 1st Class
Joined
May 8, 2012
Messages
333
Hot compression numbers are:
8: 148
7: 156
6: 130
5: 148
4: 130
3: 145
2: 150
1: 154

I'm not sure if cylinders 6 & 4 are bad enough to reevaluate keeping this motor.
 

eggs712

Petty Officer 1st Class
Joined
May 8, 2012
Messages
333
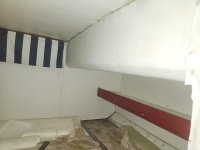
Still plugging away here, but the weather has not cooperated on the weekends. I wasted a lot of hours trying to remove all the old carpet glue in the cabin, which I'd been putting off. The only thing that finally worked was a wire wheel in my drill. Still slow and messy, but most of it is gone now.

I finally had some windows of warmth to work on a couple of glassing projects the last two weekends. First, the wood under the bow eye was rotted, and the plain steel nuts were rusted on. I ground the nuts off and the rotted wood back to clean fiberglass.
20240303_103842.jpg
I then glued two 3/4" ply pieces with PB, and added 3 layers of 1.5oz CSM over that.
20240311_182835.jpg
I finished with gelcoat and also gelcoated the dinette deck.
20240317_163818.jpg

I've started rebuilding the head as well: new pieces of plywood when needed with white tractor paint. I may skin them with FRP if I can't live with a painted finish. For any new trim pieces, I scavenged some nice drop pieces of African Mahogany from a jobsite. I already made a couple of the corner trim pieces:
20240310_173220.jpg
While waiting for paint to dry, I started on new cushions for the V-berth. I don't have the old cushions, so I made templates from masonite. A contour gauge saved some time with the hull curvature.
20240317_171804.jpg

20240317_190841.jpg

I just ordered a Singer 15-91 sewing machine off of Ebay and some vinyl, time to learn some upholstery soon!
 

eggs712

Petty Officer 1st Class
Joined
May 8, 2012
Messages
333
The keystone cushion wood warped a lot (2.5" bow) after sitting a week. I don't have access to a steamer, so I experimented. I soaked the concave side of the bowed piece with antifreeze and weighed it down with buckets of water for six hours. This actually worked in fixing the bow, so I added a layer of 1.5oz CSM to all the V-berth wood to help prevent future warping. I'm not sure if the antifreeze will inhibit the bond of the poly resin, but it's not a big deal for an upholstery piece.
20240324_174330.jpg

I also coated the edges and underside of the wood with resin for waterproofing.
 

eggs712

Petty Officer 1st Class
Joined
May 8, 2012
Messages
333
Saturday, I used vapor barrier to make templates for the V-berth and dinette cushions:
20240330_184121.jpg

20240330_152249.jpg

My Singer 15-91 has been rewired, gears re-greased, new brushes installed in the motor, and thoroughly oiled. It appears to be running great, so I can hopefully start learning to sew on weeknights while away from the boat.

For my headliner, I decided to ditch the carpet as to allow easy access to the wires and deck hardware. I used dabs of PL Fast Grab to hold furring strips of 3/4" plywood to the ceiling while a heavier bead of PL Premium dried. The furring is on 2 foot centers.

20240331_104641.jpg
I'm using 1/4" red cedar planking to hold up white FRP headliner. I've cut the cedar to fit and applied Polyurethane to it. Also pictured are the varnished pieces of a simple pine wood base for the sewing machine.
20240331_205027.jpg

Lastly, I gelcoated and reinstalled the center piece holding the V-berth cushions with screws.
20240331_183556.jpg
 

Attachments

  • 20240331_104658.jpg
    20240331_104658.jpg
    2.9 MB · Views: 3
Top