1984 Wellcraft 248 Sporstman Restore

Second Chance 248

Petty Officer 2nd Class
Joined
Dec 28, 2014
Messages
132
Happy Easter Everyone!!
Going to try and get caught up to current status.
After chopping up the cabin in a few spots, I spent two 8 hr. days with a Fein Multimaster and 3 carbide blades to get to the inner skin.


Then scarf cut the tips of the bow

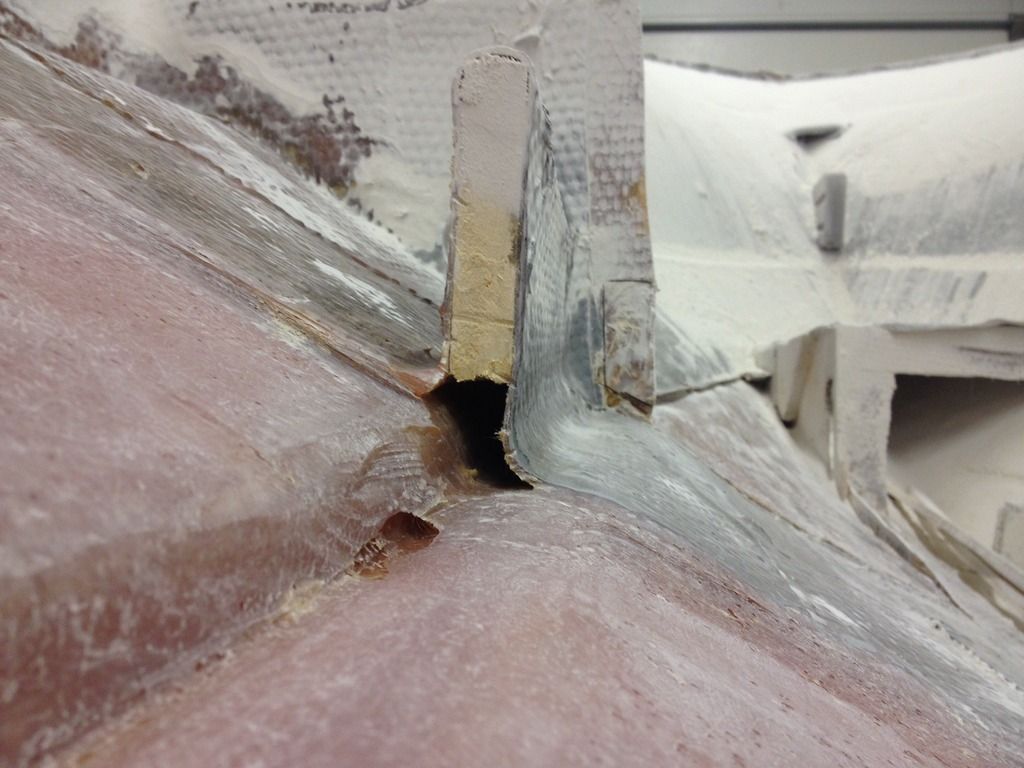
This was the port side stringer splice
not sure why it was done this way only on one side


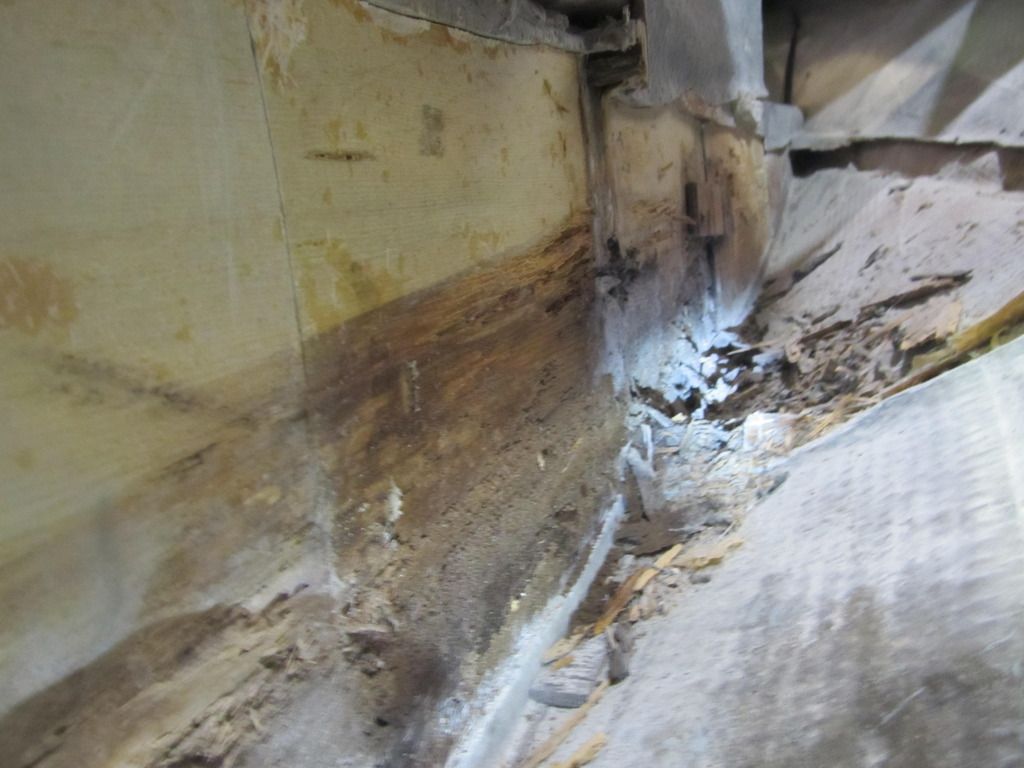


Pretty much at that point the bagster was filled, hooked up a tow strap to my buddies truck and dragged it out of the shop.
Really wish I could've weighed it, that thing was heavy!!
My advice to anyone that uses one of these is to get 2x2 and frame it out, for the few bucks you can stuff that thing to the max and it'll stay better supported when your throwing stuff in there.


Second Chance 248

Petty Officer 2nd Class
Joined
Dec 28, 2014
Messages
132
Well folks I said things were going to get interesting ;)
As I was cutting through the tiny holes I happened to notice another Whammy!!
The front of the liner was looking mighty close to the hull. After checking it out I seen why, it extends past the bulkhead about 4' and is then self supported :eek:
Houston We Have A Problem!!


Immediately I thought what did I do? Did it drop when I was cutting everything out?
But I realized the front of the cabin sole was still supported by the bulkhead so I knew it couldn't have

Well there it is, 30 years of gravity and crashing 3-5' waves has taken it's toll. With no support in the span it flexed dangerously close to the hull.
I also noticed another Whammy! The bow rail mounts that are attached to the top cap are held on with lock washers and most are buried behind the liner with no way of getting to them. I wanted to re bed everything and tighten them up
 

Second Chance 248

Petty Officer 2nd Class
Joined
Dec 28, 2014
Messages
132
Fellow Restorers, pay attention and learn from my time and my dime.
As I sat there completely deflated, and the wind sucked out of my sails, I asked myself, "SELF" why the hell have you done absolutely everything backwards on this boat over the years? I cared more about the flash and the gadgets rather then the integrity of the boat. So many upgrades and money spent never knowing that everything was rotting out under my feet, that's right folks, I paid to have a new paint job on a rotted boat. I put some shiny new white chairs 2' above rotten and wet stringers. Mounted a autopilot and a network on a half rotted cabin wall. Put some pretty new stainless scuppers and thru-hull fittings in. Changed the entire color scheme to black and stainless. Sanded down teak for days. That's right, I polished a TURD!!
​For anyone new to boats or a project of this caliber, check to make sure your not throwing money in all the wrong places. When the guys on the forum, ask you if
you checked everything, there's a good reason for it. A boat that's of age like this one, should be gone through with a fine tooth comb, and safety should be your number 1 priority, for you and your passengers.
Here is just a few examples of doing things backwards, which has brought me to the realization I'm at the point of no return and I'm all in.


Last edited:

Second Chance 248

Petty Officer 2nd Class
Joined
Dec 28, 2014
Messages
132
Sitting there thinking of everything I already did, and where I'm at now, brought me to the conclusion that I'm no longer going about this project in this manner. Something has to be done about the liner, I can't re bed and tighten the bow rail, I wasn't thrilled about having old poly tabbing under the cabin sole, and in my original plan, the rub rail was going to get re bedded properly and I wanted to epoxy some strips on the inside of the hull to have something for the rub rail screws to grab. I also knew there was going to be pounds of grinding dust trapped under the liner. Grinding inside tight spots didn't exactly thrill me, plus having to laminate and tab wasn't going to be a picnic either.
I knew it was just another derailment, but I'm not doing anything backwards on this boat anymore, I value every ones opinion but I wanted to do a 100% restore and that's what I'm going to do. I'll never go to this extreme again, and I want the boat to live up to its name "Second Chance" not "Better Chance"


ahmincha

Lieutenant Commander
Joined
Jul 21, 2012
Messages
1,512
And let the games begin Sorry to hear about you discoveries but your fixing it now good luck
 

kcassells

Fleet Admiral
Joined
Oct 16, 2012
Messages
8,737
Decapitation saved the country of France one or more times. As Minch said ....let the games begin. On a good note, unlike me it appears you have the space and the work ethic. It will make you move along so much faster and cleaner.
Sorry for the bumps in the road you had but....hey....here ya go!!
 

Mikeopsycho

Senior Chief Petty Officer
Joined
Feb 6, 2014
Messages
738
Wow! I KNEW you were gonna do it! My hat's off to you :yo:. I bet it feels good not to have that nagging at you anymore. This is going to be an awesome boat when you're finished! :clap2:
 

Second Chance 248

Petty Officer 2nd Class
Joined
Dec 28, 2014
Messages
132
Decapitation saved the country of France one or more times. As Minch said ....let the games begin. On a good note, unlike me it appears you have the space and the work ethic. It will make you move along so much faster and cleaner.
Sorry for the bumps in the road you had but....hey....here ya go!!
Thanks, not sure why I was talked out of it so many times, it's not rocket science. Can't help to think of where I'd be now if it was off from the start.
 

Second Chance 248

Petty Officer 2nd Class
Joined
Dec 28, 2014
Messages
132
Wow! I KNEW you were gonna do it! My hat's off to you :yo:. I bet it feels good not to have that nagging at you anymore. This is going to be an awesome boat when you're finished! :clap2:
Ha ha, you must of picked up on me making comments about it. Definitely happy I went this route, now I'll know it's 100%
 

Second Chance 248

Petty Officer 2nd Class
Joined
Dec 28, 2014
Messages
132
The cap was much heavier then I thought, made a few calls and got 6 guys to give a hand. My plan was to walk it outside and set it down, but 6 guys weren't going to do it. A friend came up with the idea of making a rolling carriage to make it easier to work on the cabin ceiling and the paint prep.
I had some heavy duty casters and my buddy already had his weld truck there, so he made up some brackets on them. Worked out great!!


Second Chance 248

Petty Officer 2nd Class
Joined
Dec 28, 2014
Messages
132
I ended up building a gantry frame for the liner, I'll also be able to use it to put the liner, cap and motor in, when everything is said and done it will stay at the shop for my buddies weld business, the rest of the wood I'll use over time on jobs for backing.


Kinda had some mixed emotions, I was happy that it'll be a 100% but disappointed knowing I should have done this from the start. It took longer to cut out the stringers under the liner then it took to pull it and the cap.


Second Chance 248

Petty Officer 2nd Class
Joined
Dec 28, 2014
Messages
132
Started jigging the stringers, thanks Ahmincha for the idea, I'm sure others have done this before, but it was your post that I first seen or heard of it.


At this point everything was adding up. I ended up going through 500 gallons of propane because of the brutal winter, the thing ran 24/7 to maintain 55 degrees. The building is insulated block but with negative temps for weeks on end, it sucked that tank dry fast.
The guy helping out understood when I had to let him go, I just couldn't afford him anymore. I figured it was going to be around 250-300 man hr. job complete. but he was at 220 by himself, plus jobs were getting more manageable, so I've had more time to work on her. I didn't want to waste the time and money to plastic everything off AGAIN!! I figured the exhaust fan would be enough, BIG MISTAKE!! After the first 3 hr. session the shop was COVERED!!
O well, no turning back now. Started running into some bad looking glass, the stuff was just blowing off like nothing. It wasn't everywhere, it seems like it was concentrated on the starboard side where there was a funky looking black fur stuff, any ideas of what it could be?


I can write cleaner with a shop vac then on paper lol
 

Second Chance 248

Petty Officer 2nd Class
Joined
Dec 28, 2014
Messages
132
I ended up grinding all the way down to get rid of the funky glass.
I'm on a bunk trailer but still ended up bracing the outer chine.
(" Note To Decappers ")
I also marked the v-block and boat before decapping, it was 5/8" higher once the cap came off, so I took the winch strap under the v-block and winched it back down to the mark.
Because of going down to bare glass, I wanted to go in sections so nothing got out of wack and I didn't like how thin it was. I went about 4' on the starboard side first. after cleaning everything out, I took 3 layers of tape and tabbed them into the chine, 6"- 5"- 4" then epoxied the chine smooth.


Second Chance 248

Petty Officer 2nd Class
Joined
Dec 28, 2014
Messages
132
And that's where I'm at, the port side is ground and ready. I have no jobs scheduled for the day, and since my wife slipped the Dunkin Donuts Turbo coffee in the pot at dinner, I've been unable to sleep lol, so I figured I'd get caught up to current status. After getting some sleep, I'll go tab in the chines and be ready to fill-it tomorrow.
I also made a video, if anyone would like to volunteer and lend a hand, PM me and I will arrange travel arrangements :help:​
https://www.youtube.com/watch?v=GoXUnZ4NW3w

I also wanted to post a few pics of the reason I'm doing this. After going through all the pics to upload, it gave me the boost I needed, can't wait to see all those smiles in a few months :joyous:
A few fishing pics helped to :lol:


Second Chance 248

Petty Officer 2nd Class
Joined
Dec 28, 2014
Messages
132
I wanted to get some glass on the starboard side, the yellow area was brittle.
I sure hope I did this right. I took 3 layers of 2415 stichmat and tabbed in tight on the sides. I then tabbed 5" front to back for the next pieces to tie in. Is this enough or right?
 
Top