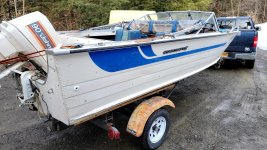
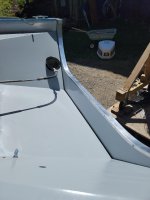
1981 StarCraft SuperSport 180 Rebuild

Tatertoz

Cadet
Joined
Apr 6, 2013
Messages
10
Hey everyone! I figured I'd start a thread for my adventure of restoring this boat that I inherited. My great Uncle originally owned the boat and regularly used it on the lakes of NY by him until his passing. It was then given to my Uncle, but he never was able to enjoy it due to this health and eventually passed the boat to my cousin. It has now come into my possession, and I couldn't be more excited about a boat. The boat has a great deal of sentimental value to me because my love of fishing and boating came from both of my Uncles at a young age. I was extremely thankful to my cousin for passing the boat onto me, and we both agreed it should stay in the family as long as it could.

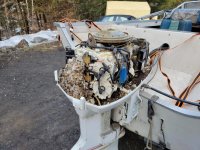
I knew the boat had been sitting a while (15+ years), so I decided to take the hour-long trip to look it over first and make sure it could make it to its new home. The trailer was in decent shape other than surface rust, tire rot, an inner wheel bearing, and a winch strap. To my surprise, I found that the trailer has shocks plus coil springs, and thankfully they were in good shape. I didn't want to try and replace them since I figured it would be tough to match them up. Unfortunately, when I started to inspect the boat, I found that the transom was rotted and will need to be replaced before it hits the water. Also, since the boat has been sitting for so long, it has become a mouse hotel. The motor seemed to be what they enjoyed the most and needed to be cleaned and gone through before it hits the water.

Well, I figured I'd share the backstory of the boat before I started posting more about it. I look forward to everyone's input/advice/experiences because I'll probably need it for this transom replacement. I really appreciate any help everyone can provide.
 

Tatertoz

Cadet
Joined
Apr 6, 2013
Messages
10
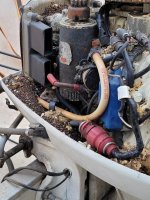
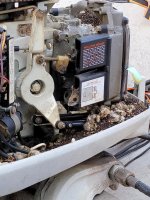
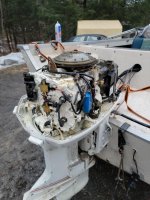
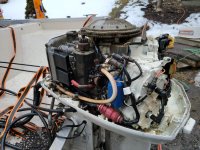
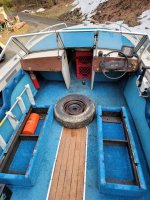
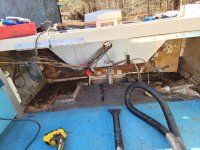
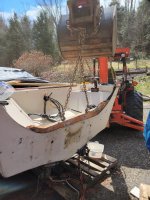
As you can see the motor was a mess. I didn't take a picture of the inside of the boat before I cleaned it so what you see is a good vacuuming and soapy water scrub down.
 

Attachments

  • Picture1.jpg
    Picture1.jpg
    704.3 KB · Views: 31
  • Picture3.jpg
    Picture3.jpg
    438 KB · Views: 25
  • Picture4.jpg
    Picture4.jpg
    343.3 KB · Views: 25
  • Picture5.jpg
    Picture5.jpg
    323.3 KB · Views: 25
  • Picture6.jpg
    Picture6.jpg
    225.5 KB · Views: 22
  • Picture7.jpg
    Picture7.jpg
    425.9 KB · Views: 24
  • Picture8.jpg
    Picture8.jpg
    396 KB · Views: 27

Tatertoz

Cadet
Joined
Apr 6, 2013
Messages
10
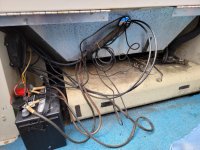
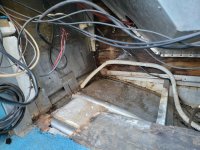
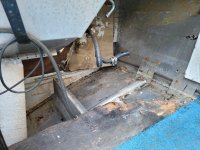
So I had a break in our crazy weather today and put some more time into the boat today. The goal for the day was to get the fuel tank out so I could inspect how the transom was laying in it. Well, it ended up being more cleaning and inspecting.

After I removed the tank I noticed there was a bit of a soft spot in the flooring along with a huge mess in the bilge. I'm fine with it actually because it will allow me to redesign how the space is used. ATM I'm not too concerned with the floor and want to focus on the transom first. It should give me enough time to come up with an idea for the tank, battery, and electrical layout.
 

Attachments

  • Picture9.jpg
    Picture9.jpg
    469.8 KB · Views: 19
  • Picture10.jpg
    Picture10.jpg
    537.5 KB · Views: 18
  • Picture11.jpg
    Picture11.jpg
    417.5 KB · Views: 19
  • Picture12.jpg
    Picture12.jpg
    370.3 KB · Views: 18

Tatertoz

Cadet
Joined
Apr 6, 2013
Messages
10
I've been reading up on all the different types of products people have used in their aluminum transom, and I have to say it is mind-numbing between all the choices. Pour-in products, plywood, and manufactured boards seem to be available and seem to be a sore subject when brought up but I recently found a video that made me question what I have read.

The Coosa Board product seems to be the best but is very expensive if you need to buy large thick sheets but seem to be the most resistant to mold, rot, and should outlast the boat. I definitely can't afford this!

I've found some pour-in products, but it seems like a very ballsy decision since it bonds to your transom and would be a pain to remove if a mistake was made. Kudos to the people that are willing to go this route!
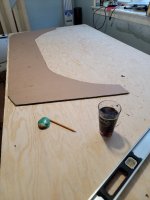
As for plywood, the info on the differences in the use has been tough to wade through on forums, websites, and videos and can get frustrating at times. What I have gathered is that good exterior plywood should be a good replacement and last a long time if sealed properly. I'm definitely good with a cheaper option that lasts.

The marine-grade plywood seems to be a hot topic due to its price and if it's actually needed since a good exterior grade will last just as long if not longer. I recently came across a video on the differences between the two, and it sold me on the marine grade for my boat, but I'd still like to hear options on his view.

I've linked the video and I'd like to hear everyone's view on it. Is he right, wrong, or is it misleading, and why?

Differences between Marine vs Exterior grade plywood
 

Bondo

Moderator
Staff member
Joined
Apr 17, 2002
Messages
70,954
Ayuh,..... I rebuilt the transom in my Starcraft Islander, back in '98, or '99, 'n it's as solid as the day I put it there,.....

I made it outa well sealed ACX plywood,....
 

Tatertoz

Cadet
Joined
Apr 6, 2013
Messages
10
Ayuh,..... I rebuilt the transom in my Starcraft Islander, back in '98, or '99, 'n it's as solid as the day I put it there,.....

I made it outa well sealed ACX plywood,....
That's awesome! Did you take any pictures of the build or post the boat anywhere?

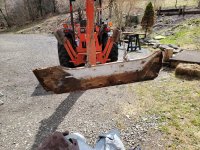
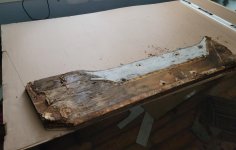
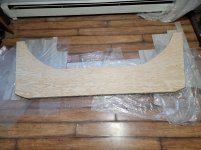
I'm going to use the marine grade for mine and seal it. I pulled the old transom yesterday and found multiple points of failure, so I'll try and correct them as best as possible.
 

havoc_squad

Senior Chief Petty Officer
Joined
Mar 5, 2011
Messages
738
As you can see the motor was a mess. I didn't take a picture of the inside of the boat before I cleaned it so what you see is a good vacuuming and soapy water scrub down.
Looks like fluffy the infamous engine compartment resident/squatter strikes again in the outboard cowling. Often gets regular media coverage on Taryl fixes all lawn equipment YouTube channel of nests found in customer's neglected lawn mowers mostly in engine shroud brought in for service.

Before you do anything to that motor, get it as clean as possible while not disconnecting anything for fuel or air.

If any garbage makes it into the intake near the reeds after you remove the carbs for inspection and cleaning, you probably need to remove the intake or at least vacuum any debris out with the vacuum motor far away from the engine.

Get some fogging oil and angle it at the top and bottom of each spark plug hole, then do a compression test using a well regarded tester before spending a cent on the motor. Most of the chain auto parts stores sell decent testers.

If compression is good, carbs have to be cleaned extensively for a motor in that condition.

Consider every recirculation hose and fuel hose as 100% garbage and replace it with the appropriate USCG outboard motor rated hose.
 

Tatertoz

Cadet
Joined
Apr 6, 2013
Messages
10
Looks like fluffy the infamous engine compartment resident/squatter strikes again in the outboard cowling. Often gets regular media coverage on Taryl fixes all lawn equipment YouTube channel of nests found in customer's neglected lawn mowers mostly in engine shroud brought in for service.

Before you do anything to that motor, get it as clean as possible while not disconnecting anything for fuel or air.

If any garbage makes it into the intake near the reeds after you remove the carbs for inspection and cleaning, you probably need to remove the intake or at least vacuum any debris out with the vacuum motor far away from the engine.

Get some fogging oil and angle it at the top and bottom of each spark plug hole, then do a compression test using a well regarded tester before spending a cent on the motor. Most of the chain auto parts stores sell decent testers.

If compression is good, carbs have to be cleaned extensively for a motor in that condition.

Consider every recirculation hose and fuel hose as 100% garbage and replace it with the appropriate USCG outboard motor rated hose.
We're on the same page, that's for sure! That is exactly how I went about it, and I have made a ton of progress.

I did a borescope on all four cylinders first, then soaked all the cylinders with fogging oil. After a day, I rocked the flywheel until I got a complete rotation, then borescope each cylinder fully. After that, I performed a compression check of all and 125-130psi. You definitely can't beat that!

I've pulled both carbs and fuel pump and did a rebuild on all of it. I'm glad I did the carbs because both floats and needles needed to be replaced. They're ready to go back on but I want to check out the impeller before I do that. I've seen that the shifting rod on this motor is a pain to get to with the carbs on so there's no rush to throw them on. Thanks for all the input!!
 

Tatertoz

Cadet
Joined
Apr 6, 2013
Messages
10
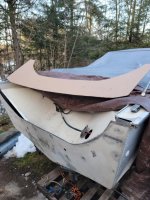
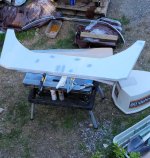
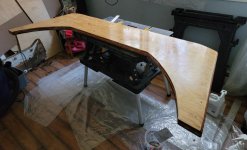
She is on the water but the resto and bringing the 90hp Johnson back to life continues. Here are some pictures of the transom build. enjoy!Picture1.jpgPicture2.jpgPicture3.jpgPicture4.jpgPicture5.jpgPicture6.jpgPicture7.jpgPicture8.jpgPicture9.jpgPicture10.jpg
 
Top