1978 Islander 22 I/O

IslandExplorer

Chief Petty Officer
Joined
Oct 21, 2019
Messages
460
Great pictures, awesome to finally see all the hard work you've been doing on her! That bare hull picture was a familiar sight! Lol I had to do the same, so much crap gets down there over the years. It's kinda nice to build it up just how you want from a clean slate though isn't it? Those transom savers look really nice, that'll make installing your accessories nice and easy. They should have done those from the factory and it would have saved a lot of people a lot of grief! Every old boat I've bought has had plenty of extra holes/screws around there.
You may have already said this but are you planning on mounting trim tabs back there?
 

66Holiday924

Chief Petty Officer
Joined
Aug 21, 2017
Messages
578
It's kinda nice to build it up just how you want from a clean slate though isn't it?
Definitely! Buying a used boat can be a challenge. It takes time and it costs to build one, that's for sure, but, you do end up with a competent, customized boat that has all the options you want, and you know what exactly what it is, you intimately know the condition of the hull, how it's wired, how it's put together, the instruments and electronics on it, etc. etc. etc. Although, building it is a hobby and fun for me, that work could be a downside for somebody else. The other downside is the time it takes. No matter what you do, it's going to take some time to get it together, especially if you don't have the means to work on it year-round. The other obvious downside to me is the money. It definitely is NOT an investment. I'll never get the money back that goes into it. The only way to get a return on it, is to use it!
Those transom savers look really nice, that'll make installing your accessories nice and easy. They should have done those from the factory and it would have saved a lot of people a lot of grief!
There's a lot of stuff I think they should do from the factories, but yeah after paying to have all the old hole (30+) from transducers, speedo's, etc. I don't want to go putting new holes in it, if I don't need to.
You may have already said this but are you planning on mounting trim tabs back there?
I decided not to go with trim tabs. I can always try them later if I think I really need them. It would have been much easier to install them now though.
 

IslandExplorer

Chief Petty Officer
Joined
Oct 21, 2019
Messages
460
Great points and totally agree, I love knowing my boats inside and out too, knowing what each hidden area conceals, where wires were routed, etc., etc. Great peace of mind when you're out on the water truly depending on the damn thing.
 

66Holiday924

Chief Petty Officer
Joined
Aug 21, 2017
Messages
578
New wheels for the old girl. Dual axle, brakes, aluminum I beam, this trailer checked all of my boxes, and the price was right! The frame is a 2000 or 2001 and the rest of it is only a few years old. New axles, re-wired, newer tires, etc. etc. etc. He rebuilt it and it just wasn't big enough for his boat.
 

Attachments

  • 20240916_121219942_iOS.jpg
    5.5 MB · Views: 11
  • 20240916_121318050_iOS.jpg
    4.6 MB · Views: 9
  • 20240916_121327080_iOS.jpg
    5.2 MB · Views: 10

IslandExplorer

Chief Petty Officer
Joined
Oct 21, 2019
Messages
460
Sweet trailer, aluminum I-beam is very nice! Not sure what's up with the spaced apart white pads, never seen that before.. Are you going to carpet the bunks or something instead?
 

66Holiday924

Chief Petty Officer
Joined
Aug 21, 2017
Messages
578
Sweet trailer, aluminum I-beam is very nice! Not sure what's up with the spaced apart white pads, never seen that before.. Are you going to carpet the bunks or something instead?
The white pads are king's starboard. The previous owner put them on instead of carpet. I'm not a fan. I don't care for the pressure points they create. I am going to remove those and carpet them. The bunks he built are great though!
 

SHSU

Lieutenant Junior+Starmada Splash Of The Year 2019
Joined
Mar 8, 2017
Messages
1,725
I have Starboard on my bunks and run them in 48" lengths. Works well for me and slick. Only complaint is if you are power loading and they aren't in the water, does a number on your hull/rivets.

You going to use the boat in saltwater or strictly freshwater?

SHSU
 

66Holiday924

Chief Petty Officer
Joined
Aug 21, 2017
Messages
578
I have Starboard on my bunks and run them in 48" lengths. Works well for me and slick. Only complaint is if you are power loading and they aren't in the water, does a number on your hull/rivets.

You going to use the boat in saltwater or strictly freshwater?

SHSU
I have composite bunks on my other boat trailer. They're really slick. I imagine the king's starboard would be similar. The way he had them on this trailer seems like they'd create pressure points and they'd be bad on the rivets. I actually just carpeted my composite bunks on my Holiday's trailer. I just had it painted and I'm trying to protect the paint job.

The Islander will probably never see saltwater.
 

IslandExplorer

Chief Petty Officer
Joined
Oct 21, 2019
Messages
460
Those bunks Do look really nice and beefy. I agree with the pressure point concern and the comment from SHSU about it having edges to grab rivets. Sacrificial free carpet suffering vs the hull definitely seems like a better choice for yours!

My first Starcraft (SS16) came on a trailer that had long rubber strips covering the 2 bunks if you can believe it. 🤨 Each was very heavily greased lol Was a teriible idea- grabbed the hull way too much, must have been why he was greasing it! That boat had lots of bottom leaks and at least some must have been caused by the weird, ill fitting grease bunks.
 

SHSU

Lieutenant Junior+Starmada Splash Of The Year 2019
Joined
Mar 8, 2017
Messages
1,725
If you do use it in saltwater, carpeted bunks holding the saltwater next to the hull isn't good. So something to keep in mind if you do ever dunk it.

SHSU
 

66Holiday924

Chief Petty Officer
Joined
Aug 21, 2017
Messages
578
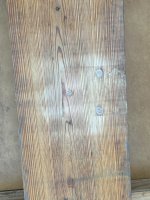
I did some work on getting this trailer ready, making adjustments, plugged and redrilled the 1/2" holes in the bunk boards. I plugged them with red-oak doll rod, dipped in Titebond III wood glue, and coated with a penetrating oil that the gentleman who sold me the trailer gave me, Penofin, seems like good stuff. I figure that if I wanted the bunks to last, I need to plug those holes to keep the water out.

I'm not sure if it's ok to treat teak, but I might use the Penofin on the stringers I'm building too. I'm not sure if you're supposed to put stuff like that on teak though.
 

Attachments

  • 20240917_140451866_iOS.jpg
    5.9 MB · Views: 4
  • 20240917_141955643_iOS.jpg
    7.1 MB · Views: 4
  • 20240917_142515553_iOS.jpg
    2.3 MB · Views: 4
  • 20240917_164144096_iOS.jpg
    5.2 MB · Views: 3
  • 20240917_165454309_iOS.jpg
    20240917_165454309_iOS.jpg
    2.4 MB · Views: 3
  • 20240917_180400587_iOS.jpg
    3.7 MB · Views: 4
  • 20240917_181648177_iOS.jpg
    6.6 MB · Views: 4
  • 20240917_181654609_iOS.jpg
    7.7 MB · Views: 4

SHSU

Lieutenant Junior+Starmada Splash Of The Year 2019
Joined
Mar 8, 2017
Messages
1,725
Can't hurt to plug. Biggest issue is keeping wood damp and not letting it dry out properly after it gets soaked.

SHSU
 

66Holiday924

Chief Petty Officer
Joined
Aug 21, 2017
Messages
578
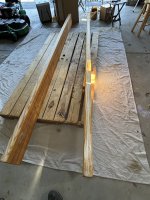
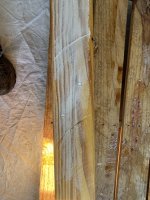
I spent the day yesterday re-working the bunks for my boat. First the admiral helped me rip them so the angle that the end the boat will rest end is angled properly. Then I spent a few hours sanding them down (ended up re-sanding the work I did the other day). I rounded all the edges. Then I treated them with the Penofin. I just need to treat the bottoms of them and then, hopefully, my new bolt holes will line up and I can install them.

My bunk carpet was delivered yesterday. I went with "Forever Carpet." It's supposed to last forever. The pile is twice as thick, and it's designed to drain the water easier. I'm not going to wrap around the bottom. It wouldn't serve any purpose, and it would act as a barrier to keep the water in. I want the boards to dry ASAP after every use.
 

Attachments

  • 20240919_142047314_iOS.jpg
    6.1 MB · Views: 9
  • 20240919_160910991_iOS.jpg
    7.8 MB · Views: 9
  • 20240919_195043884_iOS.jpg
    4.7 MB · Views: 10
  • 20240919_200227961_iOS.jpg
    4.6 MB · Views: 9
  • 20240919_200431356_iOS.jpg
    2.7 MB · Views: 9
  • 20240919_200535460_iOS.jpg
    4.6 MB · Views: 9

IslandExplorer

Chief Petty Officer
Joined
Oct 21, 2019
Messages
460
Those bunks look great with all that nice grain showing, like the wood peg solution. That penofin stuff looks like it really soaked in nicely, going to have to try some of that out myself I think. Cutting the tops to the correct angle is a very nice touch that I think is rarely actually done. That plus the extra thick carpet should be very gentle on the hull.
 

mbanbury

Recruit
Joined
Sep 21, 2024
Messages
2
I made an unplanned visit to marketplace and saw this thing hanging out there, one hour away, listed for $650 as a 1972 Starcraft "Trlr Coach"... I quickly got the admirals permission (of course), arranged to go check it out and found a 1978 22' Islander, all the wood rotted out but a perfect hull! The guy literally didn't know what he had. I ended up brining it home for $500. I think I'm going to turn it into a nice trailerable great lakes fishing boat.

First thing's first, I need to get the title transferred and the trailer registered.
I am so jealous!
 

66Holiday924

Chief Petty Officer
Joined
Aug 21, 2017
Messages
578
I did some final touches on the bunks and got those installed. The PO had kind of a hodge podge for the bunk hardware, so I bought all new Grade 8 hardware for them. I put 5200 in the screw holes where the PO had the kings starboard pads mounted, the admiral helped me carpet them, got them all adjusted nicely then had the boat shop transfer her over. It's a perfect fit! This is going to be a great trailer for this boat.
 

Attachments

  • 20240921_153337227_iOS.jpg
    20240921_153337227_iOS.jpg
    2.1 MB · Views: 4
  • 20240921_153345857_iOS.jpg
    20240921_153345857_iOS.jpg
    2.3 MB · Views: 4
  • 20240922_174045734_iOS.jpg
    5 MB · Views: 3
  • 20240922_205301597_iOS.jpg
    7.5 MB · Views: 3
  • 20240922_205403304_iOS.jpg
    5.5 MB · Views: 3
  • 20240923_154707295_iOS.jpg
    6.6 MB · Views: 3
  • 20240923_154727190_iOS.jpg
    4.4 MB · Views: 4
  • 20240923_161252109_iOS.jpg
    8 MB · Views: 4
  • 20240924_191234012_iOS.jpg
    7.1 MB · Views: 5

66Holiday924

Chief Petty Officer
Joined
Aug 21, 2017
Messages
578
The boat has been in the shop having the gimble assembly installed while I've been getting this trailer ready. He said it went in just fine so success on the coosa transom build! You can see the final product for the ply layer installed on the transom in the picture, I don't think I had posted a picture of it complete.
 

Attachments

  • 20240924_194145361_iOS.jpg
    4.3 MB · Views: 5
  • 20240924_194211856_iOS.jpg
    4.2 MB · Views: 5
  • 20240924_194224142_iOS.jpg
    4.7 MB · Views: 5

66Holiday924

Chief Petty Officer
Joined
Aug 21, 2017
Messages
578
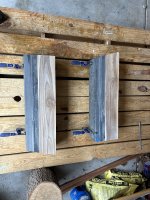
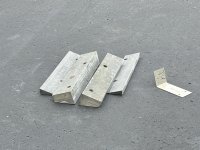
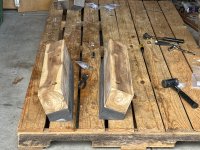
After getting the boat home, on its new trailer I could focus on my engine mounts again. When I stopped work on them I had the coosa laminated and cut out and the teak cut. The next step is to mechanically join it all. The plan is for each stringer to get two grade 8 steel bolts, each bolt has two nuts. One nut is in place to mechanically connect the laminated layers of coosa. The second nut (on the same stud) mechanically connects the teak to the coosa. I put my "Bolt Plan" in the pictures. I think it becomes more obvious what I'm trying to do when you see the plan. So, I did the starboard stringer tonight and I'm going to do the port tomorrow. I'm very happy with how good starboard turned out! It's kind of a tedious process. That teak is hard, hard, hard wood! Each one of my countersink holes probably took 15 minutes to do. Drilling into the teak with a 1-1/8 paddle bit wasn't easy. It ended up nice though!
 

Attachments

  • 20240925_042357434_iOS.jpg
    4.9 MB · Views: 2
  • 20240924_195406904_iOS.jpg
    20240924_195406904_iOS.jpg
    3.1 MB · Views: 3
  • 20240924_211712173_iOS.jpg
    5.2 MB · Views: 3
  • 20240924_221817084_iOS.jpg
    4.3 MB · Views: 2
  • 20240924_224407142_iOS.jpg
    4.4 MB · Views: 3
  • 20240925_005056787_iOS.jpg
    4.7 MB · Views: 2
  • 20240925_005104357_iOS.jpg
    4.4 MB · Views: 3
  • 20240925_005913474_iOS.jpg
    5.4 MB · Views: 2
  • 20240925_005918748_iOS.jpg
    3.9 MB · Views: 3
  • 20240925_010500000_iOS.jpg
    4.7 MB · Views: 2
  • 20240925_010722094_iOS.jpg
    4.3 MB · Views: 3
  • 20240925_010806774_iOS.jpg
    5 MB · Views: 2
  • 20240925_010856897_iOS.jpg
    4.4 MB · Views: 3

66Holiday924

Chief Petty Officer
Joined
Aug 21, 2017
Messages
578
I finished up building my stringers today. Right now I'm just waiting on some hardware so I can get them mounted. It appears that my Y pipes are going to be in the way so I'm probably going to hack out a chunk of the rear of them yet. Then I'll have a little sanding to do. My goal was for them to be 8.25" on the thicker side. I have one that's 8.25" and on that's 8-5/16! So, they are right in where they need to be, assuming that my measurements from the donor boat keyhole were accurate and assuming that those measurements transfer over the way I think they do...
 

Attachments

  • 20240925_130231247_iOS.jpg
    4.7 MB · Views: 2
  • 20240925_131214691_iOS.jpg
    5.2 MB · Views: 2
  • 20240925_131759203_iOS.jpg
    5.9 MB · Views: 2
  • 20240925_145952644_iOS.jpg
    4.9 MB · Views: 2
  • 20240925_153119812_iOS.jpg
    20240925_153119812_iOS.jpg
    2.2 MB · Views: 4
  • 20240925_153431899_iOS.jpg
    6 MB · Views: 2
  • 20240925_154209435_iOS.jpg
    7 MB · Views: 2
  • 20240925_164317070_iOS.jpg
    5.6 MB · Views: 2
  • 20240925_171205126_iOS.jpg
    7.3 MB · Views: 2
  • 20240925_171209637_iOS.jpg
    4 MB · Views: 2
  • 20240925_171213946_iOS.jpg
    4.7 MB · Views: 2
  • 20240925_171355907_iOS.jpg
    6.8 MB · Views: 2
  • 20240925_171406505_iOS.jpg
    7.4 MB · Views: 2
  • 20240925_171727064_iOS.jpg
    4.9 MB · Views: 2
  • 20240925_171731996_iOS.jpg
    5.4 MB · Views: 2
  • 20240925_174340758_iOS.jpg
    20240925_174340758_iOS.jpg
    2.9 MB · Views: 4

SHSU

Lieutenant Junior+Starmada Splash Of The Year 2019
Joined
Mar 8, 2017
Messages
1,725
Moving right along!!! Really like how the hull looks on the new trailer.

The motor mounts look like they will last a lifetime with what you are doing. Keep up the nice work!!

SHSU
 
Top