1978 22' V5 Super Sport CC

strov68

Seaman Apprentice
Joined
May 19, 2011
Messages
45
1. Clean corrosion inside and out. Yes, use a wire wheel and clean entire area that will be covered with the aluminum plate

2. Fill pits and holes with PC-11 marine epoxy and sand smooth inside and out. That or JB Weld would be fine as well

3. Self-etching primer both sides. Don't think its needed if you are going to use the 5200 and bolt the panel to the transom

4. Clean metal primer and paint both sides. Etching primer for the interior should be fine. You going to paint as well?

5. New sealed transom wood. Yep if using epoxy, glass is suggested by some. I did not with mine, but to each their own

6. Aluminum plate with 5200 with notch trowel? Don't know about a notched trowel part, just get a little squeeze out along your edges and bolt holes for the engine should ensure a good seal to prevent any future water from getting in between.

SHSU
Thank you! I appreciate the feedback and advice. Looks like this is going to be my plan of attack once it gets a little warmer so I can clean everything up real good.
 

Moserkr

Chief Officer + Starmada Splash Of The Year 2021
Joined
Nov 23, 2020
Messages
869
Welcome! Nice looking boat you got there. The 22’ V5’s are awesome!! Cant wait to see you tear into it more and start bringing her back to her glory days.
 

strov68

Seaman Apprentice
Joined
May 19, 2011
Messages
45
Still trying to catch up with the progress I have made so far...

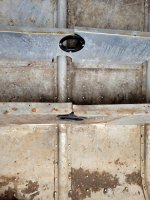
Transom is out. Should be able to duplicate a new one without too much fuss. As long as I can figure out what holes I need to keep that is. PXL_20210308_194212537.MP.jpg

More corrosion and pitting on the inside of the skin.
PXL_20210308_194218058.MP.jpg


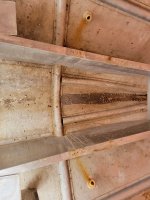
Couple cracks in the stingers that I will need to reinforce with some angle aluminum. Good news is I saw no cracks anywhere else and all the ribs look good so far.
20210310_152242.jpg

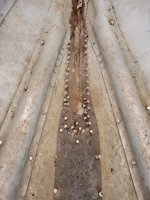
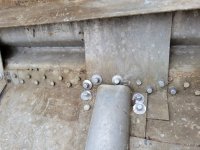
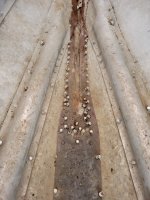
Mess of blind rivets on the bow keel area. Not quite sure how I am going to get new solids in with that epoxy stuff (or whatever it is) in there and get them to seal against the hull. 20210310_152316.jpg

Whoever did it couldn't be bothered to pick up some loose rivets and washer before pouring it in.
20210310_152321.jpg

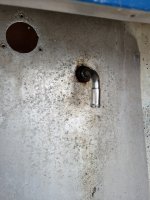
Finally got this rusted nut on the fuel vent to come loose. You can also see the hole where the old fuel filler was still attached. The one that was connected was relocated to the top of the gunwale.
20210310_152248.jpg

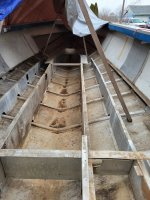
Feels good to al least have everything vacuumed out of the hull. I can't wait till it is warm enough to get the pressure washer out and really clean it out.
20210310_152223.jpg
 

SHSU

Lieutenant Junior+Starmada Splash Of The Year 2019
Joined
Mar 8, 2017
Messages
1,744
Transom is out. Should be able to duplicate a new one without too much fuss. As long as I can figure out what holes I need to keep that is.
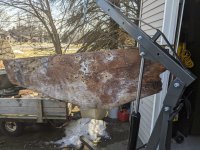
HF engine lift!!! That was a major helper durring my project too. As for the holes, you can figure it out once you drop it in for dry fit.

More corrosion and pitting on the inside of the skin.
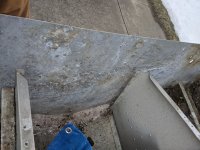
A common problem all Starcrafts it seems

Mess of blind rivets on the bow keel area. Not quite sure how I am going to get new solids in with that epoxy stuff (or whatever it is) in there and get them to seal against the hull
So you will have to remove the ribs that are running along the interior of the bow to get to all of the rivets properly bucked. Once you get the ribs removed, a wire wheel will make short work of the sealer. As you add new solids, add 5200 to each one and then come across with Gluvit or similar for cheap insurance

Whoever did it couldn't be bothered to pick up some loose rivets and washer before pouring it in.
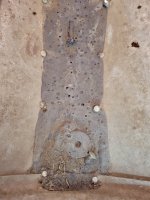
Original would be from Starcraft Factory. The dreaded "Friday Shift" group strikes again.

SHSU
 

strov68

Seaman Apprentice
Joined
May 19, 2011
Messages
45
HF engine lift!!! That was a major helper durring my project too. As for the holes, you can figure it out once you drop it in for dry fit.


A common problem all Starcrafts it seems


So you will have to remove the ribs that are running along the interior of the bow to get to all of the rivets properly bucked. Once you get the ribs removed, a wire wheel will make short work of the sealer. As you add new solids, add 5200 to each one and then come across with Gluvit or similar for cheap insurance


Original would be from Starcraft Factory. The dreaded "Friday Shift" group strikes again.

SHSU
I wouldn't have been able to get it out without the lift. The boat lifted off the trailer before it finally let go and came out.
 

strov68

Seaman Apprentice
Joined
May 19, 2011
Messages
45
Got a closer look at the tank and it is concerning...
20210312_153013.jpg
20210312_152950.jpg

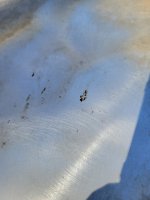
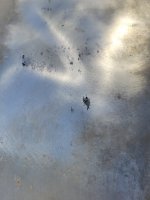
There is some pretty deep pitting on the bottom of the tank. I poked at them with an awl and it didn't go through and the tank had some fuel in it when I took it out of the boat that didn't leak out, so maybe it is OK?
Since they are not all the way through would I be able to clean the pits out good and fill with epoxy?
 

SHSU

Lieutenant Junior+Starmada Splash Of The Year 2019
Joined
Mar 8, 2017
Messages
1,744
Got a closer look at the tank and it is concerning...

There is some pretty deep pitting on the bottom of the tank. I poked at them with an awl and it didn't go through and the tank had some fuel in it when I took it out of the boat that didn't leak out, so maybe it is OK?
Since they are not all the way through would I be able to clean the pits out good and fill with epoxy?
Before you go that route, do a pressure test to see if there are any leaks as is. If there aren't any leaks, then that opens different options. I would explore JB weld or similar. Best, but also riskiest, would be to have someone "add" some additional material via welding. Again, that is the riskiest since its a flame near a fume filled container...

Just my 2 cents, take it for what its worth....

SHSU
 

strov68

Seaman Apprentice
Joined
May 19, 2011
Messages
45
Before you go that route, do a pressure test to see if there are any leaks as is. If there aren't any leaks, then that opens different options. I would explore JB weld or similar. Best, but also riskiest, would be to have someone "add" some additional material via welding. Again, that is the riskiest since its a flame near a fume filled container...

Just my 2 cents, take it for what its worth....

SHSU
I appreciate it! I will wash it out with water first to get rid of any remaining fuel before I plug all but one connection and pump some air in. Searching for pressure testing a fuel tank it seems like only a few PSI is needed.
 

SHSU

Lieutenant Junior+Starmada Splash Of The Year 2019
Joined
Mar 8, 2017
Messages
1,744
I appreciate it! I will wash it out with water first to get rid of any remaining fuel before I plug all but one connection and pump some air in. Searching for pressure testing a fuel tank it seems like only a few PSI is needed.
I believe its 3 psi.

SHSU
 

strov68

Seaman Apprentice
Joined
May 19, 2011
Messages
45
I am going to be ordering some parts and I am trying to figure out what I am going to do with these 2 thru-hull drains in the bow.
20210310_152259.jpg

I believe they will be just above the waterline and a previous owner just plugged them with corks. I would like to get new fittings that have a way to reliability plug them. Would the same type of fitting with a threaded cap work or maybe some sort of flush garboard drain? They will be visible and I am planning on stripping the bottom of the hull and leaving it bare aluminum so I want them to look decent too.
 

SHSU

Lieutenant Junior+Starmada Splash Of The Year 2019
Joined
Mar 8, 2017
Messages
1,744
Are you looking to use them at any point or just permanently plug? If so, then may want to think about just doing a patch on both sides.

SHSU
 

strov68

Seaman Apprentice
Joined
May 19, 2011
Messages
45
Are you looking to use them at any point or just permanently plug? If so, then may want to think about just doing a patch on both sides.

SHSU
I don't think I would ever use them. I'm not really even sure what they are there for. There where 2 plastic compartments on each side of the front deck with holes, but no tube connecting them. Maybe some sort of live well?
 

SHSU

Lieutenant Junior+Starmada Splash Of The Year 2019
Joined
Mar 8, 2017
Messages
1,744
I don't think I would ever use them. I'm not really even sure what they are there for. There where 2 plastic compartments on each side of the front deck with holes, but no tube connecting them. Maybe some sort of live well?
I agree with @sidingguy, most likely livewell hardware. If not going to use, just patch. That way you don't worry about any plug coming undone on you

SHSU
 

strov68

Seaman Apprentice
Joined
May 19, 2011
Messages
45
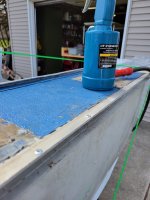
Not too much done lately. Some cleaning of the transom corrosion and gas tank. Did get to try out my pneumatic rivet gun on some corroded rivets. Using that thing is strangely satisfying... drilling out steel shank rivets not so much.
20210329_142406.jpg

Also hit another snag. I drilled out one of the many closed end blind rivets that a previous owner put in. Found out when they did they drilled them out and replaced them with 1/4" rivets. So now I have to order some 1/4" modified brazier head solids for replacing those blinds.
Using the material thickness + 1.5 x .25 I think I am going to need 1/2 and 5/8 lengths. Does that seem correct?
 

SHSU

Lieutenant Junior+Starmada Splash Of The Year 2019
Joined
Mar 8, 2017
Messages
1,744
Also hit another snag. I drilled out one of the many closed end blind rivets that a previous owner put in. Found out when they did they drilled them out and replaced them with 1/4" rivets. So now I have to order some 1/4" modified brazier head solids for replacing those blinds.
Using the material thickness + 1.5 x .25 I think I am going to need 1/2 and 5/8 lengths. Does that seem correct?

If only a couple, order 1 inch in length so you can cut down to cover a wide variety of thicknesses.

SHSU
 

strov68

Seaman Apprentice
Joined
May 19, 2011
Messages
45
If only a couple, order 1 inch in length so you can cut down to cover a wide variety of thicknesses.

SHSU
There are probably over a hundred with various layers of aluminum. I don't know that they are all 1/4" but most look to be the same as the one I removed. I will probably just get a couple different sizes.
 

SHSU

Lieutenant Junior+Starmada Splash Of The Year 2019
Joined
Mar 8, 2017
Messages
1,744

Watermann

Starmada Splash of the Year 2014
Joined
Jan 12, 2013
Messages
13,795
Not too much done lately. Some cleaning of the transom corrosion and gas tank. Did get to try out my pneumatic rivet gun on some corroded rivets. Using that thing is strangely satisfying... drilling out steel shank rivets not so much.
View attachment 336542

Also hit another snag. I drilled out one of the many closed end blind rivets that a previous owner put in. Found out when they did they drilled them out and replaced them with 1/4" rivets. So now I have to order some 1/4" modified brazier head solids for replacing those blinds.
Using the material thickness + 1.5 x .25 I think I am going to need 1/2 and 5/8 lengths. Does that seem correct?

I'd say 3/8 or 7/16 would be the longest needed, where are these 1/4 dia needing to go?
 

strov68

Seaman Apprentice
Joined
May 19, 2011
Messages
45
I'd say 3/8 or 7/16 would be the longest needed, where are these 1/4 dia needing to go?
They are all over the place. Ribs, chines, main seams where the gunwales, hull, and transom connect. JC sells 3/8 and 1/2 lengths so I will go with those.
20210331_150723.jpg20210310_152316.jpg20210331_150629.jpg
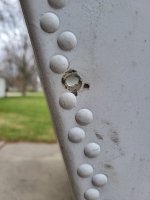
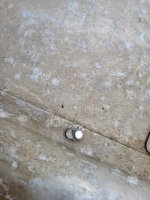
To make things harder you can see in the last picture that the blind rivets wasn't even replaced in the same hole on some of them. Half the solid rivet is gone so when I remove the blind both will come our and leave a long hole like below.
20210331_150614.jpg
I am debating leaving those if they aren't leaking and are not corroded.
 
Top