1977 StarCraft 18' Super Sport Needs Rehab [SPLASHED 2017]

Old Irving

Petty Officer 2nd Class
Joined
Nov 29, 2015
Messages
151
I am looking to raise my consoles to make them align better because I used thicker plywood for the deck. I know people have recommended raising the consoles along the gunnel and drilling new holes. When you do this, do you have to run the new screws from the hull side into the interior? It looks like it would be a tight fit because the aluminum in this area is curved. Thoughts? See image. starboard side console alignment.jpg
 

Old Irving

Petty Officer 2nd Class
Joined
Nov 29, 2015
Messages
151
Over the last few days I disconnected the VRO, got the engine running, and hooked up the tilt / trim. Now I have to figure out my wiring diagram. I also found a green Bimini on Craigslist for free.

I wondered why my engine sounded so loud when I had the muffs on, I never tested it in the garage before. Yes the door was open.

Here's to progress.
 

Old Irving

Petty Officer 2nd Class
Joined
Nov 29, 2015
Messages
151
Here is an image of my new free Bimini. Yes, it is attached backwards but this was a trial attachment. I had to buy taller deck mount slides because the originals cracked from the pressure when I laid down the Bimini.
 

Attachments

  • IMG_20170516_000902.jpg
    IMG_20170516_000902.jpg
    133.6 KB · Views: 3

Watermann

Starmada Splash of the Year 2014
Joined
Jan 12, 2013
Messages
13,753
Yeah 2 strokes are a loud popping monster on the muffs, I love that sound though, even more so when wearing ear protection.

Bimini being free now that's a nice score. Set it up right and fold back, you may not need slides, just the foot mounts. On my SS the bimini folded back completely out of the way over the SW.
 

Old Irving

Petty Officer 2nd Class
Joined
Nov 29, 2015
Messages
151
Getting ready to order my electronics and wiring. This is going to be the diagram I will use as a template. I plan on running everything through the switch panel and the bilge will also be by itself. I found the diagram on a previous post, it really makes it easy for people who don't know a lot about electronics. boat wiring electronics diagram 1.jpg
 

Watermann

Starmada Splash of the Year 2014
Joined
Jan 12, 2013
Messages
13,753
Yeah the diagram is good but to me is overboard on wire gauge unless you're planning on running some seriously hungry devices. 12 ga is 20 amp just like in your house so to use 10 ga 30 amp in a boat is not needed. 14 ga for LED lights is also not needed. I used 16 ga for all the pumps, gauges and such. LEDs draw next to nothing for amperage and you can use double stranded 18 or 20 for them. Pumps draw only a couple amps and max at 4. Heavy gauge wire is tough to work with too and get proper attachments with the terminals and butt splices. You'll also need good pro tools and not the cheap stamped tools.

I ran 12 ga (20 amp) to the fuse panel and it has a 20 amp inline fuse at the battery. The fuse panels have a ground bus so you don't need that in the stern just run the ground for the pumps to the battery.
 

Candutch

Chief Petty Officer
Joined
May 8, 2015
Messages
637
Nice diagram Irv, I saved it since I'm starting that shortly. All my wiring is already run so I just need to hook it all up properly. Like Watermann suggested I didn't go with as heavy guage wire either 16 and 18 is what I used for most. I think I ran 12 or 14 to the stereo because of the length I had to run. Somewhere I figured it all out and wrote it down. I'll post it in my build when I get to the wiring next week.
 

Old Irving

Petty Officer 2nd Class
Joined
Nov 29, 2015
Messages
151
I am putting back the steering wheel and I didn't take photos when I took it apart. So far I have put it on incorrect two times. Does the angled plastic spacer go first, then the round metal part, then the steering column shaft? Attached is the image.

Thanks Steering wheel.jpg
 

Candutch

Chief Petty Officer
Joined
May 8, 2015
Messages
637
On mine it installed plastic spacer then steering shaft and then the metal ring. There are teeth on the collar of that shaft that fit into the back of the metal ring. At least I think that is how it went from my picture.
 

Old Irving

Petty Officer 2nd Class
Joined
Nov 29, 2015
Messages
151
Thanks Candutch, I was having a brain fart last night. The only part I list was a plastic spacer. It was one of those nights when I measured 6 times and cut 3. It was best to call it quits til morning.
 

Candutch

Chief Petty Officer
Joined
May 8, 2015
Messages
637
Thanks Candutch, I was having a brain fart last night. The only part I list was a plastic spacer. It was one of those nights when I measured 6 times and cut 3. It was best to call it quits til morning.

No problem, I was having the same difficulty when I was putting my helm back together.
 

Old Irving

Petty Officer 2nd Class
Joined
Nov 29, 2015
Messages
151
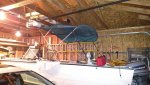
Here it is. My SPLASH. It was not pretty, still is not pretty, but I guess it counts. I prepped the boat enough to take it out on the Chicago River and there is still a lot to do but I didn't want to wait any longer. What was pretty cool about this launch is that I was the Project Manager for the development of it. Here is a recap of the launch.
1. Boat came off the trailer with no problem.
2. Boat did not start.
3. Replaced the four spark plugs.
4. Still did not turn over.
5. Went to auto parts store and bought a new battery.
6. A few cranks and the boat started no problem. I always started the engine with the battery charger and didn't notice the battery wasn't able to fully load.
7. The temperature alarm was going off constantly so I connected the VRO pump and it stopped. The VRO is not connected.
8. I have some water coming in and the bilge went off about every half hour. I guess that is OK for now until I replace a few more rivets and 5200.
9. Does the transom look too far below the water? I may be paranoid.

The boat handled like a champ besides the wheel being a little stiff and being very windy. The 18' Super Sport glided over the water and the 115 HP Evinrude got the boat up on a plane in a few seconds. I was only going to take it out for a few minutes but ended up going up and down the Chicago River for about an hour. I got her up to about 38 or 40 depending on the accuracy of my GPS. I only used about 3/4 of the throttle because the 17 pitch prop couldn't push any more. I was still impressed by the speed. I didn't want to use my good 21 pitch prop in case I hit a log, rock, or body. Time now to start my wiring, trim work, and sealing up the leaks. I think someone else said, it is more functional than pretty.

Thanks for all the help you all gave me on iboats and the Starmada Forum. IMG_3081.JPG
IMG_3085.JPG
IMG_3087.JPG
IMG_3091.JPG
IMG_3082.JPG
IMG_3093.JPG


Bob
 
Last edited:

Watermann

Starmada Splash of the Year 2014
Joined
Jan 12, 2013
Messages
13,753
Congrats on the splash! That was without warning but a nice surprise to see another fine SC cut a wake once again. :thumb:
 

Candutch

Chief Petty Officer
Joined
May 8, 2015
Messages
637
Congrats on the splash Bob. Two 18s in one day is sweet. I better get my butt in gear so we can get a fourth 18 splashed this year.
 

classiccat

"Captain" + Starmada Splash Of The Year 2020
Joined
Dec 20, 2010
Messages
3,405
Congrats on the splash!! :thumb:

Those old VRO's scare the heck out of me... :eek: So yours is disconnected (running premix already) but connecting it disabled the high-temp buzzer?
 
Top