1977 Silverline Kodiak 17T Restoration

eggs712

Petty Officer 1st Class
Joined
May 8, 2012
Messages
335
Hello everyone! I've been working on a 1977 Silverline Kodiak 17T with a '77 Mercury 1500 outboard. I started this project back in early 2012, but I've decided to put it on here because hopefully some will find it enjoyable.

Before I start posting more to this thread, please keep a few things about my work in mind. I'm only 18, so I have very limited funds and experience. There is a lot more that I wish to do on this boat still, but I'm going to have to cut back on new purchases on for the boat until spring when the grass starts growing again (I own a lawn & landscaping company). I'm also a full-time mechanical engineering student at Texas Tech, so I'm mostly limited to working on weekends.

Now for a background on the boat:
My friend's dad randomly decided to buy a boat! He went with his father-in-law to check out an ad on Craig's List. The guy wanted $1200, he gave $350 for it. It came with a detachable windshield, working trolling motor, working fish finder, a few life jackets, two extra chairs (both dry-rotted), and a canopy. The boat includes two live wells, interior lighting, only a fuel gauge, and bilge pump.
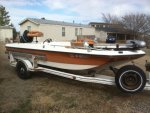
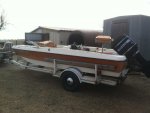
1.jpg

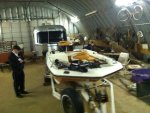
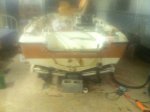
Photo from pickup of boat. Looks can be deceiving, eh?
 

eggs712

Petty Officer 1st Class
Joined
May 8, 2012
Messages
335
Re: 1977 Silverline Kodiak 17T Restoration

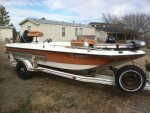
415442_405985812751842_905108371_o.jpg419626_289997727729743_76531808_n.jpg422043_289230144473168_229944278_n.jpg460101_405986336085123_987682223_o.jpg460633_405985926085164_1699923669_o.jpg
Pre-restoration
 

eggs712

Petty Officer 1st Class
Joined
May 8, 2012
Messages
335
Re: 1977 Silverline Kodiak 17T Restoration

461111_405986402751783_226481447_o.jpg465060_405986106085146_1232252804_o.jpg467802_405986242751799_865475355_o.jpg472030_405986169418473_1252688279_o.jpg475065_405985756085181_1876706650_o.jpg
Pre-restoration
 
Last edited:

eggs712

Petty Officer 1st Class
Joined
May 8, 2012
Messages
335
Re: 1977 Silverline Kodiak 17T Restoration

475574_405985996085157_1468815589_o.jpg 477981_405986519418438_1885590018_o.jpg
Pre-restoration

My friend worked on cleaning up the interior, and I got to go look at the boat for the first time; it was stored in his grandpa's barn. The motor looked very clean on the inside, except much of the wiring insulation was rotted and cracked. I really wanted to go to the lake with them, so I offered to install a new wiring harness for them (they bought the harness and a SELOC manual). After installing the new harness, they bought 3 new batteries for the boat to replace the 5 year old ones. We were ready to fire up the motor!
We got the motor started, and thought that we were done with the restoration (with the exception of the live wells not working at all; I still haven't been able to get to that yet LOL).
[video]https://fbcdn-video-a.akamaihd.net/hvideo-ak-ash2/v/1182774_576629899066523_16324_n.mp4?oh=578c366ac75 3d74f437e399571a651f0&oe=528D4C4B&__gda__=1384991853_314c8cbcfc00fefcf7f2c574f1fba05 5[/video]

We soon took it out to the lake after that, and it ran great for the first 20 minutes, and then the motor started acting up. After about an hour of playing on the water even with the motor failing to pull well under load, I noticed water coming in the boat. It seemed to be coming in rapidly, so I checked the drain plug and it had somehow came out! We rushed back to shore, but on the way back in the middle of the lake, the prop struck something and broke. I brought her back to shore as fast as the broken prop would take me there, and managed to get the boat on the trailer shortly before the water level in the boat would have flowed over the height of the batteries. One blade was broken on the prop, so we had to buy a new one (19 pitch). I was sure that I had put the drain plug firmly in the hole, but I wrote it off at the time as just my fault and nothing else.
I dumped B-12 in the fuel tank the next weekend we took it out to try and clean out the carbs and make the engine run better. I also made certain to install the drain plug right this time. We played around on the tube with the engine working decently for about half an hour before once again noticing water coming into the boat; this leak was fast and we rushed to shore and put the boat on the trailer. Once again, the drain plug was mysteriously missing. This once again baffled me, and we took the boat out once more that day just to go fishing (I installed the drain plug this time so tight that time that I thought it would break). The motor had run poorly that trip (fuel problems it acted like), but no water in the boat that time. When we pulled out for the day, we noticed that the T-handle on the drain plug was bent to hell when it had been a new plug. We thought it must have hit something and disregarded it once again. Later that day, my dad came out with my grandma's boat for the weekend, and he took a lot at the boat for the first time. The first thing he did was grab the motor and put weight on it; when the motor easily flexed the transom back and forth, my dad informed us that the transom was rotten and that we shouldn't have even taken the boat out for safety reasons. It finally made sense that the motor was flexing the transom when accelerating and whacking the drain plug. This also explained the growing stress cracks on the outside of the transom. I looked at the transom from the inside and it was an awful site.
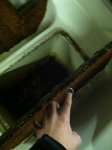
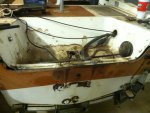
679.jpg
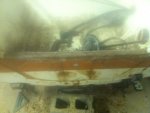
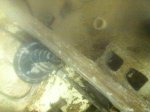
It's hard to see because of the trim motor, but there was a huge crack running the entire length of the transom. The black layer of fiberglass concealed the awful rot underneath. The bottom wood was entirely sawdust.
 
Last edited:

eggs712

Petty Officer 1st Class
Joined
May 8, 2012
Messages
335
Re: 1977 Silverline Kodiak 17T Restoration

We tried to sell the boat off the value of the motor, which had great compression and only a fuel problem, but couldn't get a buyer. We then went to get estimates from fiberglass repair places to replace the transom, but they all wanted at least $2K to fix it. My friend's dad was tired of spending money on a broken boat, so he gave it to my friend and I. I decided that I would have to fix the transom myself, though I had no idea what I was doing.
As a fun end to the summer, we went to a local lake to spend the day fishing, making sure to take it easy on the throttle. This did keep water out of the boat.
030.jpg
 

eggs712

Petty Officer 1st Class
Joined
May 8, 2012
Messages
335
Re: 1977 Silverline Kodiak 17T Restoration

Early this spring, I got started on the transom rebuild.
677__1384986228_69.65.224.112.jpg
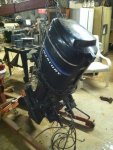
Motor off, I moved it to a motor mount I built out of wood.

678.jpg
The naked transom.
 

eggs712

Petty Officer 1st Class
Joined
May 8, 2012
Messages
335
Re: 1977 Silverline Kodiak 17T Restoration

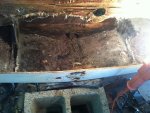
I crawled under the boat and spent a few hours taking out as much rotten wood as I could before actually cutting out anything.
IMG_2966.jpg
It's extremely hard to take the cap off of the boat because of its design, as the cap is fiberglassed into the main hull in many areas. We decided that it would be much easier to simply cut off the fiberglass outside of the transom and most of the transom wood with it, saving the fiberglass piece. I spent many hours plying, scraping, and sanding the old wood off all the way down to the fiberglass.
IMG_2968.jpg
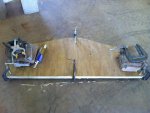
Because there aren't any major lakes near Lubbock, there aren't any stores that sell marine-grade plywood. However, the guys at a local marine shop told me that they use normal treated plywood without any problems, so I bought a sheet of 1/2" and 3/4" yellow pine treated plywood from 88 Lumber. I cut out a cardboard piece in the shape of the transom, and cut two pieces of 1/2" and 3/4" ply traced from the cardboard. I glued the two pieces of wood together to make one piece using outdoor-grade Liquid Nail (I recognize now that I should have used 5200 instead).
IMG_2974.jpg
It took three men, but we managed to get the new transom wood snugly into the perfect position through the hole we cut into the transom. I glued the original fiberglass piece that we cut out to the new wood with Marine Goop (we couldn't find anywhere in town that carried 5200) and clamped it as best as I could.
 
Last edited:

eggs712

Petty Officer 1st Class
Joined
May 8, 2012
Messages
335
Re: 1977 Silverline Kodiak 17T Restoration

Next, I crawled underneath the boat and sealed in the new transom using filet joints of fiberglass resin mixed with wood floor (I couldn't really afford to buy actual peanut butter mix). After sealing the edges, I put a layer of fiberglass over all the wood to completely waterproof the inside wood.
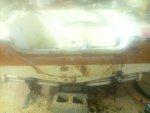
IMG_2987.jpgIMG_2988.jpgIMG_2989.jpg
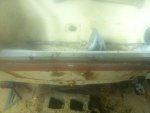
On the outside of the transom, I used three layers of fiberglass to seal in the top of the transom. I also installed a new splashwell drain.
IMG_2990.jpgIMG_2991.jpg
As a temporary measure, we spray painted the outside fiberglass to protect it and make it look better for testing. We then installed the aluminum plating and rub-rail end caps.
 
Last edited:

eggs712

Petty Officer 1st Class
Joined
May 8, 2012
Messages
335
Re: 1977 Silverline Kodiak 17T Restoration

IMG_2992.jpg
Another picture of the transom after installing the aluminum trim.
IMG_2993.jpg
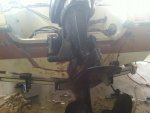
Next, we dropped the motor into place, bolted it into the transom, and re-installed wires and cables for it.
IMG_3134.jpg
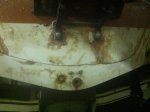
To put the final touch on the new transom, I had to properly seal the cut out fiberglass piece. First, I made it level to the rest of the transom using five brass screws.
IMG_3152.jpg
I then grinded down the gelcoat to the fiberglass.
IMG_3153.jpg
Lastly, I put a layer of fiberglass over the area where I grinded.
 
Last edited:

eggs712

Petty Officer 1st Class
Joined
May 8, 2012
Messages
335
Re: 1977 Silverline Kodiak 17T Restoration

I also rebuilt the fuel pump and replaced the primer ball to hopefully solve the fuel issue. The motor cold started and idled good on the hose, so we decided it was finally time to take her out on the water.

After finally finishing the transom, we felt like taking her out to test and finally take it easy for one weekend. It started off badly; the motor took over an hour to get started on the ramp, and was getting fuel but didn't want to fire. When it finally started, she ran great for about twenty minutes. Then, the motor resumed its old problems; it bogged down under load, and would go through periods of not running above low RPMS before finally seeming to burn through whatever was wrong. Regardless, we still had a fun trip. The last one of the summer, unfortunately. The boat also kept dry, thankfully.

I proceeded to try and get the motor running better, so I bought kits and rebuilt all of the carbs. The float levels had been way out of adjustment and the copper washers in the float bowls were all extremely worn. I tried to start the motor on the hose after installing the rebuilt carbs, but the motor refused to start. Even pre-mixed fuel into the carbs made no difference, so I knew there was likely a spark problem. I checked spark on all cylinders and only got spark on cylinder six, though I couldn't reproduce that spark. While examining the distributor, I noticed that the timing belt was rotted, so I replaced that. I also did the CDI ignition testing procedure and determined that my trigger is shot, and ordered a used, working one from ebay. That part hasn't come in yet, so that's where I'm at currently.

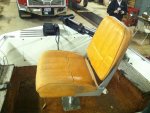
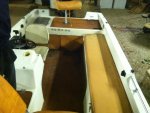
I forgot to mention previously that my friend and I also rebuilt the orange bench (it had rotten wood), rebuilt a rotten livewell cover, replaced the corroded stern light outlet, and replaced the DC outlet in the dash.

Things I still need to do (but won't get to do most of these until spring when I have the money):
I have a speedometer and pitot tube kit in possession; I just have to install it. I would have to get some other gauges as well, especially a tachometer, temp gauge, water pressure, and voltage gauge.
Once I install the new trigger, I need to perform a lync and sync and adjust idle mixture on the carbs.
I need to buy some gel coat to protect the fiberglass on the outside of the new transom.
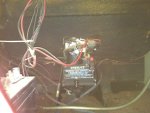
There's a nasty wiring mess underneath the dash from all of the crap that's been previously installed.
I also need to check the fuse box to see if that's what's causing the live well controls to have no power.

But most importantly, I have a soft spot on the floor on the driver's side. I don't have the money to fix that until at least next summer, so I'm going to wait on fixing that. I just want to enjoy the boat next summer and not worry about it.

Please feel free to comment with suggestions and whatnot for this project. I'm not new to boating (grew up around it), but I'm young and new to doing this kind of boat work.
 

Watermann

Starmada Splash of the Year 2014
Joined
Jan 12, 2013
Messages
13,753
Re: 1977 Silverline Kodiak 17T Restoration

Hey eggs welcome to the iboats dry dock. I'm not an itchy galsser type and normally only read their threads. I applaud your willingness to without fear jump right into an old rot bucket like so many of us have. I see your goal is to just have a safe usable boat and you seem to have figured out some things on your own.

The future may hold some more costly and disturbing things when you remove that rotten decking, like stringers that are the same mulch as the transom.

Good luck and keep plugging away on her!
 

eggs712

Petty Officer 1st Class
Joined
May 8, 2012
Messages
335
Re: 1977 Silverline Kodiak 17T Restoration

Thanks, Waterman! Yessir I have definitely figured out a lot on my own and just played things by ear. I'm mentally prepared to redo all stringers as well as the deck, because every time water has gotten in the boat, some rotten wood always comes out when the boat drains. But first, I want to have one season of enjoyment next year. I actually made a temporary floor fix :)
 

jbcurt00

Moderator
Staff member
Joined
Oct 25, 2011
Messages
24,874
Re: 1977 Silverline Kodiak 17T Restoration

Soft spot(s) on the deck & temp fixes may not suffice for even 1 season's use.

I completely understand projects hamstringed by budget constraints. But if you don't have the funds to fix the boat, you shouldn't use it, until you do.

I'm not fully following the transom repair as you've described it, so I can't comment for or against the completed repair. Hopefully it was sufficient & sound.

Delayed gratification, even at my age, isn't how we'd like to spend our spring. Those that board your boat depend on you to have maintained it properly and done everything possible (including repairs) to provide a safe vessel.

Boats aren't cars and when things happen they happen quickly. When they do, you can't pull over & just get out.

I went back & re-read the posts about the demo, fabrication & re-installation of the transom, I wouldn't want that HUGE Merc tower of power bearing against the transom as it is currently repaired.

I'd look for additional funding streams between now & the middle of January. Slowly stockpile the materials you need to address the boat in it's entirety, and find a warm place to work on the boat from mid-January thru April. W/ a buddy, and some careful planning, you can finish this boat mostly (all the necessary safety & safe use stuff 1st~now, interior finishes & gear later) by the beginning of the summer boating season in Texas. Then as your business allows, add finishing touches thru out the summer and by the end of the season you'll have the boat you see in your head when you're out in the garage working on this boat.

Commendable to tackle this project at your age. Learning how to do this type of work & sticking with it when it becomes challenging all says something about the strength of your character. However, you need to consider stepping back for a moment, looking at what really needs to be done before you use the boat thru a season. I don't know if you got lucky when you launched it last time & were able to power back to the ramp under your own power. Perhaps.

Seasoned boaters often get caught unaware, off-guard or inattentive. Often they are not the ones who pay the price for their errors.

Boat resto & boat safely.

I hope to see your project completed, and done well, soon.
 

cturboaddict

Petty Officer 1st Class
Joined
Aug 29, 2010
Messages
224
Re: 1977 Silverline Kodiak 17T Restoration

Keep at it bud. But as said, be careful most importantly. Feel free to contact me with any questions... you know how to!
 

greenbush future

Lieutenant Commander
Joined
Aug 28, 2009
Messages
1,814
Re: 1977 Silverline Kodiak 17T Restoration

I have great admiration for any 18 year old that has done what you have shared here not only with your boat but your life and all that comes with it. You have really lucked out in finding iboats and this area of the website, but most important the folks who will tell you how to do everything you need to, in order to enjoy your boat SAFELY. JB's comment above have never read more true as it relates to how safe your current repair job works and how to complete the job so you and your passengers are safe. Currently neither are the case regarding your transom repair and all the HP sitting on the back. I wouldn't take your boat out again until you have read and fully understand the correct way to replace a transom on a fiberglass boat. I don't think you are really that far off on being done with that part of making your boat safe. Unfortunately there's more to it than just the transom.
I'm not the expert, but I learned most everything I know from the guys here, and you can too. I would spend as much time as you possibly can reading in the restoration section here of similar fiberglass boats that are being rehabbed. You will then be able to save tons of $$ by doing everything once, but more important, done correct.
 

eggs712

Petty Officer 1st Class
Joined
May 8, 2012
Messages
335
Re: 1977 Silverline Kodiak 17T Restoration

Thanks guys, I definitely did luck out in finding iBoats and all of the great help here. I agree that safety is a top priority when boating, and I wanna fix anything I can during these few long months of winter.

What can I do to make the transom better? I'm sure that I made quite a few mistakes when rebuilding it, as I lacked any experience or help. Even with the huge TOP back there, the transom feels solid as a rock when I put my weight on it. Also, I haven't observed any flexing whatsoever during hole shots on the water. But y'all are experienced with this stuff, so I appreciate any help with making the transom sound and ready for many years of enjoyable boating.
 
Last edited:

greenbush future

Lieutenant Commander
Joined
Aug 28, 2009
Messages
1,814
Re: 1977 Silverline Kodiak 17T Restoration

By cutting and removing part of the fiberglass exterior skin on your transom, you may want to reinforce (re-glass) the entire back of the boat. Cutting that skin is not the standard way of replacing a transom, and I think its rather critical in tying the strength of the boat all together in that area. I'm not the guy that could tell you how to fix that, but it can be done. Read and ask, I think the pros here will help you do it right. That's one nice thing about glass boats, you can always grid anything out and redo anything you don't like.
The last thing you want is a catastrophic failure, and have your outboard and boat sunk, that's why most guys here really promote safety first, lives do depend on your work.
 

jbcurt00

Moderator
Staff member
Joined
Oct 25, 2011
Messages
24,874
Re: 1977 Silverline Kodiak 17T Restoration

I'd suggest you pull the motor, and all the non-glass stuff in, on or thru the transom (channel at the top of the transom, end caps on the rubrail, tow eys, everything). Then do a similar gelcoat grinding to what you did just at the cut line in this pix:
attachment.php


Ground to good glass, no gelcoat.

Then alternating layers of 1.5oz CSM (chopped strand mat) and 1708 biaxial fiberglass at least 3times

Fill, feather, smooth & paint

And something similar to the interior face. But only twice (4layers of glass)
 
Top