1977 Cruise Boats Restore

Status
Not open for further replies.
Joined
Aug 17, 2009
Messages
941
Re: 1977 Cruise Boats Restore

Here are more pics of the prep.

IMAG0010.jpg


IMAG0011.jpg


P1020012.jpg


P1020013.jpg


P1020018.jpg


For the below water line fills, I did use a PB mix since the Formula 27 is for above the water line repairs only.

P1020021.jpg


Once everything was finshed I ended with a 220 grit sanding surface for primer.
 
Joined
Aug 17, 2009
Messages
941
Re: 1977 Cruise Boats Restore

Okay now comes the primer. I planned on using Interlux Perfection paint (two-part polyurethane). The recommended primer was the Epoxy Prime-Kote. I also used the recommended fiberglass solvent wash (Interlux 202 Fiberglass Solvent Wash) to wipe down before priming and the 2333N Reducing Solvent as a thinner and brush cleaner. I first had to mask off the water line where the bottom paint started. I then washed down the boat with the solvent wash followed by a tack cloth wipe down just prior to applying the primer. I mixed up the two-part primer and thinned it slightly to improve the flow since I was working in hot weather. The mix has to rest for 20 minutes before applying it. The consistency of the primer was similar to milk. I used foam rollers to apply the primer. I tried the roll-and-tip method but it didn?t work form me. So I went with the roll and roll method which worked out fine since this was the primer coat and was going to be sanded before the paint was applied. Make sure you use a foam roller that can with stand a strong solvent based paint. The first pack of rollers I used couldn?t and quickly fell apart. I applied one even coat over the entire boat. The primer sets-up quickly so I didn?t have much working time. I started at one corner and worked my way around the boat keeping the wet edge going as I went. Do not attempt to go back a try to over roll a previously rolled area. It will leave roller marks in the finish, which leads to more difficult sanding afterwards. I also did the hull sides first and then did the cap section.

Once this first coat of primer had dried I carefully inspected the entire surface for spots that I missed and still needed to be faired some more. You wouldn?t believed how many spots I missed. Oh well, more filling and sanding and filling and sanding etc., etc. Once I got all the remaining spots fixed, I sanded the entire boat with a 320 grit paper to a smooth finish. I again washed down the boat with the solvent and then tack clothed it just prior to the second coat of primer. I rolled a second coat on and let it dry. Once that had dried I repeated the above process again to catch any remaining spots. Any of these spots I touched up with some more primer. Once that dried, I sanded the entire boat with 320 grit paper in preparation of the paint

IMAG0015.jpg


P1020023.jpg


P1020027.jpg


P1020026.jpg
 
Joined
Aug 17, 2009
Messages
941
Re: 1977 Cruise Boats Restore

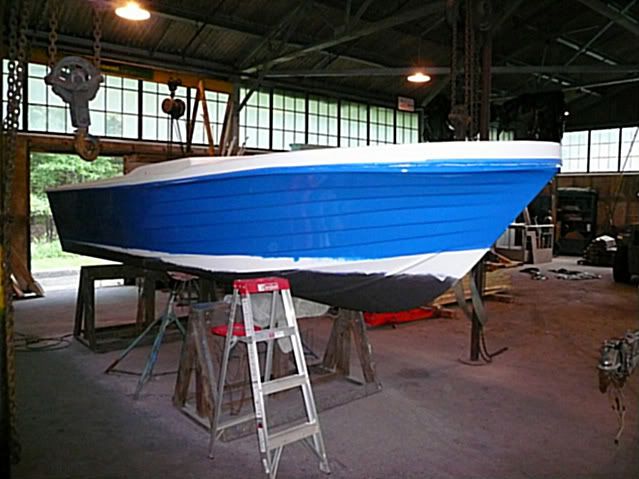
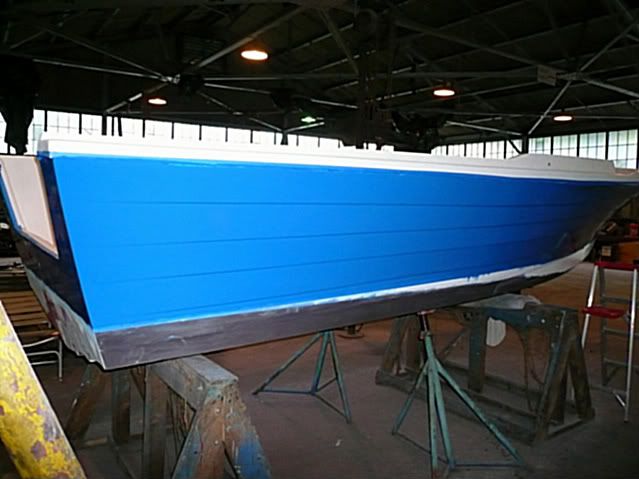
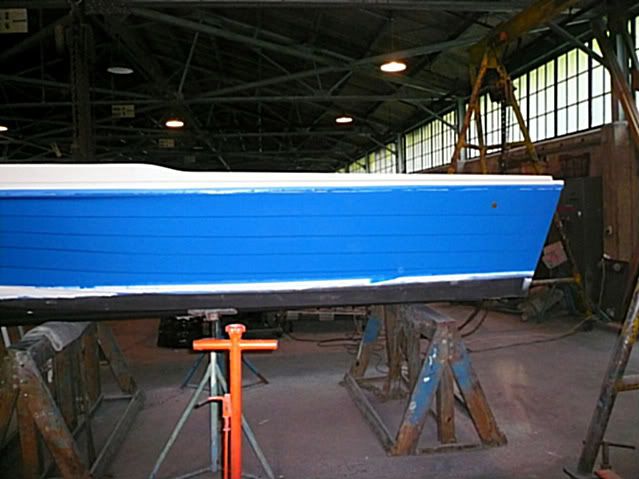
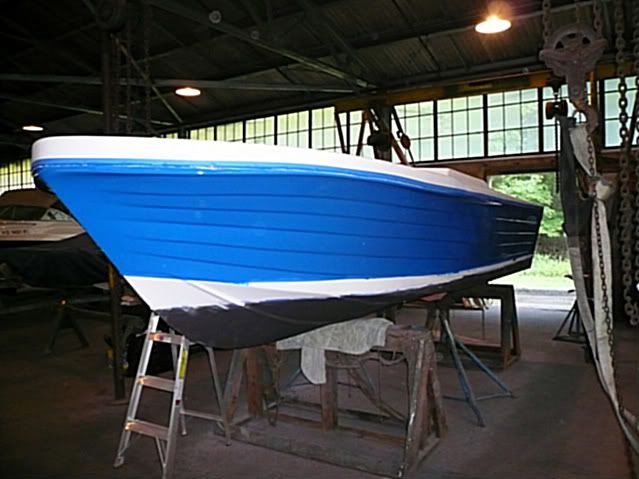
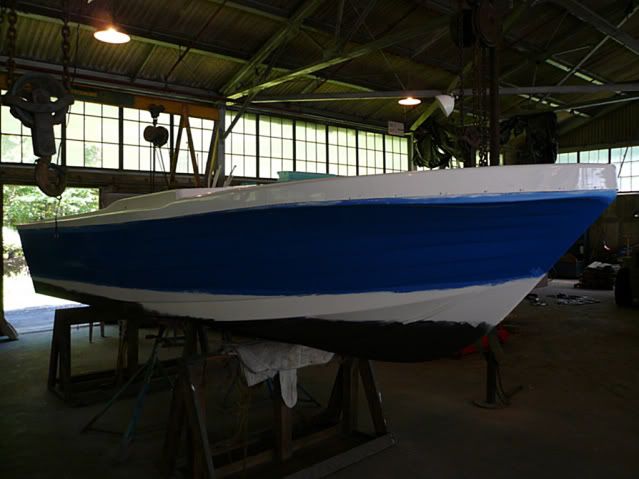
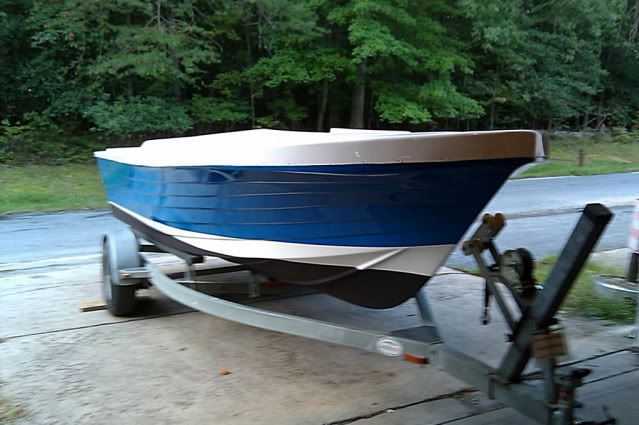
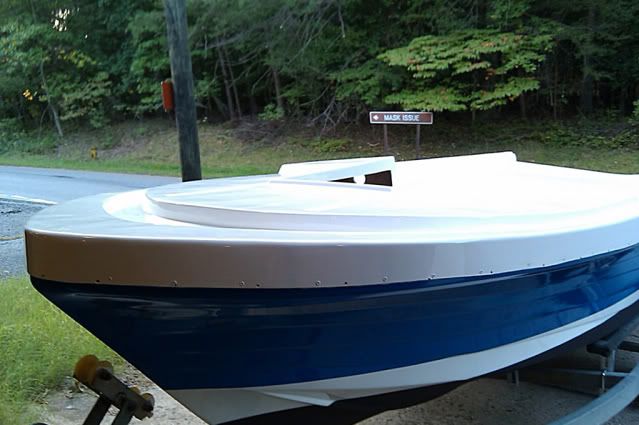
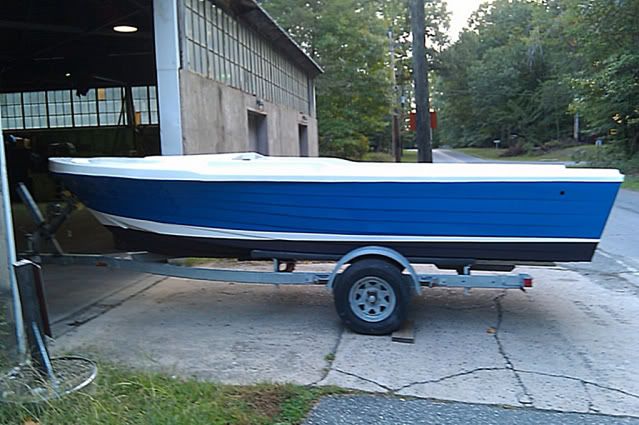
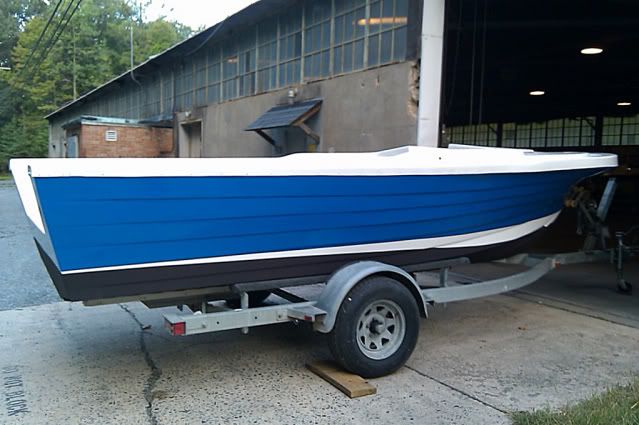
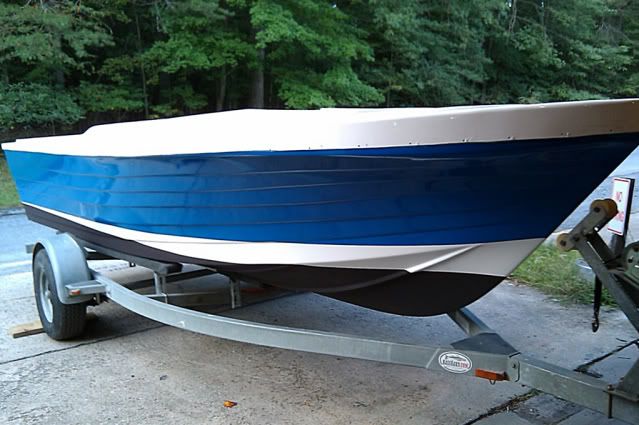
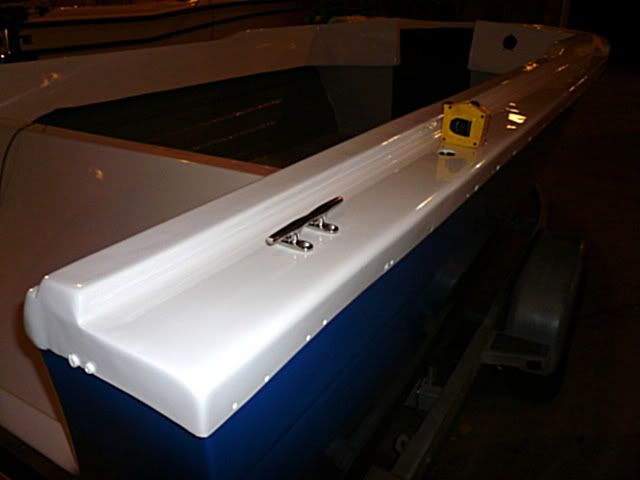
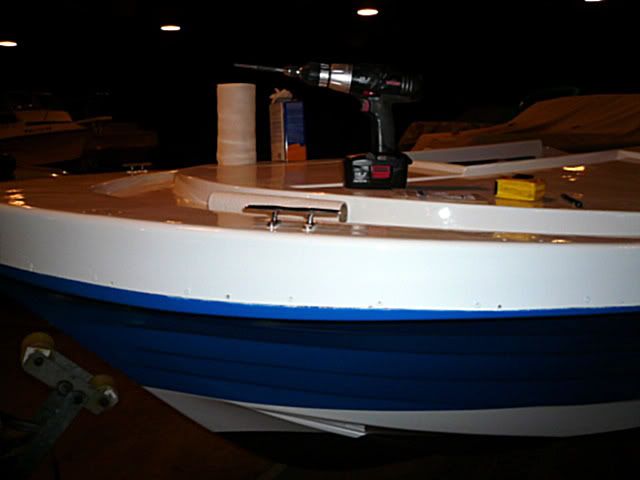
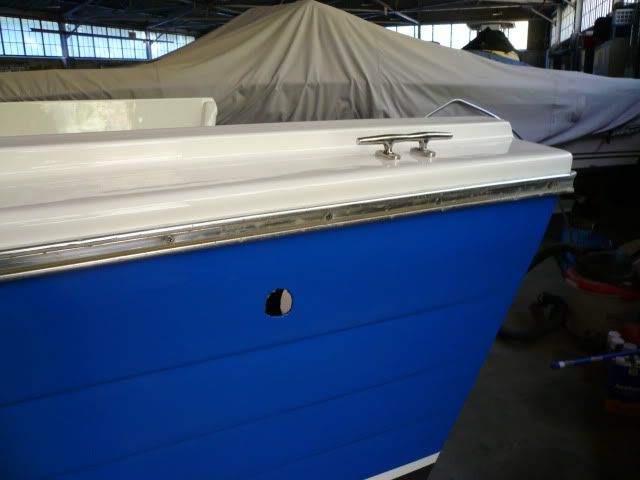
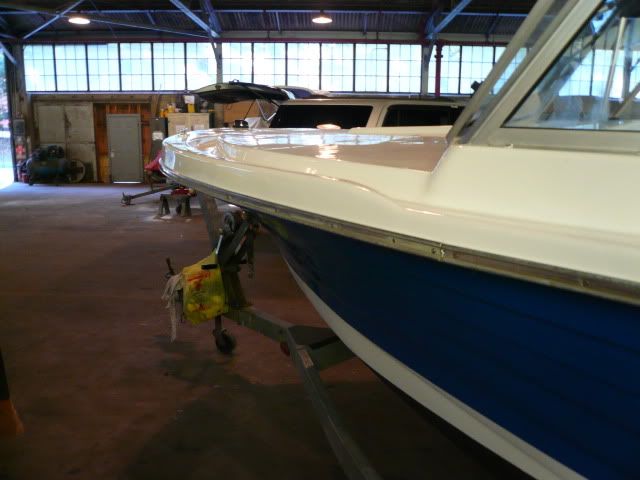
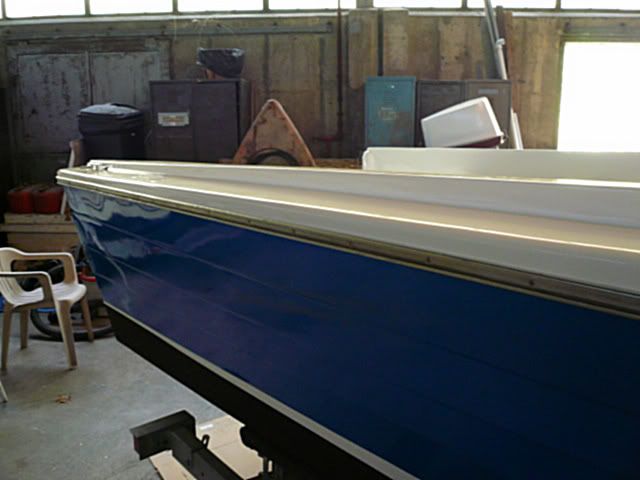
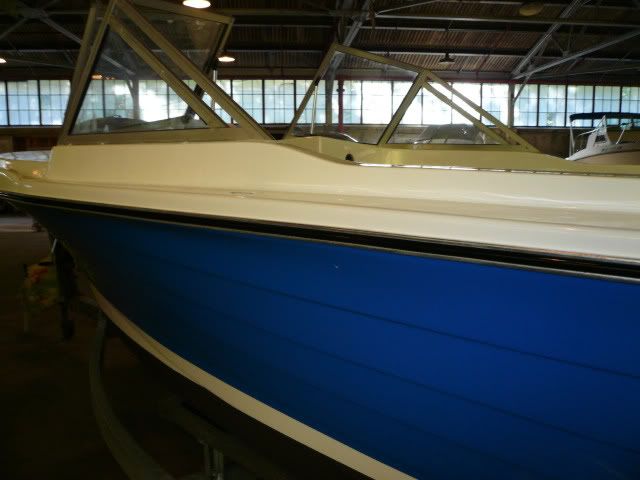
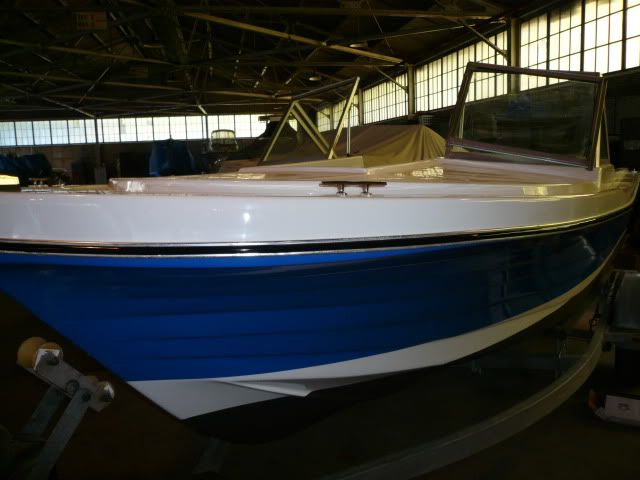
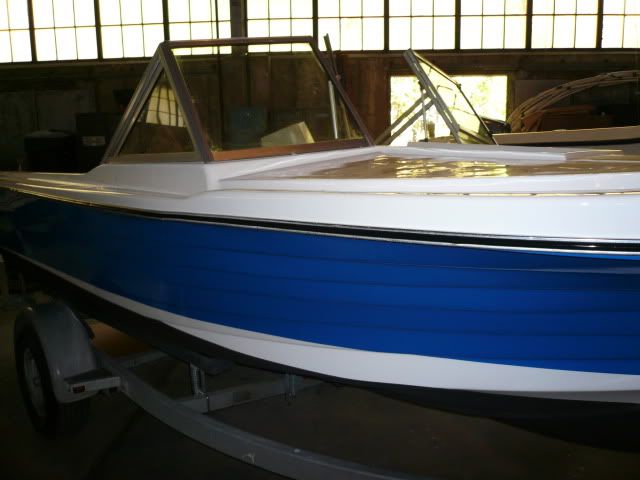
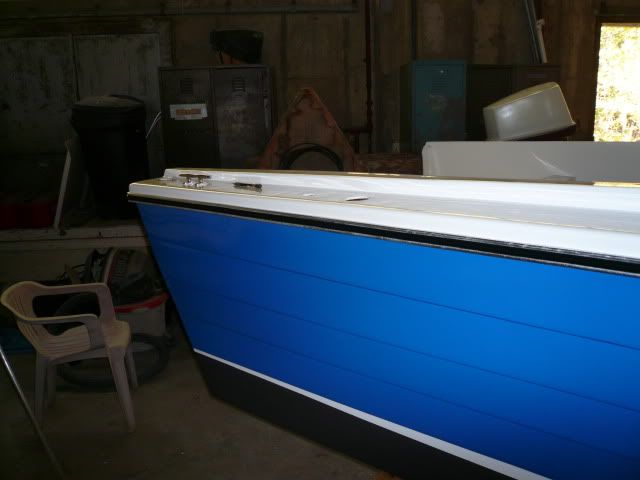
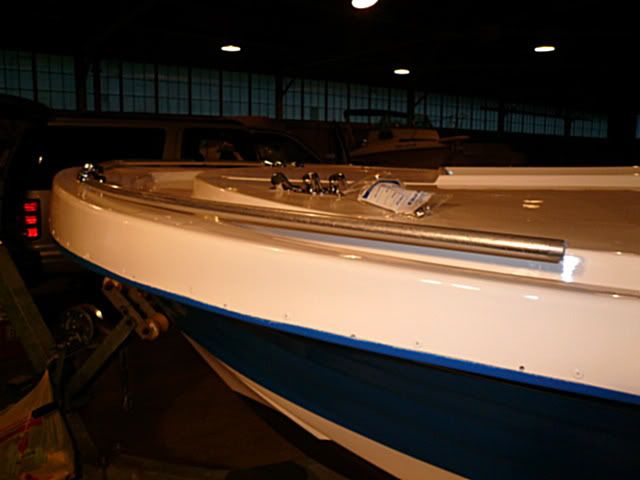
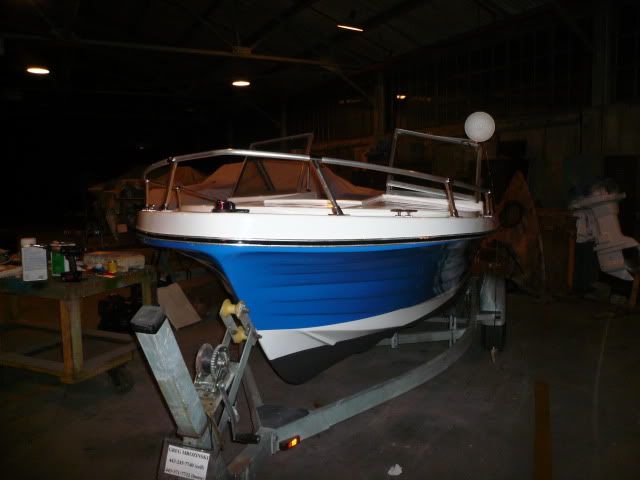
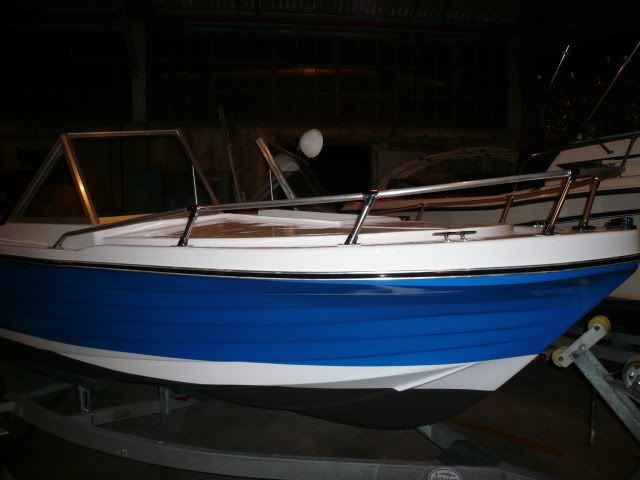
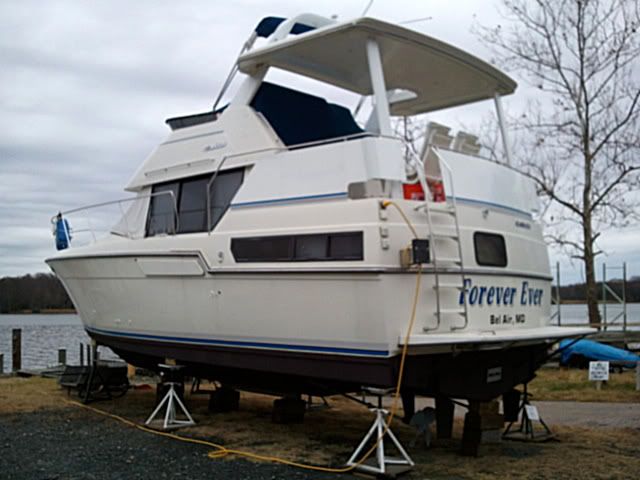
So now onto painting. Like I said before I planned on using Interlux Perfection paint (two-part polyurethane). The paint scheme will be two colors ? Lauderdale Blue on the hull and Mediterranean White for the top cap. I also wanted to make a matching white accent stripe along the water line to give the blue some punch I had seen this configuration on several project boats on here and liked the look it gave.

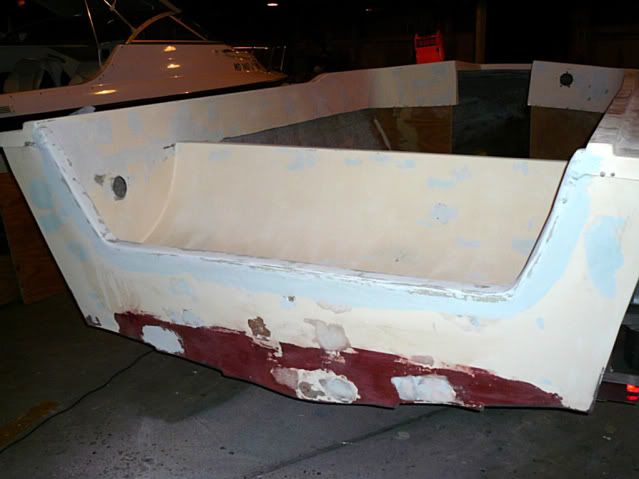
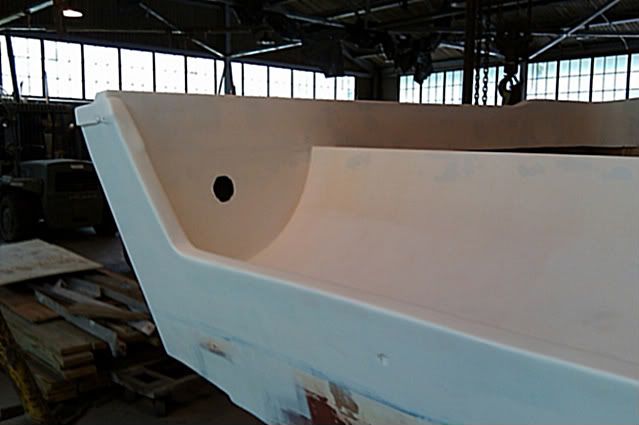
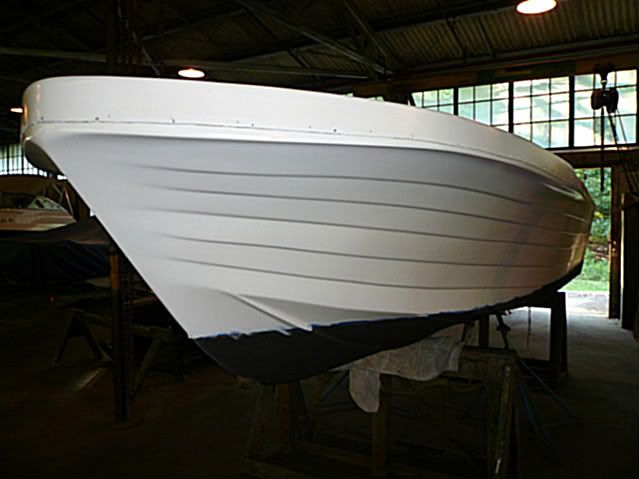
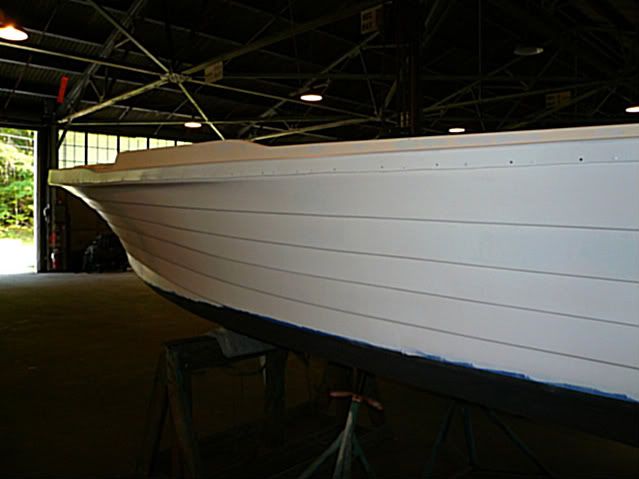
Let me again mention prep. What you see before you paint will be what you see after you paint BUT WORSE! It took me several weeks to get to this point. Don?t sell yourself short here and waste all of your hard efforts. Go the distance.

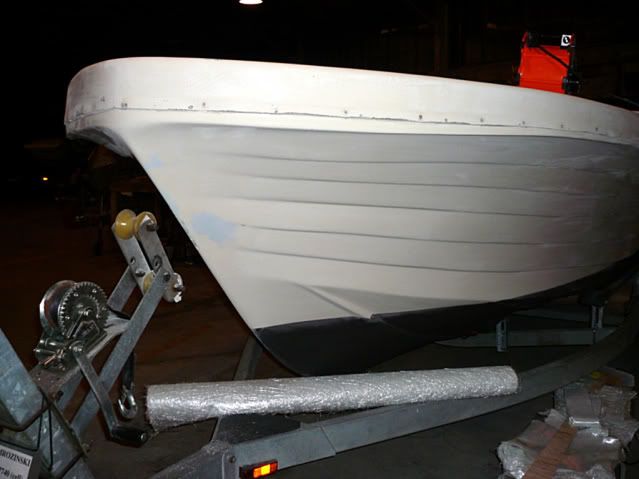
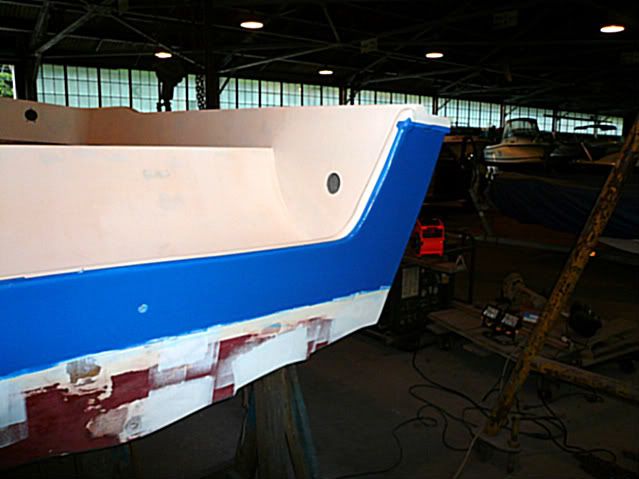
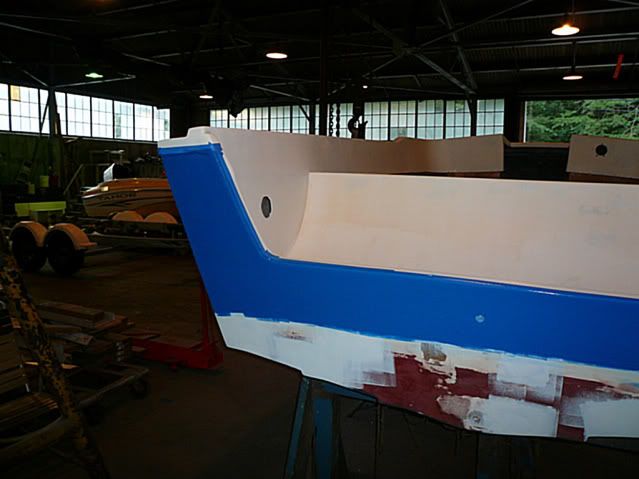
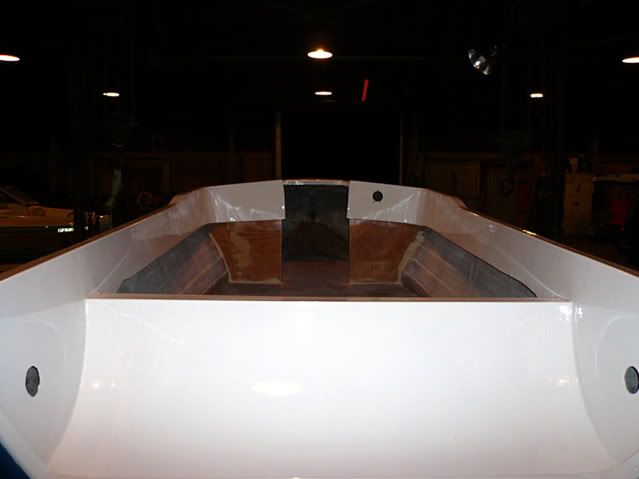
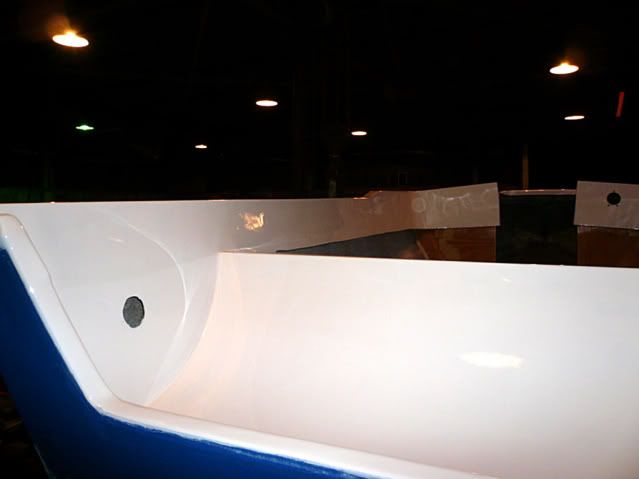
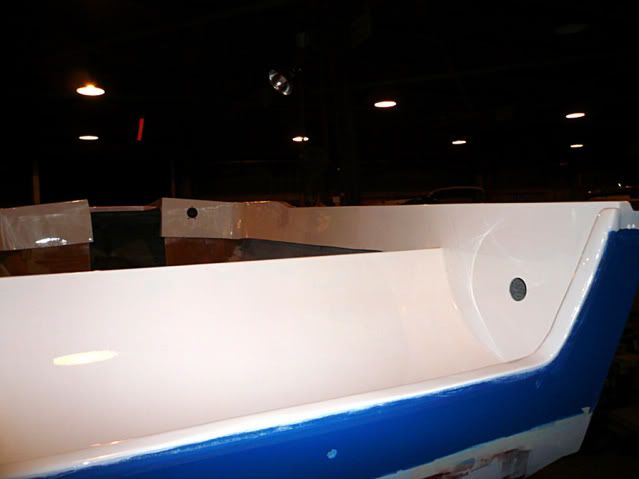
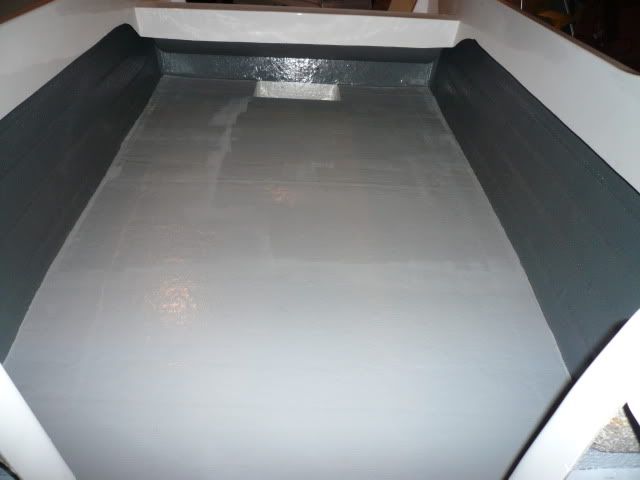
To this point I have filled, faired and final sanded the boat with two coats of primer. The final primed surface was sanded with 320 grit before painting.

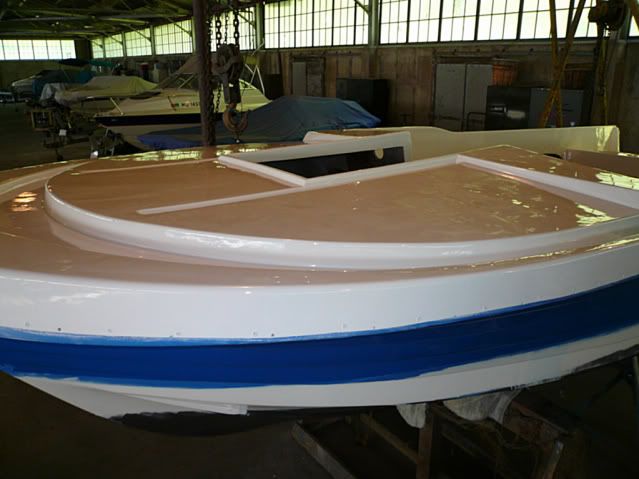
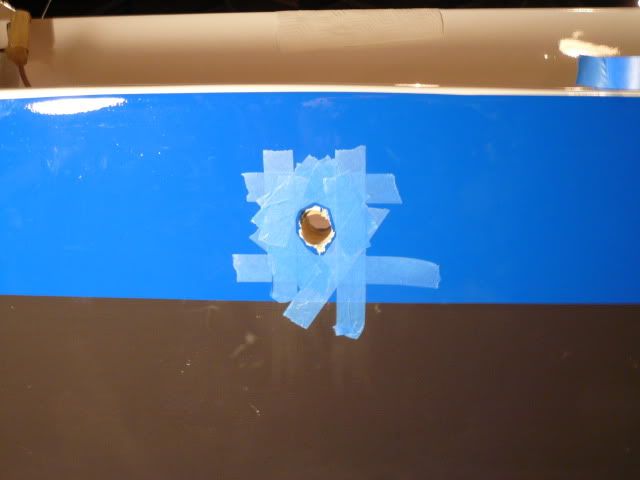
I decided to paint the blue on the hull first and then paint the white second. The first step was to lay out the accent stripe and mask this off. This takes patience and careful layout. I did this mainly by eye but I also fine tuned it by taking a few measurements at various points. There is a natural dividing line at the cap/hull seam, so taping this off is easy. Next I had to mask off the transition from white to blue at the transom. Once I was ready to paint, I washed the hull with solvent and tack clothed the area just before painting. I used the roll and roll method to apply the paint. Again, use high quality foam rollers that can take the solvents. The paint did not go on quite like the primer did. The paint has a thinner consistency; therefore your first coat will not totally cover and appear to be thin. That is okay when using the foam roller. Subsequent coats quickly fill in and cover thin spots so don?t worry. The key when applying the paint is evenness since it flows out well (less thinner the better). It does take some practice to get this stuff on correctly. A few things to note ? (1) I started out using one wet roller to apply the paint and then followed up behind that with a dry roller to even it out. It was better to use only one roller to apply and then use the same roller to give it the final finishing (very lightly) roll; (2) This paint sets up quickly, I only had about five minutes working time to apply the paint, get the paint spread even, and rolled out correctly in the section I was working on, while all the time maintaining a wet edge; (3) Once you have finished the final light rolling DO NOT go back and make contact with the paint. If you do it will leave a roller mark that will not level out and will remain in the finish; (4) As you work your way around the boat you have to be able to physically reached all parts that you are painting, meaning that you cannot do one spot and then move to another and then return. You have to keep working from the same wet edge or (3) above will happen; (5) If you cannot reach then get help so that you can maintain that wet edge front as you move forward through all sections.

Once the first coat was dry I sanded the entire surface with 320 grit paper, solvent wash, and tack cloth before applying the second coat. When the second coat was dry, I sanded the entire surface with 400 grit paper, solvent wash, and tack cloth before applying the third and final coat.

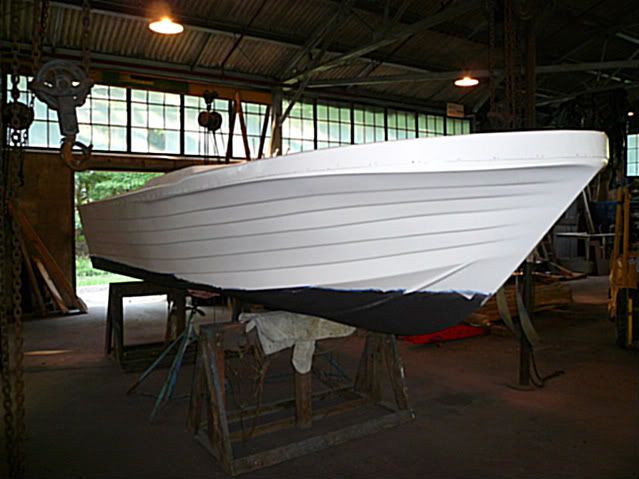
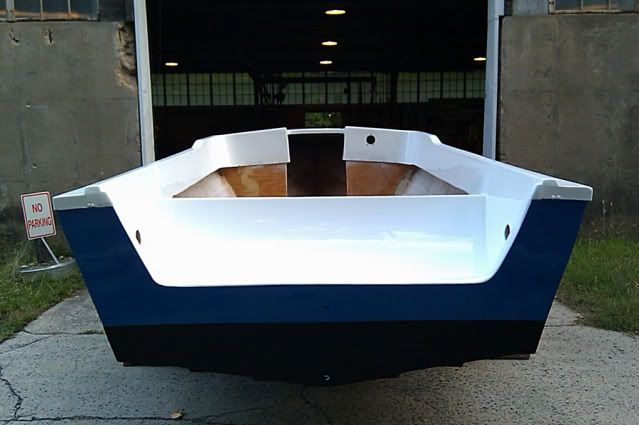
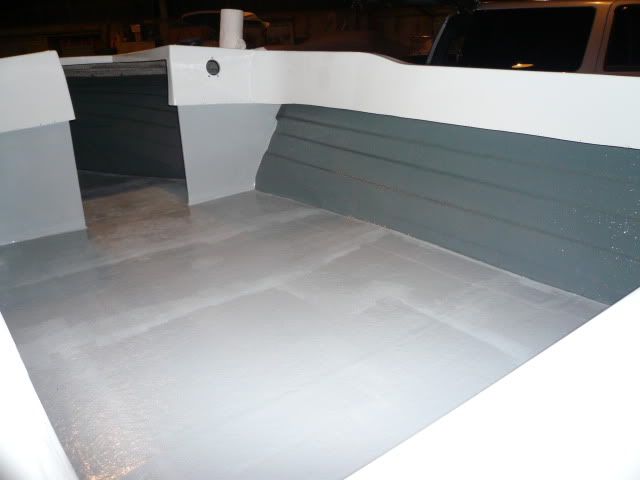
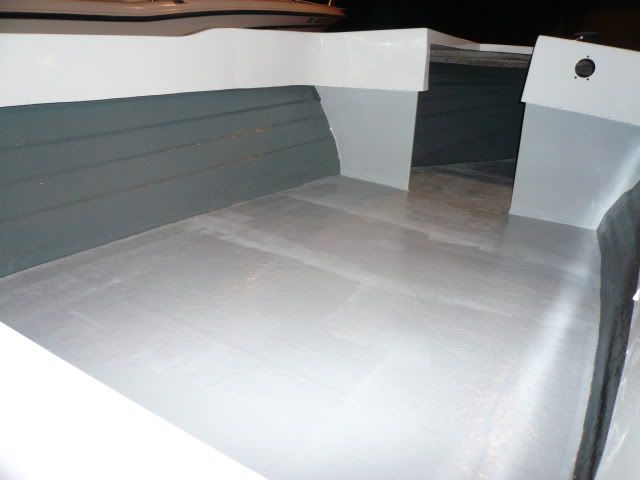
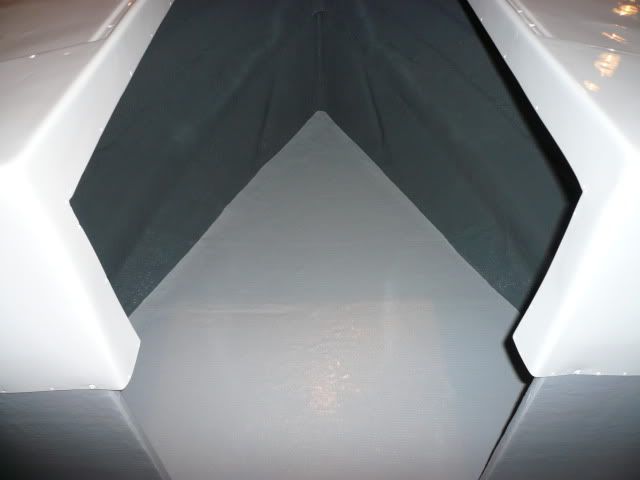
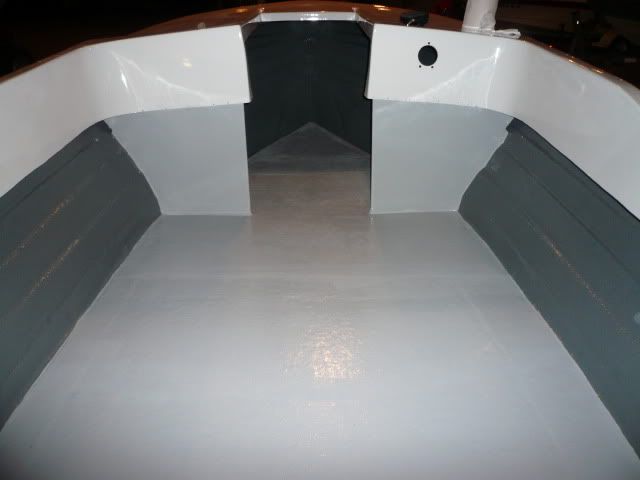
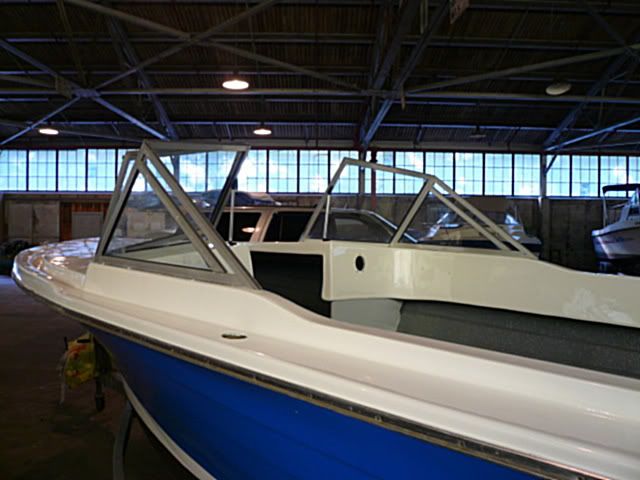
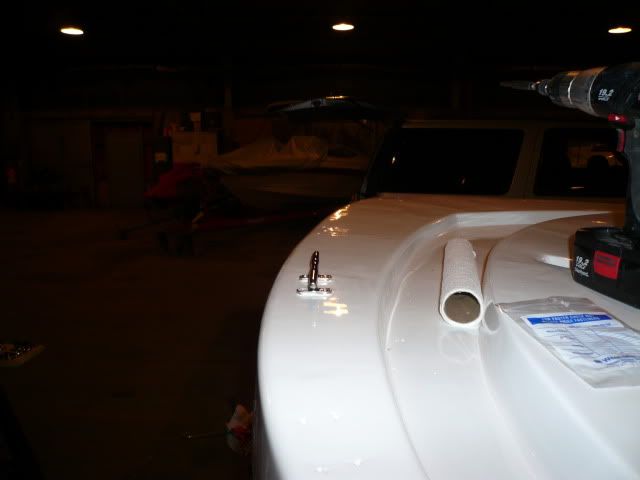
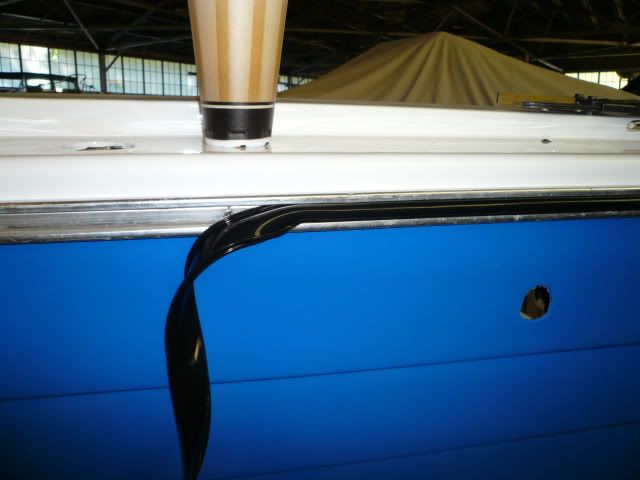
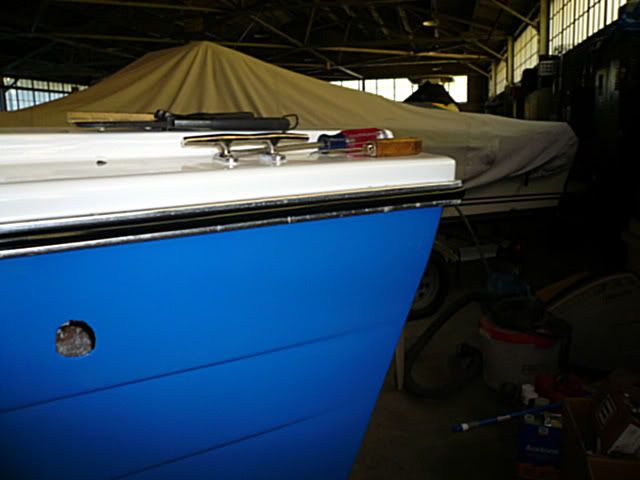
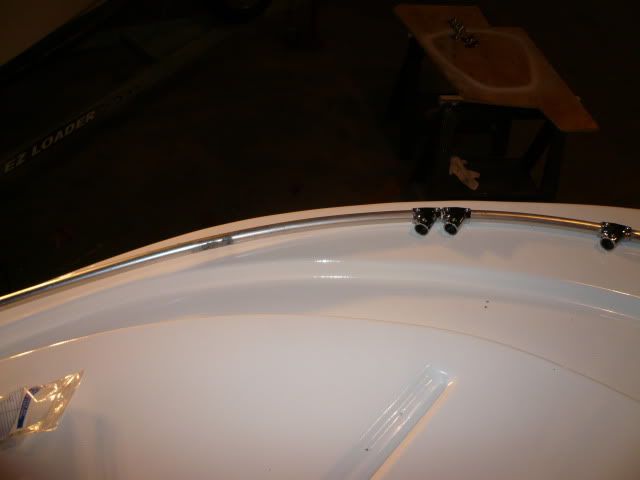
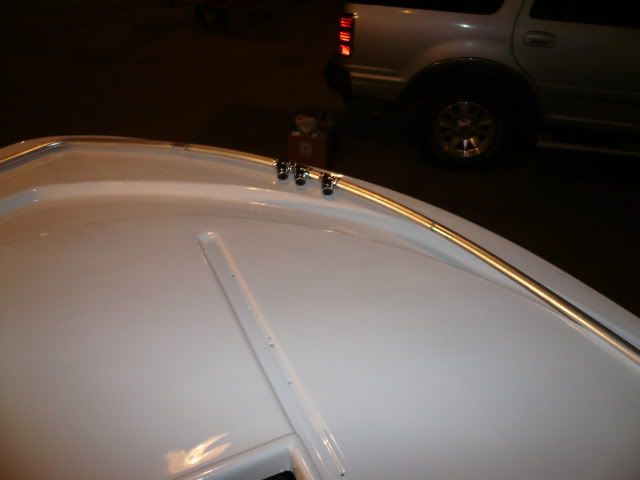
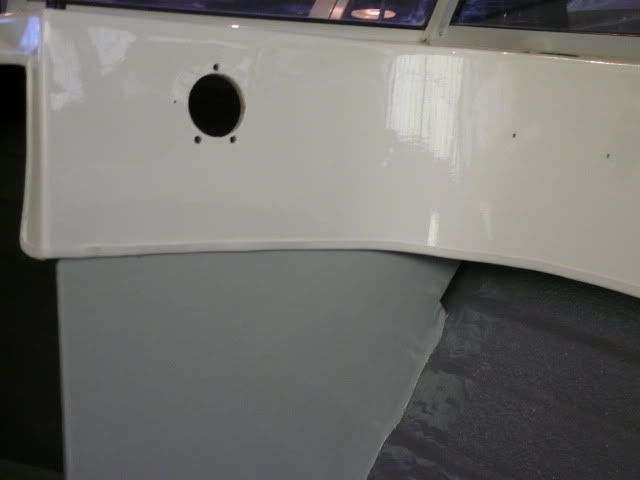
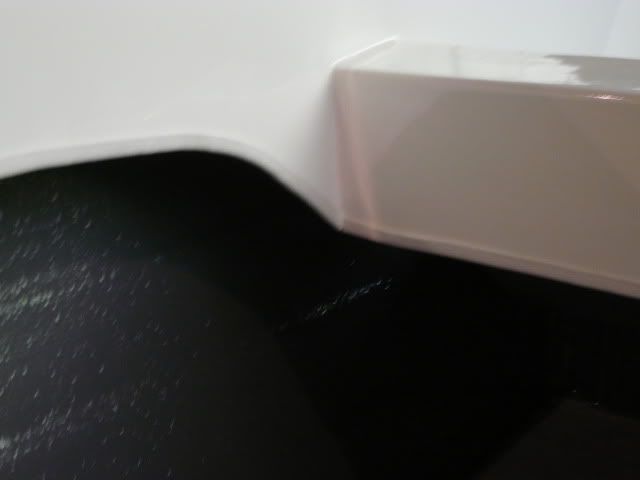
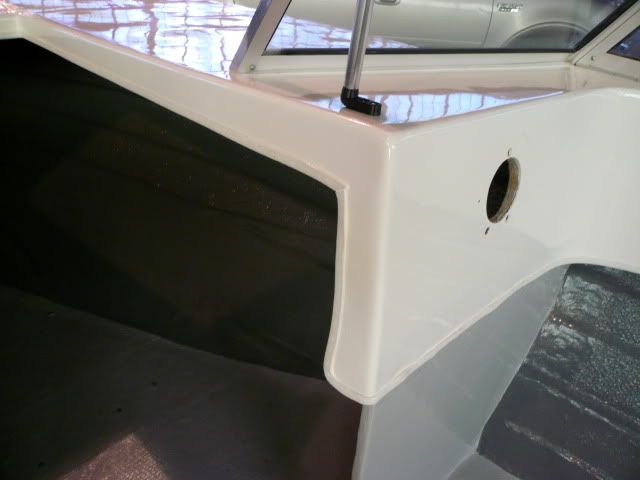
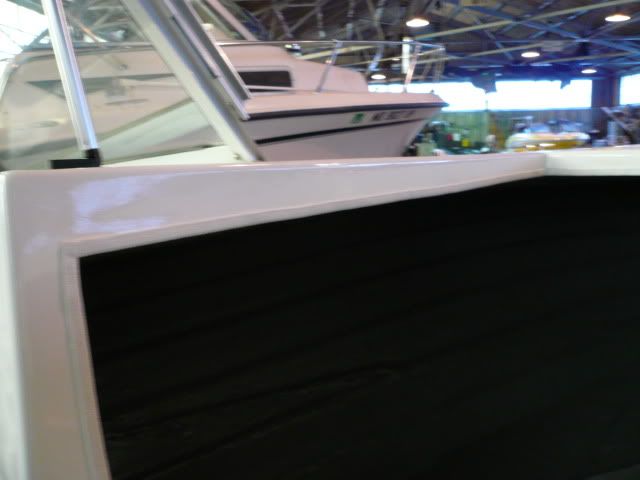
Here are the pics of the blue hull:

P1020030.jpg


P1020031.jpg


P1020032.jpg


P1020033.jpg


P1020034.jpg


P1020035.jpg
 
Last edited:
Joined
Aug 17, 2009
Messages
941
Re: 1977 Cruise Boats Restore

And here is the final product after touch ups and such. The paint turned out really well overall. There are a few spots that are not perfect but hey it easily passes the 2ft rule. Enjoy:

IMAG0024.jpg


IMAG0023.jpg


IMAG0022.jpg


IMAG0021.jpg


IMAG0020.jpg


IMAG0019.jpg


Now I am really stoked because I can start putting it back together!!!
 
Joined
Aug 17, 2009
Messages
941
Re: 1977 Cruise Boats Restore

The next step in the process is to paint the inside of the boat. I decided to use Rustoleum Marine Top Side Paint to coat the inside of the hull and the floor. I wanted something darker on the hull and lighter on the floor so I went with Battleship Gray on the inside hull sides and a light grey custom mix of two parts Gloss White/one part Battleship Grey for the console supports and the floor. I also used some of the Rustoleum Anti-skid additive for the floor. The console supports and the inner hull received two coats of paint. The floor received one coat of the custom light grey (paint only), followed by another coat with the anti-skid additive in the paint and then followed by a final coat of paint. The only issue I had was with the anti-skid. It doesn't flow out evenly with the paint. It will build up more on the end strokes of the roller. That is the unevenness you see on the floor in some shots. The entire floor is very grippy, just more so there. Here are the pics. Enjoy!

P1020098.jpg


P1020097.jpg


P1020096.jpg


P1020095.jpg


P1020094.jpg
 
Joined
Aug 17, 2009
Messages
941
Re: 1977 Cruise Boats Restore (Great thread/Lots of PICs!!)

Re: 1977 Cruise Boats Restore (Great thread/Lots of PICs!!)

Well finally all of the painting is done. So now comes the fun part...putting all stuff back on the boat. So in no particular order I decided to start with the windshield first. The original windshield was in good shape and it just needed a good cleaning and some polishing. The only parts that needed replacing were the windshield supports. Once the windshield parts were prepped, I applied some foam rubber mounting tape to the bottom edge of the pieces to provide a weather resistant seal and to cushion the bottom edge of the windshield against the newly painted surface. I used the existing holes that were in the console and gunwale to align and attach the pieces. I used #10 SS machine screws with washers and lock nuts to affix the frame to the topside.

P1020173.jpg


P1020174.jpg


P1020176.jpg


P1020175.jpg


P1020177.jpg


Now with the frame all up, I installed the supports. The supports are installed with the door closed so that you can see that an even space along the door edge is maintained while you position the supports. This prevents the door from jamming on the opposing frame and allows for smooth operation.

P1020237.jpg
 
Joined
Aug 17, 2009
Messages
941
Re: 1977 Cruise Boats Restore

Since I had the drill and drill bits out I decided to put on the cleats. Originally the boat had two stern cleats and one bow cleat with two line chocks. I didn't like the bow arrangement and wanted to use two bow cleats instead. All deck hardware is bedded with 3M 4000.

P1020165.jpg


P1020164.jpg


P1020171.jpg


P1020172.jpg
 
Last edited:
Joined
Aug 17, 2009
Messages
941
Re: 1977 Cruise Boats Restore

Next thing to go on is the rub rail. I decided to re-use the original aluminum rail and replace the insert. The rub rail was in pretty bad shape. It was scratched and crushed in spots. Slowly and carefully I straighten out the rail. After that I cleaned it first with a metal cleaner and tarnish remover. This cleaned the surface contaminates and corrosion off and converted any corrosion spots back to a solid oxide. After that I used never dull metal wadding to polish (the best I could) to give the rail a little shine and protection. This whole process was sort of like scrubbing the bathroom floor with a toothbrush? slow and painful. But it was worth it because it came back pretty well?a lot better than I thought it would. Originally the rub rail was riveted into the hull/top cap joint. I wanted to use screws this time when putting it together so I needed help since someone had to be outside while I was stuffed under the gunwale trying to put on the washer and nut. My lovely wife gave me a hand and was a huge help. We worked ourselves around the boat and got everything nice and tight.

P1020223.jpg


P1020224.jpg


P1020226.jpg


P1020227.jpg
 
Joined
Aug 17, 2009
Messages
941
Re: 1977 Cruise Boats Restore

Next goes in the rub rail vinyl insert. Fortunately this stuff is still commonly available and not that expensive. Simply fold it in half and get it the center and release. It has tabs on the top and bottom that sort of latch it in place. A thump with the palm of your hand fully sets it. The new insert really sets it off.

P1020243.jpg


P1020244.jpg


P1020246.jpg


P1020247.jpg


P1020248.jpg


P1020249.jpg
 
Joined
Aug 17, 2009
Messages
941
Re: 1977 Cruise Boats Restore

Continuing on with the deck hardware and such, it was time to install the bow rail. I decided to use as much of the old bow rail as possible which only turned out to be the rail itself. Originally all of the rail fittings were made from pot metal (zimak?) and had all corroded and split. This also caused significant corrosion to the aluminum pieces of the rail and supports also. In order to take everything apart I had to cut the rail at the first connection point so that I could remove the fittings and install the new fittings. Most of the old fittings I had to cut off with a grinder. I cleaned the rail like I did with the windshield and rub rail pieces. Some spots were pretty thin due to corrosion but there seemed to be enough there to make it work. It turned out okay considering it was pretty beat up. I scored most of the stainless steel fittings from E-bay and a great online supplier www.marinepartdepot.com. These guys have SS fittings at a fraction of the price you would find anywhere else and most of the time their shipping is free.

P1020162.jpg


P1020161.jpg


P1020160.jpg


All of the support pieces were shot so I made new ones from new aluminum tubing.

P1020163.jpg


I joined the bow rail section I cut back together by epoxying a piece of copper pipe inside the tube sections. Once that set I pop-riveted these inplace. Once eveything was good to go, I first installed the bottom 60 degree fittings. Then dry fitted the rest and worked everything into final place. I think it came out well and it is strong. Everything was bedded with 3M 4000.

P1020259.jpg


P1020258.jpg
 
Last edited:
Joined
Aug 17, 2009
Messages
941
Re: 1977 Cruise Boats Restore

Next up on the agenda is to install the trim that goes around the inside edges of the cap/gunwales/splashwell. This boat originally had a small piece of aluminum trim riveted all around this area. (Geez it's hard to believe this thing looked like this once.)

P1010836-1.jpg


I removed all of this trim and trashed it. I left the holes since I knew I was going to cover them anyway with some U-Flex trim. Here you can see the holes around the edge.

P1020174-1.jpg


Here is the U-Flex trim (and cut thumb).

P1020240.jpg


Installation was easy. Basically just push it on. I used a light tapping from a hammer to fully set it. Tight bends can be achieved by cutting small slits into the back side to relieve the strain on the trim and then forcing it on. Here is the finished look.

P1020234.jpg


P1020233.jpg
 
Last edited:
Joined
Aug 17, 2009
Messages
941
Re: 1977 Cruise Boats Restore

Well let's see...I might as well put in the steering now since I want that in before I run the electrical wiring. This was very easy and straight forward. I installed a brand new 4.2 NFB (no feed back) Teleflex rotary cable sterring system. I was able to use the old mounting holes in the dash as well as the old 20 degree mount and bezel from the old system. Everything bolted right up no problem. I use wire ties to support the cable under the starboard gunwale. (Note: The first picture shows the helm installed with the mount on the back side of the dash. This is incorrect. The mount should go through the front of the dash when installed. I found this out latter when I try to install the trim bezel and steering wheel and they wouldn't fit correctly. DOH!!) While I was at it I installed new cable boots in the splashwell. I covered the end of the steering cable with some scrap cardboard to prevent scratching the paint.

2010-10-26081048-1.jpg


2010-10-26080012-1.jpg


2010-10-26080854-1.jpg
 
Last edited:
Joined
Aug 17, 2009
Messages
941
Re: 1977 Cruise Boats Restore

Next up is the wiring. I?ll start with the battery cables first. I decided to relocate the batteries forward to the bow area. They will be positioned right in front of the port side console support. The cable run distance from there to the motor is 17?. Total round trip is 34?. My motor is a 1983 Johnson 115 Hp outboard. I figured the amp draw of the starter will be about 100-150 amps on the high side. With that length run I will need a 2 AWG size cable. I safe sided it and went with 1 AWG size cable. I ordered my cables from http://gregsmarinewiresupply.com. Greg is super friendly and very helpful. His prices are very good also. I ran the cable down the port side under the gunwale and out through the cable boot in the splash well. I attached cable clamps to the screws holding on the rub rail and then used heavy wire ties to support the cables.

P1020266.jpg


P1020264.jpg


2010-10-26080829.jpg
 
Joined
Aug 17, 2009
Messages
941
Re: 1977 Cruise Boats Restore

I will install two six switch distribution panels. I know, I know, 12 switches are a lot but I got these dirt cheap on e-bay. Besides I will have plenty of room when I need additional power for lights, live wells, etc. These panels were mounted in the starboard console support just below the steering wheel.

Switchpanel-1.jpg


2010-10-25195727.jpg


2010-10-25195655.jpg


Each panel has two 3 amp, two 6 amp, one 8 amp and one 10 amp breaker for a total of 36 amps per panel. Since I knew I would not use all 36 amps I decided to use 30 amp fuses as the panel feeds. Now it was time to connect all the battery cables and feed wires to the battery switch. The panel feeds first go through separate water tight fuses and then to the separate panels. I used 12 AWG duplex wire for the panel feeds. I also installed two single ground bus bars for the negative connection points. These switch panels will have cover boxes installed over the backs when the wiring is complete.

2010-10-25195755.jpg


2010-10-25195847.jpg


2010-10-26075946.jpg
 
Joined
Aug 17, 2009
Messages
941
Re: 1977 Cruise Boats Restore

Howdy folks. Sorry for being away for awhile. I actually didn?t go anywhere. I just had to take care of a bunch of marina stuff. I am the fleet captain here and I am responsible for slip assignments and all storage for summer and winter. I also have to handle the fall haul outs. So it is a pretty intense six weeks of endless phone calls and lift operations. I got the big boat out as well. Since the weather was nice I decided to tackle the bottom work as well and save time in the spring. I hate bottom work and I am glad that it is over. Also got everything winterized. Here she is up on stands:

2010-11-30134956.jpg


But?it is finished and I am getting back to working on my project boat. Hopefully the winter will be mild and I can knock this out.

I know I left off with the electrical work but before I continue with that I wanted to touch on some other side jobs that I completed during the summer. One of things I did was give the outboard a face lift?clean-up, re-paint and new decals for the engine cowling. Here is a shot of the motor before.

P1010835.jpg


I cleaned it well and gave it a good sanding.

IMAG0027.jpg


IMAG0025.jpg


After that I primed it with metal primer.

P1020055.jpg


P1020054.jpg


For the engine cowl, I removed the old decals, cleaned it well with a dewaxer, filled some scratches, sanded, and then primed with a sanding primer. After the primer dried I refilled any low spots again, sanded and primed a final time. Prior to painting I'll scuff the surface with a fine sanding pad.
 
Last edited:
Joined
Aug 17, 2009
Messages
941
And here is a pic of the motor with paint:

2010-11-30135730.jpg


Here is what the new decal set will look like:

Johnson-v4-together.gif


Outboarddecals.jpg


I have not put the new decals on yet because I have one small spot on the cowl to fix first and of course the weather has not been conducive for painting so I will have to take it home and paint it in a warmer area.

I got my decals off ebay. There are a few folks on there making replica decals that are nice quality. I paid around $30.00 for my set.
 
Last edited by a moderator:
Joined
Aug 17, 2009
Messages
941
Re: 1977 Cruise Boats Restore

Man this cold weather really bites (19 degrees here). This weather is keeping me from wrapping this thing up. So I will continue with one of the other side jobs I did this summer - mark and drill all of the transom mounting holes for the motor and the splash well and bilge drains.

The first thing I did was mark off where the splash well drain and bilge drain will go. I actually left the old holes in the outer transom skin as a guide. I then taped off both sides of the transom and carefully drilled 1? diameter holes keeping the drill bit perpendicular to the transom. Once the bit was just starting to cut though the other side I removed the drill and finished the hole by drilling from the opposite side. This helped minimize splintering of the fiberglass and left a cleaner finished hole. First went the splash well drain. UUGH! I hated to drill through my new transom.

P1020074.jpg


P1020075.jpg


In the one pic you can see the splash well drain tube that will be sealed into the hole to create a nice finished look.

Then the bidge drain.

P1020078.jpg


P1020080.jpg
 
Status
Not open for further replies.
Top