1975 Starcraft SS 16' Freshen Up

Michigan Lakes

Petty Officer 3rd Class
Joined
Dec 20, 2018
Messages
86
Good intel. Glad mine is mounted right! I get exactly 30 mph on the gps loaded or unloaded. Wondering if you improve dropping it down. Ive read other guys with our setup get 35 mph. Believe Im slower due to my motor’s internal issues.
In the the specifications chart of the original service manual for my 1976 Evinrude (70hp - 70763) there is a note regarding the horsepower rating; "Horsepower established at sea level. Allow 2% reduction per 1000' above sea level".
Not sure where you're at in the Sierras, but at 5000' your 75hp motor might be more like a 68hp, according to 1970s OMC engineers anyway (arguably the best in their business at that time).
I've briefly achieved 35mph when cruising solo in dead calm conditions on Orchard Lake MI (928' above sea level)
 
Last edited:

SHSU

Lieutenant Junior+Starmada Splash Of The Year 2019
Joined
Mar 8, 2017
Messages
1,741
So you may actually lose some top speed by dropping the motor. The more motor in the water, the more drag that you have to overcome. Either way it sounds like you should be good with either.

SHSU
 

Moserkr

Chief Officer + Starmada Splash Of The Year 2021
Joined
Nov 23, 2020
Messages
869
Thanks @Michigan Lakes !! That would definitely do it. I usually boat at 5000 feet!! Appreciate even more intel. My motor, as bad as she may look and seem, runs really well so its not her issues, its my elevation! What you’re really saying is I need a 90 hp… 😆😆
 

Michigan Lakes

Petty Officer 3rd Class
Joined
Dec 20, 2018
Messages
86
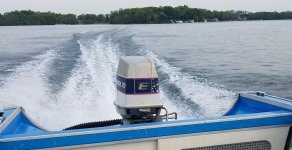
I've had the boat out 3x now since the new transom. Pretty much the same boat as last year but NO LEAKS. I'd occasionally leave my bilge pump off in past seasons just to see how bad it really was. Five gallons on a 1.5-2 hour outing was normal. No water when I pull the plug now. I had assumed that the majority was coming from the panel joint near the chine area (being forced in during hard running). The transom and plethora of past fishing equipment fasteners must have been leaking far worse than I thought. Feeling a bit ignorant but very thankful for the outcome.
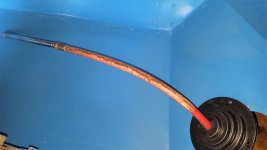
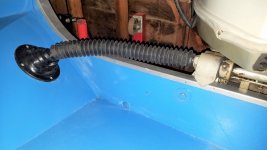
On a lesser note - and in a fashion that would be unbecoming for some of the more impressive and meticulous builds on the forum - I managed to find a rubber accordion boot on the jungle website that covers my severely sunbaked, ugly, but totally functional steering cable.
Steering Cable.jpg
Steering Boot.jpg
Orchard Lake 2021 - 1st Run.jpg
 

Moserkr

Chief Officer + Starmada Splash Of The Year 2021
Joined
Nov 23, 2020
Messages
869
I like that steering cable cover! I only have one for the ram on the other side. Glad shes not leaking and is running smooth!!
 

Michigan Lakes

Petty Officer 3rd Class
Joined
Dec 20, 2018
Messages
86
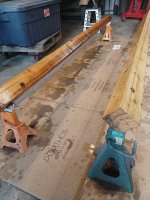
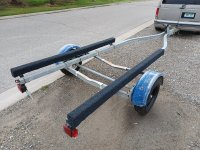
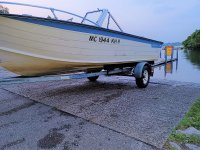
Going back to last Sept (see post 64) and the Bayliner Capri I purchased mostly for the Escort trailer, I finally got around to getting the brackets/bunks setup for the Starcraft. After somewhat flattening the brackets to a similar angle to the contact points on the hull, I took the advice of @SHSU (post #68) and had a local welder triangulate the brackets. After a POR-15 treatment, I mocked up some bare 2x4 bunks and went to the launch for a test fit. All was well except for the chines barely touching the trailer fenders. Rather than redo the entire bracket setup, I opted to use 4x4 lumber to gain the extra clearance. I intended to use all Douglas Fir but ended up with one Fir and one Cedar due to all other Fir boards being a bit curvy (Menards did sell me the Cedar at Douglas Fir $).
With the usual iboats research, and following @Watermann's advice, I pre-drilled/counter sunk the bolt holes, applied a standard OTF treatment, set the bolts in adhesive (allowed to cure before tightening), and glued/stapled the carpet, leaving the bottom portion uncovered for drying.
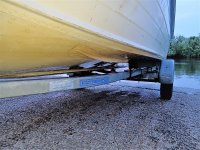
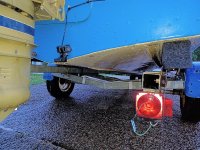
I'm extremely happy with the trailer and very thankful that the outcome appears to be good, with no chine/fender touching (even while underway) and a clean contact point between the strake and chine. In all, the boat sits about 3.5" lower now and is easier to launch in shallow water (shallow not a being a big concern in Michigan this Summer as we are having the opposite issue of Western America). Additionally, being a lower and wider trailer, it pulls much nicer and is a bit easier to maneuver. The biggest improvements are probably in appearance and noise. The old Holsclaw trailer was solidly built, but after decades of age and neglect, many of rollers were degraded, loose and mostly sounded like the world's largest and most annoying set of Sleigh Bells. Hopefully, I can get a few bucks for it to help recoup the registration, bunk work, and new bearing $$ spent on the Escort trailer (still needs some electrical work).
For anyone who has actually bothered to read this far, do you see any concern with the new bunk setup? Some of the information online seems to indicate that the ideal location for the bunks is as close to the chine as possible (pretty much where I'm at now). That being said, the sources do not differentiate between hull materials. Based on observations in the boat launch parking lot, two bunks with no keel support/rollers seems to be quite common on new trailers, although most boats around me are fiberglass. The same sources refer to keel bunks as "guides", leading me to believe that they are not intended for actual load bearing, but for ease-of-use.
Any thoughts?
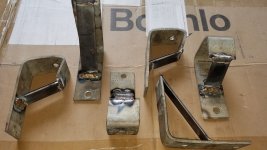
Welded Bunk Brackets.jpg
Treated Bunks.jpg
Bare Trailer.jpg
Bunk Front.jpg
Bunk Rear 1.jpg
Trailer-Boat.jpg
 

Watermann

Starmada Splash of the Year 2014
Joined
Jan 12, 2013
Messages
13,794
Those bunks have some meat on the bones. (y)

Yeah keel rollers will take some load but not a whole lot. Your 16'r with a light motor is not even close to being too heavy and needing more support than what you have.
 

Michigan Lakes

Petty Officer 3rd Class
Joined
Dec 20, 2018
Messages
86
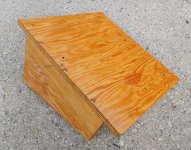
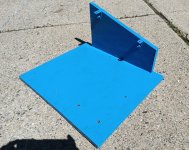
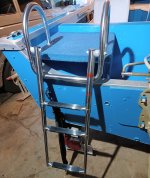
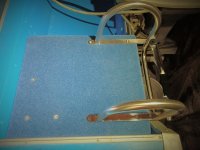
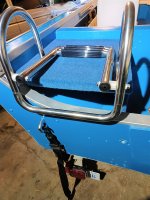
I promised the Admiral last year that I'd get a swim ladder installed "next year" so we, and more importantly our guests, could be spared using various, less-than-ideal contact points on the splashwell and outboard motor when climbing into the boat. I've made good on that promise - just not in time to catch the end of the 2021 boating season...:p
I wanted some sort of "pull-up" handles as well as a small platform in case anyone wanted to dive, cannonball, or whatever. While replacing the transom last Spring, I put stainless screws/locknuts through the transom (as opposed to the original wood screws) on every other hole along the stern in anticipation of supporting the platform.
Aside from the ladder and stainless hardware, other components (3/4" marine ply, boat carpet, OTF ingredients, paint, etc) were conveniently available in my garage thanks to previous projects on this boat.
Raw Platform.jpgPainted Platform.jpgLadder Unfolded.jpgLadder Stowed.jpgPlatform Installed.jpg
 

SHSU

Lieutenant Junior+Starmada Splash Of The Year 2019
Joined
Mar 8, 2017
Messages
1,741
Looking good

Did you use rivets to secure everything or are my eyes deceiving me?
SHSU
 

Michigan Lakes

Petty Officer 3rd Class
Joined
Dec 20, 2018
Messages
86
Did you use rivets to secure everything or are my eyes deceiving me?
They are stainless screws similar to those shown below. The button head style secures the ladder and the flush mount style are on the carpeted surface. The four screws nearest to the LH lower corner of the last photo run through the splashwell with 1" washers on the underside.

Screws.JPG
 

SHSU

Lieutenant Junior+Starmada Splash Of The Year 2019
Joined
Mar 8, 2017
Messages
1,741
Nice, yep now I know why I thought they looked like rivets

SHSU
 

ShoestringMariner

Lieutenant Commander
Joined
Apr 18, 2015
Messages
1,600
I promised the Admiral last year that I'd get a swim ladder installed "next year" so we, and more importantly our guests, could be spared using various, less-than-ideal contact points on the splashwell and outboard motor when climbing into the boat. I've made good on that promise - just not in time to catch the end of the 2021 boating season...:p
I wanted some sort of "pull-up" handles as well as a small platform in case anyone wanted to dive, cannonball, or whatever. While replacing the transom last Spring, I put stainless screws/locknuts through the transom (as opposed to the original wood screws) on every other hole along the stern in anticipation of supporting the platform.
Aside from the ladder and stainless hardware, other components (3/4" marine ply, boat carpet, OTF ingredients, paint, etc) were conveniently available in my garage thanks to previous projects on this boat.
View attachment 350946View attachment 350947View attachment 350948View attachment 350949View attachment 350950
That looks great! One of my favourite SS mods I’ve seen so far. I hope you don’t mind if I copy this idea.

Actually, would you mind sharing where you got the ladder/loop assembly? Or do you recall the manufacturers name?
 

Michigan Lakes

Petty Officer 3rd Class
Joined
Dec 20, 2018
Messages
86
Very thankful to say that the 2022 boating season was nearly trouble free. My repairs for the entirety of the Summer consisted of one fuel line quick connect, a broken trailer light ground, and a loose horn mounting screw. Mostly just enjoyed the boat with family/friends. Got my kids tubing this year so fuel usage is up, but that's OK. Again, thankful to have all these blessings.
Tubing.JPG
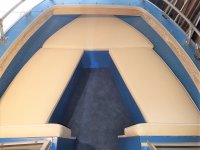
The entire (almost) inside of the hull was redone back in 2019 (see pg 1). I removed the upper pad from the bow rail area at that time with the intention of redoing vinyl due to a large hole and a generally weathered appearance. After getting the boat back on the water, I neglected to finish this last part of the job. The kids normally sit up front and the PFDs provide enough padding that the metal surface really wasn't an issue. Bow From Top.jpg
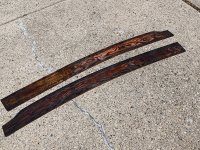
After 3 years, it was time to get it done. I was able to salvage the original wood backing and foam. This was a definite bonus, as my carpentry skills would likely be exceeded remaking the curved backing. The plywood pieces, like most everything wood on these boats, appeared to never have been treated. I gave them a solid OTF regimen.
OTF Bow Boards.jpg
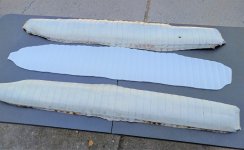
After doing a bit of research, I was able to find a supplier on ebay with what appeared to be a near-match for the original 1-1/2" pleated vinyl upholstery. Pleased to report that the new roll was spot on. I wanted to keep the original pleated look as the vertical panels in main seating area are still sporting their original vinyl. Just needed to lighten the tone a bit to match the redone bow seating. New Bow Fabric.jpg
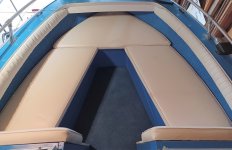
I have zero upholstery experience so the final outcome was less-than-professional. There's a bit more bunching than I'd like to see, particularly on the port side, but overall I'll be able to live with it.
New Bow Fabric Installed.jpg
 

renns

Petty Officer 1st Class
Joined
Dec 20, 2017
Messages
316
Looks great! I searched for that pleated vinyl from my local suppliers, and couldn't find anything suitable. Yours looks like a perfect match.
Glad to hear you had a successful season. It's always nice to enjoy the fruits of that labour.
 

SHSU

Lieutenant Junior+Starmada Splash Of The Year 2019
Joined
Mar 8, 2017
Messages
1,741
Nothing like the smile of kids to know your hard work has paid off.

SHSU
 
Top