1974 Starcraft SS16 Restortation

MD28

Petty Officer 1st Class
Joined
Sep 1, 2016
Messages
222
I did the same as mnhunter. I never had it upright in a cradle though. I demoed it, gluvit, flipped, then redid the trailer, then stripped and painted the boat, then flipped it back on the trailer. I use a ladder to get in and out now. I do wish it was lower, so maybe a cradle to hold the hull upright would be nice. I am still barely in my 20s though, so I can handle it for now. Next year I'll be 30 so I'll build me a cradle then😂
 

Watermann

Starmada Splash of the Year 2014
Joined
Jan 12, 2013
Messages
13,794
I did the same as mnhunter. I never had it upright in a cradle though. I demoed it, gluvit, flipped, then redid the trailer, then stripped and painted the boat, then flipped it back on the trailer. I use a ladder to get in and out now. I do wish it was lower, so maybe a cradle to hold the hull upright would be nice. I am still barely in my 20s though, so I can handle it for now. Next year I'll be 30 so I'll build me a cradle then😂

Ah to be a kid again :lol:
 

FIGMO

Petty Officer 1st Class
Joined
Jun 18, 2017
Messages
321
Some interesting observations. I am 54 so I would prefer a cradle to hold the boat upright and lower, making it easier for me to get in and out while the boat is in the garage. I think I will use something like the wider lower cradle on casters that I can use for the boat when it is inverted.

I will be making the motor stand next weekend, so it will likely be about another month before I need the cradle for the actual boat.
 

FIGMO

Petty Officer 1st Class
Joined
Jun 18, 2017
Messages
321
Electrical Ideas:

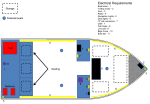
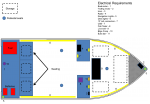
I before I start on the tear down of the boat I have been thinking about various electrical requirements, and how I see things being placed in the boat. So I did a simple graphic layout of how I see things. I thought I would share this with you guys for your input and thoughts. Maybe you can come up with some better ideas, or things that I might have forgotten.

Electrical Requirements.png
 

Attachments

  • Electrical Requirements.png
    Electrical Requirements.png
    158.4 KB · Views: 24

Brackett221

Petty Officer 3rd Class
Joined
May 27, 2015
Messages
75
I think you need to decide what size fuel cell or cells your going to use and maybe also give thought to moving the trolling motor battery or batteries to the front (not sure if your using 12 volts or 24 volts) This will help in your layout. I feel Starcrafts like a little counter weight in the front to help with getting on plane and help with porpoising when trimming. These factors may help you decide a layout to suit your needs and wants. I feel it's a good place to start because these factors of weight placement and the size of storage space goes hand in hand. Just my 2 cents. ;)
 

skyfisher

Seaman Apprentice
Joined
Feb 13, 2013
Messages
45
Hey FIGMO looks like you have been working on some plans. There is lots of good advice on the site and great ideas from those that have several rebuilds under there belt. Your idea of a cradle is a good one take it from some one with a bad back that has tweaked it more then once getting in and out of a boat on a trailer carrying weight. I noticed you did not have a battery charing system in your electrical plan are you going to put one in.
 

FIGMO

Petty Officer 1st Class
Joined
Jun 18, 2017
Messages
321
Hello Brackett,

A very good observation about distribution of weight.

One of the issues I have been pondering is fuel capacity and range. There was a formula on another post that I read where it equated 10 hp to 1 gallon of fuel burned hourly. Given that I have a 60 hp motor, that means that I would have a 2 hour range given the 2 x 6 gallon tanks I normally carrying in the boat. I was thinking of purchasing 1 x 12 gallon tank, and carrying 1 x 6 gallon tank as a back up. That would extend my range by an hour, providing 3 hours of cruise time.

Your recommendation of placing the batteries in the bow would create the space needed for the extra tank. That adjustment would allow me to place the 12 gallon tank on the port side and the 6 gallon on the starboard side. Plus I like that fact that it balances the weight distribution. I would probably move the batteries to the fore most storage space.

Hello Skyfisher,

I am in the same boat as you, bad back from one too many bad parachute landings. I will endeavour to keep the cradle low making it is easier for me to crawl in and out of the thing. My son has a load of 2x6s in a pile behind my shed, so I plan on raiding his wood pile for the cradle.

Good catch on the battery charger, it did not make the diagram I posted here. It is on an updated diagram (Ver 1.1), and I will repost the diagram once I have made adjustments to it with peoples' recommendations, such as Brackett.

Thanks to both you for offering your advice and observations. Greatly appreciated.
 

FIGMO

Petty Officer 1st Class
Joined
Jun 18, 2017
Messages
321
Hello Gents,

I am getting ready to start the tear down of the boat, but before I can do that I had to sort out the garage, build the boat cradle and motor stand. All three are now done, and in addition to that I have fogged the motor for its winter storage. In another two days or so my neighbour and I will remove the motor from the boat and tuck away in the corner of the garage for safe keeping. After that I will commence removing the innards of the boat and label everything as I go along.

I noticed when I was fogging the motor that there was no air filtration system in the cover to the carburetor. Is that normal? I included some photos, there are three air intakes, but there is nothing to actually filter the air going into the carburetor.

1.jpg


Sorry for the sizing issues on the pictures, but I think I finally figured it out (OMG I'm slow). The motor stand worked out great, but I didn't measure properly so I had to add another 2x4 to the bottom in order to get the desired clearance.


2.jpg

There are six connection points on the bunks. I only have carriage bolts in for now. Once we lift the boat onto the cradle, I will adjust the angle of the bunks and add lag bolts to hold it secure.

3.jpg

With the boat on an angle in the garage I can fit it in nicely and still have room to do other things, like use the snow blower.

4.jpg

When I took the cover off of the carbs, I noticed that there was no filter on the air intakes. I don't know if this is normal, but it sure doesn't seem right to me.

5.jpg
 

FIGMO

Petty Officer 1st Class
Joined
Jun 18, 2017
Messages
321
Oh K Guys,

So after posting this I went looking for an air filter, and guess what there isn't one, which I am sure all you experienced gents already knew. It's an AIR BOX, lol no dust on the lake......I'm an idiot in addition to being slow (freaking photographs).
 

Watermann

Starmada Splash of the Year 2014
Joined
Jan 12, 2013
Messages
13,794
Oh K Guys,

So after posting this I went looking for an air filter, and guess what there isn't one, which I am sure all you experienced gents already knew. It's an AIR BOX, lol no dust on the lake......I'm an idiot in addition to being slow (freaking photographs).

Yeah I think the air filter thought crosses everyone's mind when they get their first boat. About the closest thing is a flame arrestor on an inboard motor.

Let the fun of the tear down begin!
 

DJ_Allatoona

Petty Officer 2nd Class
Joined
Feb 24, 2008
Messages
187
Following this thread! I have the same boat, and I'm always in the middle of a project with it. Latest one was stripping & painting. I became really smart in a short time about stripping, sanding, priming and painting.

Here's some photos from the paint job: https://imgur.com/a/U7IA1

This week I'm ripping up the carpet and dealing with some springy spots in the floor. Replacing the flooring with either outdoor carpeting or vinyl stuff if I can find it.
 

FIGMO

Petty Officer 1st Class
Joined
Jun 18, 2017
Messages
321
I changed the lower end oil in the outboard today, and it came out this colour. Does that look right to you? I didn't see any water, and the colour was a fairly consistent brown/tan.

6.jpg
 

FIGMO

Petty Officer 1st Class
Joined
Jun 18, 2017
Messages
321
Hey DJ,

Sorry I didn't see your post before posting my most recent. I love the video painting the boat, great idea. The finished product looks pretty slick!
 

Watermann

Starmada Splash of the Year 2014
Joined
Jan 12, 2013
Messages
13,794
The LU oil shouldn't be brown, it will only be that color of chocolate milk if it got some water in it.
 

FIGMO

Petty Officer 1st Class
Joined
Jun 18, 2017
Messages
321
Hey Watermann,

I was afraid of that. I would be curious to know if there are specific areas that I should be looking at in order to rectify this issue?
 

Watermann

Starmada Splash of the Year 2014
Joined
Jan 12, 2013
Messages
13,794
Only a few ways for water to get in, vent/drain plugs, prop shaft, driveshaft and shift shaft.

The leak if bad would have more milk color, first thing I would do is pull the prop to look for fishing line and replace the washers on the plugs. Seals normally leak bad. Go run and check the level and oil color in the vent plug.If the same condition happens you'll need to reseal the LU.

I had the same issue with my Johnny so I just replaced everything I mentioned due to the age of the motor, it had fishing line on the prop shaft.
 

FIGMO

Petty Officer 1st Class
Joined
Jun 18, 2017
Messages
321
That is sound advice. I watched a couple of Youtube videos on the subject and it looks pretty straight forward. I will likely do exactly what you suggested, just replace it all.

Thanks for the input
 

Watermann

Starmada Splash of the Year 2014
Joined
Jan 12, 2013
Messages
13,794
Yeah the biggest issue was pulling out that dang carrier from the gear housing, they get stuck in there. The driveshaft seals and gear shift were super easy.
 

FIGMO

Petty Officer 1st Class
Joined
Jun 18, 2017
Messages
321
Well, we started the tear down today, and made some good progress. I have included a series of photos showing the interior slowly coming apart.

For reference, I will put comments at the bottom of all my photos (if I have any).
1.jpg


That is my neighbour Gordy stopping by to see how we were making out. Gordy and I will pull the motor this Sat. More to follow on that.
2.jpg


Nothing special here just a before shot.
3.jpg


My son Garrett holding up the windows so I remember how they go back together.
5.jpg


There was a lot of rotten wood and bits. Some like the cushioned side rails basically just fell apart. Which made my life easy!
7.jpg
8.jpg


Pretty happy with the progress we made thus far after an hour of work.
9.jpg


So about that boat motor, I forgot that I took a fair amount of weight out of the front of the boat and when I walked to the rear the front went up. Naturally I was concerned about the bottom end of the motor, but it only moved a bit. No harm no foul, however I did put a jack under the stern until we pull the motor on Sat. My plan will be to leave the boat attached to the trailer hitch until we have the motor safely on the engine hoist. That should prevent any unwanted wheelies.

More photos to follow this weekend when we pull the motor.
 

FIGMO

Petty Officer 1st Class
Joined
Jun 18, 2017
Messages
321
Well, we started the tear down today, and made some good progress. I have included a series of photos showing the interior slowly coming apart.

For reference, I will put comments at the bottom of all my photos (if I have any).


That is my neighbour Gordy stopping by to see how we were making out. Gordy and I will pull the motor this Sat. More to follow on that.


Nothing special here just a before shot.


My son Garrett holding up the windows so I remember how they go back together.


There was a lot of rotten wood and bits. Some like the cushioned side rails basically just fell apart. Which made my life easy!


Pretty happy with the progress we made thus far after an hour of work.


So about that boat motor, I forgot that I took a fair amount of weight out of the front of the boat and when I walked to the rear the front went up. Naturally I was concerned about the bottom end of the motor, but it only moved a bit. No harm no foul, however I did put a jack under the stern until we pull the motor on Sat. My plan will be to leave the boat attached to the trailer hitch until we have the motor safely on the engine hoist. That should prevent any unwanted wheelies.

More photos to follow this weekend when we pull the motor.
 
Top