1974 Sea Ray SRV 240 Weekender - complete rebuild, refit, and who knows what else...

CrazyFinn

Petty Officer 1st Class
Joined
Dec 12, 2016
Messages
357
Progress has been slower this summer than I hoped - but life is like that...

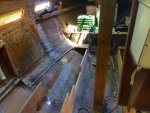
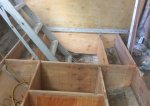
Still, getting some work done. Temporarily removed part of the wall to the cabin to get better access. All of the rotten wood is removed. New stringers tabbed in all the way to where it meets dry, solid, non-rotted wood.

Now working on the floor for the bathroom...

cabin1.JPG

The vertical 2x6 in the middle is supporting the dash/windshield from sagging until I get the new walls in place.
 

Attachments

  • cabin1.JPG
    cabin1.JPG
    179.7 KB · Views: 1

sheboyganjohn

Senior Chief Petty Officer
Joined
Aug 2, 2005
Messages
753
Looks good. I lucked out by not having to remove the bulkhead between the cabin and the deck area. Only had to pull out the floor and about 1 foot of stringer to get to good wood.
 

CrazyFinn

Petty Officer 1st Class
Joined
Dec 12, 2016
Messages
357
Looks good. I lucked out by not having to remove the bulkhead between the cabin and the deck area. Only had to pull out the floor and about 1 foot of stringer to get to good wood.

The stringers in the cabin were complete mush inside, and the fibreglass skin on the stringers had buckled- they support the walls that in turn support the dash/windshield. So - I put in the temporary 2 x 6 support to hold everything up where it should be while I rebuilt the structure below it. The bottom of the wall/bulkhead was rotted as well where it continued below the level of the cockpit floor. I’m also changing the size of the head/bathroom to fit in the new toilet and small sink.
 

CrazyFinn

Petty Officer 1st Class
Joined
Dec 12, 2016
Messages
357
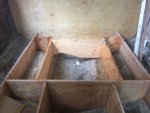
Managing to get a little bit done on the boat in between everything else that is going on. New stringers are in to the front of the cabin, bathroom walls/bulkheads are back in, and the new galley "floor" (between the hull and the main stringer) is in.

Click image for larger version  Name:	galley_floor.JPG Views:	1 Size:	122.7 KB ID:	10642501
Test fitting the new galley "floor".

Hoping to start working on the new floor for the cabin tomorrow.
 
Last edited:

sheboyganjohn

Senior Chief Petty Officer
Joined
Aug 2, 2005
Messages
753
Are you making the floor panels removable? And by "floor" do you mean more of a shelf. In mine there was only one section of floor that was the dead center of hull about 24" wide and 4' long.
 

CrazyFinn

Petty Officer 1st Class
Joined
Dec 12, 2016
Messages
357
Are you making the floor panels removable? And by "floor" do you mean more of a shelf. In mine there was only one section of floor that was the dead center of hull about 24" wide and 4' long.

The "floor" in the pic is more of a ledge - what all of the galley cabinetry etc. will sit on. And yes, the actual floor is 24" wide (actually 24 1/4" wide) and the lower part on mine will be 52" long (I cut it today, and glassed the underside).

No, I'm not making the floor panels removable. I am creating an access hatch to get to the various pumps that are going under the step down to the cabin. That opening you see in the piece of plywood is to create a path for various bilge, water and ventilation hoses from the cabin floor. There is a small bulkhead both in front of and behind that opening. (The original access route for bilge and water hoses on this boat was a length of 4" bilge ventilation hose encased in the foam.)

On my boat, the head was originally a small enclosure with porta-potty on the port side, galley was on the starboard side. I know on later models of this boat Sea Ray switched it to be the other way around, and then created an opening in the port side bulkhead to create more room for the galley. I originally considered switching the two on my boat, but decided to keep things on the original side.

I did move the forward bulkhead for the head forward a few inches to give me more space - I am installing a Jabsco manual toilet, a small sink and faucet (with a shower hose), and a shower drain in the floor. The drain will lead to a shower sump that will be located under the cabin step. A bilge pump will also be under the cabin step. Water and waste tanks will go just aft of the head, with a raised section of cabin floor below the starboard cockpit seat. The water pump will go just behind the water tank. Water lines for the galley will run across under the step.

Yes, I'm stuffing a lot more equipment in this boat than it originally came with!
 

sheboyganjohn

Senior Chief Petty Officer
Joined
Aug 2, 2005
Messages
753
Mine has the same layout. I have a sump and bilge pump under the step. I am going to put the hose in again and foam it in for the path to the thru hulls to the bilge sump. I have kept the head the same size and I am only keeping the porta potty in there. I bought a Sealand 975 MSD that I can either pipe out or run as a traditional porta potty. Plan on putting the water tank back under the port seating area. But for now, I just need to get the damn thing running. Interior will happen in time. For the time being I will just live vicariously through you.
 

CrazyFinn

Petty Officer 1st Class
Joined
Dec 12, 2016
Messages
357
But for now, I just need to get the damn thing running. Interior will happen in time. For the time being I will just live vicariously through you.

Getting mine running will happen later (much later) - but since I had to replace the stringers all the way through the boat, it kinda made sense to rebuild the rest of the cabin while I was at it. Once I get the cabin sorted out, I have to move back to working on the rear part of the stringers, engine mounts, etc. And after that, the gas tank, a floor, etc... and maybe then I can start to think about getting it running. I'm figuring sometime late next summer!
 

CrazyFinn

Petty Officer 1st Class
Joined
Dec 12, 2016
Messages
357
Been getting small amounts of work done on this thing over the past couple of months. Life has been exceptionally hectic... I work in a University so September is nuts, wife started a new job, and the in-laws are in very bad health.

Still, managed to remove decals and clean up and prime the starboard side of the exterior hull, cabin floor is in and glassed, new platform for the toilet is built.

Took this week off work to get some more done. Today was exceptionally warm for October so trying to get more glassing done. Hopefully can get some pics up later this week.
 

CrazyFinn

Petty Officer 1st Class
Joined
Dec 12, 2016
Messages
357
As promised, got a bit more done...

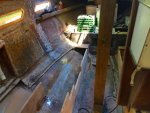
Here's a shot from a few weeks ago when I was working on the stringers and bulkheads for the cabin.

Click image for larger version  Name:	stringers-cabin.JPG Views:	1 Size:	83.4 KB ID:	10667072

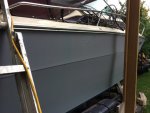
Managed to de-decal, sand, prep, and prime one side of the boat in between work, rain, and everything else a few weeks ago:

Click image for larger version  Name:	primer-side.JPG Views:	1 Size:	57.7 KB ID:	10667073

Click image for larger version  Name:	primer-rear.JPG Views:	1 Size:	80.1 KB ID:	10667074

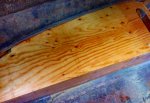
This week, got the cabin floor glassed in, and got some glass over the floor in the head - hoping to do more tomorrow if it gets warm enough:

Click image for larger version  Name:	floor-head.JPG Views:	1 Size:	64.1 KB ID:	10667075

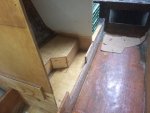
Started working on the stringers around the engine compartment today:

Click image for larger version  Name:	engine-stringers-rear.JPG Views:	1 Size:	83.8 KB ID:	10667076

Managed to get them tabbed in today before I quit for the day (getting too dark). That piece with the strange cut in it is just a piece of scrap I am using as a temporary spacer until the tabbing is cured:

Click image for larger version  Name:	engine-compartment-stringers.JPG Views:	1 Size:	88.1 KB ID:	10667077

I'll have a few hours tomorrow to get more done - hope it gets warm enough out there to do some more glassing. Will have to wrap the boat up for the winter within the next couple of weeks...
 

dezmond

Senior Chief Petty Officer
Joined
Jul 21, 2010
Messages
760
Looking like forward progress! Really enjoying this build. Just finished reading your first project. Amazing work. I would love to use some of your ideas on my build.

Tagging along on this build if that’s ok :)
 

CrazyFinn

Petty Officer 1st Class
Joined
Dec 12, 2016
Messages
357
Looking like forward progress! Really enjoying this build. Just finished reading your first project. Amazing work. I would love to use some of your ideas on my build.

Tagging along on this build if that’s ok :)

Ok with me, although you’re catching up with me just as we’re getting to the time of year when not much will be happening on the boat!

Not sure which ideas you’re referring to, but I figure with these old rotten Sea Rays I bought, with no interior left in them, I’m free to build them however I want. It’s not like they are prime examples for an accurate restoration to make them look “original”.
 

mickyryan

Rear Admiral
Joined
Apr 18, 2016
Messages
4,214
eh it was a friday and dude hit a spliff at lunch and well those stringers will make it past warranty period ...
 

sheboyganjohn

Senior Chief Petty Officer
Joined
Aug 2, 2005
Messages
753
Looking at the stringers brings back memories. Looking at the cabin reminds me I still have a lot of work left to do on mine. Great progress.

So what are you using for primer and paint? I have been debating painting mine or just re-shooting some gelcoat. Most of my hull, outside of needing a good buffing to remove a ton of oxidation, is in decent shape. Just not sure I want to play with shooting gelcoat at $200+ a gallon for the color matched stuff.
 

CrazyFinn

Petty Officer 1st Class
Joined
Dec 12, 2016
Messages
357
eh it was a friday and dude hit a spliff at lunch and well those stringers will make it past warranty period ...

It seems that when it was assembled, they attached the outer two sets of stringers to the floor first (probably the center/main stringers as well) and then dropped the whole assembly into the hull. The outer stringers apparently were supposed to attach to the hull with that green adhesive they globbed into the hull. Problem is, in most places the stringers missed the bead of adhesive, and weren’t attached to the hull at all. The bead of adhesive was doing nothing. Since the floor was covering it, there would have been no way to see what was happening. Only the main/center stringers had any glass sealing them, and even that was pretty thin.
 

CrazyFinn

Petty Officer 1st Class
Joined
Dec 12, 2016
Messages
357
Looking at the stringers brings back memories. Looking at the cabin reminds me I still have a lot of work left to do on mine. Great progress.

So what are you using for primer and paint? I have been debating painting mine or just re-shooting some gelcoat. Most of my hull, outside of needing a good buffing to remove a ton of oxidation, is in decent shape. Just not sure I want to play with shooting gelcoat at $200+ a gallon for the color matched stuff.

I’m using Interlux brightside paint. Same stuff I used on my smaller boat. Easy enough to work with, and I was happy with the results. My hull is in pretty good shape, other than being oxidized. The transom has a bunch of extra holes I had to patch. Not crazy about a red boat though, so decided to paint it. I have some of the dark blue left from my other boat, so I think I’ll go with the same colour.
 

sheboyganjohn

Senior Chief Petty Officer
Joined
Aug 2, 2005
Messages
753
I will be interested in how it looks dark blue. I like the idea of changing colors, just worry that it looks good on paper but not in practice.

Are you shooting the paint or using roll and tip?
 
Top