1973 starcraft ss restore in progress

crankbait cowboy

Chief Petty Officer
Joined
Mar 25, 2013
Messages
574
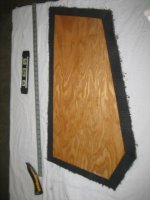
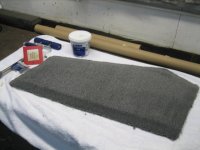
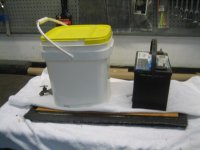
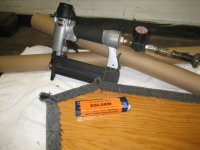
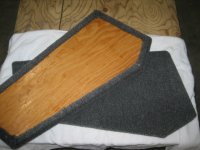
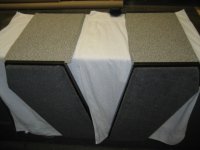
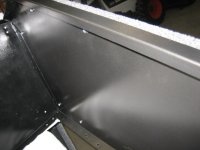
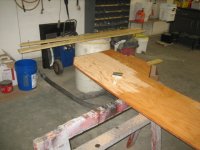
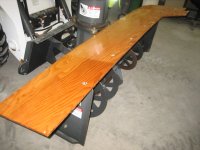
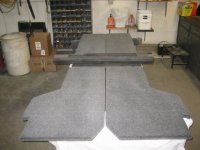
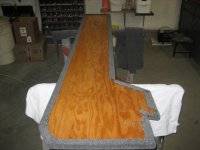
I got my side panels of consoles completed this weekend
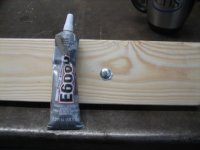
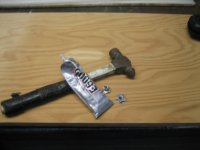
cut carpet / applied henry 663 adhesive to flat side / rolled with roller and let sit overnight under weight / stretched over edges and stapled with air stapler / screwed on from metal side with 1/2 inch screws
 

Attachments

  • IMG_0763.JPG
    IMG_0763.JPG
    48 KB · Views: 19
  • IMG_0764.JPG
    IMG_0764.JPG
    96.4 KB · Views: 18
  • IMG_0765.JPG
    IMG_0765.JPG
    81.7 KB · Views: 18
  • IMG_0766.JPG
    IMG_0766.JPG
    101.2 KB · Views: 17
  • IMG_0767.JPG
    IMG_0767.JPG
    108.7 KB · Views: 19
  • IMG_0769.JPG
    IMG_0769.JPG
    90.3 KB · Views: 19
  • IMG_0770.JPG
    IMG_0770.JPG
    89.3 KB · Views: 19

Moserkr

Chief Officer + Starmada Splash Of The Year 2021
Joined
Nov 23, 2020
Messages
869
Just finished reading your entire thread. Keep up the hard work that is many years in the making. Rooting for you to get her splashed!!!
 

crankbait cowboy

Chief Petty Officer
Joined
Mar 25, 2013
Messages
574
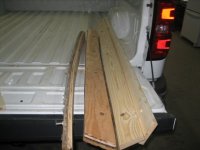
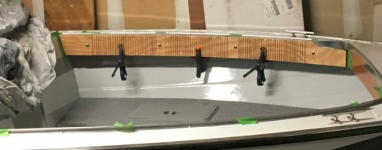
Still chipping away at er , here in the bitter cold north country. I cut my upper side panels ( plan is to foam and vinyl them) and used adhesive to put in carriage bolts to bolt to boat ( I went plenty long so as to have something to attach my wiring to out of sight) also adhesive applied to tnuts in the lower side panels, and then 2 coats epoxy going on. next step is to get the lowers carpeted and uppers with vinyl. I was able to use my old uppers as a pattern for length and bolt pattern, and the lowers i measured and revamped them from old design. no pictures of the bow area uppers, as I cut from 1/2 inch plywood, and clamped them to the boat for a week or so , trying to get them curved as needed to fit.
 

Attachments

  • IMG_0771.JPG
    IMG_0771.JPG
    85.5 KB · Views: 18
  • IMG_0772.JPG
    IMG_0772.JPG
    78.5 KB · Views: 17
  • IMG_0773.JPG
    IMG_0773.JPG
    72.3 KB · Views: 16
  • IMG_0774.JPG
    IMG_0774.JPG
    110.5 KB · Views: 17
  • IMG_0775.JPG
    IMG_0775.JPG
    108.8 KB · Views: 17

crankbait cowboy

Chief Petty Officer
Joined
Mar 25, 2013
Messages
574
Update: I sprayed my bow uppers with h20 to get them wet , and then clamped them in place on boat, with the idea of leaving them 10 days , they would form to the bow, as the old were. That is not at all what, took place, as they did not form at all. plan b is to soak them in the tub for 20 hours or so, and then clamp them. any ideas out in tin land?
 

MNhunter1

Lieutenant Junior Grade
Joined
May 12, 2014
Messages
1,053
Update: I sprayed my bow uppers with h20 to get them wet , and then clamped them in place on boat, with the idea of leaving them 10 days , they would form to the bow, as the old were. That is not at all what, took place, as they did not form at all. plan b is to soak them in the tub for 20 hours or so, and then clamp them. any ideas out in tin land?

Yeah, not sure how well they got soaked with the initial spraying, but maybe they just weren't wet enough. I had the same dilema with my SS and just salvaged the original wood, cleaned them up as best I could, sealed them with Spar, applied some new padding/cushion and wrapped them with vinyl.
 

Reserector_

Chief Petty Officer" & 2021 Splash of the Year Win
Joined
Oct 15, 2019
Messages
602
Soak the heck out of them. Hot water works better than cold.
Soaking in cold, and then heating the soaked wood is another way.
Using supports and weight, (or using spacers and clamps) to bow the wood, followed by judicious, repeated wetting, will also curve them over time.

I used 3/8" exterior sheathing for mine. A bit thinner than 1/2" and noticeably easier to curve.

You can also make a bazillion kerf cuts on the foam side, soak it and curve it more easily, because the part you are curving is technically thinner. the dried part will be more flimsy, though. You could fiber glass the cut side to hold the curve, I suppose.
 

classiccat

"Captain" + Starmada Splash Of The Year 2020
Joined
Dec 20, 2010
Messages
3,412
if that doesn't work, you can try ripping relief cuts. I'm trying this with 1/2" exterior PLY which will get soaked with several coats of "Old Timer's Formula".

1614011382929.png
 

crankbait cowboy

Chief Petty Officer
Joined
Mar 25, 2013
Messages
574
Classic, how do you get it to keep the shape while you put on the several coats? thanks guys, yes those relief (kerf) cuts may be the way to go, but thinking i may try 1/4 inch birch , soak 24 hours, heat it up, clamp it on for a few days, and then laminate 2 pieces together to make it 1/2 inch.
 
Last edited:

Reserector_

Chief Petty Officer" & 2021 Splash of the Year Win
Joined
Oct 15, 2019
Messages
602
Just make sure that the plywood you use is rated for exterior use. If the bond between layers is not waterproof, it won't work for your application.
 

crankbait cowboy

Chief Petty Officer
Joined
Mar 25, 2013
Messages
574
i hear ya, reserector. im also tossing around the idea of using 3/8 hyfax (poly) material.( the kind you find on snowmobile skies or portable fish houses. heating it , clamping it any thoughts?
 

Reserector_

Chief Petty Officer" & 2021 Splash of the Year Win
Joined
Oct 15, 2019
Messages
602
Not familiar with that, but PVC sheet from a home improvement store is a good option. You can bow it over something and apply heat from a heat gun to help it hold a curve. Waterproof and staple-friendly.
 

sidingguy

Petty Officer 2nd Class
Joined
Nov 3, 2017
Messages
136
I used Azek vinyl trim boards in some of my projects where I needed to follow a curve. I did run it thru a planer first and took it down to 3/8" .
 

crankbait cowboy

Chief Petty Officer
Joined
Mar 25, 2013
Messages
574
thanks for the input gang, i got some things to try, and will keep you posted as to what works and doesn't for me. On another note i did get my bottom panels carpeted.
 

Attachments

  • IMG_0777.JPG
    IMG_0777.JPG
    109.2 KB · Views: 19
  • IMG_0776.JPG
    IMG_0776.JPG
    92.6 KB · Views: 18

mattsteg

Petty Officer 2nd Class
Joined
Mar 25, 2019
Messages
177
I just used 1/4 in exterior ply and it fastened in place fine. Did not need to do anything special with forming.
 

crankbait cowboy

Chief Petty Officer
Joined
Mar 25, 2013
Messages
574
i hear ya Mattsteg. my 1/2 inch will also let me pull it into place. my issue is after i epoxy it 2 coats, i want to foam and vinyl. if i dont have it holding its curve independant of being fastened, when i vinyl then bend, my vinyl will be wrinked not smooth.
 

mattsteg

Petty Officer 2nd Class
Joined
Mar 25, 2019
Messages
177
i hear ya Mattsteg. my 1/2 inch will also let me pull it into place. my issue is after i epoxy it 2 coats, i want to foam and vinyl. if i dont have it holding its curve independant of being fastened, when i vinyl then bend, my vinyl will be wrinked not smooth.
I wentwith a relatively thin (1/2 in) layer of foam on my boat which may impact the results. Also the curve may be less extreme on a 22 footer V5 than a 16 footer. I did not encounter any wrinkling issues. I could see a possible difference if I was going for a big plush cushion rather than a thin padded trim panel, but wrinkling was a complete non-issue for me.
20201011_111810.jpg
I
 

crankbait cowboy

Chief Petty Officer
Joined
Mar 25, 2013
Messages
574
thanks mattsteg, ill keep that in mind and have to play with it a bit.

hello budski, hoping for fall, and still looking for power, as i moved the 1974 115 johnson i had in mind. ( no tilt /trim). my work is in agricultural inputs so only about a week from long hours to get the crop seeded and sprayed, and it goes thru july, but i got a plan to finish er, and my list is getting shorter.
 

budski

Lieutenant Commander
Joined
Sep 12, 2012
Messages
1,845
I know where you're at I have a few friends that are grain farmers, I know your priorities are'
 

crankbait cowboy

Chief Petty Officer
Joined
Mar 25, 2013
Messages
574
It is with a heavy heart, that due to life getting in the way, it does not look good for me to finish and splash anytime soon if at all. Long story short, the C word landed in me, shortly after my last post, which put me on the sidelines for quite some time. I am on the mend, and today cancer free, but it was a long-drawn-out battle. No sympathy please, as I feel very fortunate, to be one of the lucky ones, and God is good. That being said, the admiral and I have decided it's time to move on, enjoy the grandchildren and maybe do some traveling. I do have some repercussions from the chemo and radiation treatments, and to quote the great Toby Keith "I'm not as good as I once was."
That being said, the project is for sale. I don't expect to get what I have into it (we all know, these boat projects don't pencil out very well), but I would love to see somebody complete what I started and splash it someday.
Thanks, and p.s. I love the STARMADA gang, and all I have learned hanging out with ya all.
 
Last edited by a moderator:
Top