1972 Starcraft Nova 18'

djpeters

Lieutenant Commander
Joined
Jun 9, 2010
Messages
1,824
Re: 1972 Starcraft Nova 18'

You'll be fine, if it comes apart, it can be put back together. Working on Starcraft's is not rocket science. Time and perseverance will get the job done. Looking good from what I see...
 

captainnate

Petty Officer 2nd Class
Joined
Apr 19, 2011
Messages
190
Re: 1972 Starcraft Nova 18'

Thanks for the encouragement, djpeters. This is all a first to me, and sometimes it takes me a while just to figure out what to do next. I'm doing a lot of reading the manual and researching older threads on iboats to try to get a clue. I'll get there; but I'm sure it will take some time. Thanks.
 

GA_Boater

Honorary Moderator Emeritus
Joined
May 24, 2011
Messages
49,038
Re: 1972 Starcraft Nova 18'

I'm just happy that you're fixing her right, Nate. You have a rare one in an 18' I/O Nova. She is gonna give you another 41 years of fun.
 

captainnate

Petty Officer 2nd Class
Joined
Apr 19, 2011
Messages
190
Re: 1972 Starcraft Nova 18'

It has been a while. Funds for boat repair aren't always available. I think I'm going to finally get this transom rebuilt. I have been debating between Arauco and Marine grade plywood from Menards. What do you guys recommend? Jasoutside, I know you said Arauco, and I respect that advice; I know you have put your time in.
 

GA_Boater

Honorary Moderator Emeritus
Joined
May 24, 2011
Messages
49,038
Re: 1972 Starcraft Nova 18'

Glad you're back, Nate. You mentioned funds, so my vote is also Arauco - Even if you were swimming in dough. I've used it and I like like it. Much, much cheaper than marine and just about the same. Nice ply to work with.
 

captainnate

Petty Officer 2nd Class
Joined
Apr 19, 2011
Messages
190
Re: 1972 Starcraft Nova 18'

Thanks for the input GA_Boater. I'm sure if I seal it up well the Arauco will last as long as I need it to.
 

jasoutside

Supreme Mariner
Joined
Dec 20, 2009
Messages
13,269
Re: 1972 Starcraft Nova 18'

Arauco or Marine Grade?

Funds for boat repair aren't always available.

Neither! Grab yourself some exterior grade, seal it up good with porch and floor paint and run with it.

Since funding is a problem you'll need to be creative and save pennies every step of the way. Saving on plywood is no doubt one place where you can do that. A little here and there will add up to thousands saved over the whole project eh!

(Unfortunately) I am very familiar with working on a zero$ budget.
 

captainnate

Petty Officer 2nd Class
Joined
Apr 19, 2011
Messages
190
Re: 1972 Starcraft Nova 18'

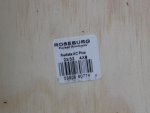
Well I finally whipped out the debit card and took a trip to Menards. I bought 2 4x8 sheets of Roseburg Arauco 3/4" plywood. I think that is right; it looks like Menards got a different supplier for this plywood. It still had the Arauco tag on the shelf, but the sticker says Roseburg or Rossburg or something. I will post a pic when I get home. I also got a "handy panel" (2 x 2') of 1/2" plywood. All the plywood was labled ACX, and the specs say it has exterior glue. It should work nicely. I also got some spar urethane, boiled linseed oil, and mineral spirits. I'm going to use the recipe that was previously posted in this thread to seal the wood, plus a few coats of rustoleum. I also got some Titebond III to glue the pieces together. I do have a few concerns:

Thickness, it may be just shy of 2" when I get the wood laminated together, the aluminum skin of the hull may bring it to 2", time will tell.

Screw and glue, is that the norm? Seems basic, but wondering about the screws. I like those star drive deck screws, but I don't want to use anything that will rust or react with the aluminum. I also need to find a flat spot for the glue up. My work bench isn't big enough, and the garage floor isn't level.

I'm also wondering about the area near the top of the transom wood where it was drilled out, or cut at and angle, to make room for the steering horn/lever. Maybe I can do it with a jigsaw, I will have to experiment.

Nevertheless, even something as small as getting supplies gets me one step closer to a finished project.
 

GA_Boater

Honorary Moderator Emeritus
Joined
May 24, 2011
Messages
49,038
Re: 1972 Starcraft Nova 18'

Going back to the pics of the pulled transom in May, it looks like you have a fair chunk for a pattern. If you feel like it's good enough, you could do a rough keyhole cut and then you can clamp through the rough cut. Some 2X4 pieces and all thread rod/nuts makes a good clamp. Won't break the bank, either. The area around the keyhole is the where you need the 2- 2 1/4" flat spot. Final trim after the wood is in to final match the AL keyhole cut. Use the screws to squish it in the rest of the transom and take them out when the glue is cured.

I've seen hole saws and jig saws, wood chisels, sanding drums and even course rasps used for the steering relief. What ever you feel comfy with will work.

Any progress is good, Nate. Go get 'er. :)
 

captainnate

Petty Officer 2nd Class
Joined
Apr 19, 2011
Messages
190
Re: 1972 Starcraft Nova 18'

GA_boater, Thanks for the advice. I appreciate any help I can get.

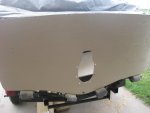
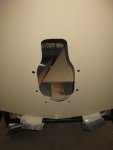
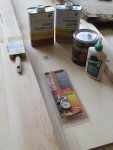
Here's the pics of what I bought yesterday. I even got a little measuring calibers; I have to try to be accurate. Looking at the old transom, I wonder what the quality was of that plywood; it had football shaped patches in some places. I'm sure some of you guys who rebuild these old Starcraft tin boats are rebuilding them to a better than new condition.


july 20 2013 149.jpgjuly 20 2013 150.jpgtransom supplies.jpg
 

captainnate

Petty Officer 2nd Class
Joined
Apr 19, 2011
Messages
190
Re: 1972 Starcraft Nova 18'

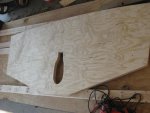
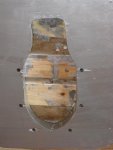
I got the transom plywood cut. I had one problem to figure out. The two 3/4" pieces seemed to be bowed ever so slightly, unless it was partially an illusion because of the transom aluminum skin sagging. I tried the two boards sandwiched together both ways, and decided I will glue them together so the bow of each piece is opposite of the other, if that makes sense. The end result seemed to make for a much flatter board. I also clamped up the plywood for a thickness test. The two 3/4" pieces plus the 1/2" piece plus the aluminum hull skin gave me a pinch over 2 2/64 inches. I guess the next step is to glue and clamp. I haven't decided if I'm going to add the 1/2" spacer now, and just do it in one step or add it after I glue up the 2 3/4" pieces.

One question/concern, I have the key rough cut right now. I guess I will put it back in the boat for the finally cut. Also, I suppose I will have to drill the six bolt holes around the key hole if I want to make sure I get varnish and paint to those areas.
july 22 2013 005.jpgjuly 22 2013 006.jpg
 

captainnate

Petty Officer 2nd Class
Joined
Apr 19, 2011
Messages
190
Re: 1972 Starcraft Nova 18'

Just to confirm, the transom is the correct thickness if the plywood plus space collar plus aluminum hull skin is 2 or more inches, but less than 2 1/4 inches? Thanks.
 

jbcurt00

Moderator
Staff member
Joined
Oct 25, 2011
Messages
24,871
Re: 1972 Starcraft Nova 18'

View attachment alpha1.pdf
Although for an Alpha gen1 it's 2-2.25" total transom thickness. I'm not familiar w/ the space collar you refer to, but I don't own any I/O.........
 

GA_Boater

Honorary Moderator Emeritus
Joined
May 24, 2011
Messages
49,038
Re: 1972 Starcraft Nova 18'

That's it, Nate. Had a scare for a second with the measuring pic, I thought the bottom of the cutout was too big until I realized you were using scraps. :facepalm:

You can do a trail fit and use a few of the through bolts to hold it in place and then mark and drill the around the keyhole, also mark the final keyhole. You can do the steering relief cuts too. Pull it back out and apply the varnish and paint.

JB - the spacer is to get the final 2-2 1/4" thickness.
 

captainnate

Petty Officer 2nd Class
Joined
Apr 19, 2011
Messages
190
Re: 1972 Starcraft Nova 18'

Thanks, GA, it helps to get some reassurance on a first time project like this. I appreciate the help. I did a transom on a 15' aluminum boat (outboard of course) and it sure didn't take much to get a hole misaligned. I think I drilled a few holes for the through bolts and then took the wood out for some reason, and then they didn't line up when I put it back in; it was a bit frustrating. I'm trying to avoid that kind of situation with this transom. I think I will drill the six holes around the keyhole and maybe a few of the through bolts to hold it in place, but the rest of the through bolts will have to wait until the wood is in the boat for the final assembly. Hopefully 5200 will be a good enough sealant around those through bolts.

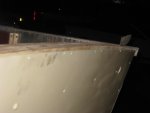
I got some spray paint on the outside of the aluminum transom skin. It took one regular size can of spray paint.

The transom plywood is still clamped and drying in my garage; I got it glued last night. I think I will unclamp and finish cutting, drilling, and sanding it tomorrow. Hopefully it is dry by then.

I know there are a few places to buy parts online. What do you recommend? Mercstuff.com looks like they have the right stuff, and they are only a few hours away here in Michigan. I need the transom seal, an exhaust flapper, gaskets/o-rings for the exhaust pipe, and probably a few other things. I am going to take a second look at the bellows, but right now I'm leaning towards waiting to do that maintance until after I get the boat in the water for the rest of the summer. I tried poking a finger through the bellows, and they didn't give. I might try to inspect them with a flashlight and see if I can find any cracks; hopefully I can wait on replacing them. The gimbal bearing also seems fine; I will probably wait on that. I have also thought of replacing a few hydraulic trim lines, but may wait; the trim was working before, and I didn't notice any leaks, so why mess with it. The two lines the go from the trim pump from the inside of the boat look a little rough, but they are working now. I'm also concerned about the lower shift cable. It was shifting a little rough before, kind of stalling out, but again, I may wait. I haven't tried to adjust it, maybe that is all it needs. As you can tell I'm anxious to get the boat in the water. I'm not really in the full restoration mode at this point, more like repair to safe and functional condition. However, I don't want to be cheap or stupid and get myself into a bad situation on the water. I'm sure I will continue to fix it up down the road; I can tell it is kind of addicting already.

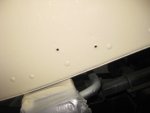
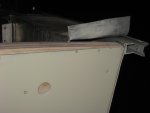
The last pic shows two holes from where the old depth finder was fastened with what I think were sheet metal screws. I'm wondering if I can fasten one of those transducer mounting plates/boards in the area. The new transducer will have to be mounted somewhere, maybe I can use the old holes.
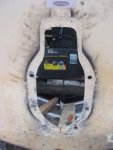
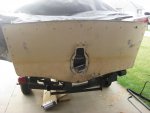
july 23 2013 003.jpgjuly 23 2013 004.jpgjuly 23 2013 005.jpgjuly 23 2013 006.jpgjuly 23 2013 007.jpg
 

captainnate

Petty Officer 2nd Class
Joined
Apr 19, 2011
Messages
190
Re: 1972 Starcraft Nova 18'

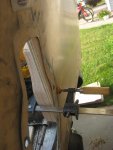
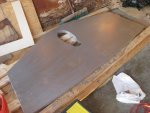
I made a little progress today. I cut the final keyhole and drilled the six bolt holes. I tried a router for a little bit, but then went back to the jigsaw while cutting the keyhole. I even did a test fit to see if all the bolts would go into the holes; so far so good. I am wondering how much I should sand down the top of the transom plywood. I would rather not have sand it down later while it is in the boat because the back end didn't fit together correctly.
july 25 2013 003.jpgjuly 25 2013 004.jpgjuly 25 2013 005.jpgjuly 25 2013 006.jpgjuly 25 2013 007.jpg

Next the 1/2" space will need to be attached, glued and clamped. After that dries I will cut the steering relief and then start with the the varnish and paint.
 

captainnate

Petty Officer 2nd Class
Joined
Apr 19, 2011
Messages
190
Re: 1972 Starcraft Nova 18'

This might be a better post for the mercruiser section, but I'm wondering if my trim pump will be toast. I let it drain out. It has been sitting in the boat like this since I took the transom apart a few months ago. The manual said you shouldn't let it drain out, but I guess out of stupidity I thought somehow it might be okay. I probably should have had some kind of cap to seal the hydraulic hoses as I took them off. Maybe there is a way to the prime the pump/system so that it doesn't crap out on me. What do you guys think? The trim system worked will before I took the transom apart (with the exception of having to press two buttons to get it to move up).

july 25 2013 008.jpg
 

GA_Boater

Honorary Moderator Emeritus
Joined
May 24, 2011
Messages
49,038
Re: 1972 Starcraft Nova 18'

Just a few things, Nate. The transducer - If you get the same brand the holes might be the same. I've seen some inventive mounting boards too.

For the Mercruiser parts, Have you checked here at iboats? I think they match prices too. I haven't bought M/C parts in forever so I'm not up on the prices or best places.
On trimming the transom - I would run a pencil along the top of the skin and sand or trim with a jig saw. It has to be down close to the skin so the trim cap fits.
And lastly, the trim pump - How long has it been since you pulled it out? Can't be that long. I would cap the lines and make sure it's filled.
Everything is looking real good. I think you have better skills than you thought when you started this job. :)
 

captainnate

Petty Officer 2nd Class
Joined
Apr 19, 2011
Messages
190
Re: 1972 Starcraft Nova 18'

Hey GA, thanks again for the help. I like all your ideas. I have a cheap $90 fishfinder from a smaller boat that I will probably use on the Nova. I may just mount a board in the area of the old holes, and reuse them. Either way I will have to seal them up with probably a bolt or rivet.
 

captainnate

Petty Officer 2nd Class
Joined
Apr 19, 2011
Messages
190
Re: 1972 Starcraft Nova 18'

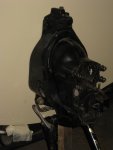
boat exhaust shutter 004.jpgboat exhaust shutter 003.jpgboat exhaust shutter 006.jpgboat exhaust shutter 005.jpg

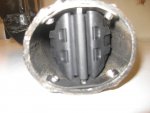
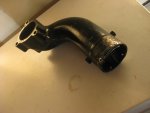
Here is a little update. I have been treating and painting the transom plywood for a few days. First I did one heavy application of a mixture of linseed oil, varnish, and mineral spirits. Then a slightly thinned application of rustoleum oil based, and then two more of rustoleum at regular strength. I have also included a pic of the exhaust shutter/flapper I fixed. I used stainless steel rivets. The hardest part was getting the two rusted screw/bolts out. It had one rivet and one small bolt on each side. Maybe it was orignally designed so you could take the bolt out and then pivot the piece to replace the shutter; just a thought. I ended up just using four ss pop rivets. I was concerned how it seems to stay partially open, but I don't see any other way it could be put in there. I slid a piece of wire up the tube to see how the flapper closes; it seems to work correctly as far as I can tell, anybody?? I also purchase a few parts today, one which was the seal/gasket that goes between the hull and gimbal housing. After the paint drys I should be able to start with the assembly process. Thanks for reading.
 
Top