Engine Rebuild:
During this entire process there had been upgrades/repairs done to the motor/lower unit (distributor, alternator, trim pump, carburetor, lower unit, bellows, oil pan gasket, starter, etc.), but had never needed to rebuild the motor itself. When we first got the boat, that was the first thing we fired up and it ran great.
This was the case until we took a trip up the intracoastal one day. We went up about 15 miles to St. Augustine, stopping at various points along the way. We then decided to start making a leisurely way back when I begin to notice the motor was taking a couple seconds longer than usual to fire up, but once underway still ran great. We made a final stop at a sandbar about 6 miles from our starting point. After stopping for an hour, we pushed off and I went to fire the motor up. It did a rotation or town and then froze. We did some initial trouble shooting, switched to the second battery, but to no avail. We knew we had a problem. A friend and I ended up jumping in and dragging the boat back to the sandbar. Fortunately, another group that was out that day offered to tow us 6 miles back to the dock!
On our way back we stopped, and I decided to pop a spark plug and sure enough water came pouring out and I knew that the motor was going to need a complete breakdown and rebuild.
What ended up being the culprit was the exhaust manifold. The cast iron wall between the water discharge and the exhaust discharge blew a 1’’ hole thru that day and would flood into the valves when the boat was shut off. The crack had probably started to form years ago, but that day it finally gave way.
I found out later that the manufacturer recommends changing the manifold out every twenty years or so for this reason. The one I had was probably the original from the 70’s and had been on there for 40+ years.
I pulled the motor out, had it machined, did the rebuild and threw it back in the boat.
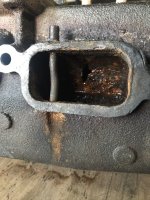
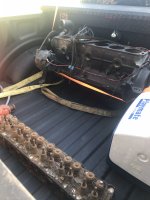
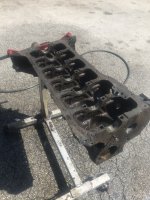
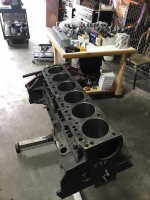
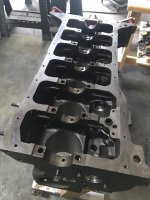
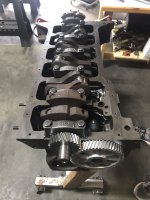
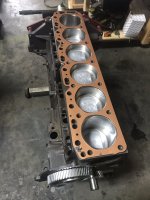
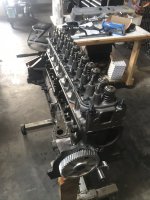
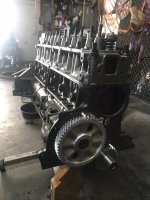
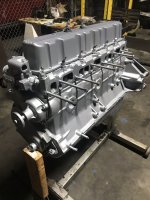
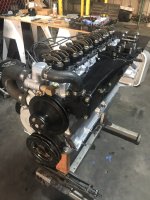
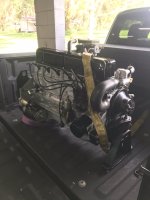
Once back together and back in the boat with a brand-new exhaust manifold, she was fired up, ran thru the break-in procedure and tuned.
One of the biggest improvements that was made during this process, beyond having a brand-new motor, was I switched from the old point distributor over to a Sierra electronic distributor. This has been a huge improvement and something I recommend to anyone running an old I/O.
During this entire process there had been upgrades/repairs done to the motor/lower unit (distributor, alternator, trim pump, carburetor, lower unit, bellows, oil pan gasket, starter, etc.), but had never needed to rebuild the motor itself. When we first got the boat, that was the first thing we fired up and it ran great.
This was the case until we took a trip up the intracoastal one day. We went up about 15 miles to St. Augustine, stopping at various points along the way. We then decided to start making a leisurely way back when I begin to notice the motor was taking a couple seconds longer than usual to fire up, but once underway still ran great. We made a final stop at a sandbar about 6 miles from our starting point. After stopping for an hour, we pushed off and I went to fire the motor up. It did a rotation or town and then froze. We did some initial trouble shooting, switched to the second battery, but to no avail. We knew we had a problem. A friend and I ended up jumping in and dragging the boat back to the sandbar. Fortunately, another group that was out that day offered to tow us 6 miles back to the dock!
On our way back we stopped, and I decided to pop a spark plug and sure enough water came pouring out and I knew that the motor was going to need a complete breakdown and rebuild.
What ended up being the culprit was the exhaust manifold. The cast iron wall between the water discharge and the exhaust discharge blew a 1’’ hole thru that day and would flood into the valves when the boat was shut off. The crack had probably started to form years ago, but that day it finally gave way.
I found out later that the manufacturer recommends changing the manifold out every twenty years or so for this reason. The one I had was probably the original from the 70’s and had been on there for 40+ years.
I pulled the motor out, had it machined, did the rebuild and threw it back in the boat.


Once back together and back in the boat with a brand-new exhaust manifold, she was fired up, ran thru the break-in procedure and tuned.
One of the biggest improvements that was made during this process, beyond having a brand-new motor, was I switched from the old point distributor over to a Sierra electronic distributor. This has been a huge improvement and something I recommend to anyone running an old I/O.


