1972 15' Nova rebuild

Status
Not open for further replies.

Watermann

Starmada Splash of the Year 2014
Joined
Jan 12, 2013
Messages
13,798
My opinion is with everything fused I don't see the need for a battery shut off switch unless you have issues with power drain and the battery going dead. You don't turn off the power at the battery for your car or house every time you leave it because everything's fused so if there's an issue like a direct short then it blows the fuse.

My main run from the battery is 20a rated 12 ga primary wire with an inline 20a fuse at the battery. Then you need the same gauge primary for the negative minus the fuse of course. I don't see the need for 6 or 8 ga primary wire and have never seen any factory boat wiring with that size either or your house for that matter which has 20a wiring through it to all the outlets and lights. My trolling motor is the exception to that since it's a 60a rated circuit and relay. All of my accessories are wired with 16 ga except for the LED wiring, I have double strand 18ga for it. Nav and gauge lights are one circuit and interior lighting needs to be separate.

So did you get the rub rail insert in alright?
 

MNhunter1

Lieutenant Junior Grade
Joined
May 12, 2014
Messages
1,059
My opinion is with everything fused I don't see the need for a battery shut off switch unless you have issues with power drain and the battery going dead. You don't turn off the power at the battery for your car or house every time you leave it because everything's fused so if there's an issue like a direct short then it blows the fuse.

My main run from the battery is 20a rated 12 ga primary wire with an inline 20a fuse at the battery. Then you need the same gauge primary for the negative minus the fuse of course. I don't see the need for 6 or 8 ga primary wire and have never seen any factory boat wiring with that size either or your house for that matter which has 20a wiring through it to all the outlets and lights. My trolling motor is the exception to that since it's a 60a rated circuit and relay. All of my accessories are wired with 16 ga except for the LED wiring, I have double strand 18ga for it. Nav and gauge lights are one circuit and interior lighting needs to be separate.

So did you get the rub rail insert in alright?


I haven't attacked the rub rail inserts yet. It's been rather cold here lately, but should warm up by the end of the week. Heated hanger and all, but I figure a nice hot tub of water and some dish soap should help ease the process a bit. Sounds like a good beer night with the boys and I predict a few curse words directed towards some inanimate objects. I like to refer to it as worker's tourettes - at least that's how I explain it to my wife.

With the lights, navigation and interior lighting will be on separate switches, but can I run the wiring for the individual switches through the same fuse, say a 15a? I'm trying to eliminate tying up 3 separate fuse banks of my 6 bank panel for the lights. I know I could combine the nav and anchor lighting onto a single switch, but I figured I could keep it simple and use individual switches for each since I have them available. The courtesy lights are just a couple leds, separate switch again, but was hoping to just leverage the same fuse bank. If need be, I could free up some fuse banks by running inline fuses for the radio and fishfinder also.
 

Watermann

Starmada Splash of the Year 2014
Joined
Jan 12, 2013
Messages
13,798
Sure you can double up on the same fuse for the lights but a 15a fuse would be way more than needed, 5a would do just fine. I added my gauge lights to the same switch as the nav lights. I can run all my lights just fine when testing using a 5a and you won't be using them all at the same time anyway when on the water.
 

MNhunter1

Lieutenant Junior Grade
Joined
May 12, 2014
Messages
1,059
Suppose I better feed the mob with an update...

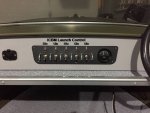
Slow moving, but forward progress. Got all the rub rails installed and the splashwell all sealed and transom capped. Will give it a few more days for the 5200 to cure and hit it with another coat of paint before installing the steering cable boot and cable grommet. Installed the dash and a set of 48" Bert's tracks, along with some of the other trim pieces, nose cap, corner end caps, etc. Dash pad is all painted and ready to install, just need to drill a few holes for the mounting bolts. Haven't yet tackled the electric or pieced together my custom switch panel, but aside from mounting the controls and motor, that's pretty much the finishing touch, sans decals and registration.


Dabbler_E

Petty Officer 1st Class
Joined
Apr 20, 2009
Messages
338
BWR1953: that's awesome! Who knew StarCraft was part of the nuclear triad?
 

MNhunter1

Lieutenant Junior Grade
Joined
May 12, 2014
Messages
1,059
Anyone know if you need to pull the flywheel off a 1987 Mercury outboard to install the lifting eye? I have the motor, I have the eye, but it doesn't appear to be a direct attachment??
 

Watermann

Starmada Splash of the Year 2014
Joined
Jan 12, 2013
Messages
13,798
No you don't, the inside center of the flywheel where the nut is at has threads that you just screw the lifting eye into.
 

Watermann

Starmada Splash of the Year 2014
Joined
Jan 12, 2013
Messages
13,798
Oh I see yeah your Mercs flywheel is different than mine, that's the lifting eye I have for mine. That would be a bear to remove the flywheel without those inner threads to pull the wheel off. The center nut is torqued to 150 ft lbs with red locktite and I had to use a rattle gun making several runs at it.

Removing any of those other smaller bolts is not a good idea either, they shouldn't be used to support the motor as I think they just hold in the magnets to the underside of the wheel.
 

MNhunter1

Lieutenant Junior Grade
Joined
May 12, 2014
Messages
1,059
Oh I see yeah your Mercs flywheel is different than mine, that's the lifting eye I have for mine. That would be a bear to remove the flywheel without those inner threads to pull the wheel off. The center nut is torqued to 150 ft lbs with red locktite and I had to use a rattle gun making several runs at it.

Removing any of those other smaller bolts is not a good idea either, they shouldn't be used to support the motor as I think they just hold in the magnets to the underside of the wheel.

The good news is...my same model year Classic Fifty has the threads.


I think they must have thought the lighter 35hp wouldn't need it. I mainly want to mock it up for hole placement and height, which should be universal across the two motors. I'll just use the bigger motor to get everything lined up, then a couple of my buddies to help mount the 35. I know the 35 was running well when I purchased it and I'd really like to see how it performs on the smaller hull. I'll still go through the Fifty(45hp) and may swap it out once completed.
 

MNhunter1

Lieutenant Junior Grade
Joined
May 12, 2014
Messages
1,059
Just checking in after a little PB fueled hiatus and internet moratorium at work... a few more electrical connections to make, an outboard to awaken, and registration...then I should be ready to see if this thing still floats.

Looking at a new storage option tomorrow afternoon to get the 16SS closer to home and ready for a winter renovation.
 
Status
Not open for further replies.
Top