1962 Glastron Starflite winter project

ruttbuster

Cadet
Joined
May 21, 2018
Messages
18
This is how I purchased her. Rescued from a field where she was setting for about 25 years. Figured out she is a Starflite with the original Starflite motor. Sitting on a 1957 Mastercraft tilt trailer.
 

Attachments

  • photo291059.jpg
    photo291059.jpg
    1.3 MB · Views: 0

ruttbuster

Cadet
Joined
May 21, 2018
Messages
18
This gives an idea of the state she was in. I had a different picture in my head.
 

Attachments

  • photo291060.jpg
    photo291060.jpg
    1.2 MB · Views: 0
  • photo291061.jpg
    photo291061.jpg
    1.3 MB · Views: 0
  • photo291062.jpg
    photo291062.jpg
    1.2 MB · Views: 0

ruttbuster

Cadet
Joined
May 21, 2018
Messages
18
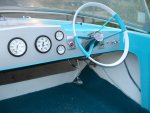
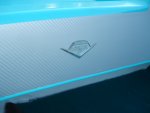
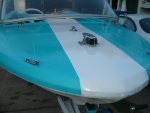
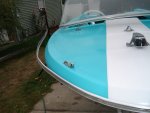
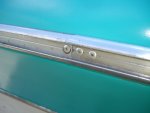
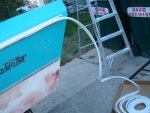
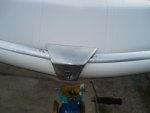
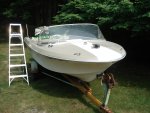
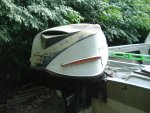
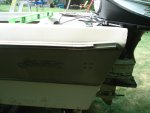
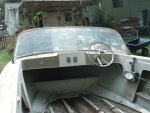
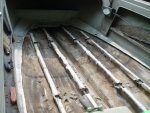
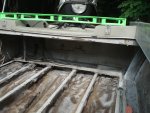
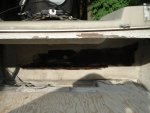
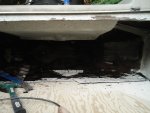
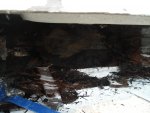
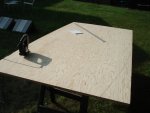
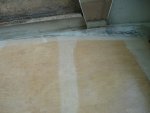
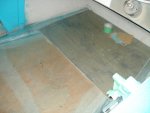
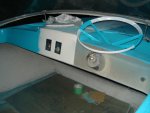
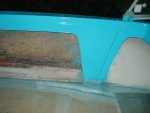
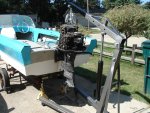
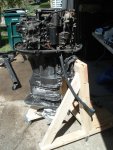
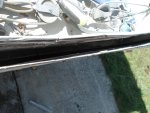
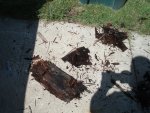
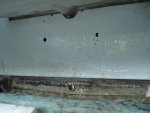
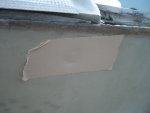
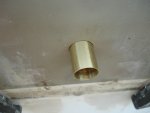
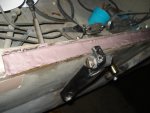
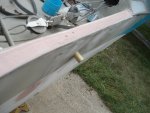
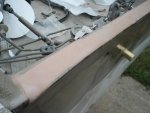
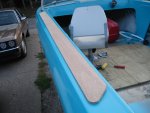
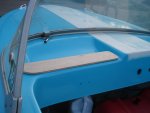
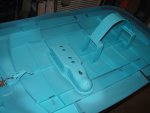
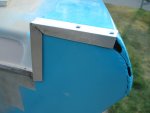
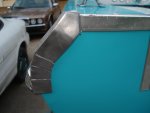
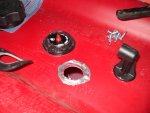
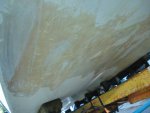
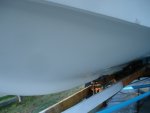
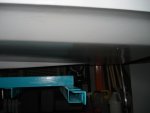
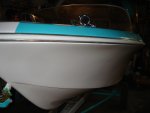
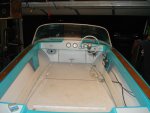
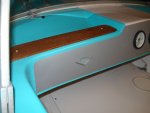
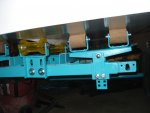
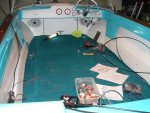
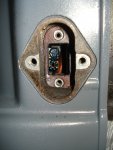
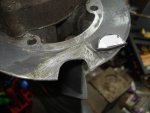
This is my first boat. Been on big ships. Never owned a boat. Did not know what I was getting myself into. Here is where it had to start. Good old angle grinder to cut away the delaminated deck fiberglass. Wood was completely rotted out. Had to take it out in pieces. Transom was as well. Transom was solid on the outside, so I chose to tackle that from the inside. Again, completely rotted out.
 

Attachments

  • photo291063.jpg
    photo291063.jpg
    1.3 MB · Views: 0
  • photo291064.jpg
    photo291064.jpg
    1.3 MB · Views: 0
  • photo291065.jpg
    photo291065.jpg
    1.4 MB · Views: 0
  • photo291066.jpg
    photo291066.jpg
    1.2 MB · Views: 0
  • photo291067.jpg
    photo291067.jpg
    1.3 MB · Views: 0
  • photo291068.jpg
    photo291068.jpg
    1.1 MB · Views: 0

ruttbuster

Cadet
Joined
May 21, 2018
Messages
18
Time for a new deck using 3/4" marine plywood. Decided on a slight incline toward the bow section. You see the color I chose to paint her. Needed to get this done on a budget, yet do a good job.
 

Attachments

  • photo291069.jpg
    photo291069.jpg
    1.2 MB · Views: 0
  • photo291070.jpg
    photo291070.jpg
    1.3 MB · Views: 0
  • photo291071.jpg
    photo291071.jpg
    1.2 MB · Views: 0
  • photo291072.jpg
    photo291072.jpg
    1.2 MB · Views: 1
  • photo291073.jpg
    photo291073.jpg
    1.2 MB · Views: 1

ruttbuster

Cadet
Joined
May 21, 2018
Messages
18
It was time to pull the motor. With a coupon, I got the lift at HF for $99. Piece of cake to get it off. Built the stand from on-line plans, but used larger wheels to make it easier to move.
 

Attachments

  • photo291074.jpg
    photo291074.jpg
    1.4 MB · Views: 0
  • photo291075.jpg
    photo291075.jpg
    1.3 MB · Views: 0
  • photo291076.jpg
    photo291076.jpg
    1.2 MB · Views: 0

ruttbuster

Cadet
Joined
May 21, 2018
Messages
18
After cutting the top of the transom off, I was able to get the remainder of the rotted wood out. As well as an ant colony. Created a new form for the inside and fiberglassed it in place. Drilled the new holes for the motor mounts. Aluminum foil wrapped around the bolts made them real easy to remove later. Needed the bolts in place to hold the fiberglass parts in the approximate place the belong. They are about to get almost 10 gallons of ceramic resin poured inside. Made sure to tape off all holes. Don't want leaks! I chose to go with a brand which came in gallon buckets. A lot easier to handle by myself.
 

Attachments

  • photo291077.jpg
    photo291077.jpg
    1.2 MB · Views: 0
  • photo291078.jpg
    photo291078.jpg
    1.3 MB · Views: 0
  • photo291079.jpg
    photo291079.jpg
    1.3 MB · Views: 0
  • photo291080.jpg
    photo291080.jpg
    1.3 MB · Views: 0
  • photo291081.jpg
    photo291081.jpg
    1.1 MB · Views: 0
  • photo291082.jpg
    photo291082.jpg
    1.1 MB · Views: 0
  • photo291083.jpg
    photo291083.jpg
    932.9 KB · Views: 0
  • photo291084.jpg
    photo291084.jpg
    1.2 MB · Views: 0

ruttbuster

Cadet
Joined
May 21, 2018
Messages
18
The pour went almost as planned. Had a few missed holes had to hurry and plug. Took about 9.5 gallons. The on-line calculator was right on! Time to make a new transom cap. Decided to discard the ugly aluminum and sticker things on the sides and go with mahogany cut with the same lines so they look like they belong there. Decided on a couple more to help hide the pockets under the windshield.
 

Attachments

  • photo291085.jpg
    photo291085.jpg
    1.1 MB · Views: 0
  • photo291086.jpg
    photo291086.jpg
    1.3 MB · Views: 0
  • photo291087.jpg
    photo291087.jpg
    1.4 MB · Views: 0
  • photo291088.jpg
    photo291088.jpg
    1.3 MB · Views: 0
  • photo291089.jpg
    photo291089.jpg
    1.2 MB · Views: 0
  • photo291090.jpg
    photo291090.jpg
    1.1 MB · Views: 0
  • photo291091.jpg
    photo291091.jpg
    1.3 MB · Views: 0
  • photo291092.jpg
    photo291092.jpg
    1.3 MB · Views: 0

ruttbuster

Cadet
Joined
May 21, 2018
Messages
18
It was time to shift focus onto the trailer. Found a sales brochure on a large auction site which matched the trailer. Discovered it to be a Mastercraft from 1957. The model A type spring gave it away. I could not go with the original orange and green. That would not work. Has to match the boat! Much of the trim on the boat was missing or damaged. Time to start creating new pieces from aluminum stock. Had one of these to go by for the other side. Original transom trim was still in place with the original stamped serial number.
 

Attachments

  • photo291093.jpg
    photo291093.jpg
    1.2 MB · Views: 0
  • photo291094.jpg
    photo291094.jpg
    1.2 MB · Views: 0
  • photo291095.jpg
    photo291095.jpg
    1.2 MB · Views: 0
  • photo291096.jpg
    photo291096.jpg
    1.1 MB · Views: 0
  • photo291097.jpg
    photo291097.jpg
    1.1 MB · Views: 0
  • photo291098.jpg
    photo291098.jpg
    1.4 MB · Views: 0
  • photo291099.jpg
    photo291099.jpg
    1.2 MB · Views: 0
  • photo291100.jpg
    photo291100.jpg
    1.2 MB · Views: 0

ruttbuster

Cadet
Joined
May 21, 2018
Messages
18
Decided it was time for a little decal and gauge work. Decided to use decal on the white stripe and for a vintage look on the console. Found a nice set of gauges I thought needed to be. Found those on a local free listing site as new old stock. All were still mounted on a plastic form for mounting in a console. The rub rail was severely damaged at the aft end. Found a matching piece on that large auction site. Just needed one 8' piece for the splices. Decided on a white insert instead of tan or black. The rub rail was a two person job. One to heat up with heat gun, the other to push in place.
 

Attachments

  • photo291101.jpg
    photo291101.jpg
    1.3 MB · Views: 0
  • photo291102.jpg
    photo291102.jpg
    1.1 MB · Views: 0
  • photo291103.jpg
    photo291103.jpg
    1.1 MB · Views: 0
  • photo291104.jpg
    photo291104.jpg
    1.3 MB · Views: 0
  • photo291105.jpg
    photo291105.jpg
    1.4 MB · Views: 0
  • photo291106.jpg
    photo291106.jpg
    1.2 MB · Views: 0
  • photo291107.jpg
    photo291107.jpg
    1.3 MB · Views: 0
  • photo291108.jpg
    photo291108.jpg
    1 MB · Views: 0
  • photo291109.jpg
    photo291109.jpg
    979.5 KB · Views: 0

ruttbuster

Cadet
Joined
May 21, 2018
Messages
18
Here is how I recreated the look of the original. Had to cut and bend more aluminum stock to fit. Each side was a little different.
 

Attachments

  • photo291110.jpg
    photo291110.jpg
    1.1 MB · Views: 0
  • photo291111.jpg
    photo291111.jpg
    1.1 MB · Views: 0

ruttbuster

Cadet
Joined
May 21, 2018
Messages
18
It was time to recreate the original look on the trailer wheels. Found some solid wheels with tires. Used Volkswagen hubcap clips, just a little bending to make them work. Drill and rivet in place. Baby Moon hubcaps off that large on-line auction site. Paint to match with decalled logo.
 

Attachments

  • photo291112.jpg
    photo291112.jpg
    1.2 MB · Views: 0
  • photo291113.jpg
    photo291113.jpg
    1.3 MB · Views: 0
  • photo291114.jpg
    photo291114.jpg
    1.2 MB · Views: 0
  • photo291115.jpg
    photo291115.jpg
    1.2 MB · Views: 0
  • photo291116.jpg
    photo291116.jpg
    1.1 MB · Views: 0
  • photo291117.jpg
    photo291117.jpg
    1.3 MB · Views: 0

ruttbuster

Cadet
Joined
May 21, 2018
Messages
18
Picked up a 10 gallon, low profile tank. Wanted a sending unit to go to the dash. A hole drilled, self tapping screws and a little silicone. Nice and solid.
 

Attachments

  • photo291118.jpg
    photo291118.jpg
    1.3 MB · Views: 0
  • photo291119.jpg
    photo291119.jpg
    1.4 MB · Views: 0
  • photo291120.jpg
    photo291120.jpg
    1.2 MB · Views: 0

ruttbuster

Cadet
Joined
May 21, 2018
Messages
18
I think the worst part of the entire boat had to be the hull. It was full of dried on scum or calcium. I tried different acids and cleaners. Nothing was cutting it. Had to make a decision. Finally grabbed a packet of course sandpaper. That worked! Sanded with finer grit. Filled gouges and chips with epoxy putty. Sanded again. Two coats of Gluv-It to seal it all up. Then two coats of Epoxy paint. I like the results!
 

Attachments

  • photo291121.jpg
    photo291121.jpg
    1.2 MB · Views: 0
  • photo291122.jpg
    photo291122.jpg
    1.1 MB · Views: 0
  • photo291123.jpg
    photo291123.jpg
    1 MB · Views: 0
  • photo291124.jpg
    photo291124.jpg
    1.2 MB · Views: 0
  • photo291125.jpg
    photo291125.jpg
    1.4 MB · Views: 0
  • photo291126.jpg
    photo291126.jpg
    1,023.4 KB · Views: 0
  • photo291127.jpg
    photo291127.jpg
    981.3 KB · Views: 0
  • photo291128.jpg
    photo291128.jpg
    984.2 KB · Views: 0

ruttbuster

Cadet
Joined
May 21, 2018
Messages
18
Time to start placing trim pieces. Deck is all painted. Next came the carpet. Recreated the wobble rollers. Still had two at the back end of trailer. Someone made bunks for the mid section. Recreated the wobble roller which belonged there. They originally had oval shaped springs. Good luck finding something like that. I went with MTD lawnmower seat springs. Perfect!
 

Attachments

  • photo291129.jpg
    photo291129.jpg
    1.1 MB · Views: 0
  • photo291130.jpg
    photo291130.jpg
    1.1 MB · Views: 0
  • photo291131.jpg
    photo291131.jpg
    1.3 MB · Views: 0
  • photo291132.jpg
    photo291132.jpg
    1.3 MB · Views: 0

ruttbuster

Cadet
Joined
May 21, 2018
Messages
18
Fuel lines were hard as a rock. Replaced all of them. Also took the carb off. Float was coated with gas tank sealer. New gaskets. Had to replace the entire ignitions system. Coil was bad. Points and rotor were cheap enough. Also replaced the cap. Made new wires out of tractor wires. Need to be the solid core.
 

Attachments

  • photo291133.jpg
    photo291133.jpg
    1.3 MB · Views: 0
  • photo291134.jpg
    photo291134.jpg
    1.4 MB · Views: 0

ruttbuster

Cadet
Joined
May 21, 2018
Messages
18
Time to drop the lower unit. Sure enough needed work! All new seals and o-rings. New impeller. new shaft seal. The dog gear looked new on this! Fastened everything up and let it soak in a bucket for a few days. No oil slick! Yahoo! Back on it went.
 

Attachments

  • photo291135.jpg
    photo291135.jpg
    1.3 MB · Views: 0
  • photo291136.jpg
    photo291136.jpg
    1.3 MB · Views: 0
  • photo291137.jpg
    photo291137.jpg
    1.3 MB · Views: 0
  • photo291138.jpg
    photo291138.jpg
    1.3 MB · Views: 0

ruttbuster

Cadet
Joined
May 21, 2018
Messages
18
Before placing back on motor, I wanted to fix this ugly spot. Cut a piece of dibond material, which happened to be about the correct thickness. A little fiberglass and paint. Better than new!
 

Attachments

  • photo291139.jpg
    photo291139.jpg
    1.3 MB · Views: 0
  • photo291140.jpg
    photo291140.jpg
    1.3 MB · Views: 0
  • photo291141.jpg
    photo291141.jpg
    1.2 MB · Views: 0
  • photo291142.jpg
    photo291142.jpg
    1.2 MB · Views: 0
  • photo291143.jpg
    photo291143.jpg
    1.3 MB · Views: 0
  • photo291144.jpg
    photo291144.jpg
    1.2 MB · Views: 0
Top