1960 Lund Fishing Boat Overhaul

r.muss400

Cadet
Joined
Mar 31, 2016
Messages
7
Hello Everyone, I've been doing a lot of reading on here and watching a lot of videos online and I have been hard at work remodeling my 1960 17' Lund fishing boat that I picked up on the cheap! I've finally figured out how to get the pictures linked so you guys can see (hopefully!). Here's the boat in its original condition:


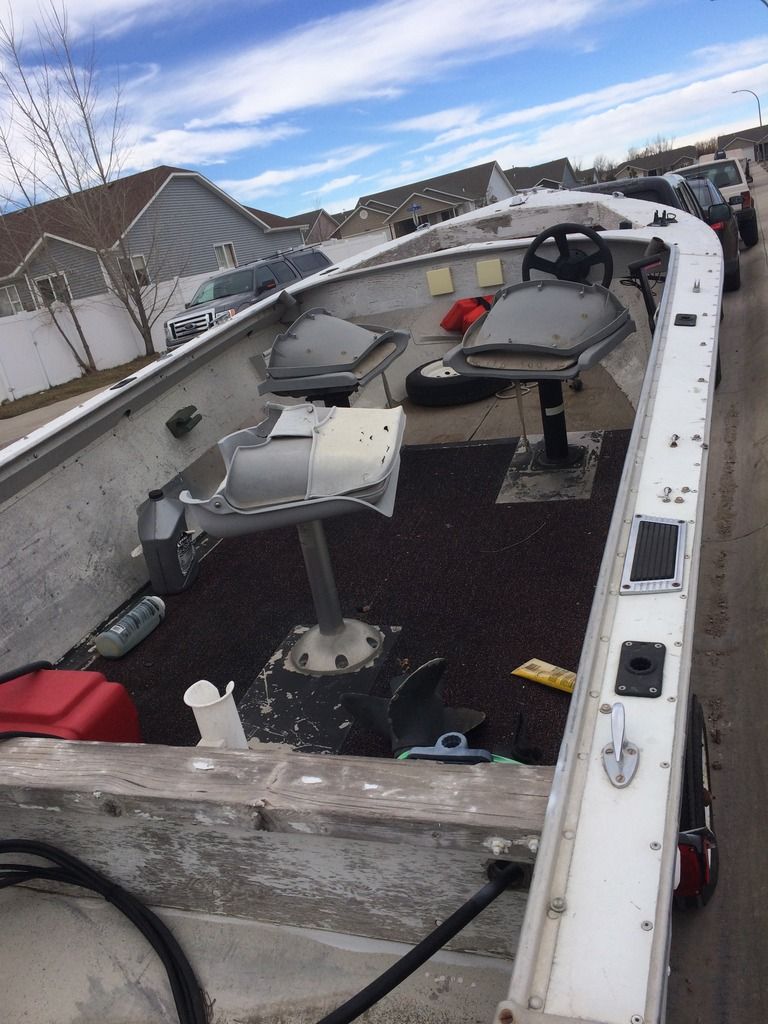
Yuck! I had some work cut out for me, especially on the bottom of the hull.

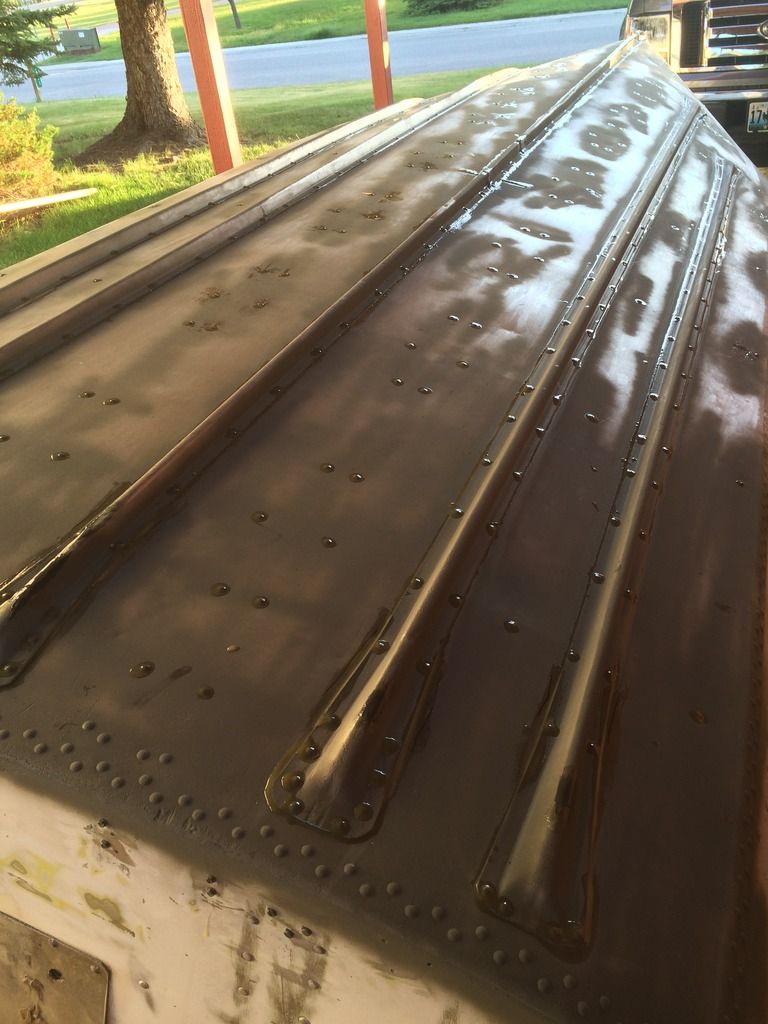
Well, after many hours I finally got the bottom sealed up (G-Flex epoxy became my best friend). I still have to sand the epoxy down, but I figure I'll get around to that when I am closer to painting:


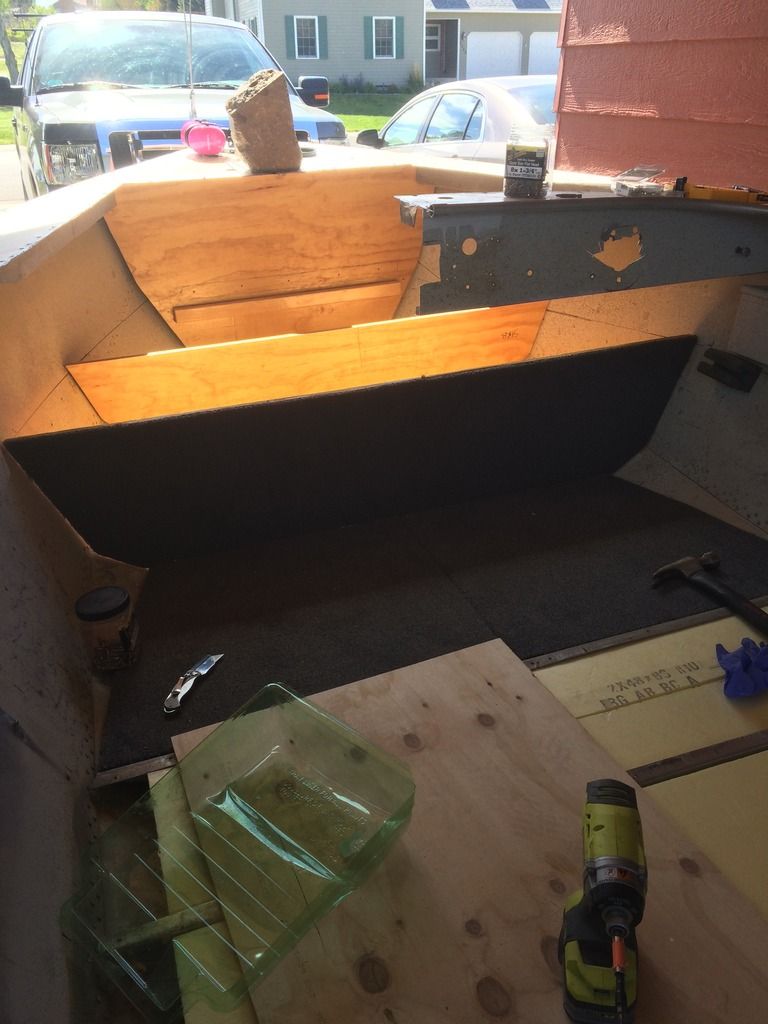
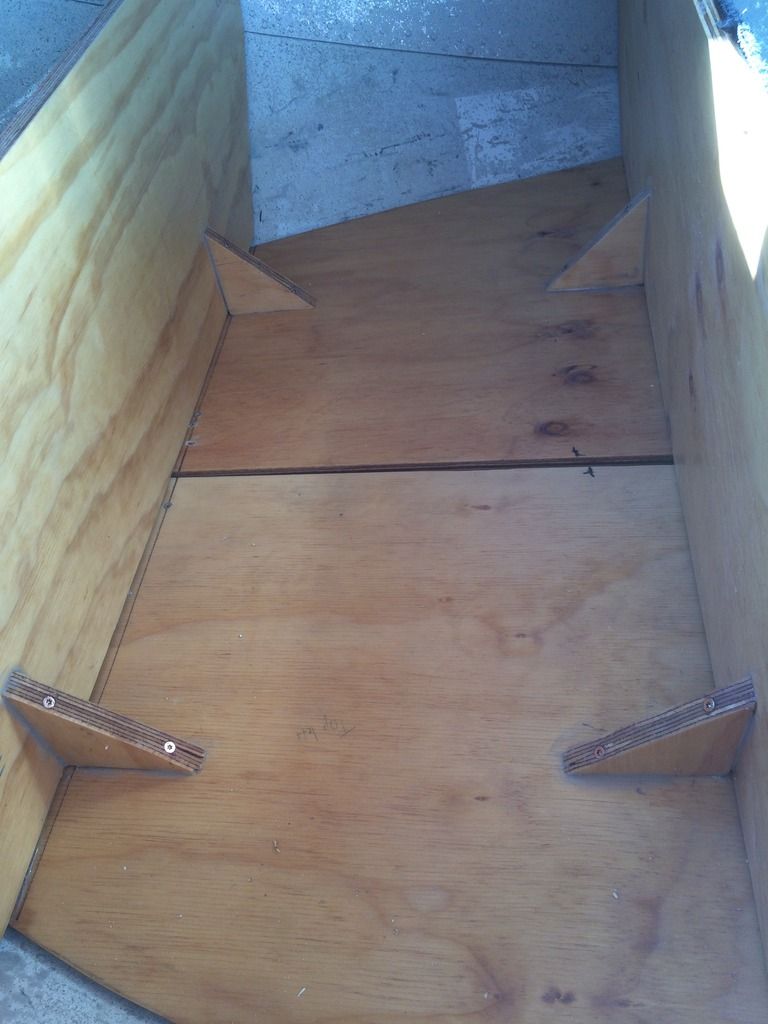
After finishing up the epoxy job on the hull, I started putting in some foam for floatation and got some decking and a casting platforms installed (all the plywood was encased in epoxy):


I know I should have finished stripping the paint off the hull and probably painted before starting the foam, decking and some carpet, but my father-in-law was visiting for the week and he is much more knowledgeable about boat building and restoration than I am so he wanted to teach me how to build what I needed while he was out here (thank you!!). Now that I am back to working on the boat by myself, I decided to take a break from the interior and get back to prepping the boat for paint, sorry, no pics of this yet just started the stripping process today and it is far from done.

Well, that's all I have for you so far but I look forward to keeping you guys updated on my project!
 

TruckDrivingFool

Lieutenant Commander
Joined
Jul 30, 2007
Messages
1,818
Nice! Don't get to see many Lund's here.

QFT

Not surprised but didn't know Lund made a closed bow, cool to see and the PO's cutting of the bow deck wouldn't of been toO bad to fix but now, well......

Brings a little tear to my eye to see it cut but I'll get over it. :)

I do have this rare dream where I give a bowectomy to a SC and make into a center console fisher, so I'll be interested in seeing how well the bench gussets support the sides. Any plans to attach them to the hull mechanically?
 

r.muss400

Cadet
Joined
Mar 31, 2016
Messages
7
The bench gussets are just screwed the the decking and also secured with thickened epoxy. That's about the extent of my plans with them, so far the deck seems very solid.

I also had a little mishap with the come-along hoist system-- the bow hook snapped off when I was flipping the boat =/. Suffered a dent and a lot of noise (my neighbor thought I was dead haha), but other than that no worse for the wear.

I just finished my first coat of paint tonight, and I think it's going to turn out good! Looking forward to hitting it with another coat tomorrow night. Hopefully within a week or so I'll have more pictures to post.
 
Last edited:

r.muss400

Cadet
Joined
Mar 31, 2016
Messages
7
Sorry for the lack of updates, but I've gotten quite a bit of work done on the boat. Here are some pictures of the paint and decking install.

Primed:


Three coats of Rustoleum Marine Topside white later (roll and tip method):


Next it was time for the design on the side (rinsed and repeated on both sides). I highly recommend the rustoleum painters tape (orange colored stuff) it had such great lines, no bleed through. I even left the tape on for a week or two in 90-100 degree heat and had no issues getting the tape off cleanly:


Three coats of red (same type of paint- rustoleum marine topside) later-


And the retro Lund decals are back!


Back to decking!


And carpeting:


Oh yeah, and I painted the trailer, and got new tires for it too. I also replaced the rollers, but they weren't installed when I took the picture:


That's about it so far, all I really have left to do is build the cockpit, plumb the livewell, run the wiring and put the engines back on and she'll be ready to go!

I did have a question about livewell plumbing though, I've tried looking it up on youtube and on here but I can't seem to find the answer to my question. I was planning on installing my livewell pump through the transom (like most livewell intakes are) and run the hose to my livewell to a fill point. Then, drilling a hole through the side of the boat for an overflow (I've read if you have a 3/4" inlet, your overflow should be something like 1.25"). My question is about draining the livewell after I'm done with it for the day. I've found this plumbing kit: http://www.basspro.com/T-H-Marine-Overflow-Drain-Kit/product/120829053318475/

But it looks like that would require a hold to be drilled in the bottom of the livewell and then the overflow pipe would screw into that drain. Then, when you're done fishing for the day you unscrew the overflow pipe and it would drain out the bottom of the well. My question is how would I plumb that drain? If my thinking is right, I would have the hose to fill the well running in from the top, then that overflow/drain kit installed in the bottom, but where would that drain hose run to? I can't think of anywhere that would drain to that would actually drain, seems like the drain hose would be lower than where it would try to drain over the side so it wouldnt actually drain. This is really the only part I am hung up on.

Also, the livewell sits right on the decking, so I don't really have room to run a drain out the bottom. I'm a little afraid I'll need a bilge pump inside of the livewell to actually make it drain.

Any ideas or suggestions for the livewell would be appreciated!

Thanks guys!
 

r.muss400

Cadet
Joined
Mar 31, 2016
Messages
7
Well, I finally finished the project, or close enough to use it. I still have the home made live well to plumb, but I got her out on the water yesterday! She ran great and got several fish in the boat. I have some more pictures, but I switched to a Samsung phone and they won't seem to come off the phone... Should have stayed with Apple!

Anyway, if/when I can get these pictures off my phone, I'll be glad to post them! She turned out beautiful, I still have a few cosmetic things to do here or there, but she's a functional boat again and I couldn't be much happier with the results!
 
Top