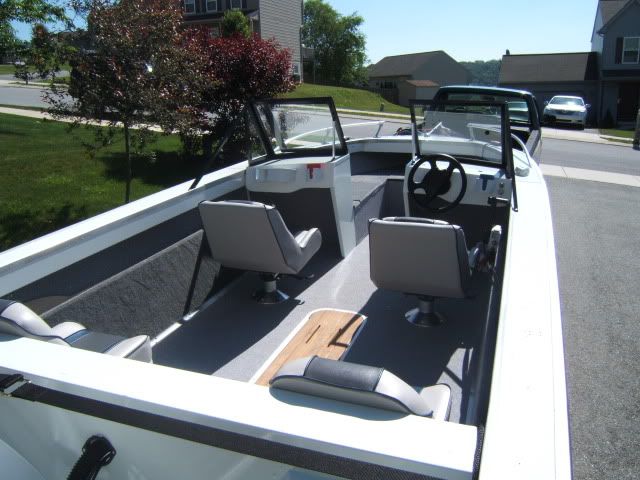
18' Starcraft SuperSport restoration

ezmobee

Supreme Mariner
Joined
Mar 26, 2007
Messages
23,767
Re: 18' Starcraft SuperSport restoration

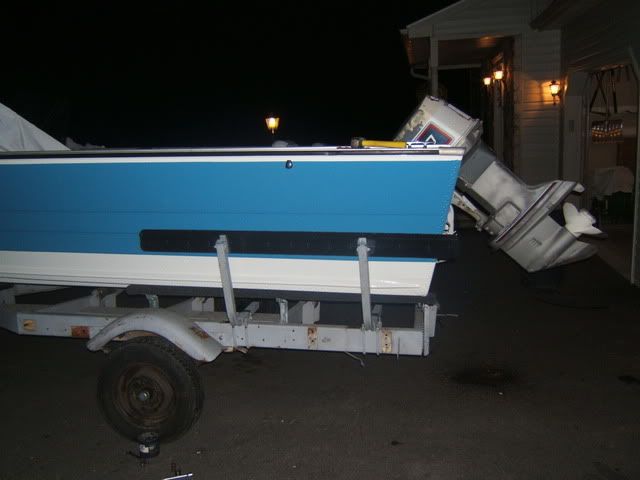
Other side
DSCF2718.jpg


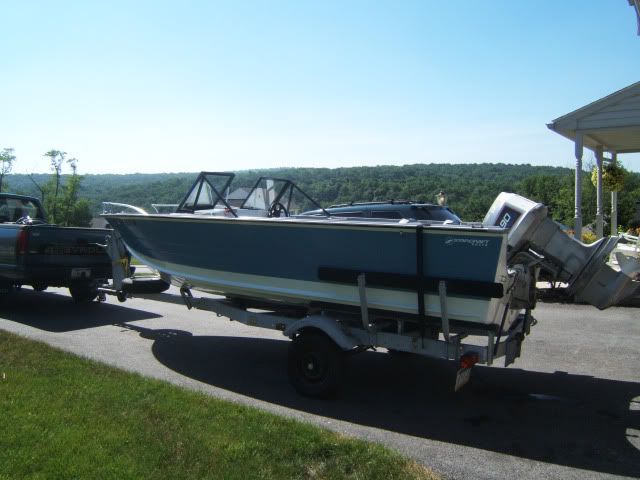
My bad @ss bunk guides. Pretty sure I could load drunk and stoned with these things :p
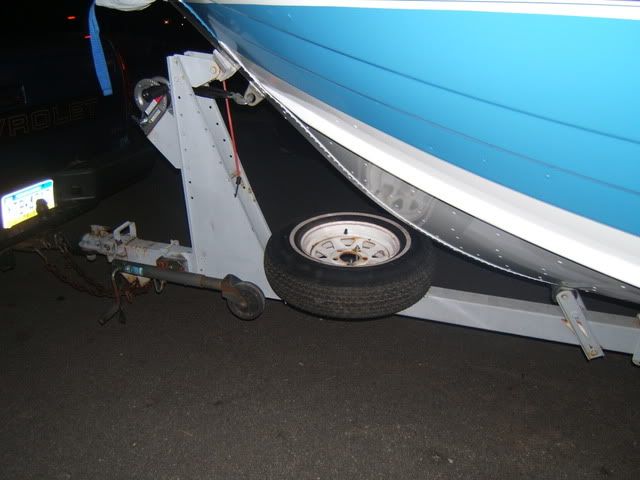
DSCF2719.jpg


Spare tire added
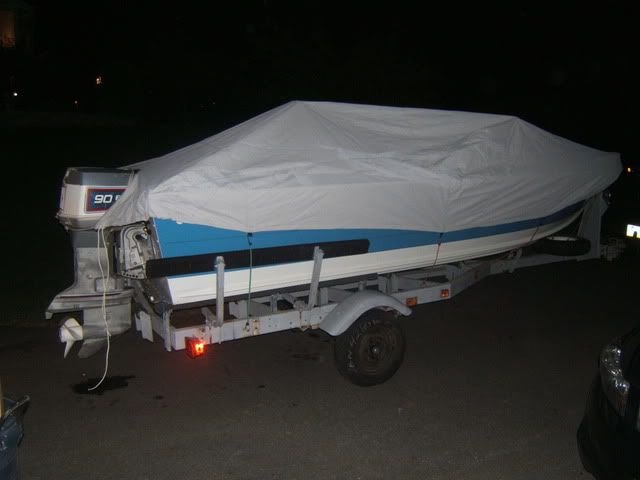
DSCF2720.jpg


My ill-fitting cover. I know it looks ok in this pic and it does get the job done but it really it about a foot short. I played the iboats cover lottery (the crazy sale they have in the fall) and lost. Still pretty effective for the $40 or so I paid for it.
DSCF2721.jpg
 

ezmobee

Supreme Mariner
Joined
Mar 26, 2007
Messages
23,767
Re: 18' Starcraft SuperSport restoration

Well I don't know what's up with the huge images. I resized them in photobucket. They must be cached somewhere. Hopefully they will eventually correct themselves.

Plan is to splash the boat on Friday although the weather looks iffy. If it's not raining, I'm going. I have a few items left to do before then:

- Install new lights on the trailer
- Put the registration numbers on the boat
- Put my other Starcraft decal on the port side
- Change the lower unit oil in the motor
- Run the motor and adjust the idle speed up a bit
- Put 4200 in the holes in the transom which are for the swim platform. That's not ready to go on yet and I need to temporarily seal the holes
- Swap out the thru-splashwell fuel line fitting with a better fitting one I've already bought
- Install new boot I bought for motor cables as they come through the splashwell
- Clean the boat! The whole thing is dusty from all the work

Also, before TinStock, new wheels and tires will go on the trailer and a motor tune up will be done. Bearing buddies will also be installed.
 

ezmobee

Supreme Mariner
Joined
Mar 26, 2007
Messages
23,767
Re: 18' Starcraft SuperSport restoration

I ran the motor again last night. It starts easily and stays running. I had the lower at least mostly submerged in this big bed box I keep in my truck. It idled very nicely, although perhaps a bit low. So I bumped up the idle speed just a bit. It went into gear fine with no stalling. I realize that my fairly shallow box of water isn't providing as much backpressure as actually having the boat in the water would but I am optimistic.
 

ezmobee

Supreme Mariner
Joined
Mar 26, 2007
Messages
23,767
Re: 18' Starcraft SuperSport restoration

SUCCESS!!!! My wife and I took it for a ride this morning before the weather goes to crap. It ran awesome! It idled, went into gear without stalling and ran great. 41MPH!!!!!!!!!!!!!!!!!!!!!!!!!!!!!!!!!! I thought I'd lose speed but apparently I gained it! 41!!!!

DSCF2726.jpg


It was rough when we went out and this boat handled the chop with aplomb. Much better than the Jupiter. The power trim worked great for maximizing the hole shot and then getting the perfect angle for speed. Couldn't be happier


ezmobee

Supreme Mariner
Joined
Mar 26, 2007
Messages
23,767
Re: 18' Starcraft SuperSport restoration

Well I should have at least cleaned the windshield :p Actually that's another thing I'm happy about. My seat height with regards to seeing out the windshield is perfect. Glad I got the pedestals I did.
 

ezmobee

Supreme Mariner
Joined
Mar 26, 2007
Messages
23,767
Re: 18' Starcraft SuperSport restoration

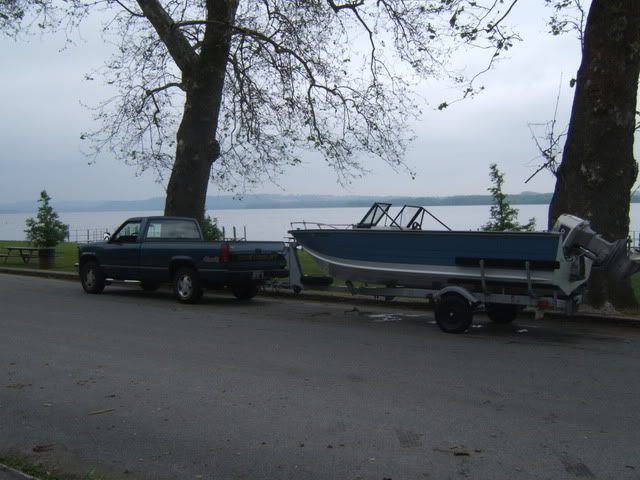
Had a great day on the boat yesterday. The motor definitely needs a tune up as it went back to the stalling going into gear thing but it was usable. I haven't even changed the plugs in it so it's reasonable to assume it could use a little maintenance. Here are some outside pictures of the semi-final product

DSCF2727-1.jpg


DSCF2728-2.jpg


DSCF2729-2.jpg


DSCF2737-1.jpg


ezmobee

Supreme Mariner
Joined
Mar 26, 2007
Messages
23,767
Re: 18' Starcraft SuperSport restoration

I suppose since I'm in here, a little update.

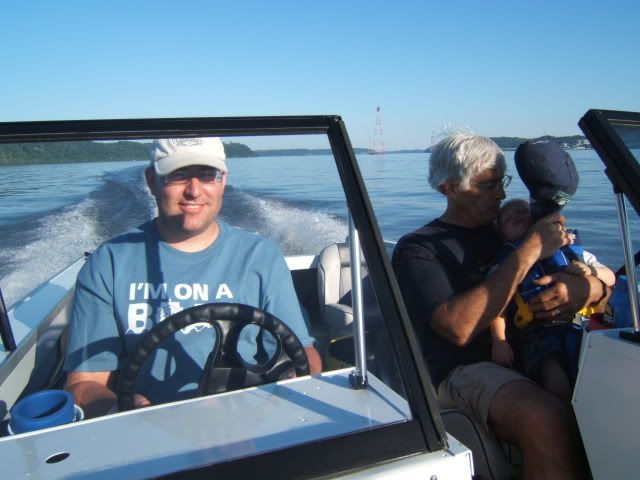
I've been using the boat, not nearly as much as I'd like though. It's either been storming or hot as heck. My wife and I had it out last Monday which was a beautiful day. We decided we really need to invest in a bimini top.

We're taking the boat to Ocean City, MD with us on vacation the end of next week. I've ordered brand new wheels and tires for the trailer in preparation for that trip. I have yet to do any work to the outboard. I attempted to replace the impeller last night as a preventative measure but was stymied right off the bat with an inaccessible screw. I decided to recruit the services of a mobile marine mechanic in our area. I am hoping he will be able to make time for me next week. If not, I'll just run it as I have been. It still has a hot restart issue which I have been able to just deal with and it doesn't run great around idle speed. Otherwise it runs pretty darn well. I'm going to have the mechanic rebuild the carbs and fuel pump as well as replace the thermostats and water pump. It will surely cost me a bundle but I'm hoping at that point it will pretty much run like new.

Future plans are to add a removable fishing seat mount up in the bow as I had originally planned and to build a casting deck/box with a seat mount also on it in the stern. I already have the seats and the materials to build the platform/box but I have yet to spring for the pedestals. I will also eventually like to add some gauges. Probably just fuel, volts, and tach. And a fish/depth finder. I also need to remount my swim platform once I clean up the teak some.

I really really love this boat. It rides amazingly well and goes great with the 90HP.

My paint job sucks and I apologize to anyone on here I've recommended Easypoxy to and I know that's a lot of you. It's soft garbage with poor adhesion. My advice to anyone else would be stick with trusty Rusty or spring for 2 part paint.
 

ezmobee

Supreme Mariner
Joined
Mar 26, 2007
Messages
23,767
Re: 18' Starcraft SuperSport restoration

The only thing I can think of Darren is some horrible incompatibility between Easypoxy and whatever my boat was last repainted with.
 

ezmobee

Supreme Mariner
Joined
Mar 26, 2007
Messages
23,767
Re: 18' Starcraft SuperSport restoration

UPDATE: So we're taking the boat to Ocean City, MD with us on vacation tomorrow. I had still not replaced the impeller in my motor and I knew I was pushing my luck too much. So I ordered one and went to install it last week. Well I was stymied pretty much right off the bat. The bolt that holds the shift rod on up in the powerhead under the carbs was pretty well buried under a bunch of hoses and other such things. As I had no interest in turning my running motor into a non-running motor....I decided to call up this mobile mechanic I had found on CL a few months ago and has corresponded with about some of my running issues. He told me that he would go over the whole motor for me but that he like to do the thermostats when he does the impellers. He told me to order them and call him when they came in to set up a time for him to come out.

The t-stats come in on Monday and I called him to see when he could come out. No good, he says he's real busy and wouldn't be able to make it till Friday or perhaps Saturday. Well that's no good as I'm leaving tomorrow. So I said I would just run it as-is and take it in when I get back. He says that if I can bring it to his house he could work on it much sooner. So I took a real gamble, the week before vacation, and took it out there. Well the gamble paid off. This guy is a GURU on all things that power boats, particularly outboards and older jet skis. He said he's one of the last people in the area that still works on the older Merc inline 6's and he was even working on an old '71 Evinrude electric shift model.

So I dropped it off on Monday evening, by Tuesday around lunch time he was already calling me to tell me what was wrong with it (he was troubleshooting my hot-restart stalling issue). Turns out some dumb PO had tried to hop the motor up by slapping some 140HP carbs on it. Much too big for it. He said with 115 carbs he could make my 90 an honest 115 and does that often, but he said anything bigger, like the 125, 135 and 140 carbs are all just too big without other modifications. He said I should try to find some 115 carbs. In the meantime, he rejetted the 140 carbs and made numerous other adjustments so the motor would run as good as could for me in the meantime.

They also replaced the impeller, installed new fuel pump and carb kits, t-stats, plugs, and even changed the lower unit oil. He put a used starter bendix on as mine was real beat up and tested out my charging system (which was great). He put 7 hours of labor into it and charged me $60 an hour, total of $420. While cripplingly expensive :eek: I thought it more than fair. I'm caught up now on all periodical maintenance.

I wanted to run it before I dragged it 4 hours away on vacation so I called up Scott, coolbikeguy, to see if he was interested in coming to the lake with me. He was, which turned out to be really great because the water level was low and I think I would have had a heck of a time retrieving by myself. The motor ran much better. Not perfect, but much better. We drove around a while and then let it sit for a few minutes and restarted it. Typically it would have given me fits and stalled a number of times before I could have kept it running. This time, with a little warm up lever applied, it started right up and stayed running. My mechanic, knowing I was taking it out, actually called me to see how it ran. He gave me some suggestions on how to get a little more idle speed out of it and assured me that with the right carbs he could get it running perfect.

So it sucks I have the wrong carbs and I did have to drop some cash but at least I'm all caught up maintenance-wise, my issues have been diagnosed, my motor runs better and I found a heck of a mechanic. It was also a beautiful night last night which Scott and I enjoyed for our short sea-trial.
 

ezmobee

Supreme Mariner
Joined
Mar 26, 2007
Messages
23,767
Re: 18' Starcraft SuperSport restoration

Despite the cool weather I decided to bring the boat home from winter storage today. It was a bright and sunny day so even though it was a little cold, I was able to get some work done on it. I installed my bimini top and my fish finder transducer and head unit. I didn't get it wired though. I am absolutely THRILLED with my bimini. It is the perfect size. You can pretty much walk from front to back without ducking, and it lays down perfectly behind the rear seat when not in use. Love it.

IMG_0460.jpg


IMG_0463.jpg


Why do these damn things always need new holes? Oh well. At least there isn't wood behind there. I didn't bother sealing them at the moment because I want to make sure the height is right first and that everything is working. I'll later back the screws out a bit and seal them.

IMG_0461.jpg


Brennan seemed pleased with the progress
IMG_0457.jpg


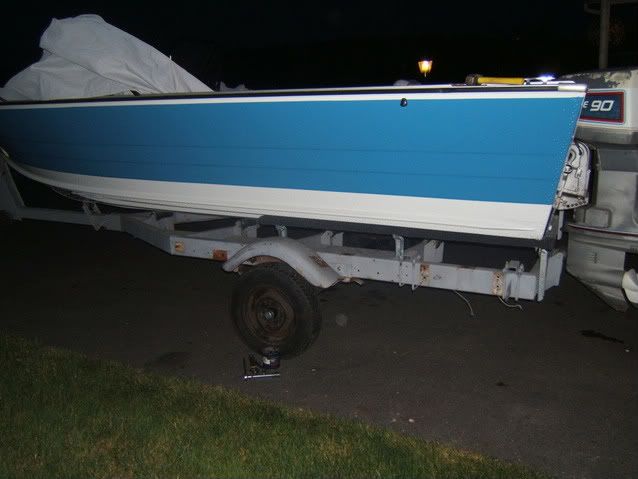
As you can see, Easypoxy is great paint :rolleyes: That isn't even the worst part. Not by a long shot. I'm hiding that from you. Tim Fives was with me today for the retrieval and was rather distressed about the condition of my paint job. I've made peace with it. However, at his encouragement, when it gets warmer, I'll roll some more blue over the bad spots and buy some darn fenders.

Fired the motor up and it started quickly and ran well and idled great. There's really nothing I need to do to it prior to being able to go for a ride. (take that I/O guys :p)
 

ezmobee

Supreme Mariner
Joined
Mar 26, 2007
Messages
23,767
Re: 18' Starcraft SuperSport restoration

My son went to Behrend back in '96-'98.

I was there from '95-99!!! I was an EET major.

Guys, I used Easypoxy. It sucks. What I would use the next time is Rustoleum. Doesn't matter what kind: regular, professional, marine. I'd first go with etching primer then their clean metal primer. BEWARE of their "aluminum primer". That stuff is weird. If you read the can it's latex. http://www.rustoleum.com/CBGProduct.asp?pid=43 That cannot be a good idea. I think Dale used it and have to strip it off again. I forget if that was him or someone else. Anyway, etching primer, rusto clean metal primer, rusto top coat. That's what I'd do.

But ask yourself, would you really take paint advice from me? :p
 

ezmobee

Supreme Mariner
Joined
Mar 26, 2007
Messages
23,767
Re: 18' Starcraft SuperSport restoration

Since I have officially ordered this and I don't have to worry about any of you scarfing them up before I can get one....I can tell you about the awesome gauges I just got. As you know, the SS has VERY little dashboard space. I had already decided that I wasn't going to have a speedo as they are pretty well worthless and not worth the room or the complication. I did, however, want a tach and a fuel gauge for sure and a trim and volt gauge would be nice. I was browsing GLS and when I found this thing I was PSYCHED!!!!!!!!!

15850-1-md.jpg

https://greatlakesskipper.com/produ...fuel-temp-trim-volt-boat-gauge-wout-logo.html

My concern was being able to make the temp part work with my outboard. I posted here: http://forums.iboats.com/showthread.php?t=466576 and got some answers. Bob_VT emailed me some great info that I added to that thread. I can't wait to get that thing hooked up. I will be so pumped if it all works. It would have super awesome if I could have found a matching tach but no dice. So I ordered this one from Overtons:

teleflex%20artic%20tachometer.jpg


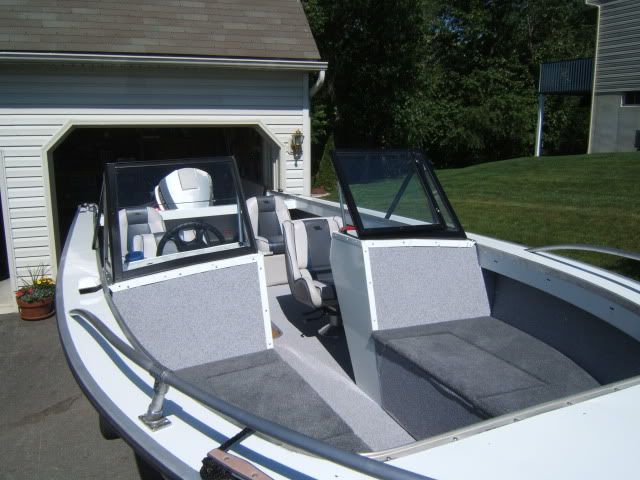
Whilst I was on Overtons, I figured I may as well order the pedestals for my fishing chairs. I got these http://www.overtons.com/modperl/pro..._KingPin_Hi_Lo_Package&aID=601C7&merchID=4006 because that seemed really cheap to me for all three pieces which I need. These are just the removable fishing chairs so they don't need to be anything special. I guess now that I've ordered the pedestals, I better get busy building my stern casting box and bow insert.
 

ezmobee

Supreme Mariner
Joined
Mar 26, 2007
Messages
23,767
Re: 18' Starcraft SuperSport restoration

Little bit of progress. Got the carpentry mostly done for my stern casting box.

IMG_0465.jpg


Cut out so it will fit around my fuel tank. I put the same cutout on both sides because I figured I may want to run wires or hoses through the other side or something someday.
IMG_0466.jpg


Plan right now is for the sides to be vinyled, and the top carpeted. The wood will be porch painted prior to being covered. I have cupholder inserts to go into the top as well when I mount the pedestal.
 

ezmobee

Supreme Mariner
Joined
Mar 26, 2007
Messages
23,767
Re: 18' Starcraft SuperSport restoration

Little more work done on the stern box.

IMG_0470.jpg


IMG_0468.jpg


IMG_0469.jpg


Lots of storage now created
IMG_0472.jpg


My jump seats fold all way down so I can still access the area behind them. Even more storage.
IMG_0473.jpg


IMG_0472.jpg


I like it. This thing is built tough. The opposite of my bow deck. I ordered a yard of 72" wide Nautolex and adhesive tonight to do the sides. The top will be carpeted and I already have enough of that.
 

ezmobee

Supreme Mariner
Joined
Mar 26, 2007
Messages
23,767
Re: 18' Starcraft SuperSport restoration

On the fence......it might be too tall. Trying to decide whether I want to hack a couple inches off it. The idea behind it being as tall as it is was so the user's feet could swing over the splashwell. You don't have this issue with newer boats.

Superfish170_SternSeatUp.jpg
 

ezmobee

Supreme Mariner
Joined
Mar 26, 2007
Messages
23,767
Re: 18' Starcraft SuperSport restoration

I'm leaning that way. I'd imagine I'd probably be facing toward either side more often than directly backwards when fishing so the top of the splashwell might be as big a deal as I think. Heck on some of the new ones I'm looking at online right now, if you faced directly back your feet would be IN the splashwell. I'll check it out again tomorrow. Got plenty of time before the rest of my materials arrive.
 

ezmobee

Supreme Mariner
Joined
Mar 26, 2007
Messages
23,767
Re: 18' Starcraft SuperSport restoration

Couple small updates. My hinges from Veada came (quickly I might add) and they are perfect. Anyone considering doing any kind of hatches should go with them at $6 a piece you can't beat 'em. http://veada.com/product/8-Boat-Hing...Set-Hinge.html

So I hacked 3 1/2" off the bottom of the stern box. That was a good plan. I sat in the fishing seat again and it was indeed ridiculously high. My wife figured I'd pitch myself into the drink off that thing. So I shortened it and am am very pleased with the result. My feet can now fit under the splashwell a bit and it just basically looks and works fine. I added my two cupholders to the hatch lid that I bought last year. I sanded the whole thing down and slapped a coat of paint on it. I did not take a pic of it yet. You'll have to wait till tomorrow. I have to paint the other sides of things and get some vinyl and carpet on it. I think I'm going to be very pleased with how it works out. Since the seat pedestal base is mounted on an opening hatch, I'll need to find a suitable latch for it.
 

ezmobee

Supreme Mariner
Joined
Mar 26, 2007
Messages
23,767
Re: 18' Starcraft SuperSport restoration

I finished the stern box today. I'm very please with how it came out.

IMG_0481.jpg


IMG_0477.jpg


IMG_0483.jpg


IMG_0485.jpg


IMG_0484.jpg
 

ezmobee

Supreme Mariner
Joined
Mar 26, 2007
Messages
23,767
Re: 18' Starcraft SuperSport restoration

Thanks gents. I've been working on my bow insert today. I decided not to get real hardcore on that since that whole situation up there is going to be rebuilt eventually anyway. Pics when it's done.

The only thing I have left after this is the electrical stuff. I have to wire up my fish finder, install the new gauges, and perhaps add a fuse panel. Will have to buy some wire to do it properly.
 
Top