Since my vinyl is still in great shape, I am going with Meguiar's RV vinyl cleaner. When it gets bad, then I will remove and deal with it
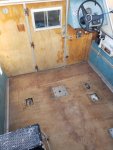
As to the floor: My thoughts are as follows: (I am not planning on tearing everything out and doing a full on restoration at this time)
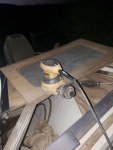
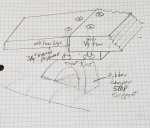
1. I am going to cut out a 4' center part from Cuddy to Splash Wall and put in a never used fiber-glassed piece of 3/4 ply I found in the old marine shop. One side is smooth glassed,the other has the textured side. On each edge, about 6", I want to put in a rib that will be under the edge from the hull up to the base of the plywood. I would like to put in an expanding closed-cell foam to help with support and added buoyancy. I want to bring up the cut edge to the height of the 3/4 on a slope. Then I plan to epoxy resin with glass to seal the transition joint.
2. I had bought two sheets of 3/4 marine ply which I could use if the above fiber-glassed piece should not be used.
3. I am planning to cover the floor with marine carpet. Out here in Nevada, things get really hot to touch in 110 degree temps. I got blisters grabbing a tool last week fixing a broken water pipe in 115 degree temps bare handed. Unless the wise Sages' here think another surface would be better.
4. Under the seat bases, I plan to use a steel plate with the nuts attached (I was thinking of tapping the holes for the base screws, but did not think enough material to hold the plate on) for added support for my heavy self. Like an 8" square. The previous system used steel stripes with nuts JB welded in place
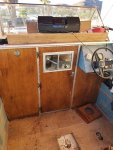
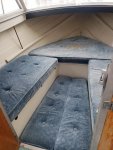
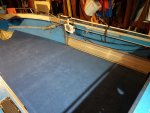
In all, I am new at boat restoration/repair. My gal seems to be in very good shape compared to some I have seen in the many posts I have read. The white tapered edged foam pieces are in fairly good shape I saw after cutting out the center piece of flooring. The flooring had popped a few rivits and anded in some spots.
Any thoughts or suggestions I am open to hear. I do not want to say, "Well that idea didn't work out like I thought"
Thanks